
:format(webp))
Table of Contents
Key takeaways
DuoPlus is a cloud phone service that runs real Android mobile device environments for multi-accounting, automation, and other use cases.
A free trial is available to new users – don't forget to enable it before setting up your cloud phone instances.
Currently, DuoPlus supports SOCKS5, HTTP, and HTTPS proxies with IPv4 addresses, so make sure your mobile or residential proxies use these settings.
You can assign proxies to cloud phones per device or in batch proxy settings, which saves time when managing multiple accounts.
DuoPlus auto-simulates mobile device settings based on your residential or mobile proxy address, but you can also adjust them manually.
DuoPlus is an anti-detect cloud phone service with real Android environments in the cloud. You can run and manage multiple accounts without separate physical devices for social media management or other automations.
Everything runs in your browser, so you don't need to install anything, though a client is available if you want one. Otherwise, just log in to DuoPlus cloud phone service, add anyIP mobile or residential proxies, and you're ready to go.
How To Configure My Proxy On DuoPlus
Step 1: Get Your anyIP Proxy Credentials
Register with anyIP to access your proxy user dashboard.
Once you select a plan, choose the Proxies tab and click on the Add profile button.
When setting up your proxy user profile for DuoPlus cloud phone service, it's important to choose SOCKS5 residential or mobile proxies in the Proxy protocol section.
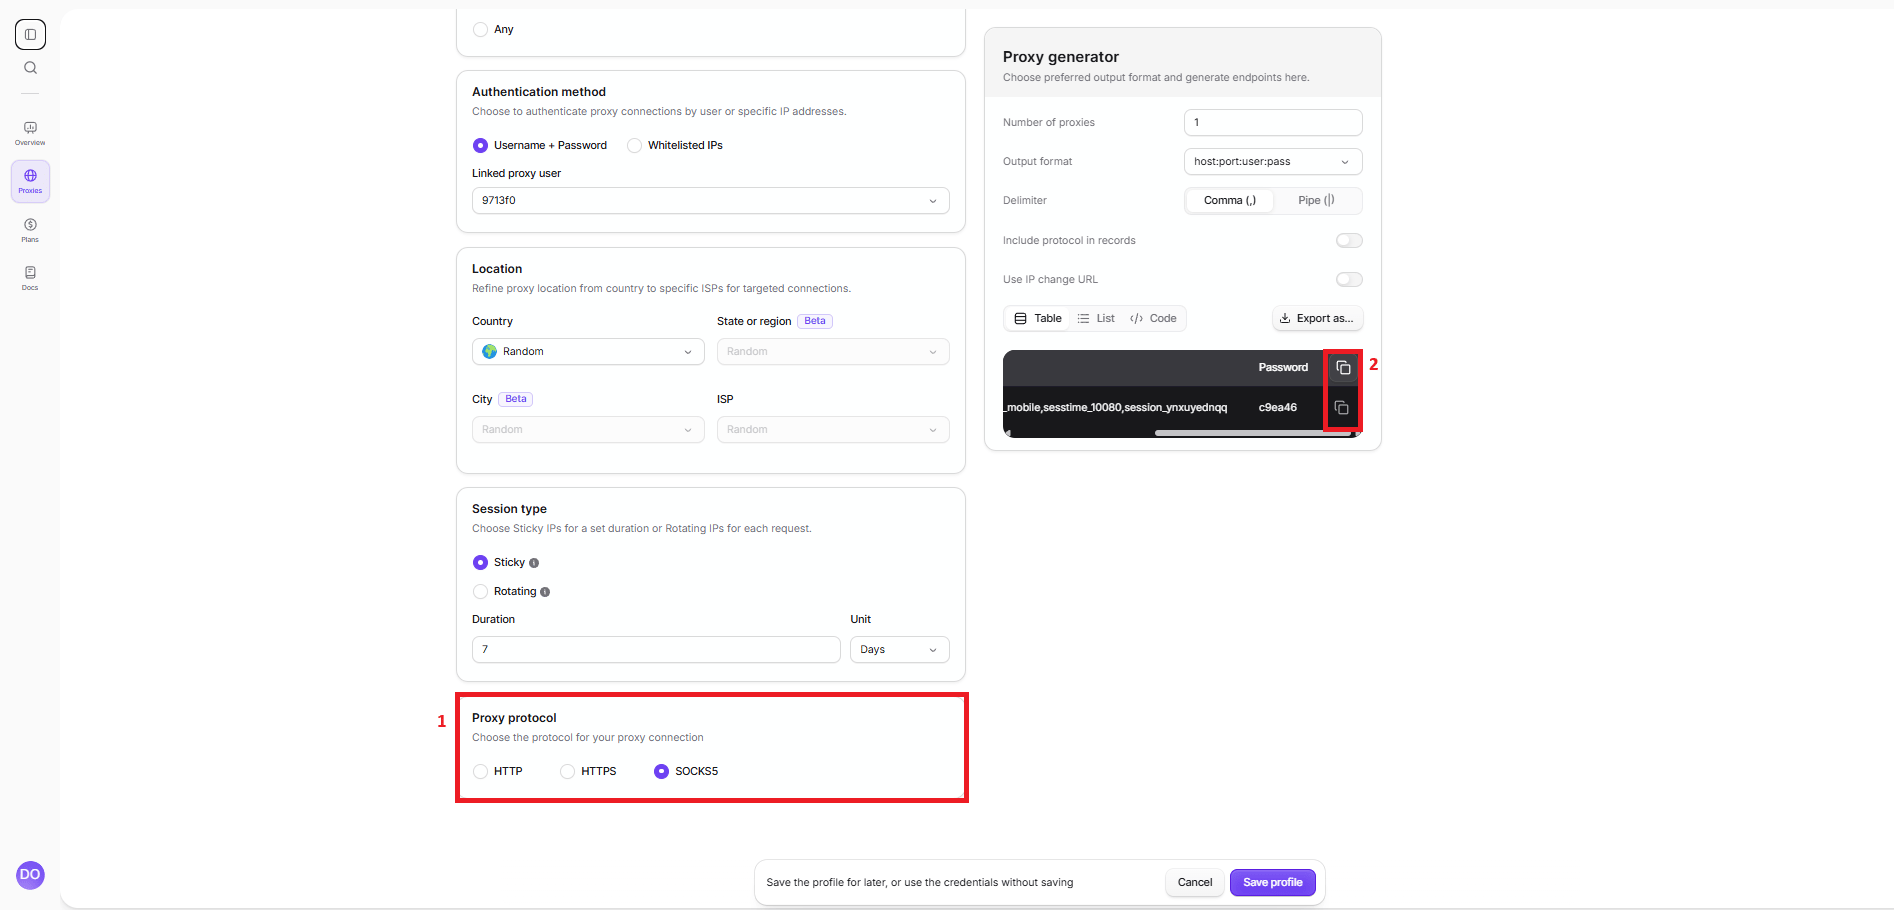
In the Proxy generator section, the system will generate your proxy credentials (host, port, username, and password). Copy them for later use in DuoPlus cloud phone service. If you'll add multiple proxies, copy the whole list.
Click Save profile for later use, or use the credentials without saving.
Step 2: Log In to DuoPlus
Open the home page of DuoPlus cloud phone service.
Use the Login button or start a Free Trial to create an account.
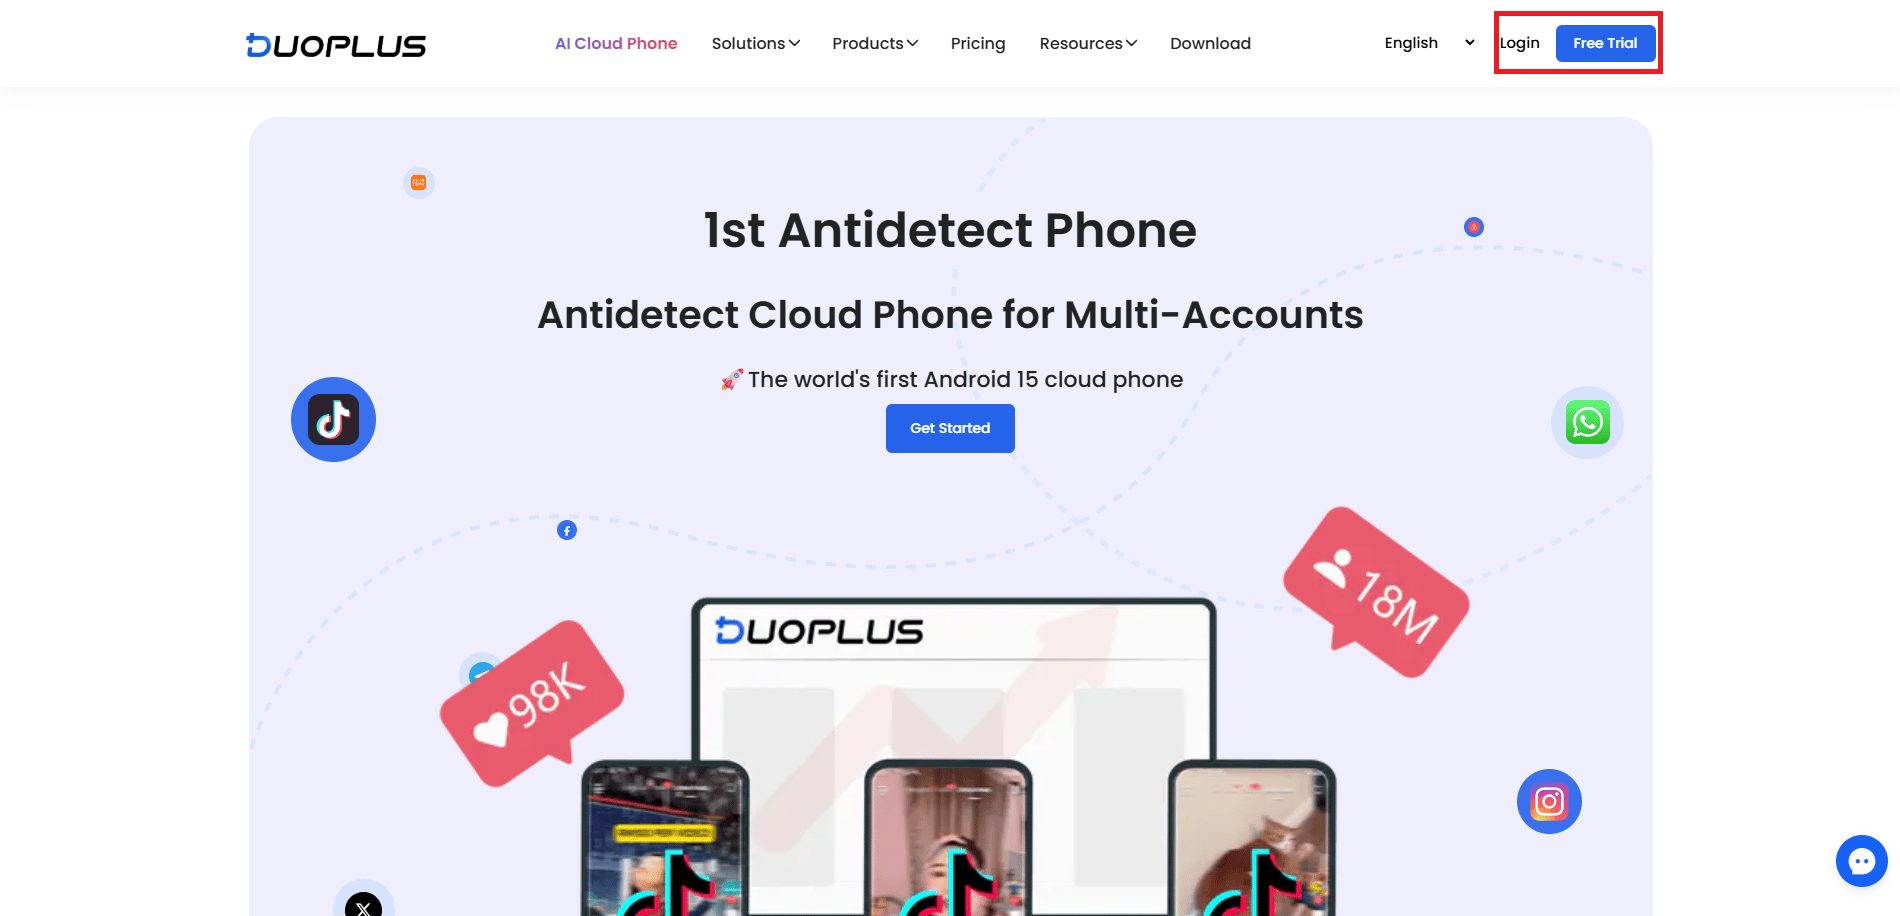
Creating a DuoPlus cloud phone account takes only a few minutes, since you only need an email and a password, or you can even bypass that and use a Google account.
Step 3: Add the Proxy to Your Dashboard
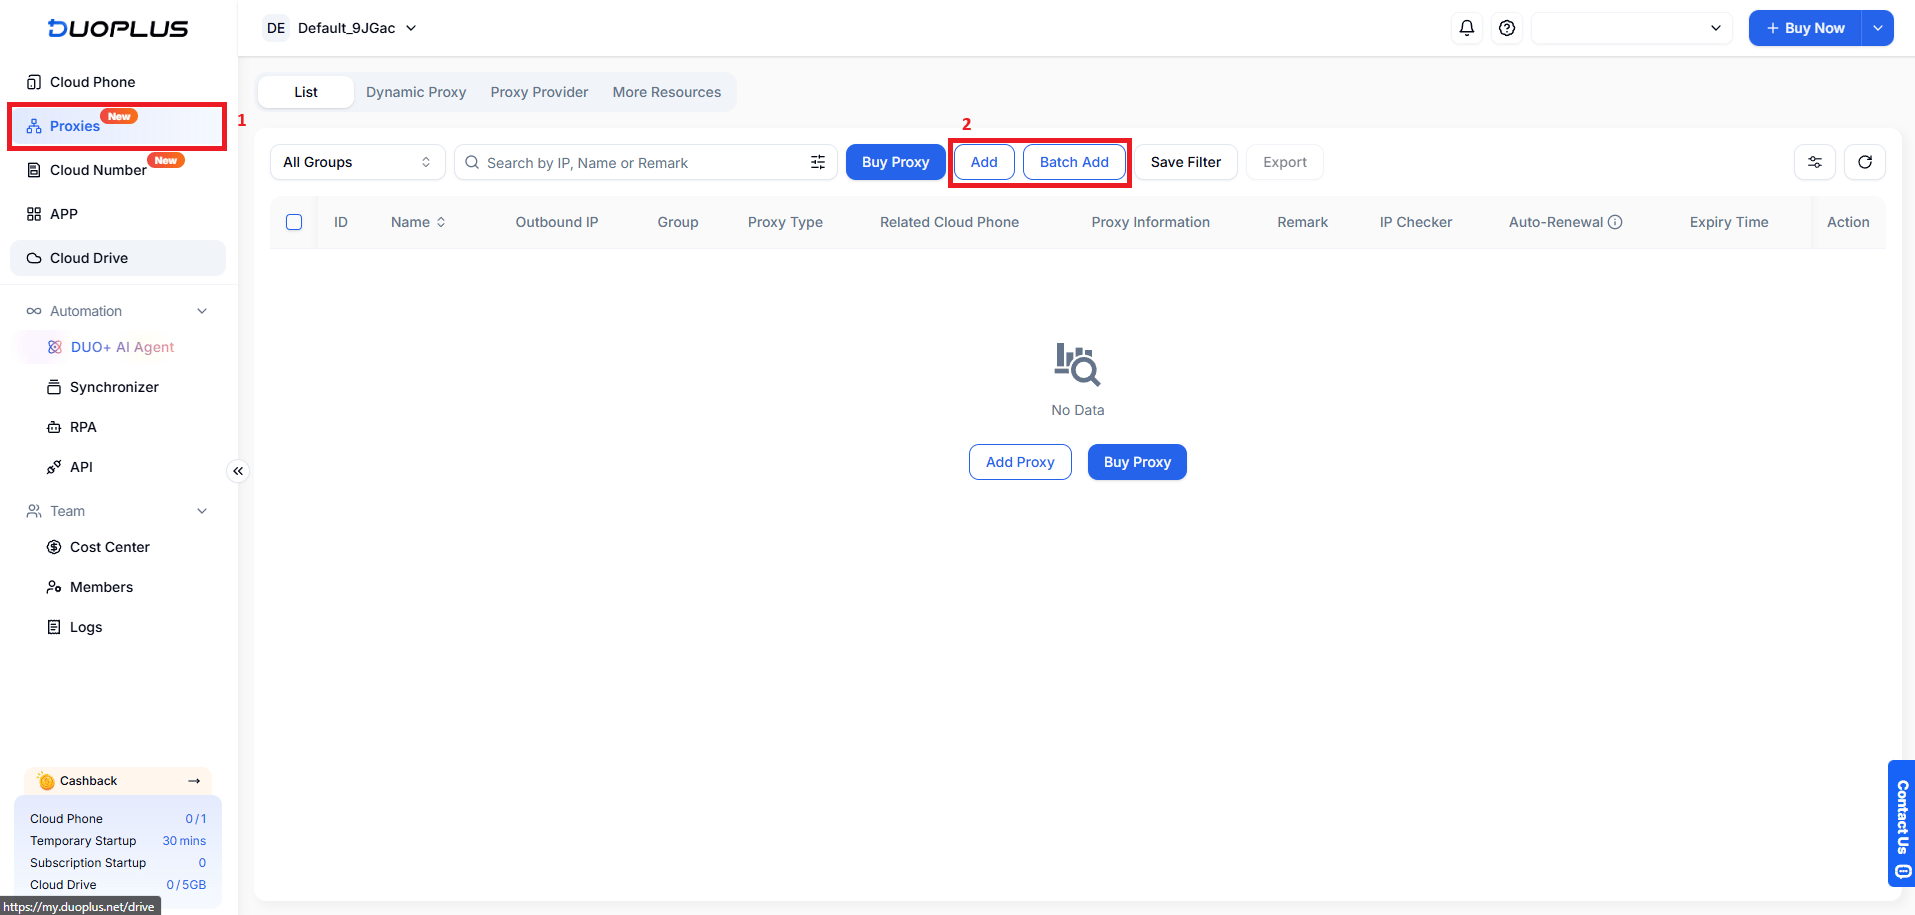
Once you log in, you'll see a list of your DuoPlus cloud phones. If you're using a free trial, you'll need to activate it before using cloud phones or adding proxies.
In the top left of the sidebar, press the Proxies tab. There, click on Add to add a proxy, or choose Batch Add to add multiple proxies.
Step 4: Enter Your Proxy Details
Remember that DuoPlus cloud phones support HTTP, HTTPS, and SOCKS5 proxies with IPv4 addresses.
Enter your anyIP proxy credentials in the pop-up modal.
When adding a proxy, it's easiest to copy the host, port, username, and password fields from the anyIP dashboard separately and paste them into the appropriate fields.
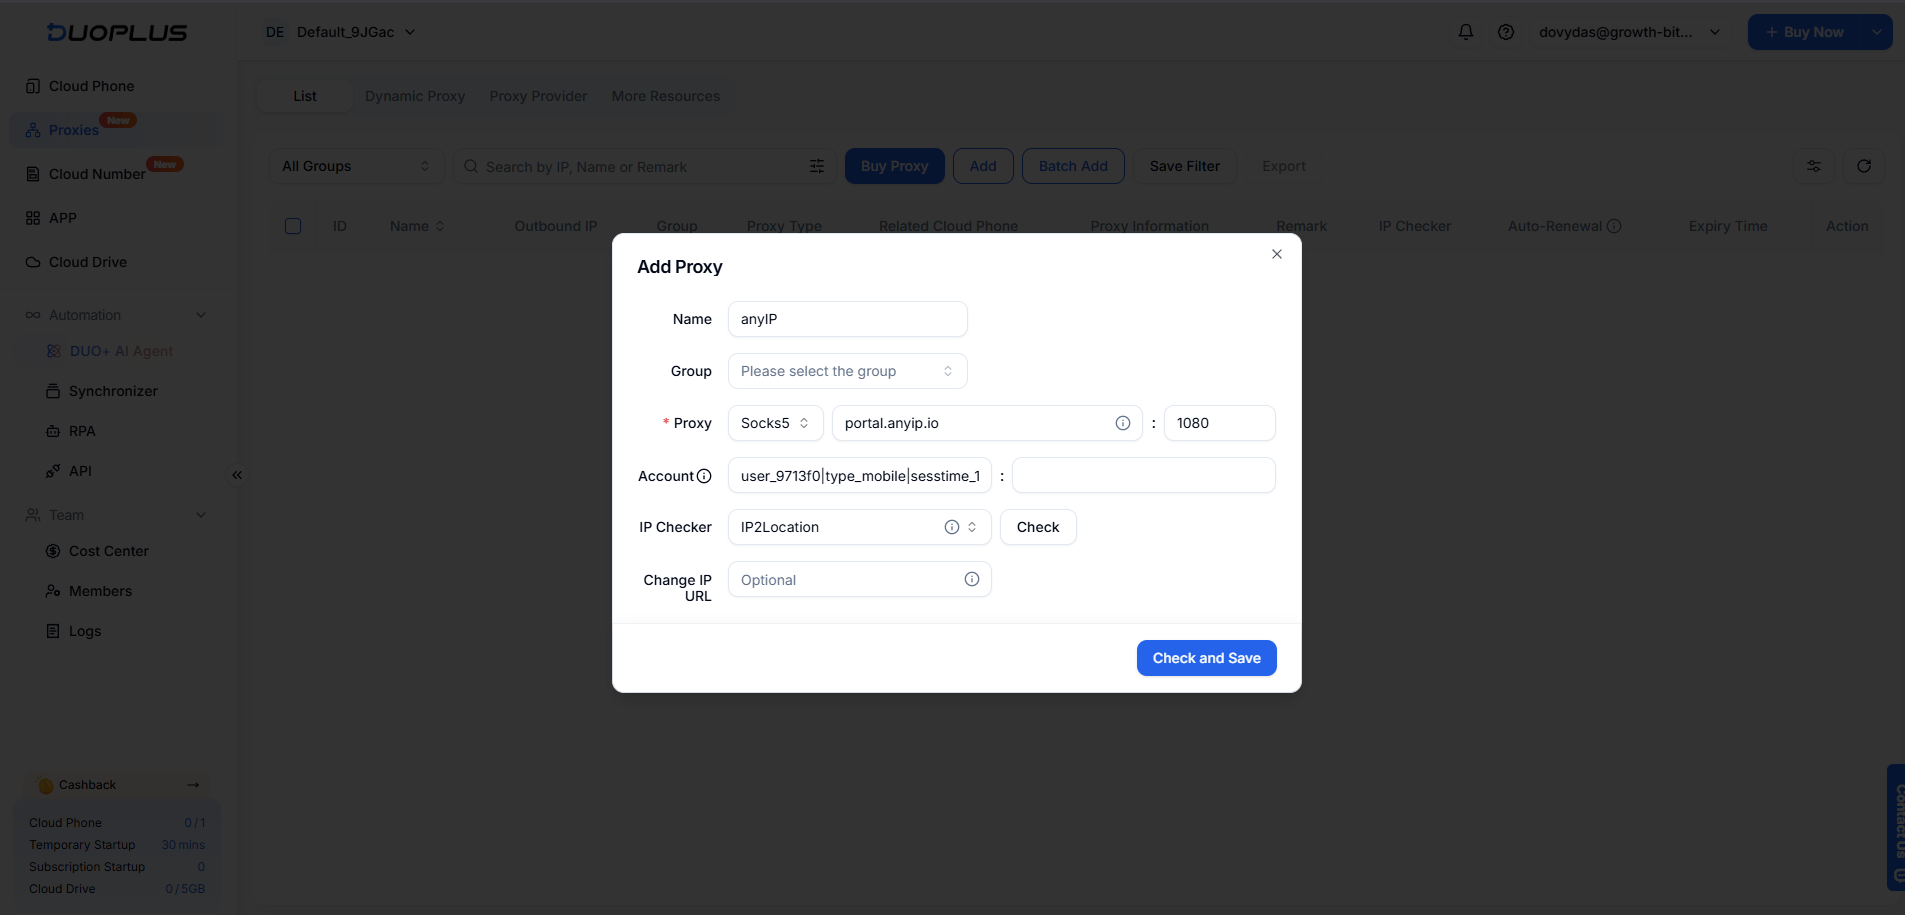
When using different proxies for multi-account management, you can paste the whole list. DuoPlus cloud phone setup accepts host:port:username:password or username:password@host:port formats, also available with anyIP residential and mobile proxies.
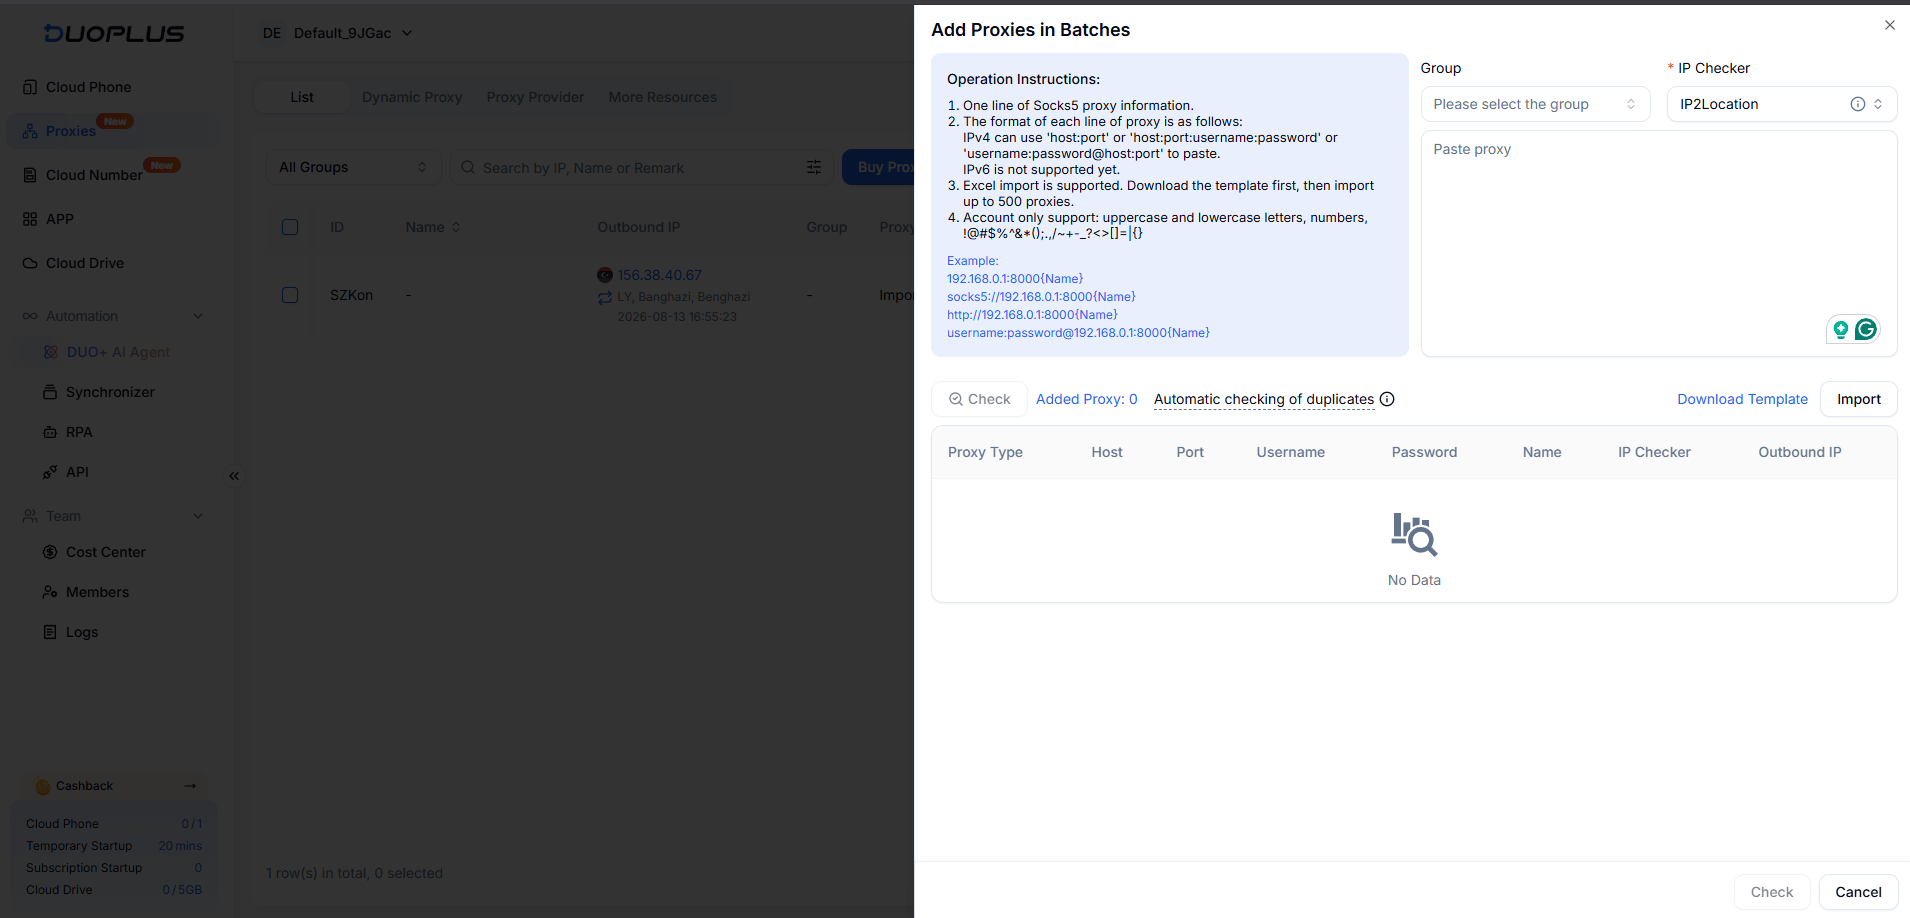
Use the Change IP URL option to paste the rotation link for mobile proxies or other rotating proxies. If you don't want to use this feature, simply skip the field.
Press Check and Save.
Step 5: Test Your Connection
You can also check whether your mobile or residential proxy setup works before saving by pressing the Check button in the IP Checker row. Here's how a passing result looks:
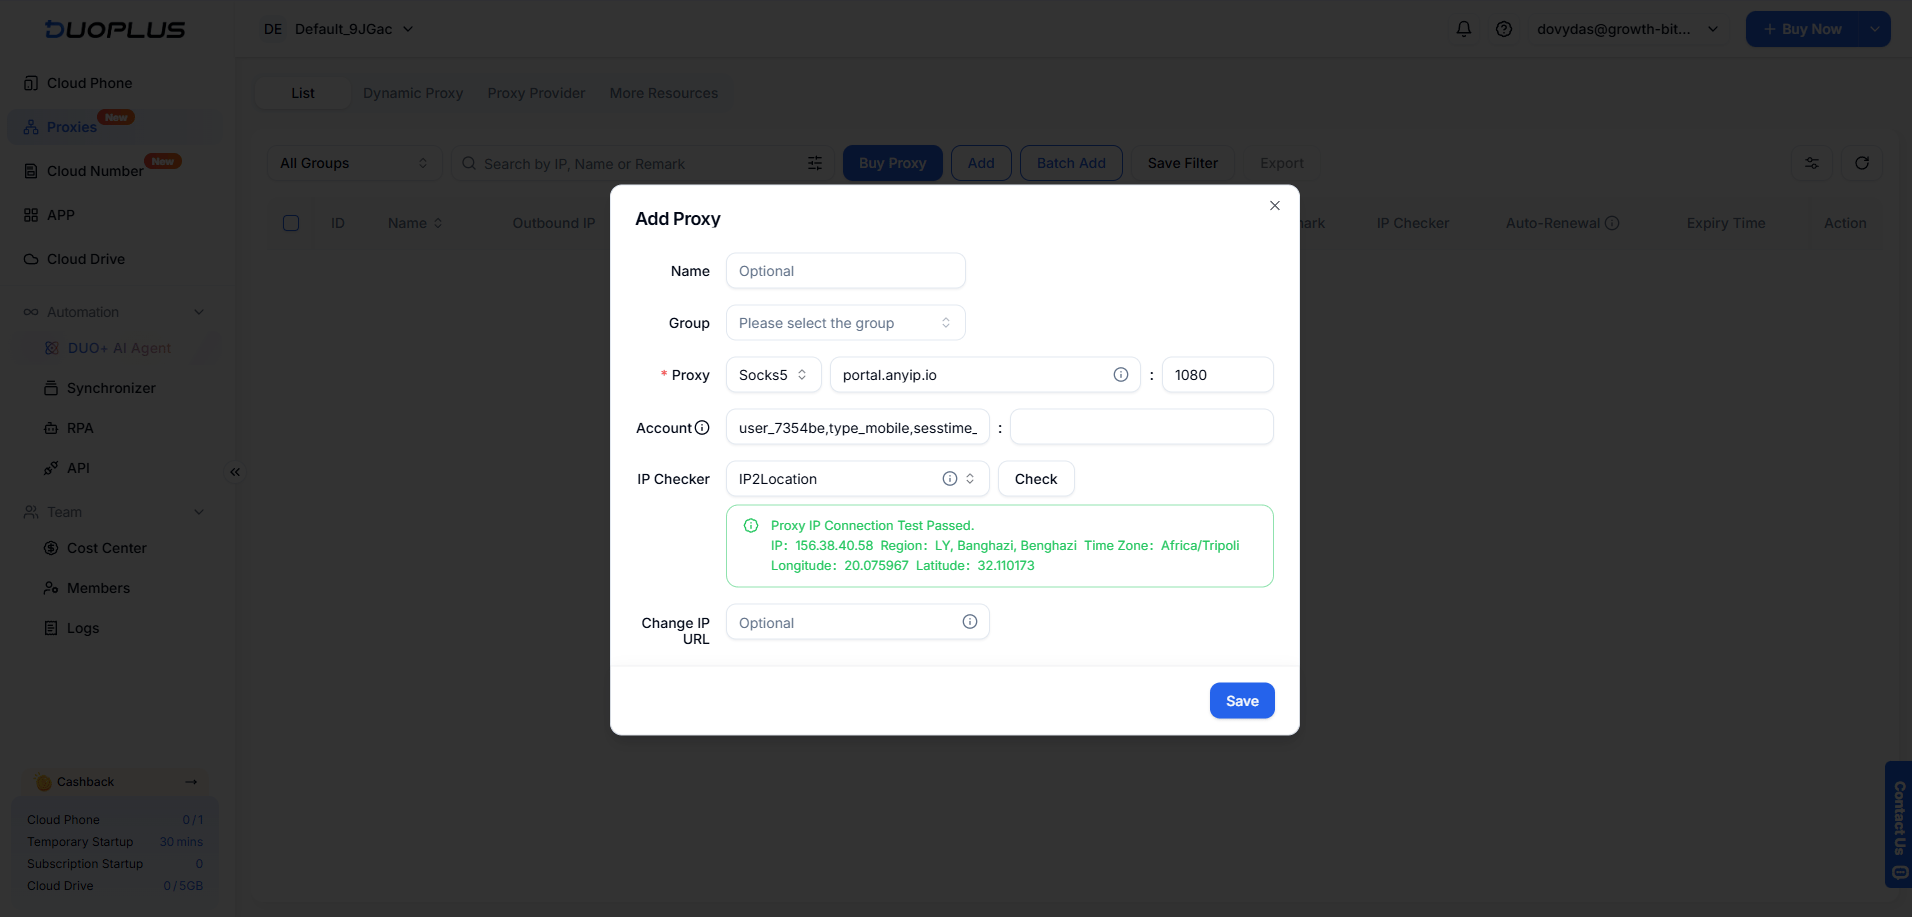
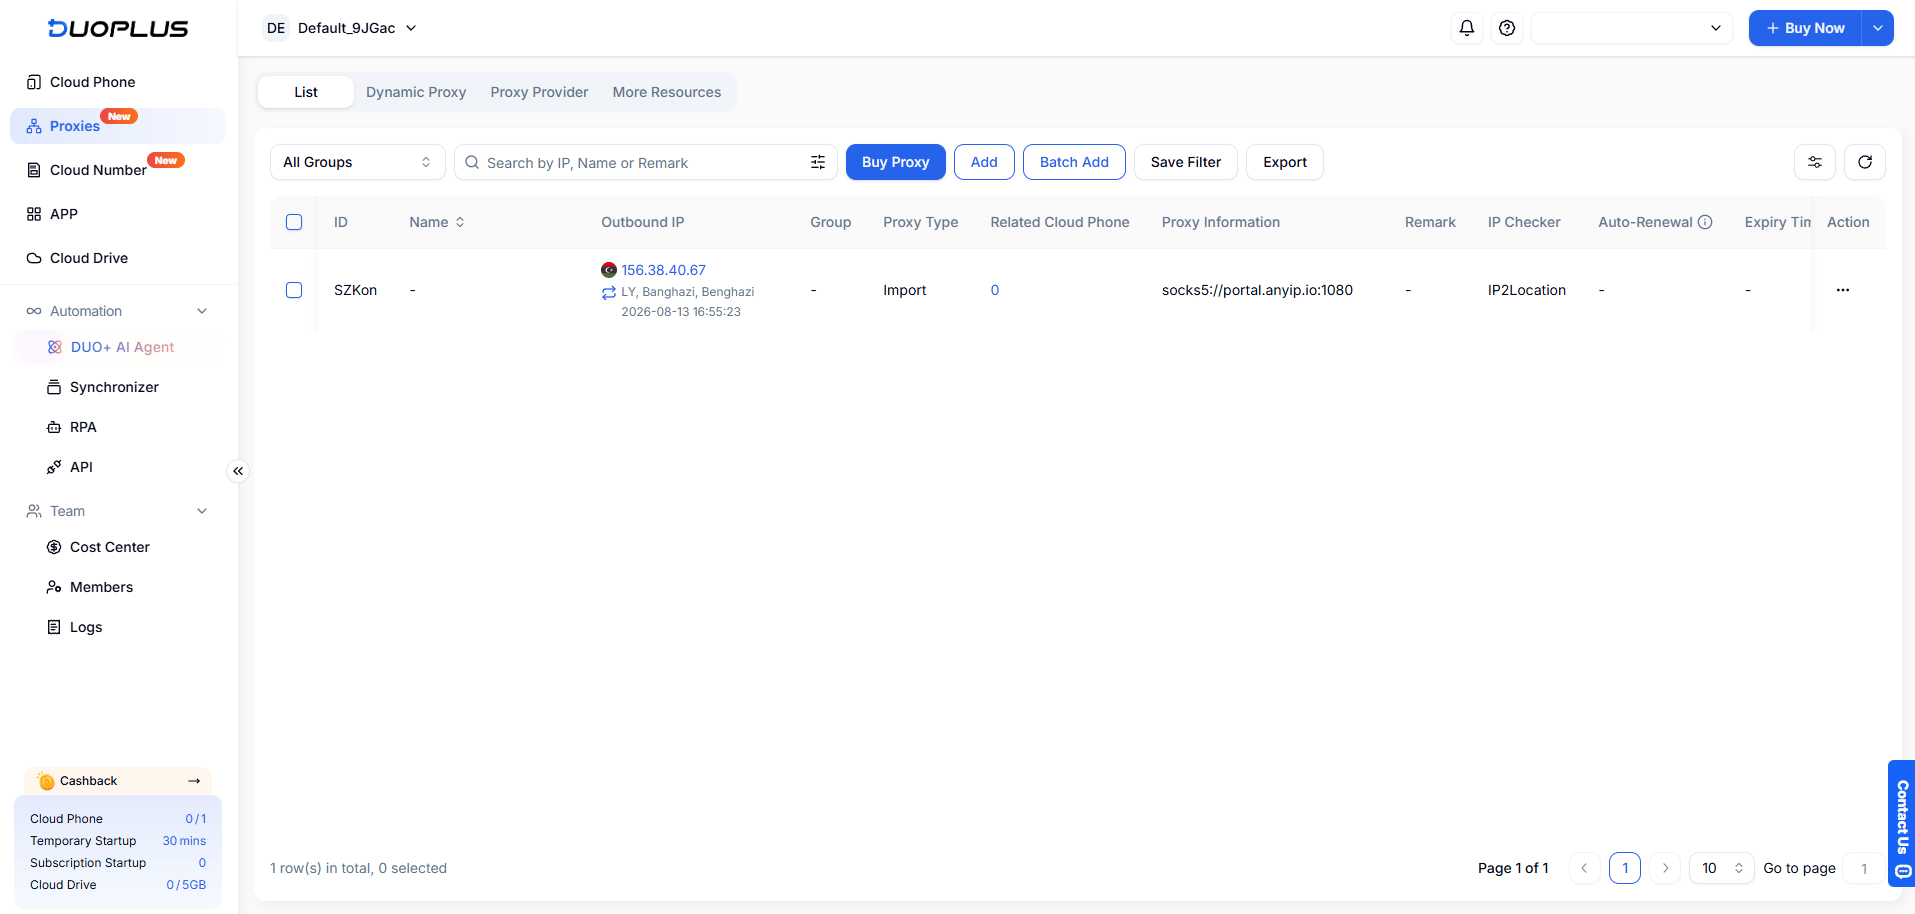
Don't forget to press Save if you check the proxy connection manually. Otherwise, you can press the Check and Save button. If your proxies pass the check, they will be added to the Proxies tab in the DuoPlus cloud phone service.
Step 6: Assign the Proxy to a Cloud Phone
Go to the Cloud Phone tab. Find the cloud phone instance you want to pair with your mobile or residential proxies.
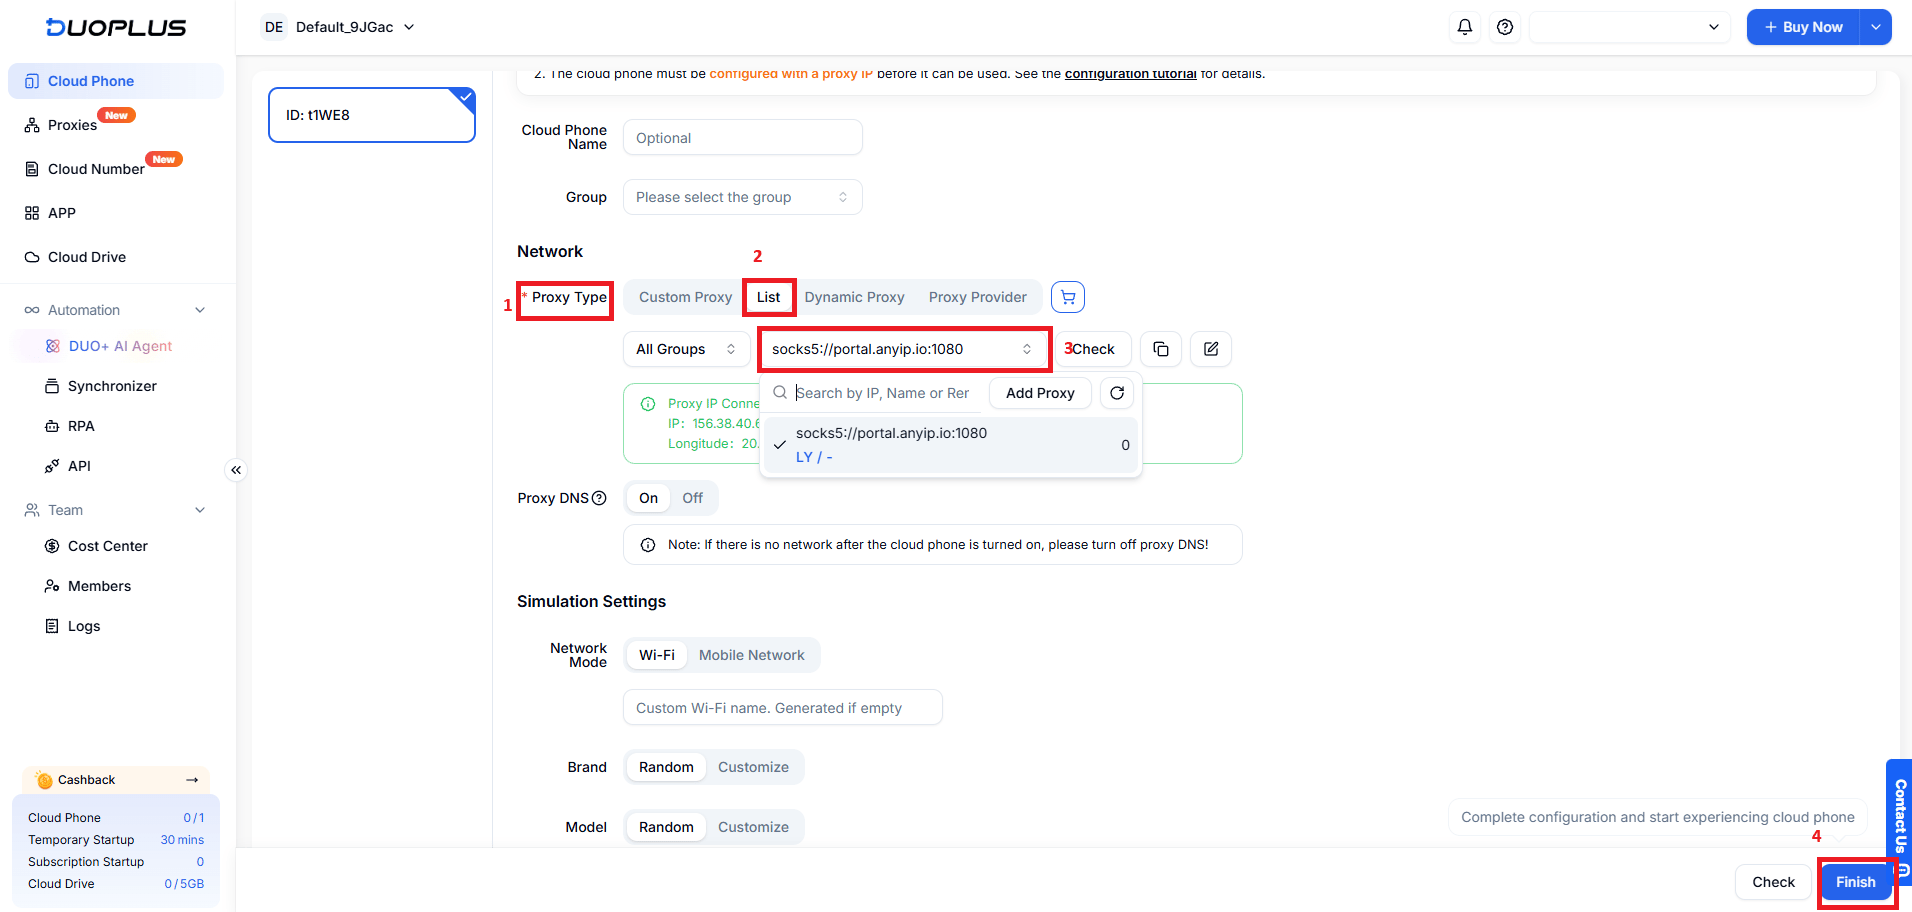
Press the Initialize Proxy button.
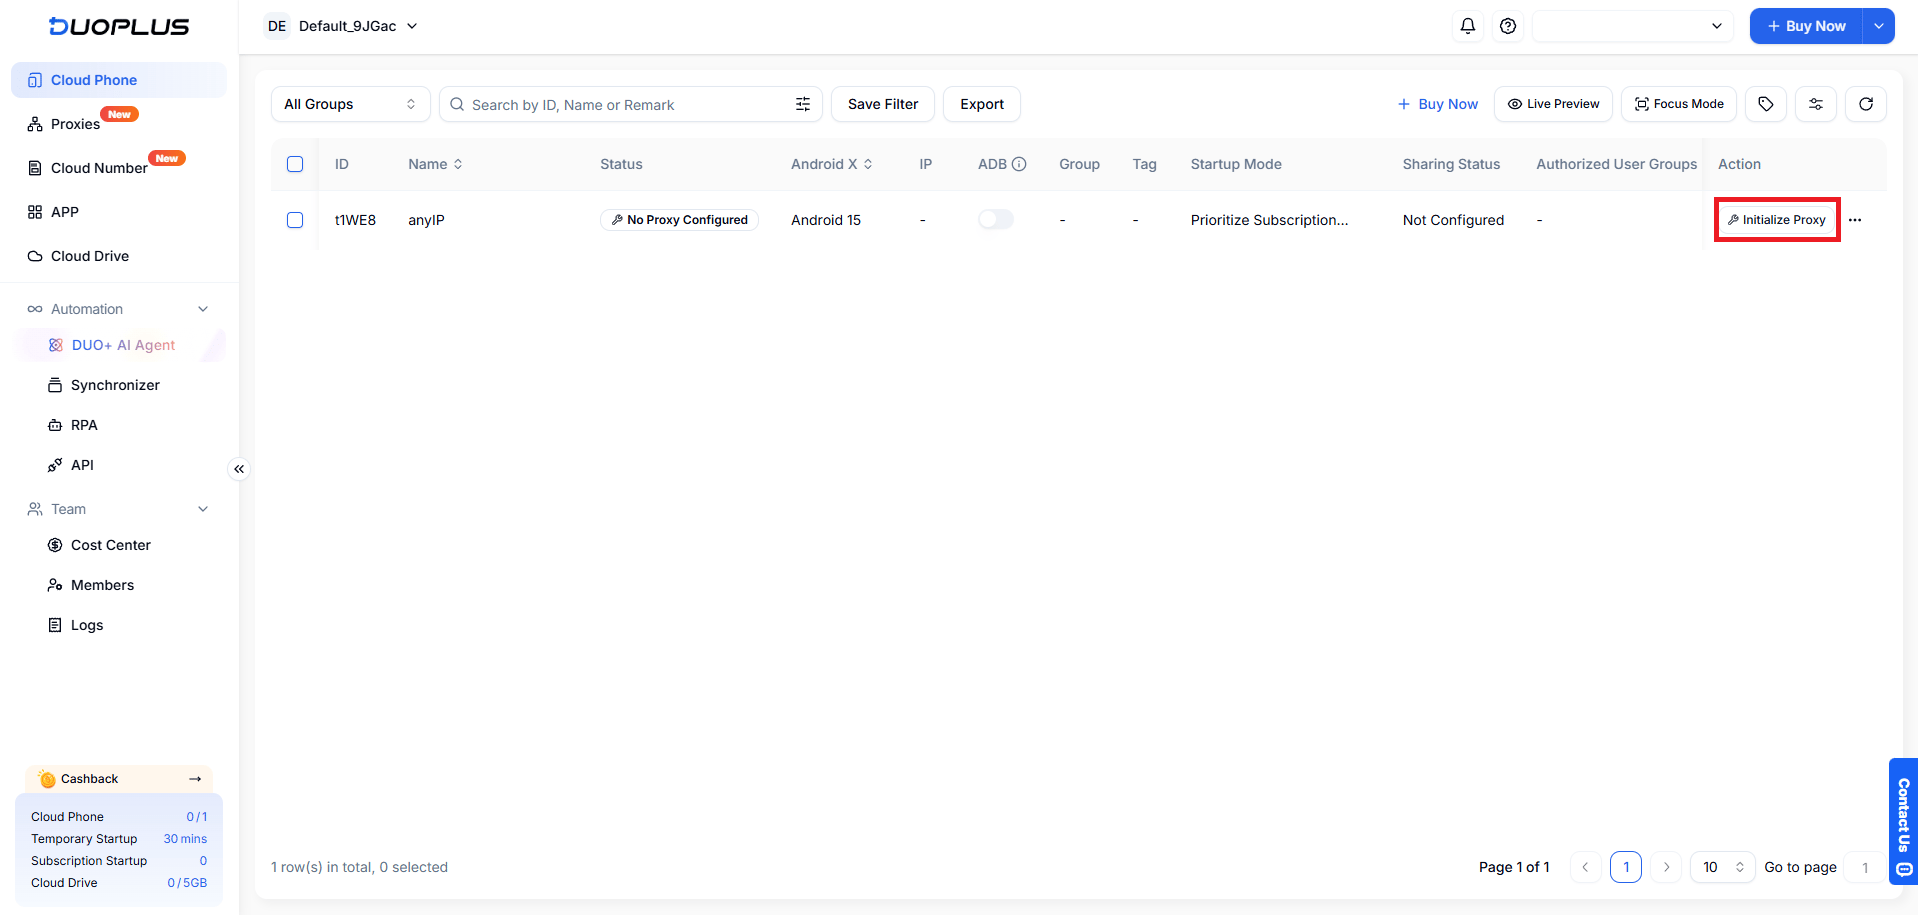
A new window will pop up, where, among other settings, you'll find Proxy type settings.
Choose List, and under Please select the proxies, you'll find anyIP mobile or residential proxies we just configured.
Click Finish after selecting them.
Step 7: Launch the Cloud Phone
After you return to the main Cloud Phone tab, you'll find your proxy now initialized. All you need to do is press the Power On button.
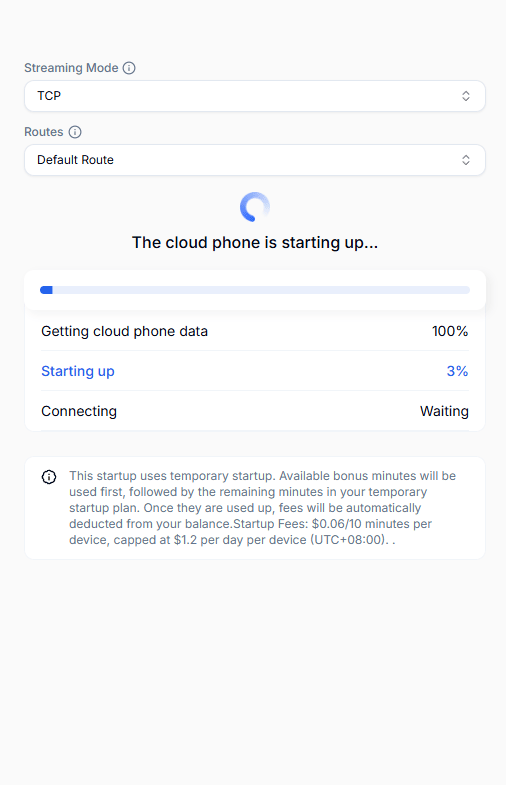
It will take some time for the cloud phone's virtual environment to load. Once it's loaded, you can start using the cloud phone for multi-account management or other projects.
You can turn the mobile device off and enable various other functions with the buttons at the bottom.
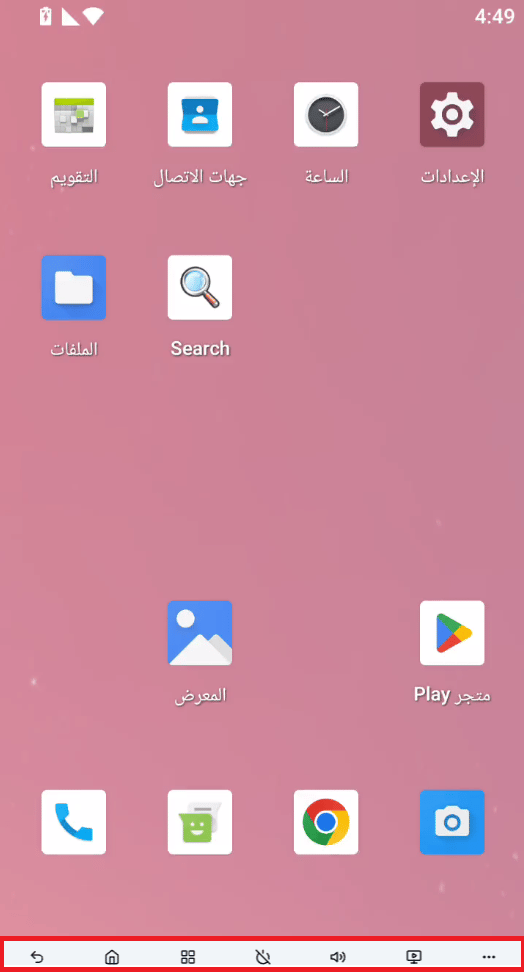
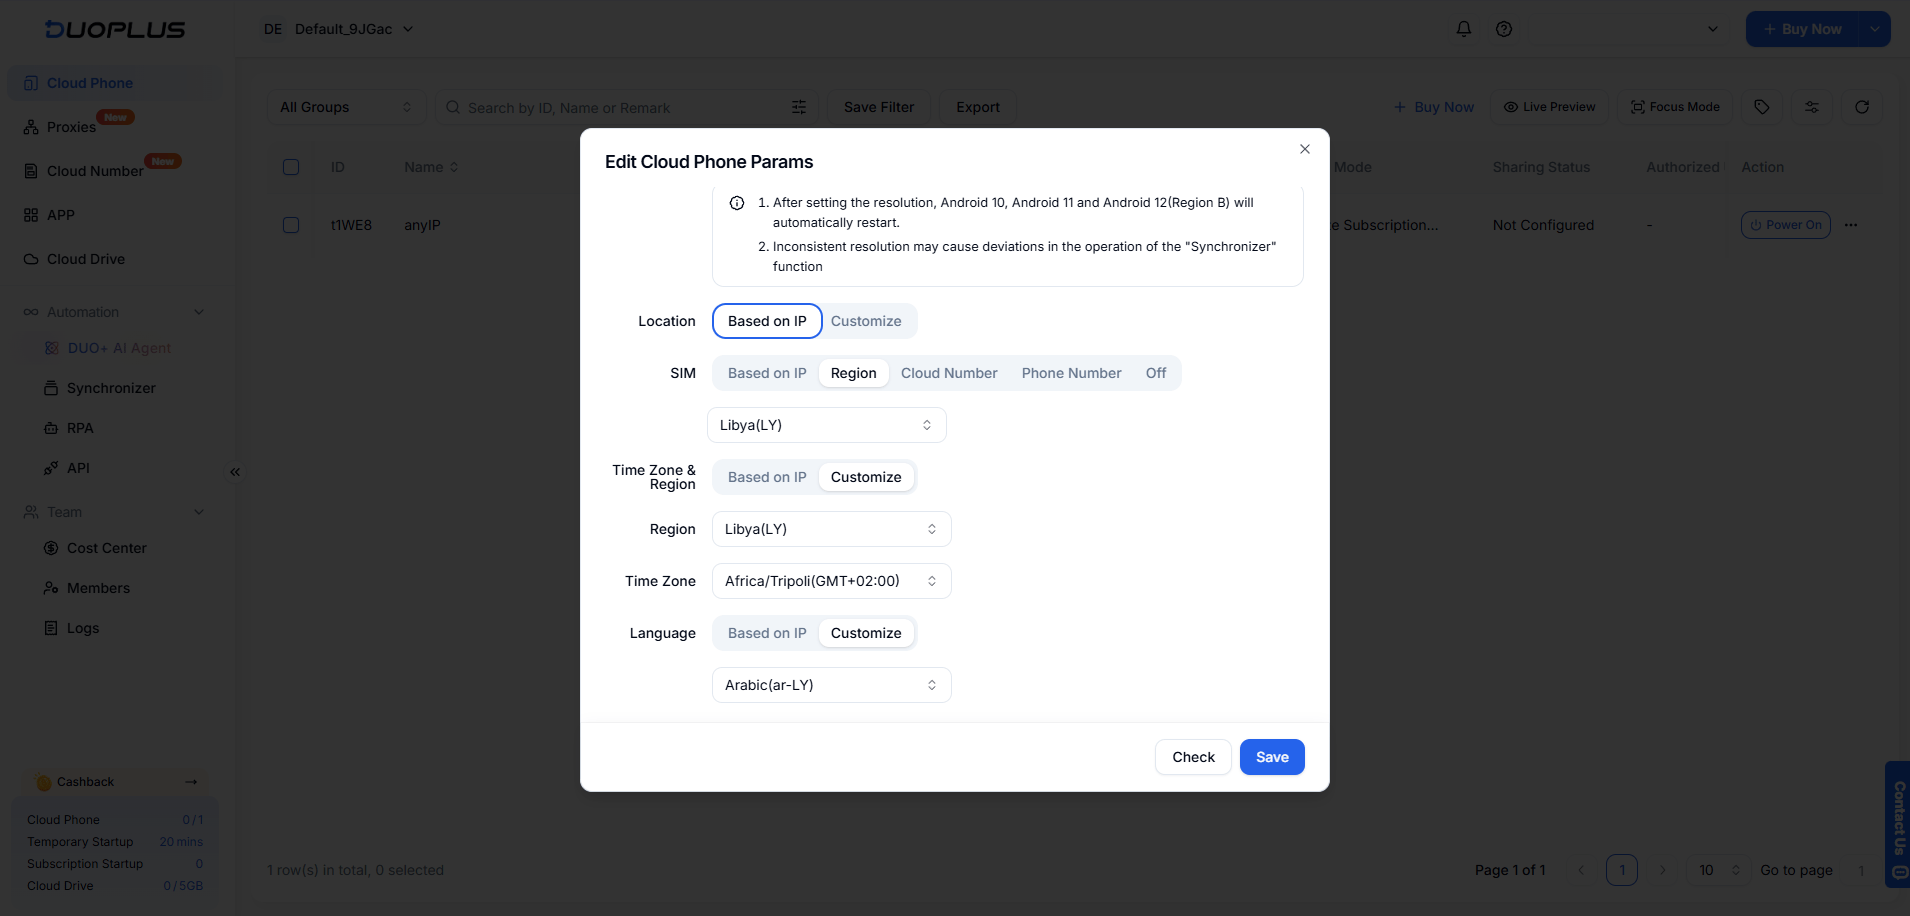
DuoPlus cloud phone settings auto-simulate the device settings from the proxy IP. Our mobile proxy is from Libya, so it matches the device settings, including the language of the mobile device UI.
If you add proxies from different regions, DuoPlus will match their configuration. These settings can be adjusted manually by pressing the three dots next to the Power On button, selecting Edit Params, then scrolling to Simulation Settings.
Conclusion
Integrating anyIP residential or mobile proxies with DuoPlus cloud phone is as easy as inserting SOCKS5 credentials in the settings. With a quality proxy, each account gets consistent identity, keeping your multi-account management and other efforts less likely to get interrupted or flagged.