
Step-by-Step Multilogin Proxy Integration Tutorial
Table of Contents
Table of Contents
Key takeaways
Integrate proxies with Multilogin for enhanced privacy and multi-account management.
Use Multilogin to create browser profiles with unique fingerprints for anonymity.
Configure proxies using HTTP, HTTPS, or SOCKS5 protocols in Multilogin.
Quick profile feature allows creating multiple profiles with proxies efficiently.
Multilogin lacks a dedicated UI for managing proxies across multiple profiles.
Learn how to seamlessly integrate a proxy into Multilogin for enhanced privacy and security while managing multiple accounts.
Multilogin is a powerful anti-browser designed to help users create, manage, and operate multiple browser profiles with unique fingerprints.
At anyIP, we specialize in providing clients access to premium proxies, including mobile and residential options available globally. Our proxies support various activities, from web scraping or social account management to any various online tasks. With our extensive industry experience, we deliver top-tier service, ensuring our clients receive the best possible solutions for their needs.
💡 Before stepping into this guide, you will need:
A Multilogin account, you can enjoy a 14-day refund policy on every plan. Perfect to test this solution hassle-free.
Your proxy details:
proxy server infos (URL or IP + port) ;
username/password;
You don’t have a proxy account? Create your account on anyIP.io in less than 5min.
How to create a browser profile with a proxy
Step 1: Create a profile with a proxy
When you open the app for the first time, Multilogin will invite you to directly create your first profile.
Open the profile creation by clicking on the “Create profile” button:


The UI of Multilogin is very fluid and well-designed. There isn't too much information on the screen, allowing you to focus on the important part of the profile configuration.
Once you've filled in the basic information, you can proceed with the proxy settings.
Integrating a proxy in your Multilogin profiles is essential for maintaining privacy, security, and effective account management. Proxies mask your real IP address, allowing you to manage multiple online accounts or sessions without triggering security flags or account suspensions.
By pairing Multilogin with reliable proxies like anyIP.io, you ensure smoother operations and reduce the risk of bans, ensuring anonymity and seamless multi-account management.
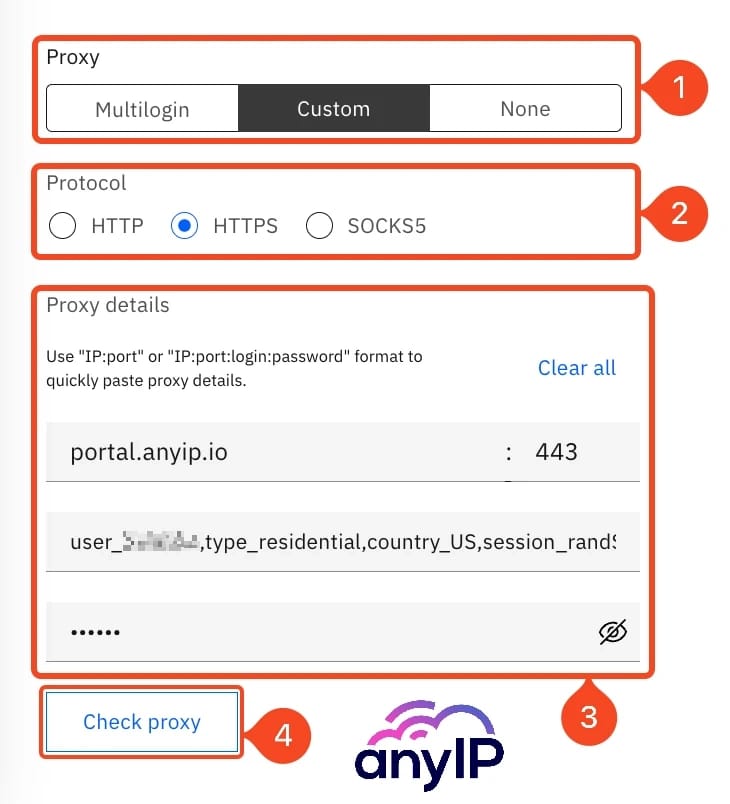
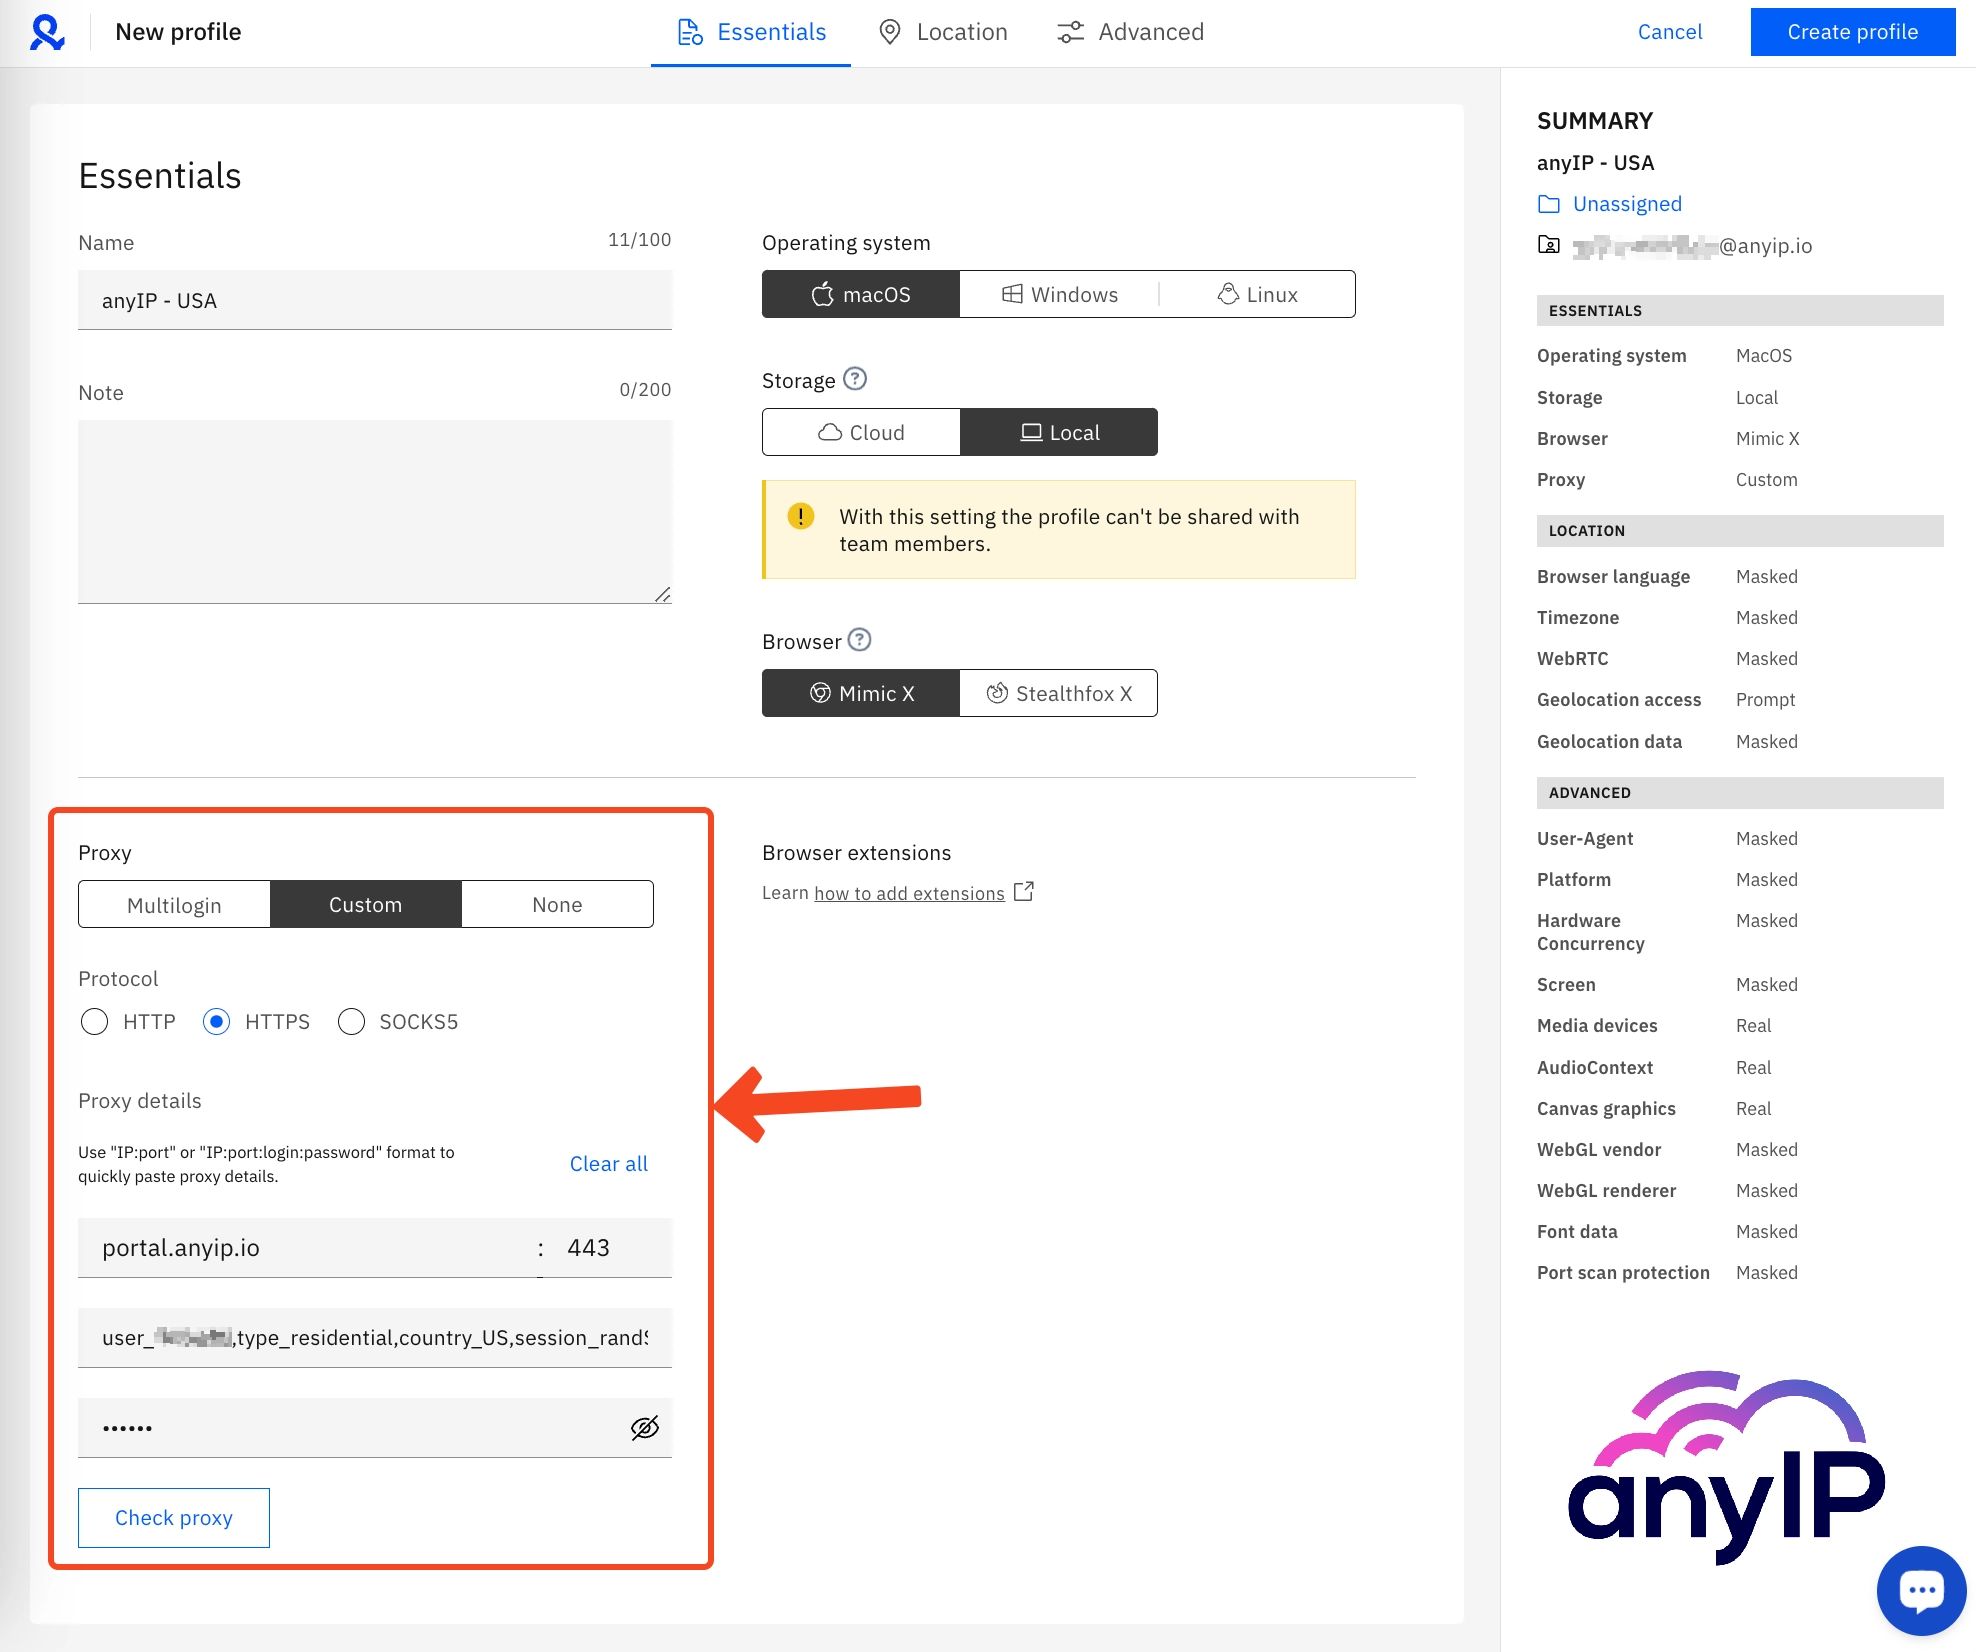
Proxy: Here, you can select the type of proxy you want to use. While Multilogin offers to use its proxies, we chose a custom configuration to integrate our personal proxy with a US residential proxy.
Protocol: you can choose between three types of encryption to set up your proxy:
HTTP: Handles unsecured web traffic, suitable for basic web browsing without encryption.
HTTPS: Encrypts web traffic for secure browsing, making it ideal for gathering sensitive data.
SOCKS5: Supports various types of traffic, offering flexibility but no built-in encryption.
Proxy details: Fill up the form here with all the proxy information you have (Host, server IP, proxy username, and password)
💡 For a quicker proxy integration, you can directly paste the configuration from your clipboard using the correct format:
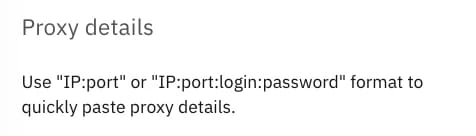
You can paste those two formats from your clipboard or use our proxy formatter tool to make any other formats compatible.
- IP:PORT (if you don’t need authentication)
portal.anyip.io:2000- IP:port:login:password
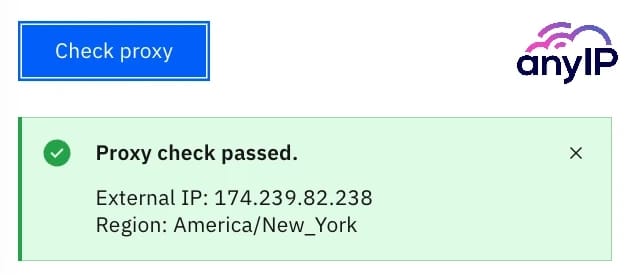
portal.anyip.io:1080:user_xxxx:myPasswordYou can execute a quick connection test once you've set up the proxy. Simply clic the “Check proxy” to proceed.
If it’s successful, you’ll see a “Proxy check passed” message with few proxy information such as:
Your IP address;
Your location, the country, and the city you’re located in;
💡 If the test failed, make sure to double-check all the proxy settings and try again. Most of a time it’s only due to a tiny mistake.
Finally, after filling up all the basic information, you can click on “Create profile” on the top right of the page to save your profile:

Step 2: Run the profile
Now that you’ve saved your profile, you should see it on the main page.
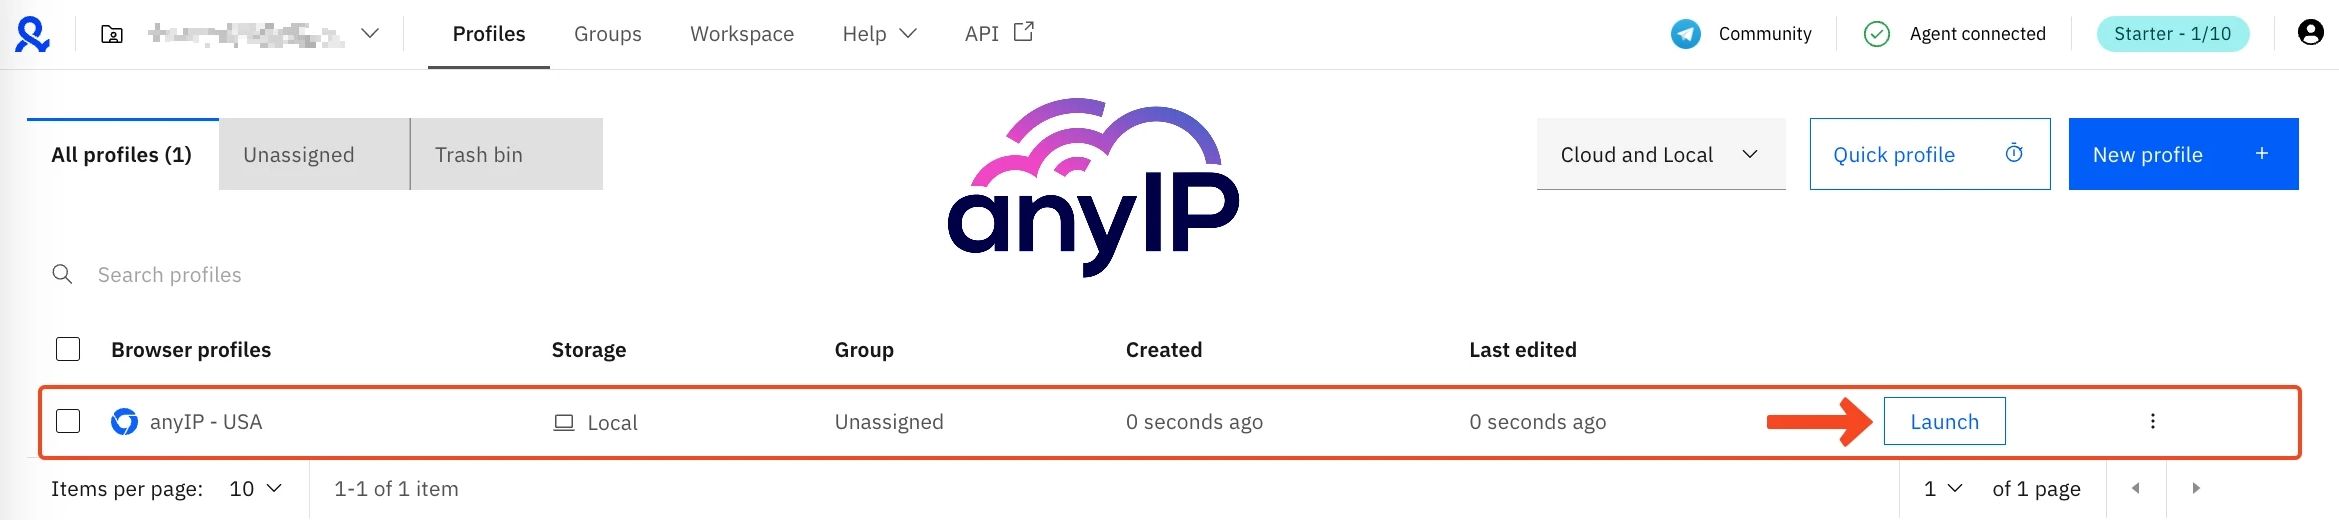
💡 For each browser profile you start, Multilogin will launch a new instance. You will see a custom icon on your dock/toolbar that will look like this:
What about the quick creation?
If you don’t have time to spare and need one or more profiles out of the box in a second, you can use the “Quick profile” feature.
To be honest, I think that this feature is not very useful if you need only one quick profile. Indeed the time to create the profile is about the same as a basic one (as long as you keep all the advance settings in auto).
One big advantage is that as soon as you close the quick profile, all data related to it will be directly deleted.
On the other hand, if you need more than one profile, then it can be a game changer.
Click on “Quick profile” to open the form.

The form is very similar to the one used when creating a new profile using the basic method.
Only two differences can be spotted:
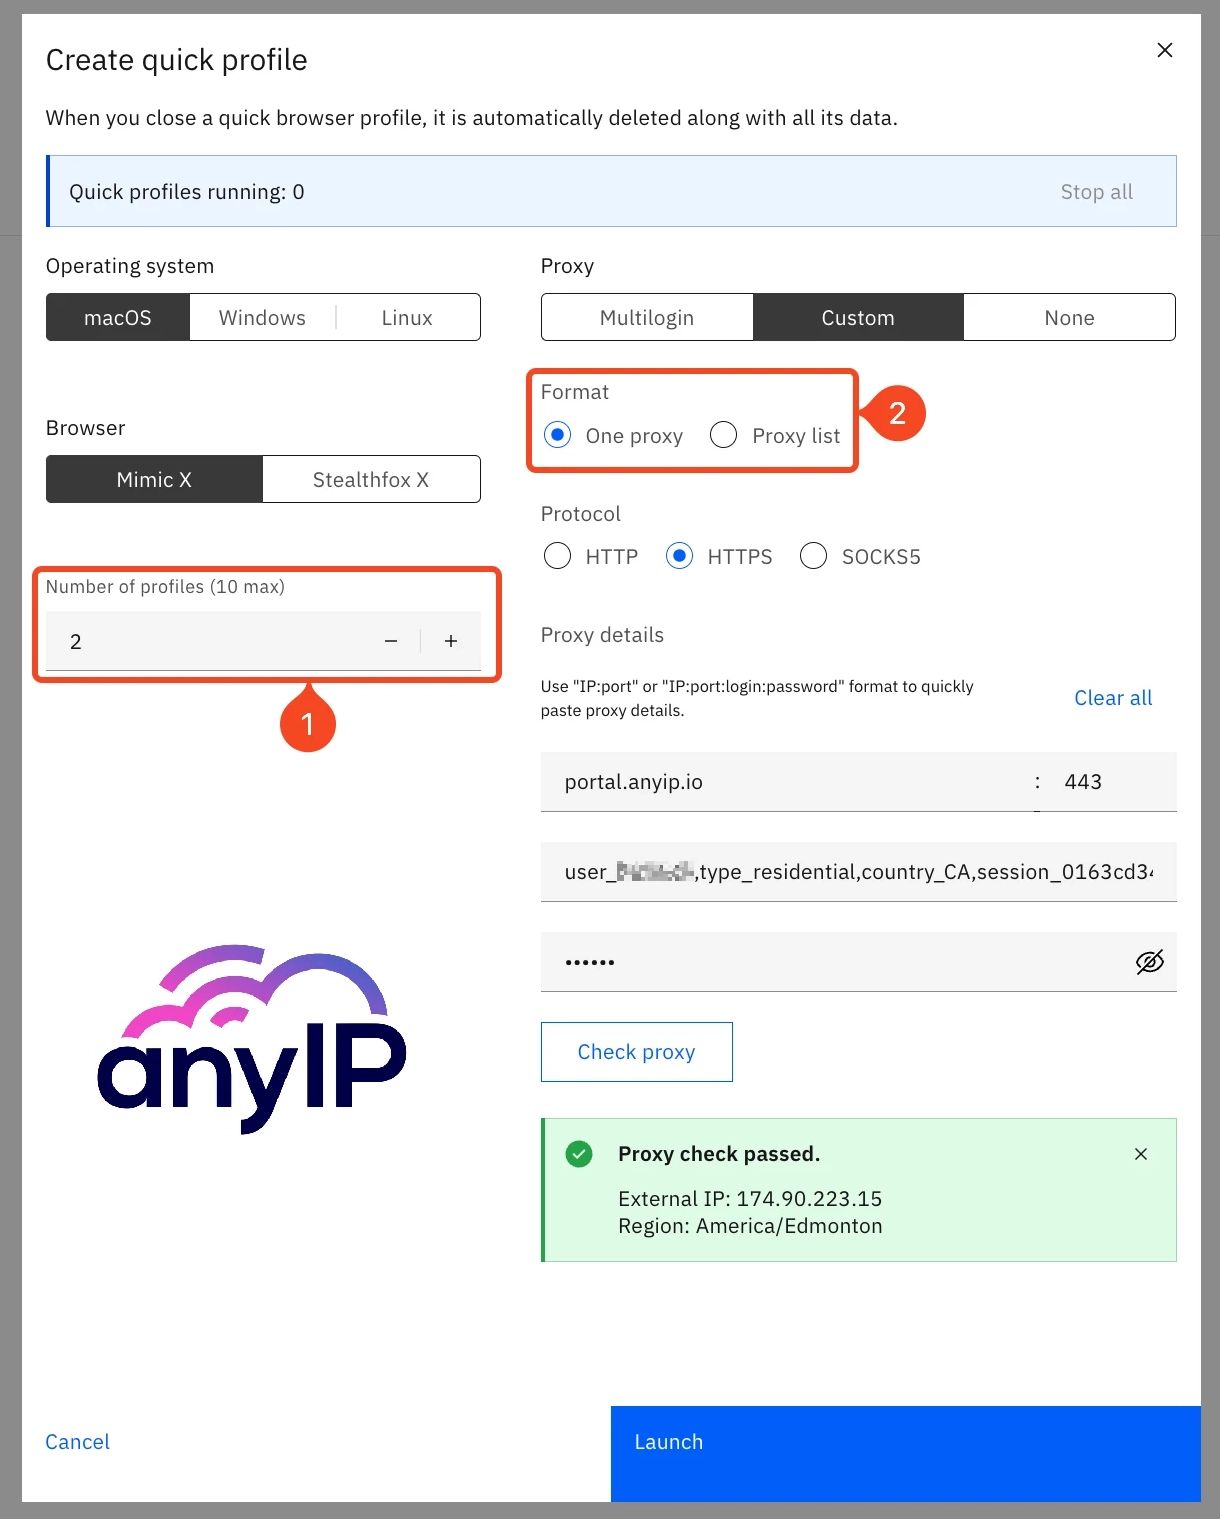
Number of profiles: you can specify how many profiles you want to create. You can create maximum 10 profiles instantly, which can be really helpful depending on your needs.
Format: You can choose to use one or multiple proxies for your profiles
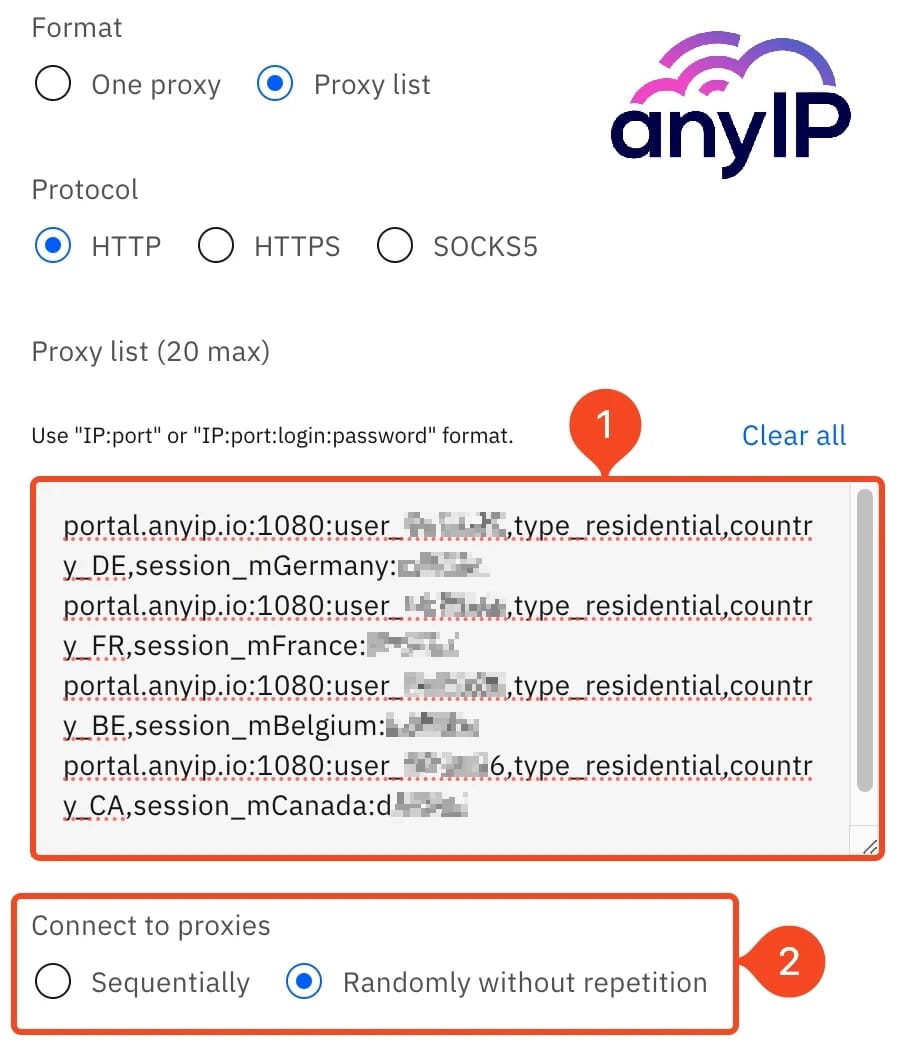
If you selected “Proxy list,” you’ll have to specify all your proxies in a list (1) where one line = one proxy and using the same format as before (IP:port:login:password)
You can also choose how the proxy will be connected to your profiles:
Sequentially: your proxies are going to be used from the first to the last proxy in a classic order.
Randomly without repetition: as mentioned in the title, your proxies will be set in random order and used only once.
Hit “Launch” when you’re all set and enjoy your multiple quick profiles.
Where can I manage my proxies?
As strange as it can be, Multilogin doesn't offer a dedicated UI to manage your proxies… This is a shame for an app that doesn't offer a free plan.
The way it currently works is simple. The proxy is saved on a profile, and to edit it, you need to edit the profile directly. If you use the same proxy on more than one profile, then good luck…
Unlike many other competitors, like Dolphin Anty, for instance, you cannot easily use the same proxy on multiple profiles without having to write all the credentials over and over.
This option is badly needed!
More about the profile options
The Multilogin dashboard provides a comprehensive set of options for managing your browser profiles. You can easily create new profiles with unique settings, import existing profiles, and edit existing ones.
Additionally, you can organize your profiles into groups for better management, clone profiles to create duplicates, and delete profiles that are no longer needed.
The basic information
When configuring a new or editing an old profile, you’ll have the option to configure all the basic information.
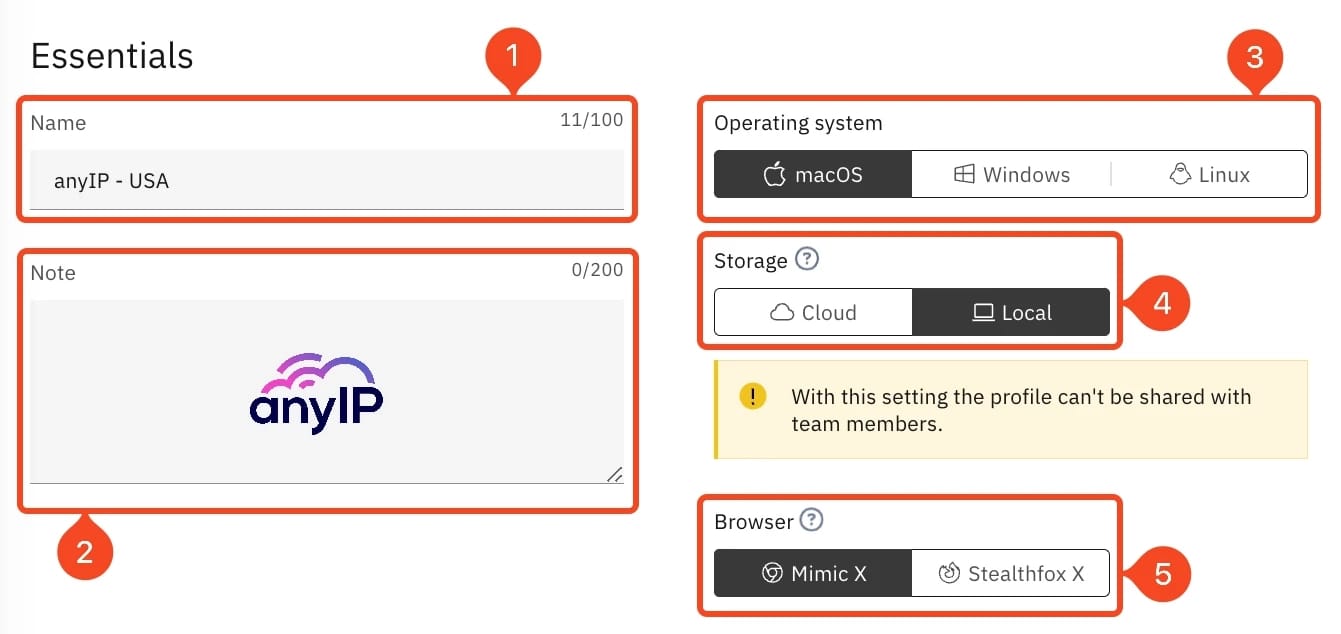
Name: here is where you can specify your profile’s name
Note: leave any useful notes regarding your profile
Operating system: you can select the OS you want your browser to emulate
Storage: A nice option that comes with Multilogin is the option to save the profile on the cloud. Very useful if you need to share it with colleague or even to have access to it anywhere without your personal computer.
Browser: Like AdsPower, you can choose a browser type:
Mimic X is built on Google Chrome
Stealthfox X is built on Mozilla Firefox
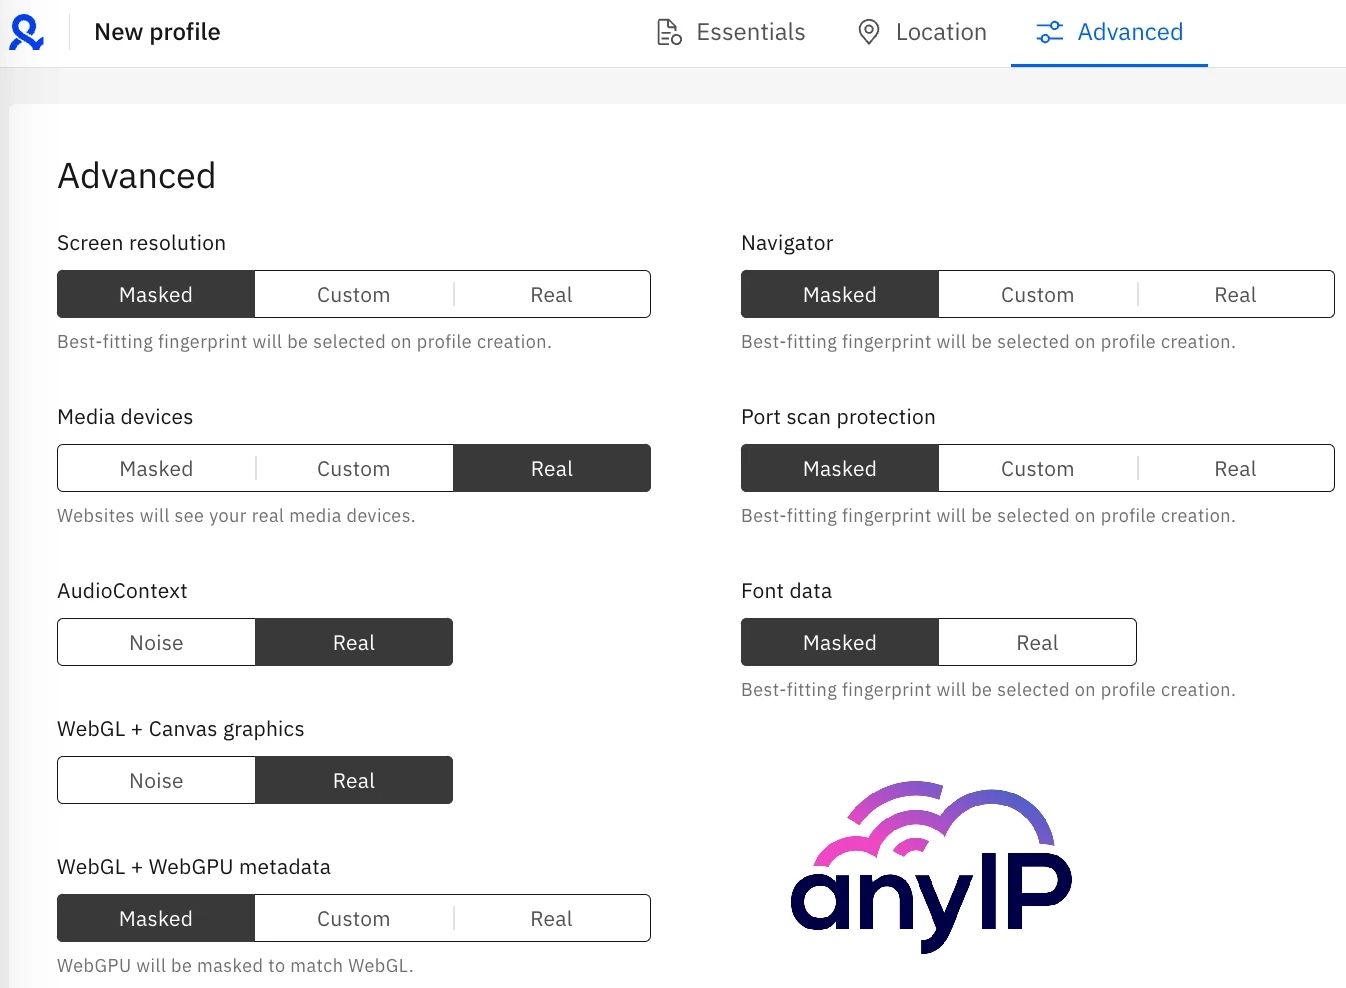
Profile summary and advanced settings (optional)On the right part of the form, you can see the summary of your profile. We have just setup the basic information but if you need a more advanced configuration of your fingerprint your can use the tab “Location” or “Advanced”.
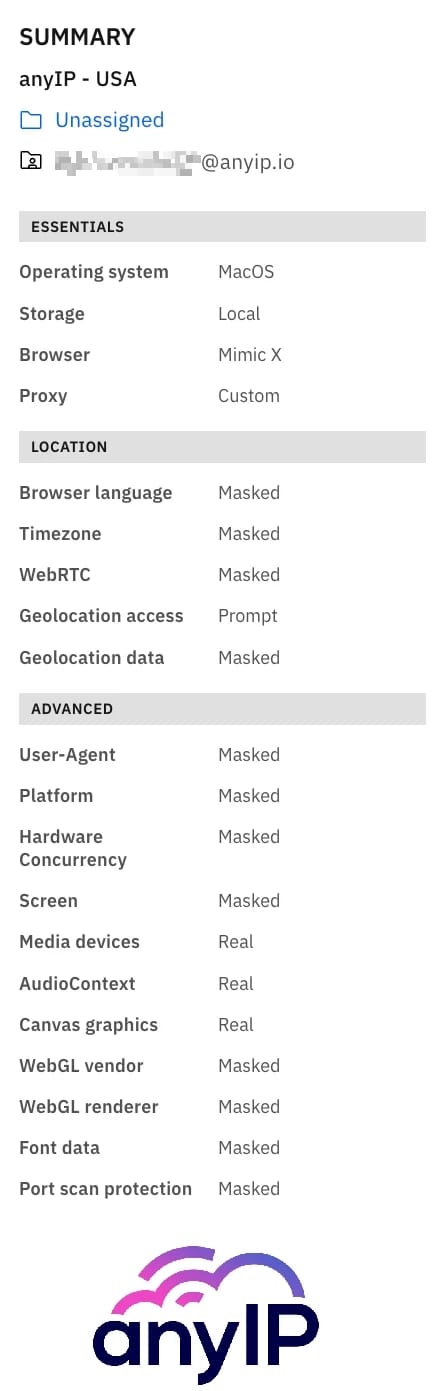
By default, we do not recommend updating those sections as Multilogin is already doing a great job by masking all the important settings:

Control the browser consistency
Fingerprint tests are crucial for ensuring your online anonymity and security, especially when using antidetect browsers. By running fingerprint tests, you can identify vulnerabilities that could compromise your anonymity, make necessary adjustments to your fingerprint settings, and verify the effectiveness of your antidetect browser. This helps you stay one step ahead of potential trackers and maintain a high level of online privacy.
Multilogin Homepage
When you open a browser, Multilogin will always open this homepage. It’s a very basic “What is my IP” page. Unfortunately, there is not much information here.
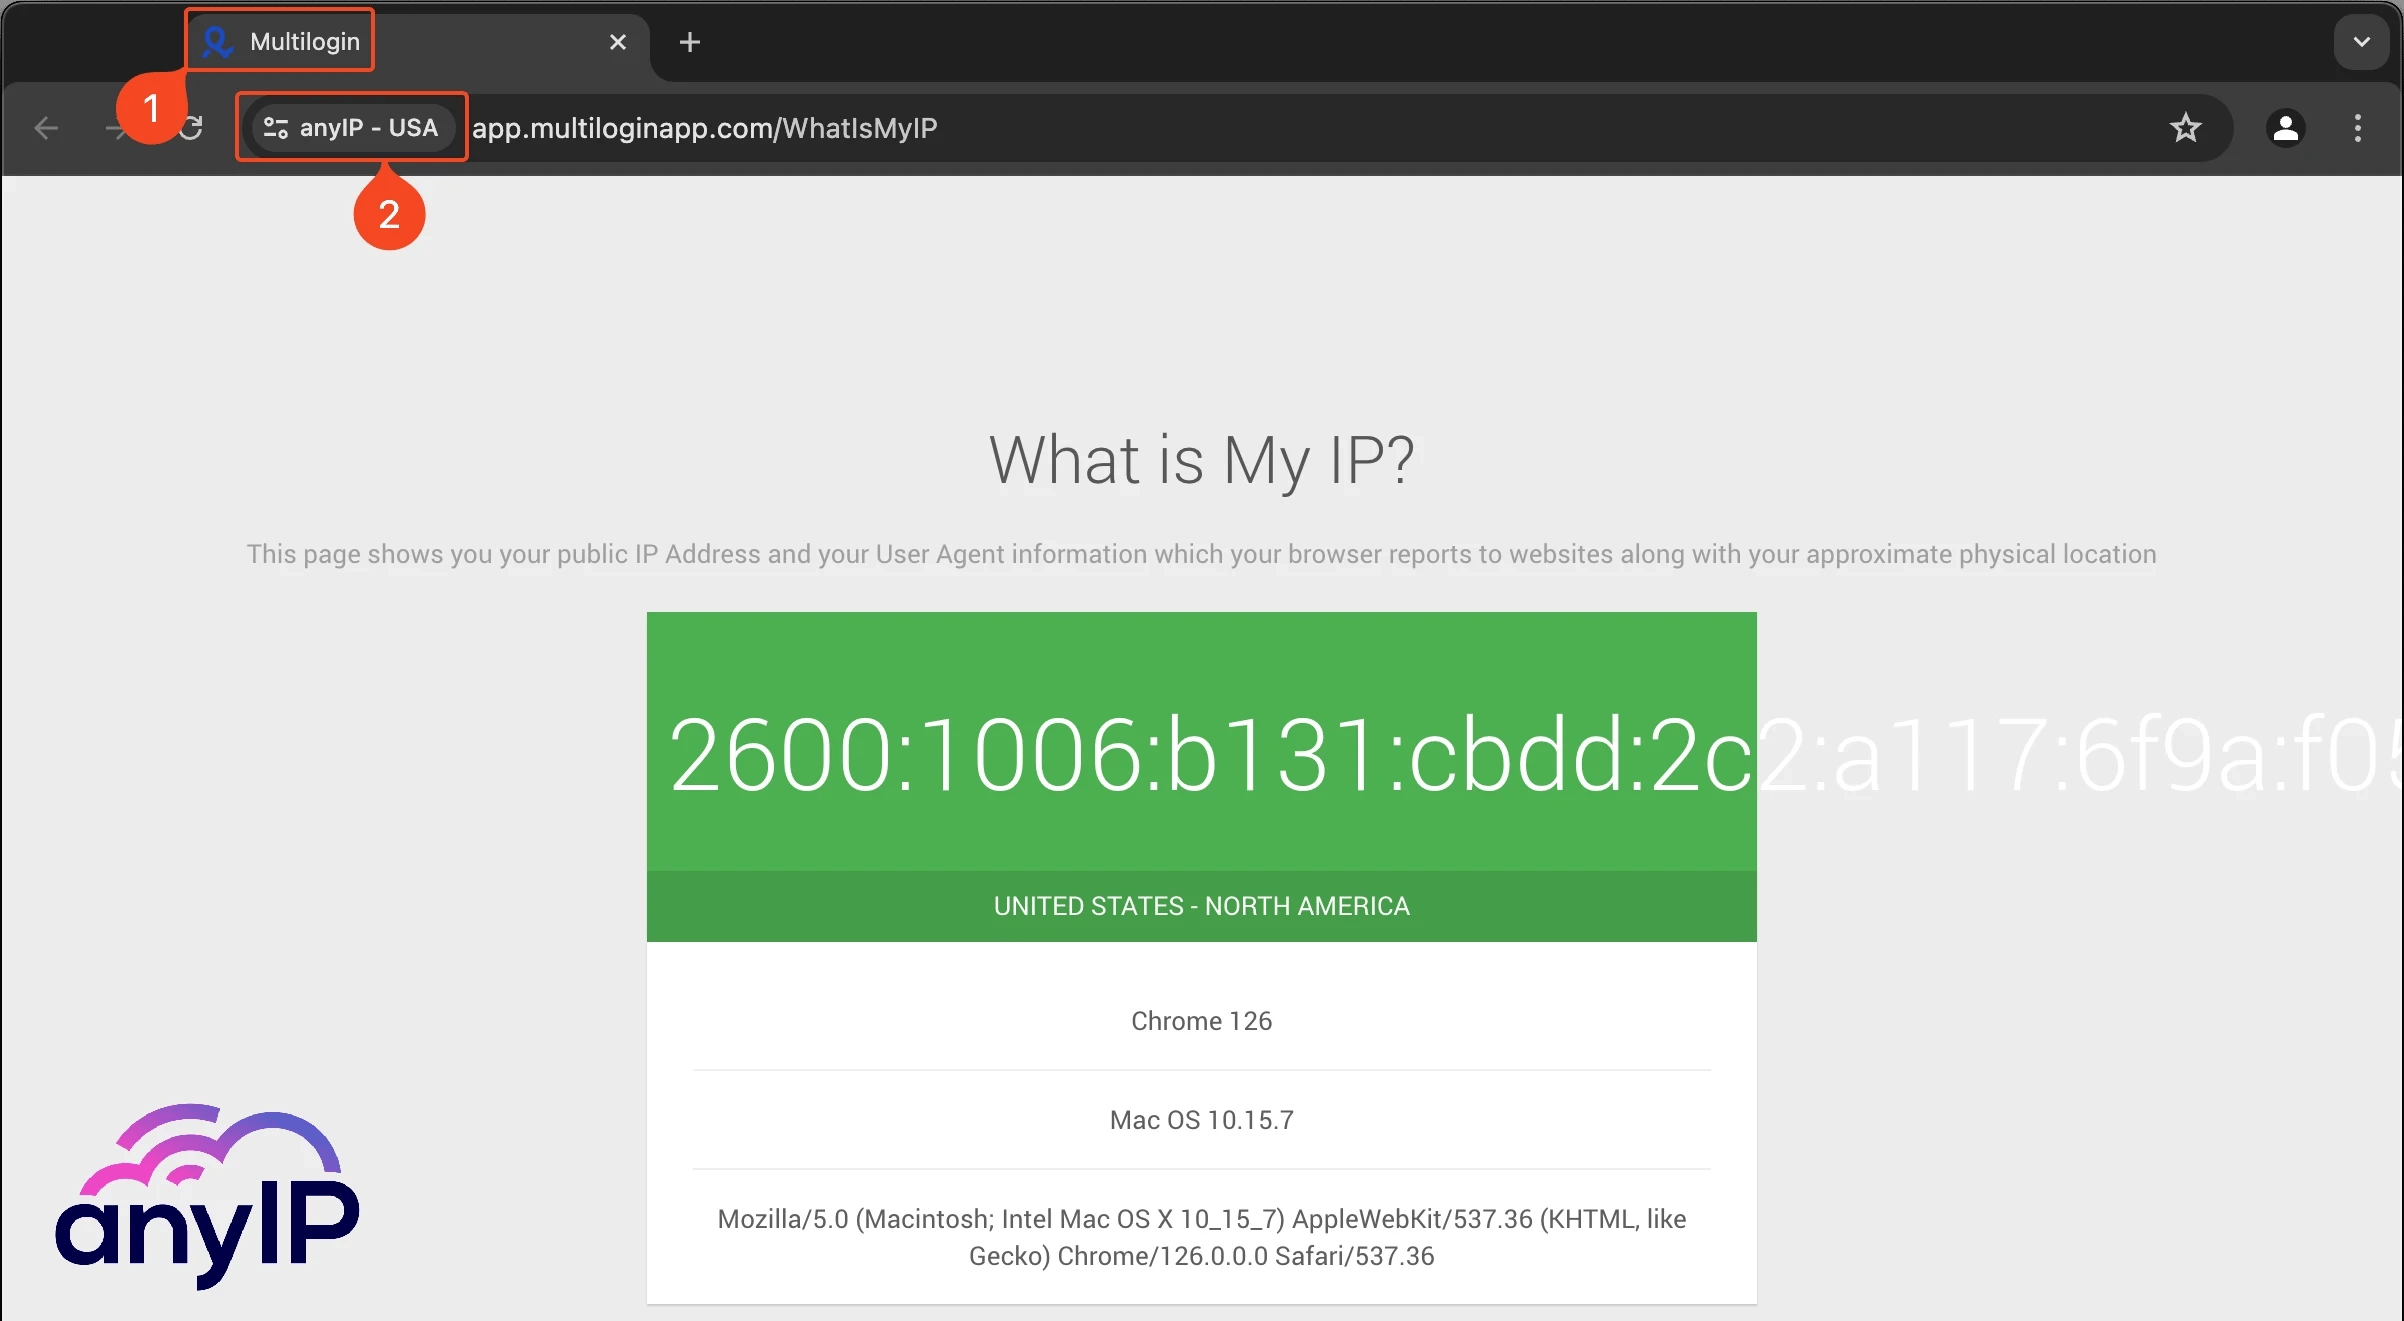
The homepage tab “Multilogin” serve as a quick recap for your profile.
More useful, is the profile name that should appears here. Make sure that you are on the correct profile by checking the name here.
Advanced fingerprint test
To get more information about your profile, you can run a quick and highly recommended test on both pixelscan.net or iphey.com.
Once the test is complete, you will see a all the browser information.
For this profile, I’m using a proxy located in the USA. You can see which city, the timezone and even more details.
Pixelscan will also check your IP score and if you have altered your fingerprint by analyzing it completely.
You can see all your fingerprint parameters in this section (you can update those data from the “Location” and “Advanced” tabs on your profile settings)
How to edit a profile
To edit or update your profile, you can click on the triple dot button associated with your profile.

You’ll have access to the Edit menu from there. This will open the exact same form as the creation menu, you can then easily update your profile as you need.
Don’t forget to save any change you’ll make.
Why should I use Multilogin with a proxy?
Using Multilogin with a proxy offers several key benefits:
Enhanced privacy: Using a proxy masks your IP address and location, making it difficult for websites to track your online activities and protect your personal information.
Improved security: By using different proxies for each account, you can reduce the risk of account compromise if one of your accounts is compromised.
Access to geo-restricted content: Proxies can help you bypass geo-restrictions and access content that is blocked in your region.
Better account management: By organizing your accounts into different profiles and using proxies, you can keep your online activities well-organized, avoid confusion, and improve your global success rate.
Where can I find the desktop application?
It’s important to note that, unlike the majority of anti-browsers, Multilogin is now a web app.
According to their support, you can use it on any browser. During our tests, we used it on the well-known Mozilla Firefox and Google Chrome.
Since there is no application, the first time you’re using the Multilogin web-app, you’ll need to install the agent first:
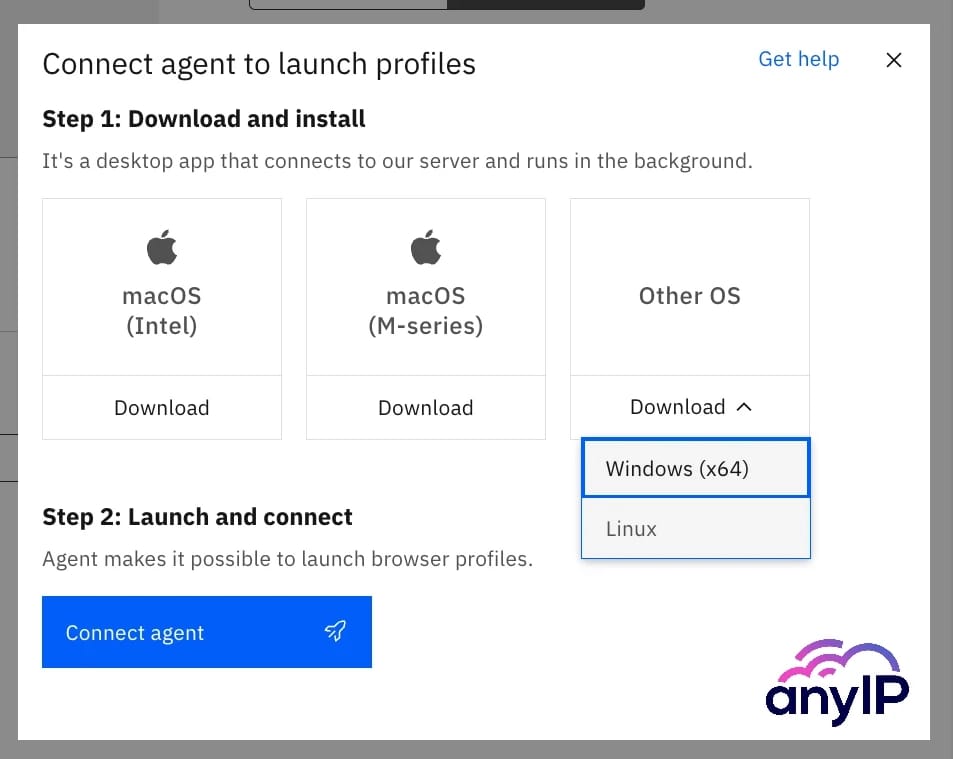
Select the agent depending on your OS. All the most popular platform are available, you can choose between macOS (both intel or M-series/ARM), Windows and even Linux.
Once the agent is installed, launch it to connect it with the web app
When the installation is over, you will be able to easily see if the agent is connected from the dashboard.

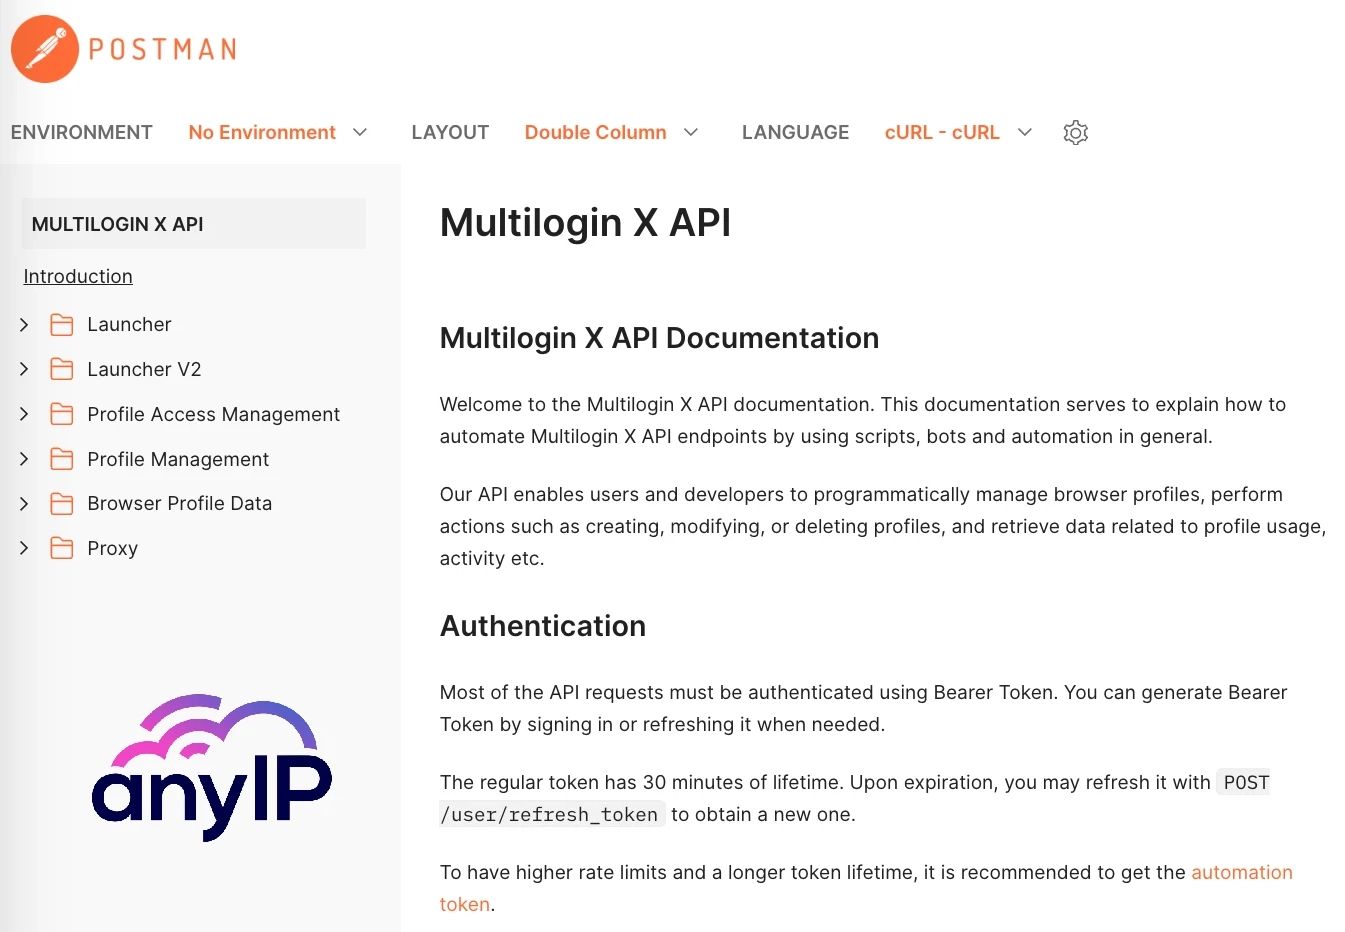
How to use the Multilogin API
For those with advanced technical skills looking for an alternative method to manage their profiles, proxies, and automation tasks, Multilogin offers a remote API with robust network integration and enhanced compatibility.
To learn everything about the API, have a look at the official documentation using the following link Multilogin API.
Get a proxy now with anyIP.io
Looking for a proxy? It's mandatory to take into account factors like the type of proxy you need, it’s performance, or again, does it have bandwidth limitations? All those key factors will have an impact on your daily usage.
Residential and mobile proxies are generally the most secure and reliable options, outperforming datacenter, public, or ISP proxies.
These proxies offer IP rotation and route your requests through real devices with authentic IP addresses, providing enhanced anonymity.
Create you account at anyIP.Io to access a large pool of IPs from around the globe, starting at just $2/GB.
Our 24/7 support team is ready to assist you with any questions and help you during your journey.
Article by
Khaled Bentoumi
Khaled is a software engineer. He's been involved in many startups of different sizes. Previously, he founded Data to Page, an AI Programmatic SEO startup. He now handles all the marketing at anyIP.


Article by
Khaled Bentoumi
Khaled is a software engineer. He's been involved in many startups of different sizes. Previously, he founded Data to Page, an AI Programmatic SEO startup. He now handles all the marketing at anyIP.
Read more

How to customize Your User-Agent with Python Requests
Learn how to update and rotate user-agents in Python Requests to avoid detection and improve scraping efficiency.

