
Setting Up Proxies on AdsPower: A Complete Guide
Table of Contents
Table of Contents
Key takeaways
AdsPower allows seamless proxy integration with Firefox and Chrome for anonymity.
Easily create, configure, and test proxies within AdsPower for enhanced security.
Use batch proxy management for multiple profiles to prevent account linking and bans.
AdsPower supports custom proxy formats and browser fingerprint control for privacy.
Upgrade to AdsPower's paid plan for API access and advanced management features.
AdsPower is one of the leading antidetect browsers on the market, providing a vast choice of protocols for seamless proxy integration. It also allows users to choose between Mozilla Firefox and Google Chrome as base browsers for their profiles, offering greater flexibility, anonymity, and robust security setup.
Follow this guide and see for yourself. In less than 15 minutes, you’ll know everything about integrating proxies in AdsPower and more!
In this tutorial, you’ll learn how to:
Create and manage your proxies;
Integrate them into a browser profile;
Test your proxies;
Verify your browser fingerprint integrity ;
💡 Before jumping right into the guide, you need a few requirements:
An AdsPower account, they offer a lifetime free plan perfect for most users.
AdsPower installed on your computer. You can easily find the compatible app for your system on the download page, and choose between Windows, macOS (arm & intel), or again Linux.
Your proxy credentials (you can quickly create an account at anyIP.io):
username/password;
proxy server infos (URL or IP + port) ;
With no further ado, let's jump right into the guide!
How to setup a browser with a proxy in AdsPower
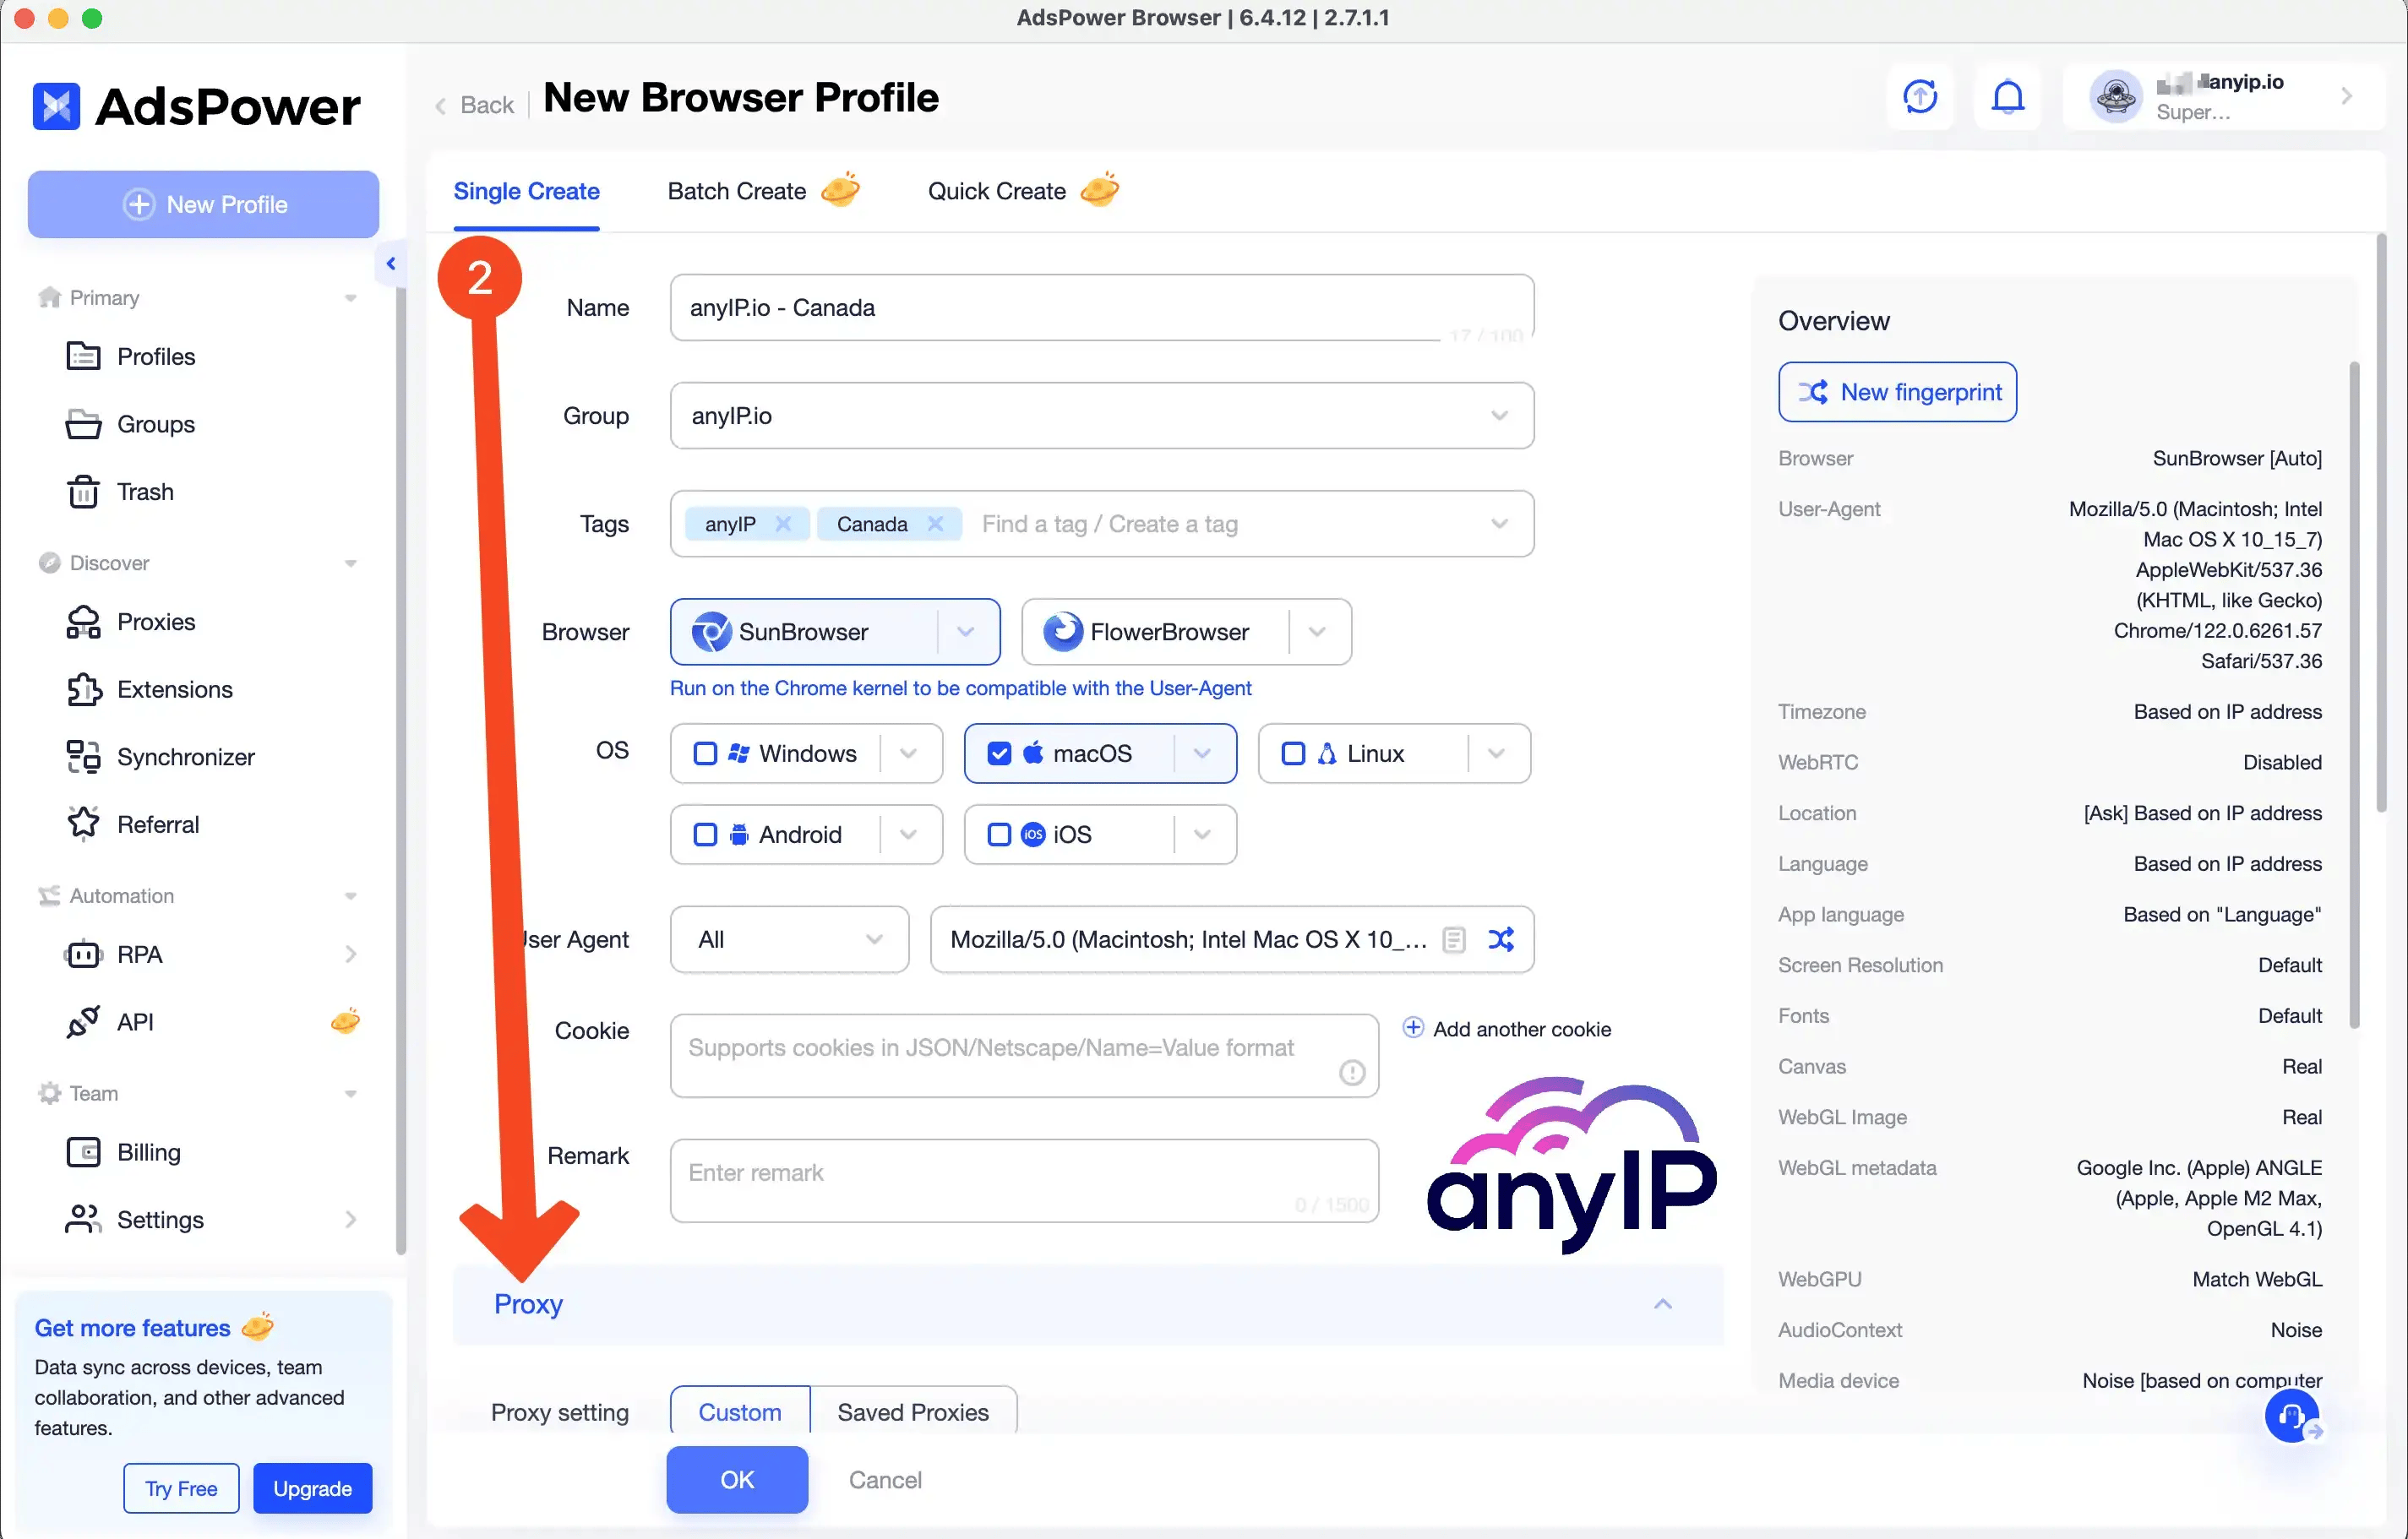
Step 1: Create a new browser profile
The first step of our guide is to set up a new profile by clicking on the “+ New profile” button (1)

Fill out all the essential informations and scroll down to find the proxy setting section (2).
Step 2: Configure a custom proxy
Adspower proxy settings are simple to integrate and offer a large compatibility.
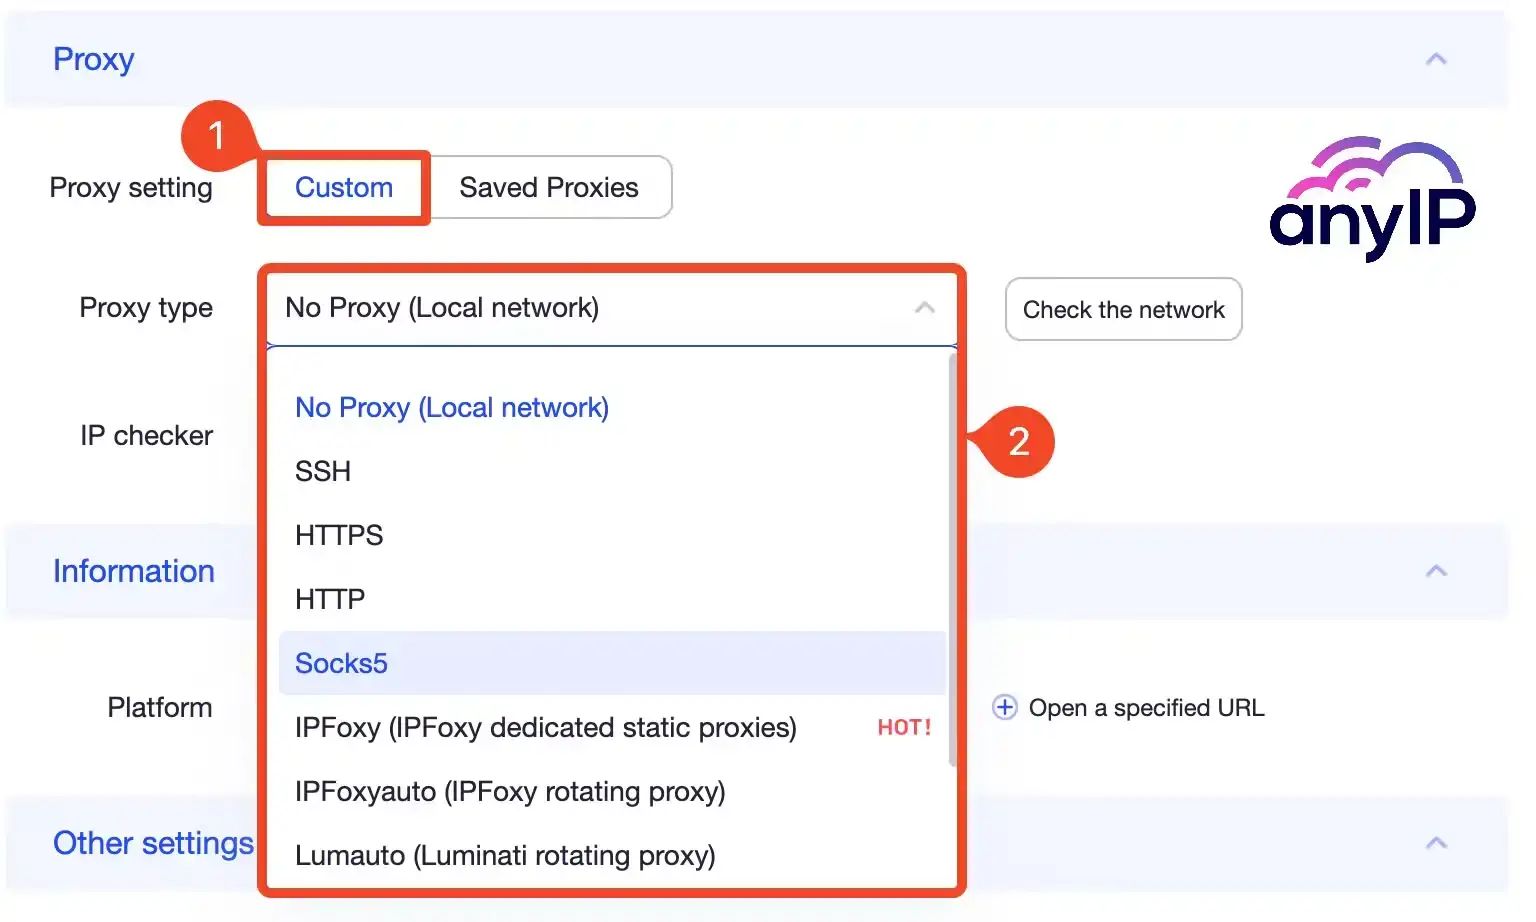
Select “Custom” (1) and Choose the protocol (2) you want to use.
AdsPower supports a range of tunneling methods, ensuring secure data transmission, and encryption. You can select the protocol to use between SSH, HTTP(S), or again, a Socks5 proxy.
Once you’ve selected the Proxy type (protocol), AdsPower will display the proxy form.
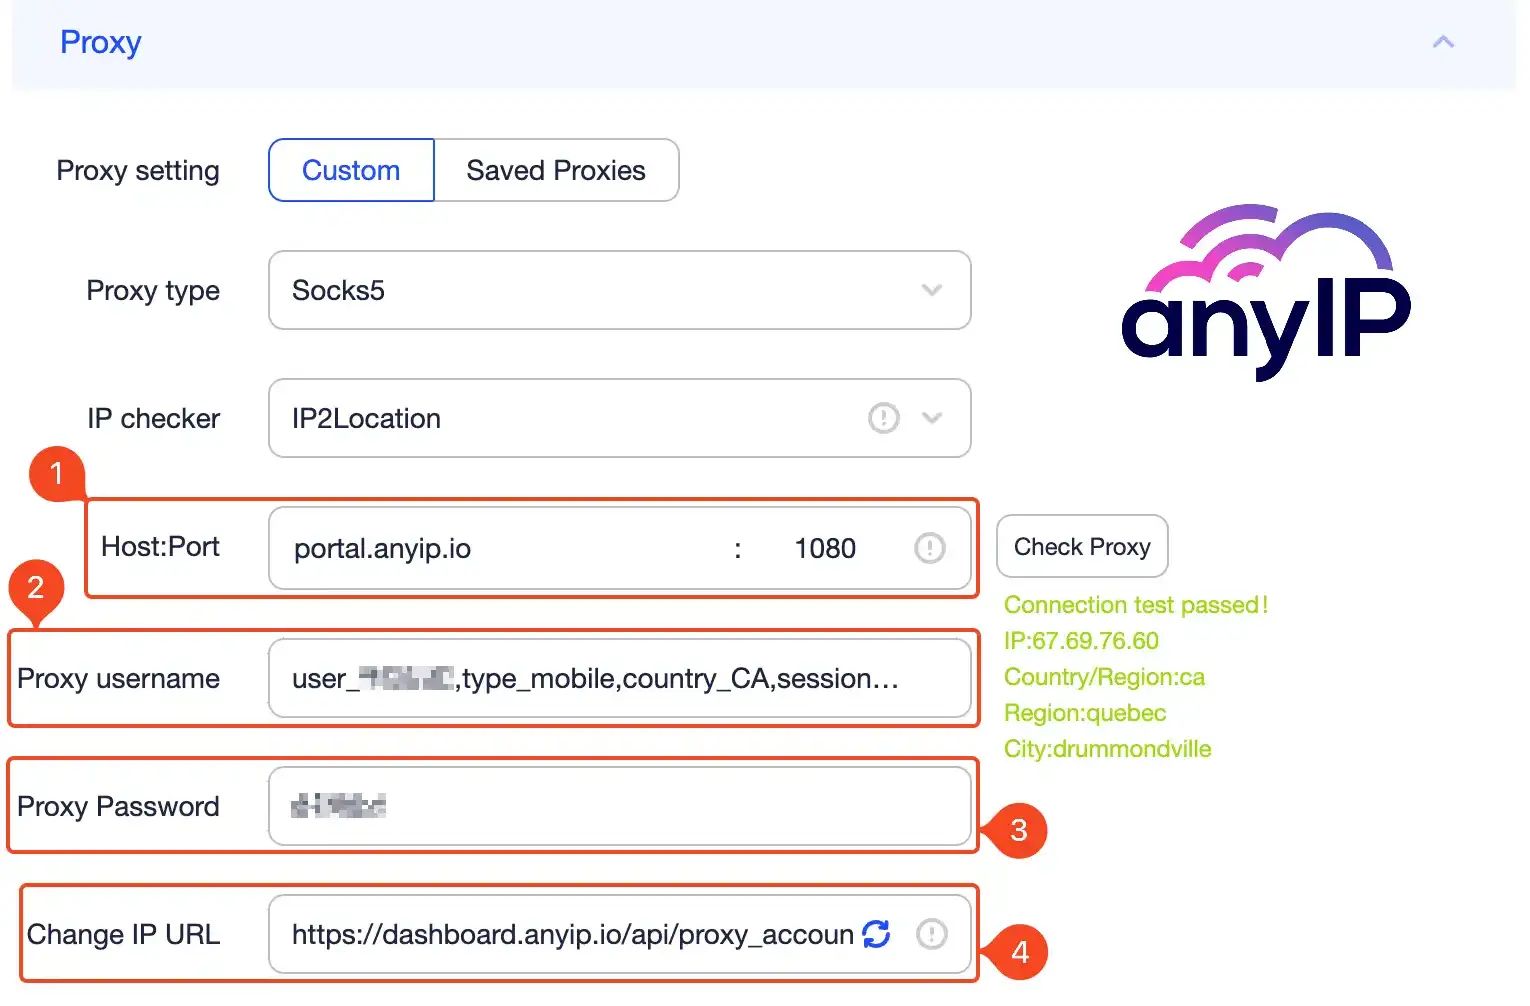
There is nothing fancy here, only the basic field, which is perfect. Fill out the form with your proxy credentials:
Proxy host & proxy port: portal.anyip.io : 1080
Proxy username or login: copy/paste your authentication details here
Proxy password: copy/paste your password
💡 How to test the proxy
AnyIP.io offers three different protocol, HTTP, SOCKS5 and HTTPS. Depending on the protocol you choose to use and your organization’s network setup, you may need to adapt the proxy configuration.
Once you’ve set up the proxy, you can use the “Check Proxy” button to test the connection

If the authentification is successful, you’ll see a confirmation message and:
The IP address attributed by the proxy
The country you’re located in
The region and the city where your IP address is from
AnyIP.io has an excellent success rate and latency that you can live check using our status page.
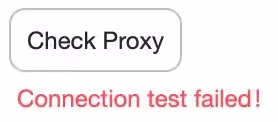
If Adspower fails to connect to the proxy server, you’ll see a “Connection test failed!” error. In that case, double-check your login credentials and try again.
And that’s it, you can save your new profile by clicking on “OK”
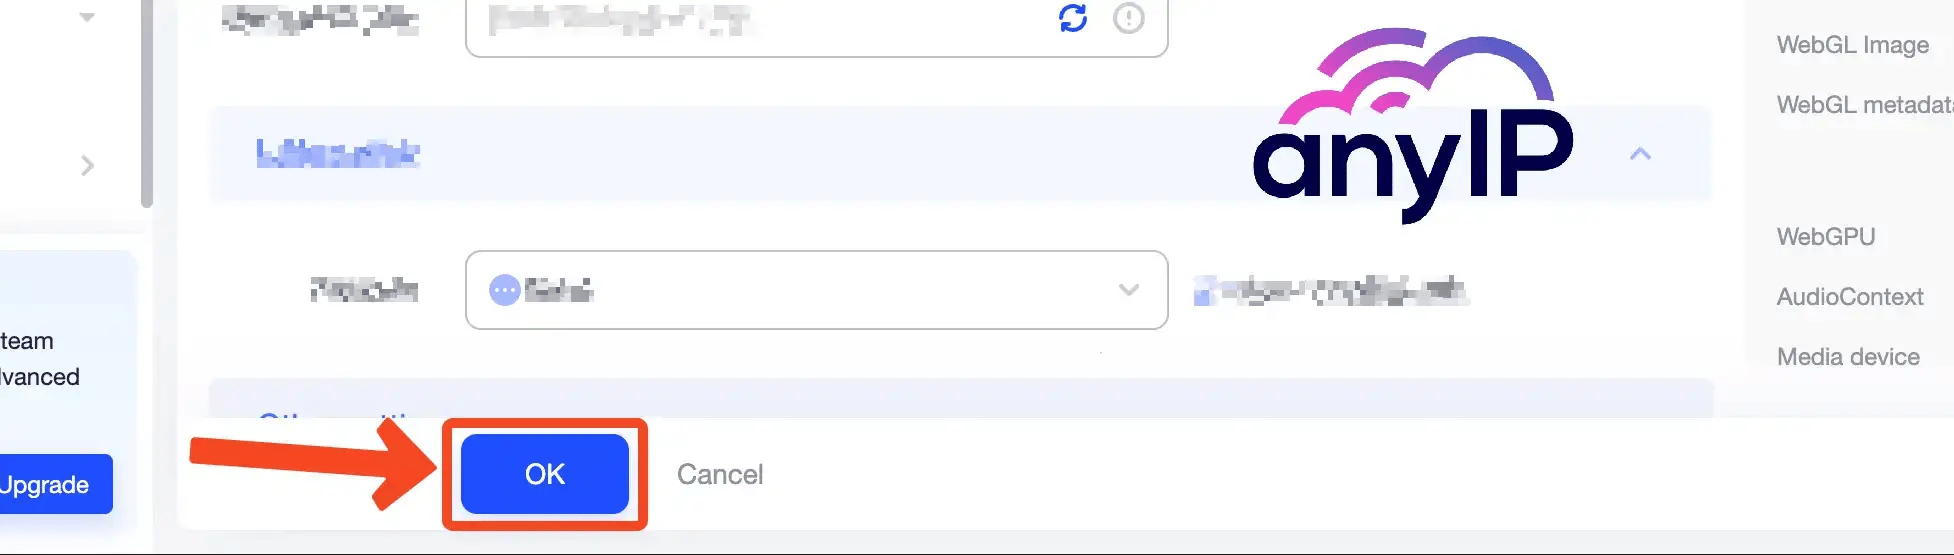
A confirmation will pop out, you'll be redirected to the "Profiles" view, and you see your brand new profile ready to use, with an extra layer of privacy granted by the proxy.
Step 3: How to use your profile
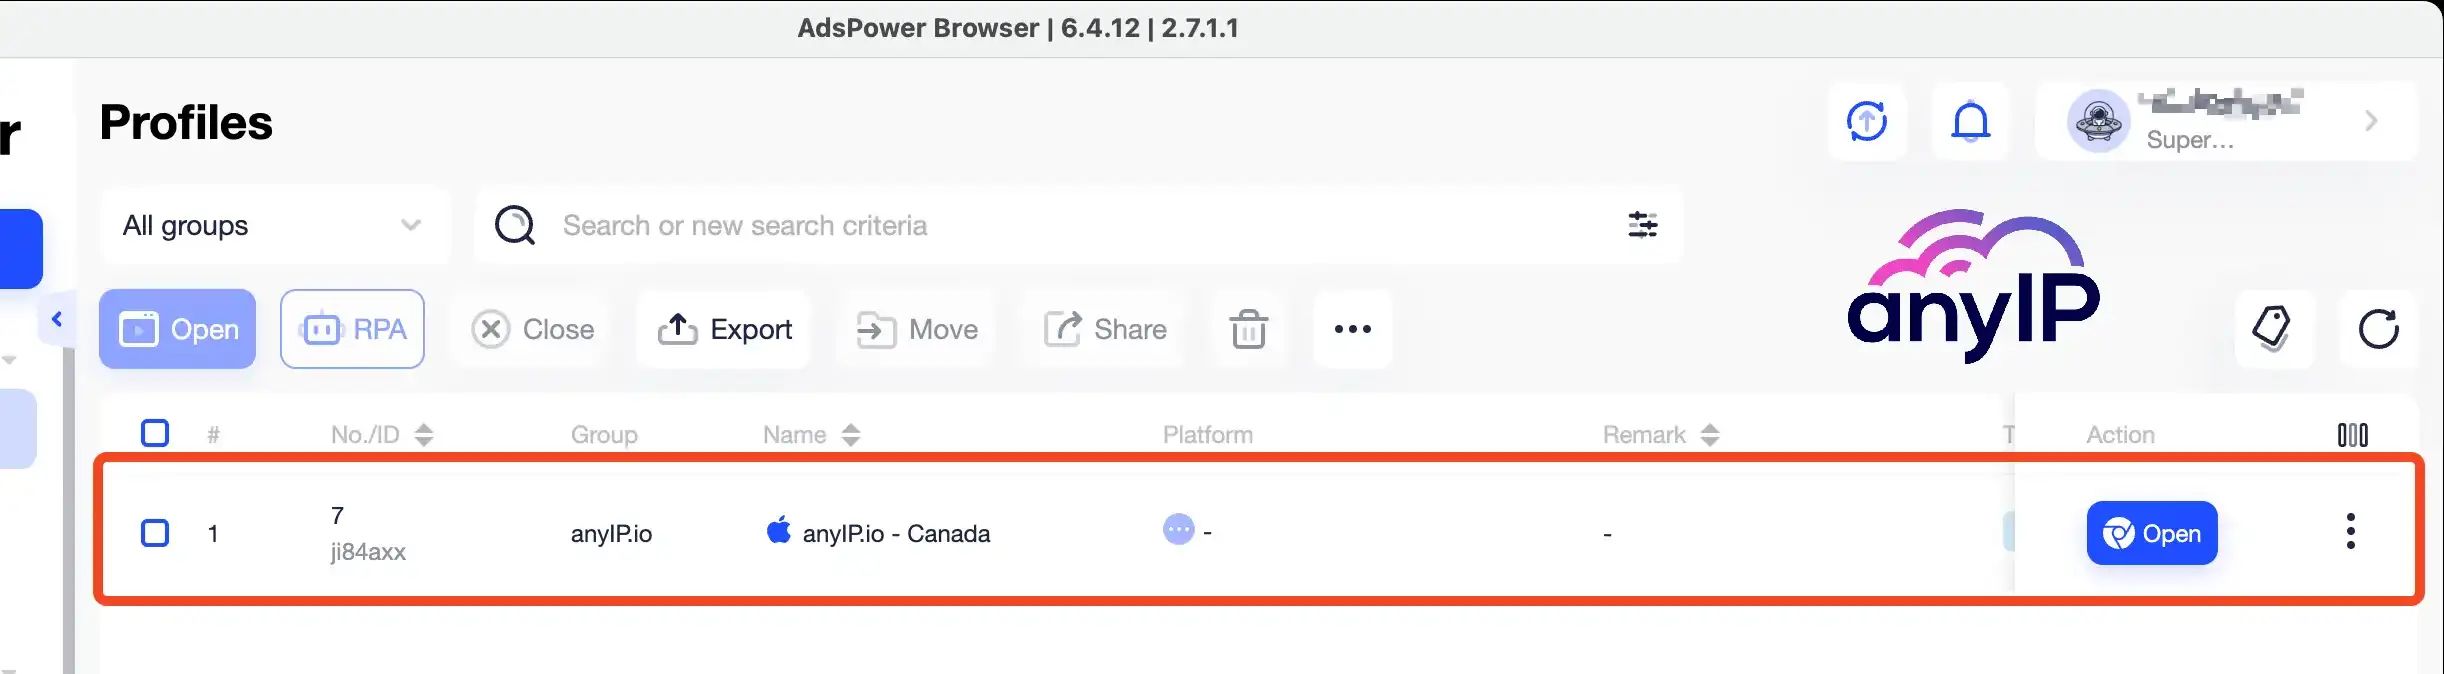
Open the browser
It's a no-brainer here. You'll see an "Open" button associated with your profile. Click on it to launch the dedicated browser.

💡 AdsPower launches a new instance each time you open a profile and you get a icon on your dock/toolbar
The number you see match the ID of your profile, this making it easy to spot.
A nice touch from AdsPower is that it displays a recap of your profile when you open it. It will look like this, and you'll quickly see all the information on your profile.
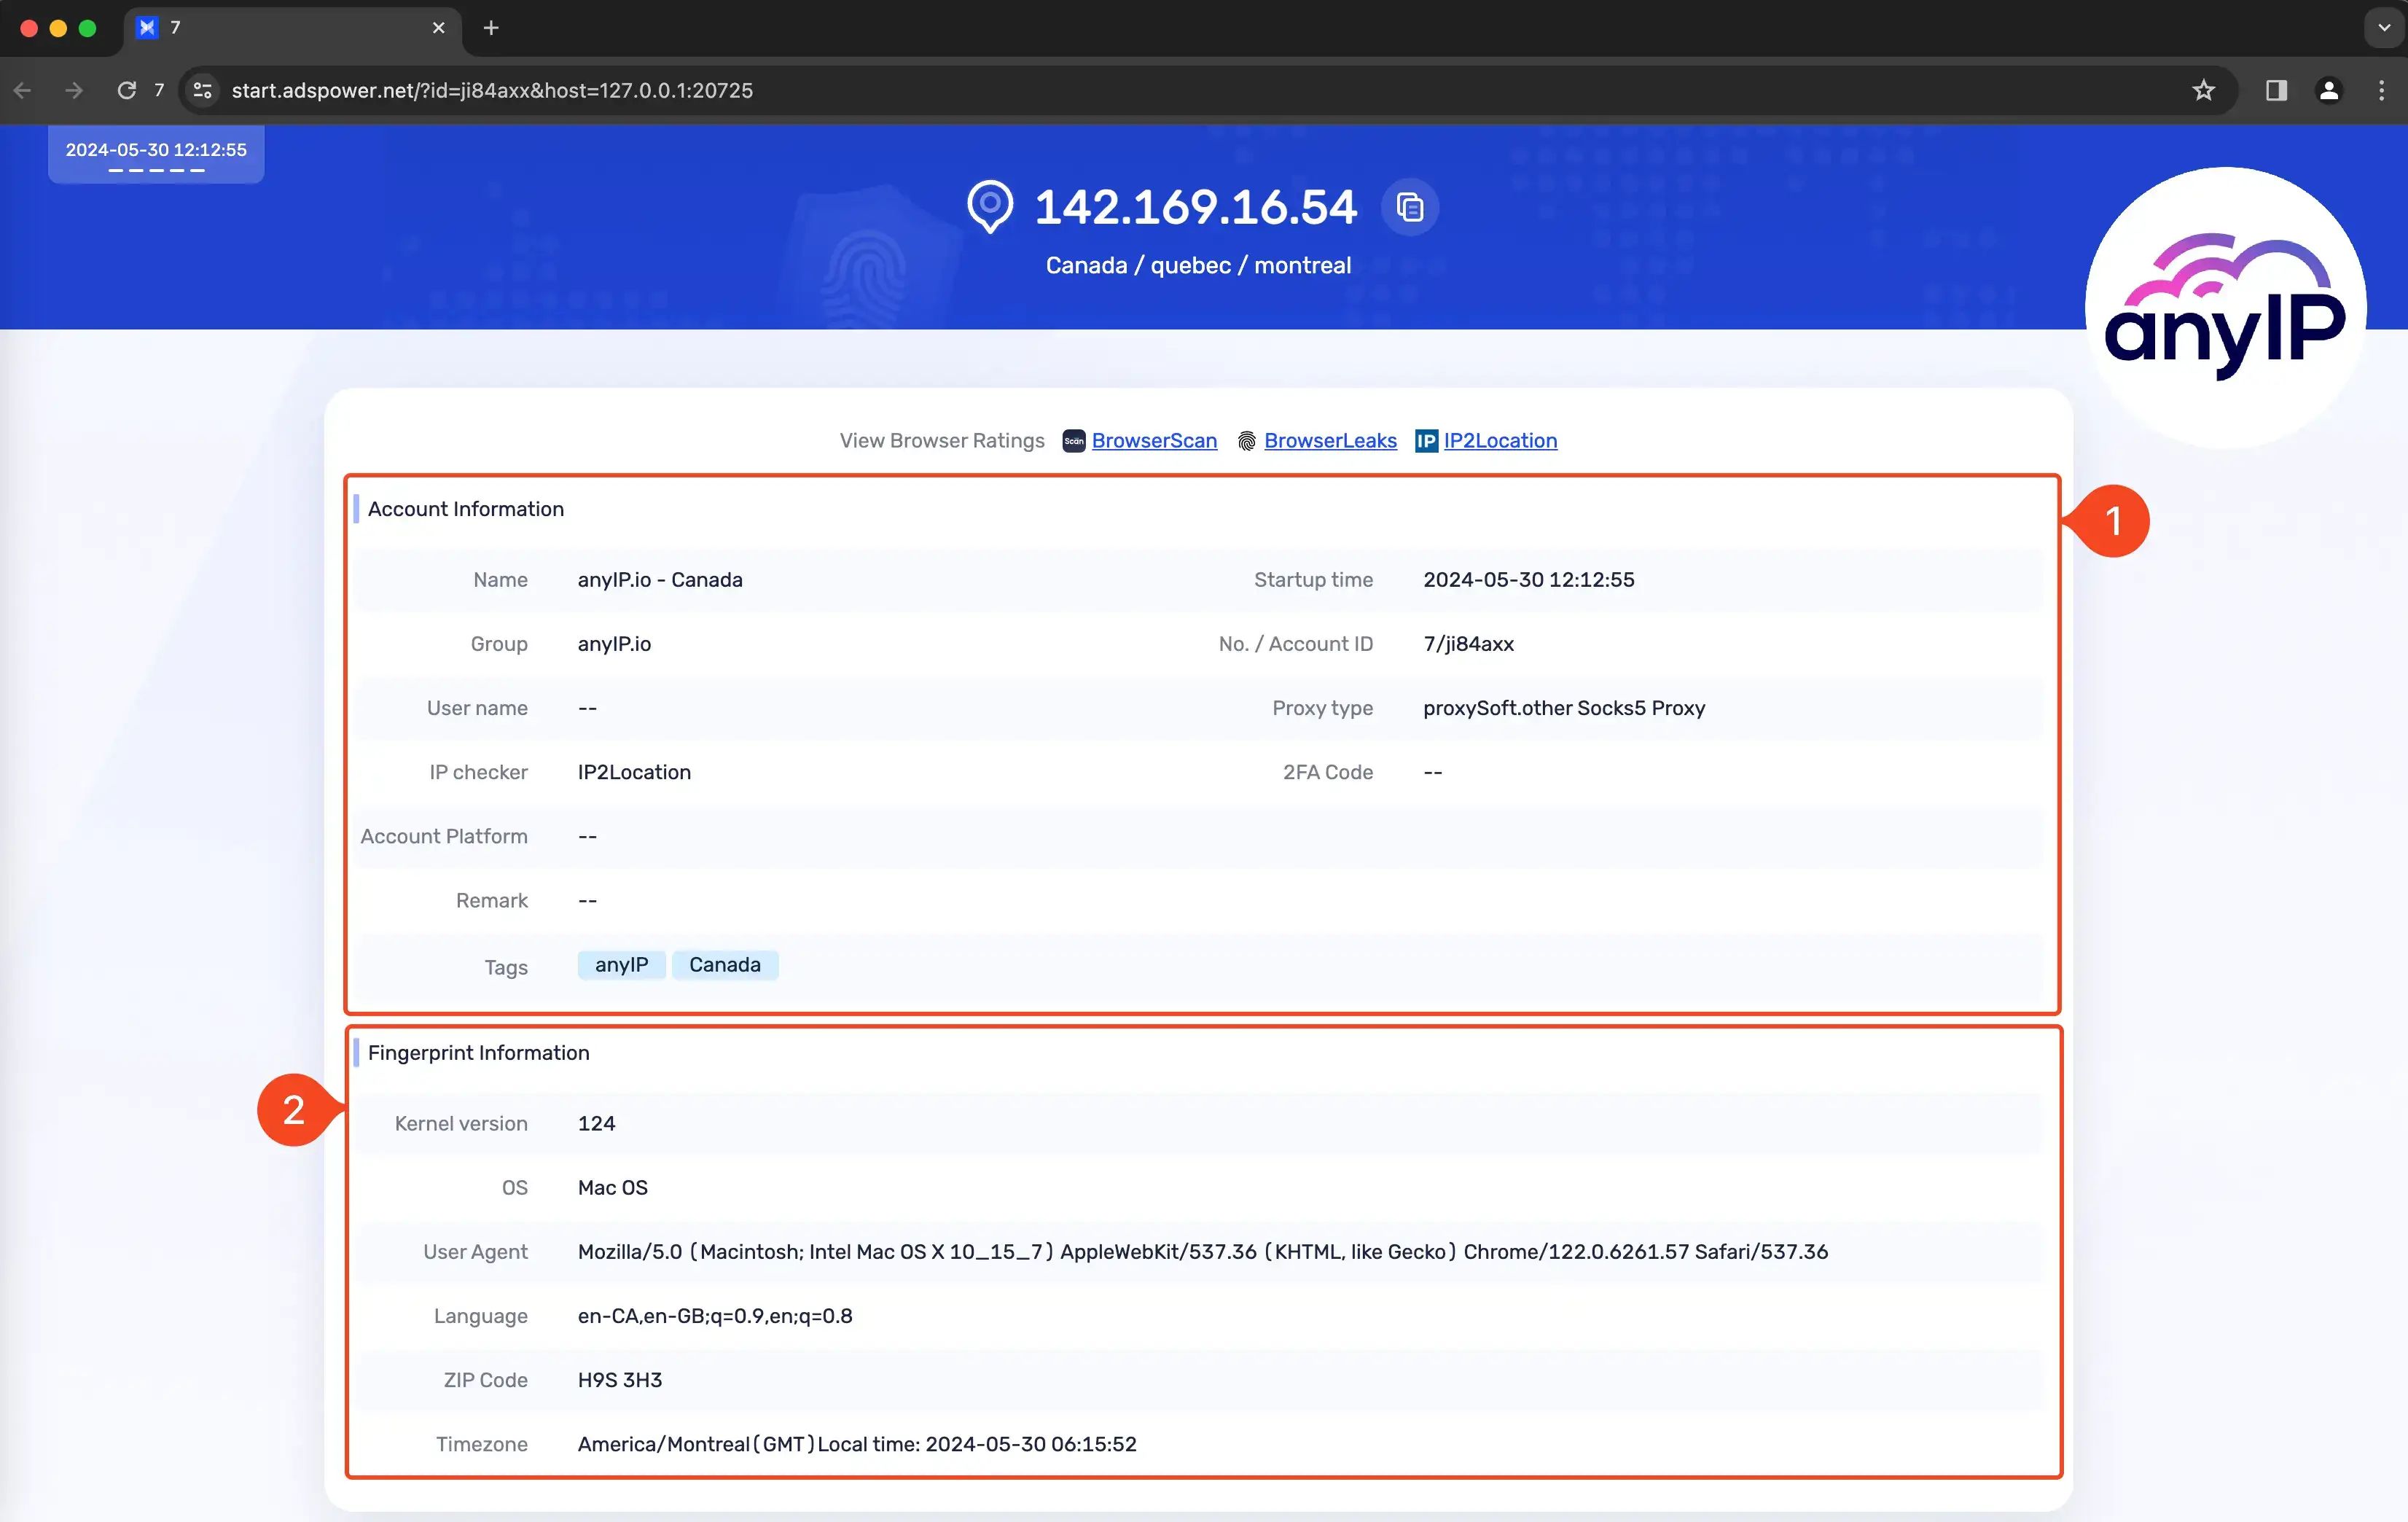
In the first section, you can find all the information you choose when creating the profile
In the second section, you'll see the browser fingerprint
Single or batch proxy creation
We learn how to configure a profile using a custom proxy, but what if you have multiple accounts? AdsPower offers dedicated proxy management to make your life easier.
This UI is especially useful for activities like running multiple advertising campaigns, managing numerous social media accounts, or even scraping data while avoiding detection.
Batch proxy creation allows you to easily manage and assign a proxy to a profile, helping prevent bans, blocks, or account linking by ensuring all accounts operate from different IPs.

Click on “Proxies” on the left menu to open the proxies management
Then click on “Add proxy” to open the proxy form
If you’re familiar with the previous version Dolphin Anty, you will most likely find few similarities in this form.
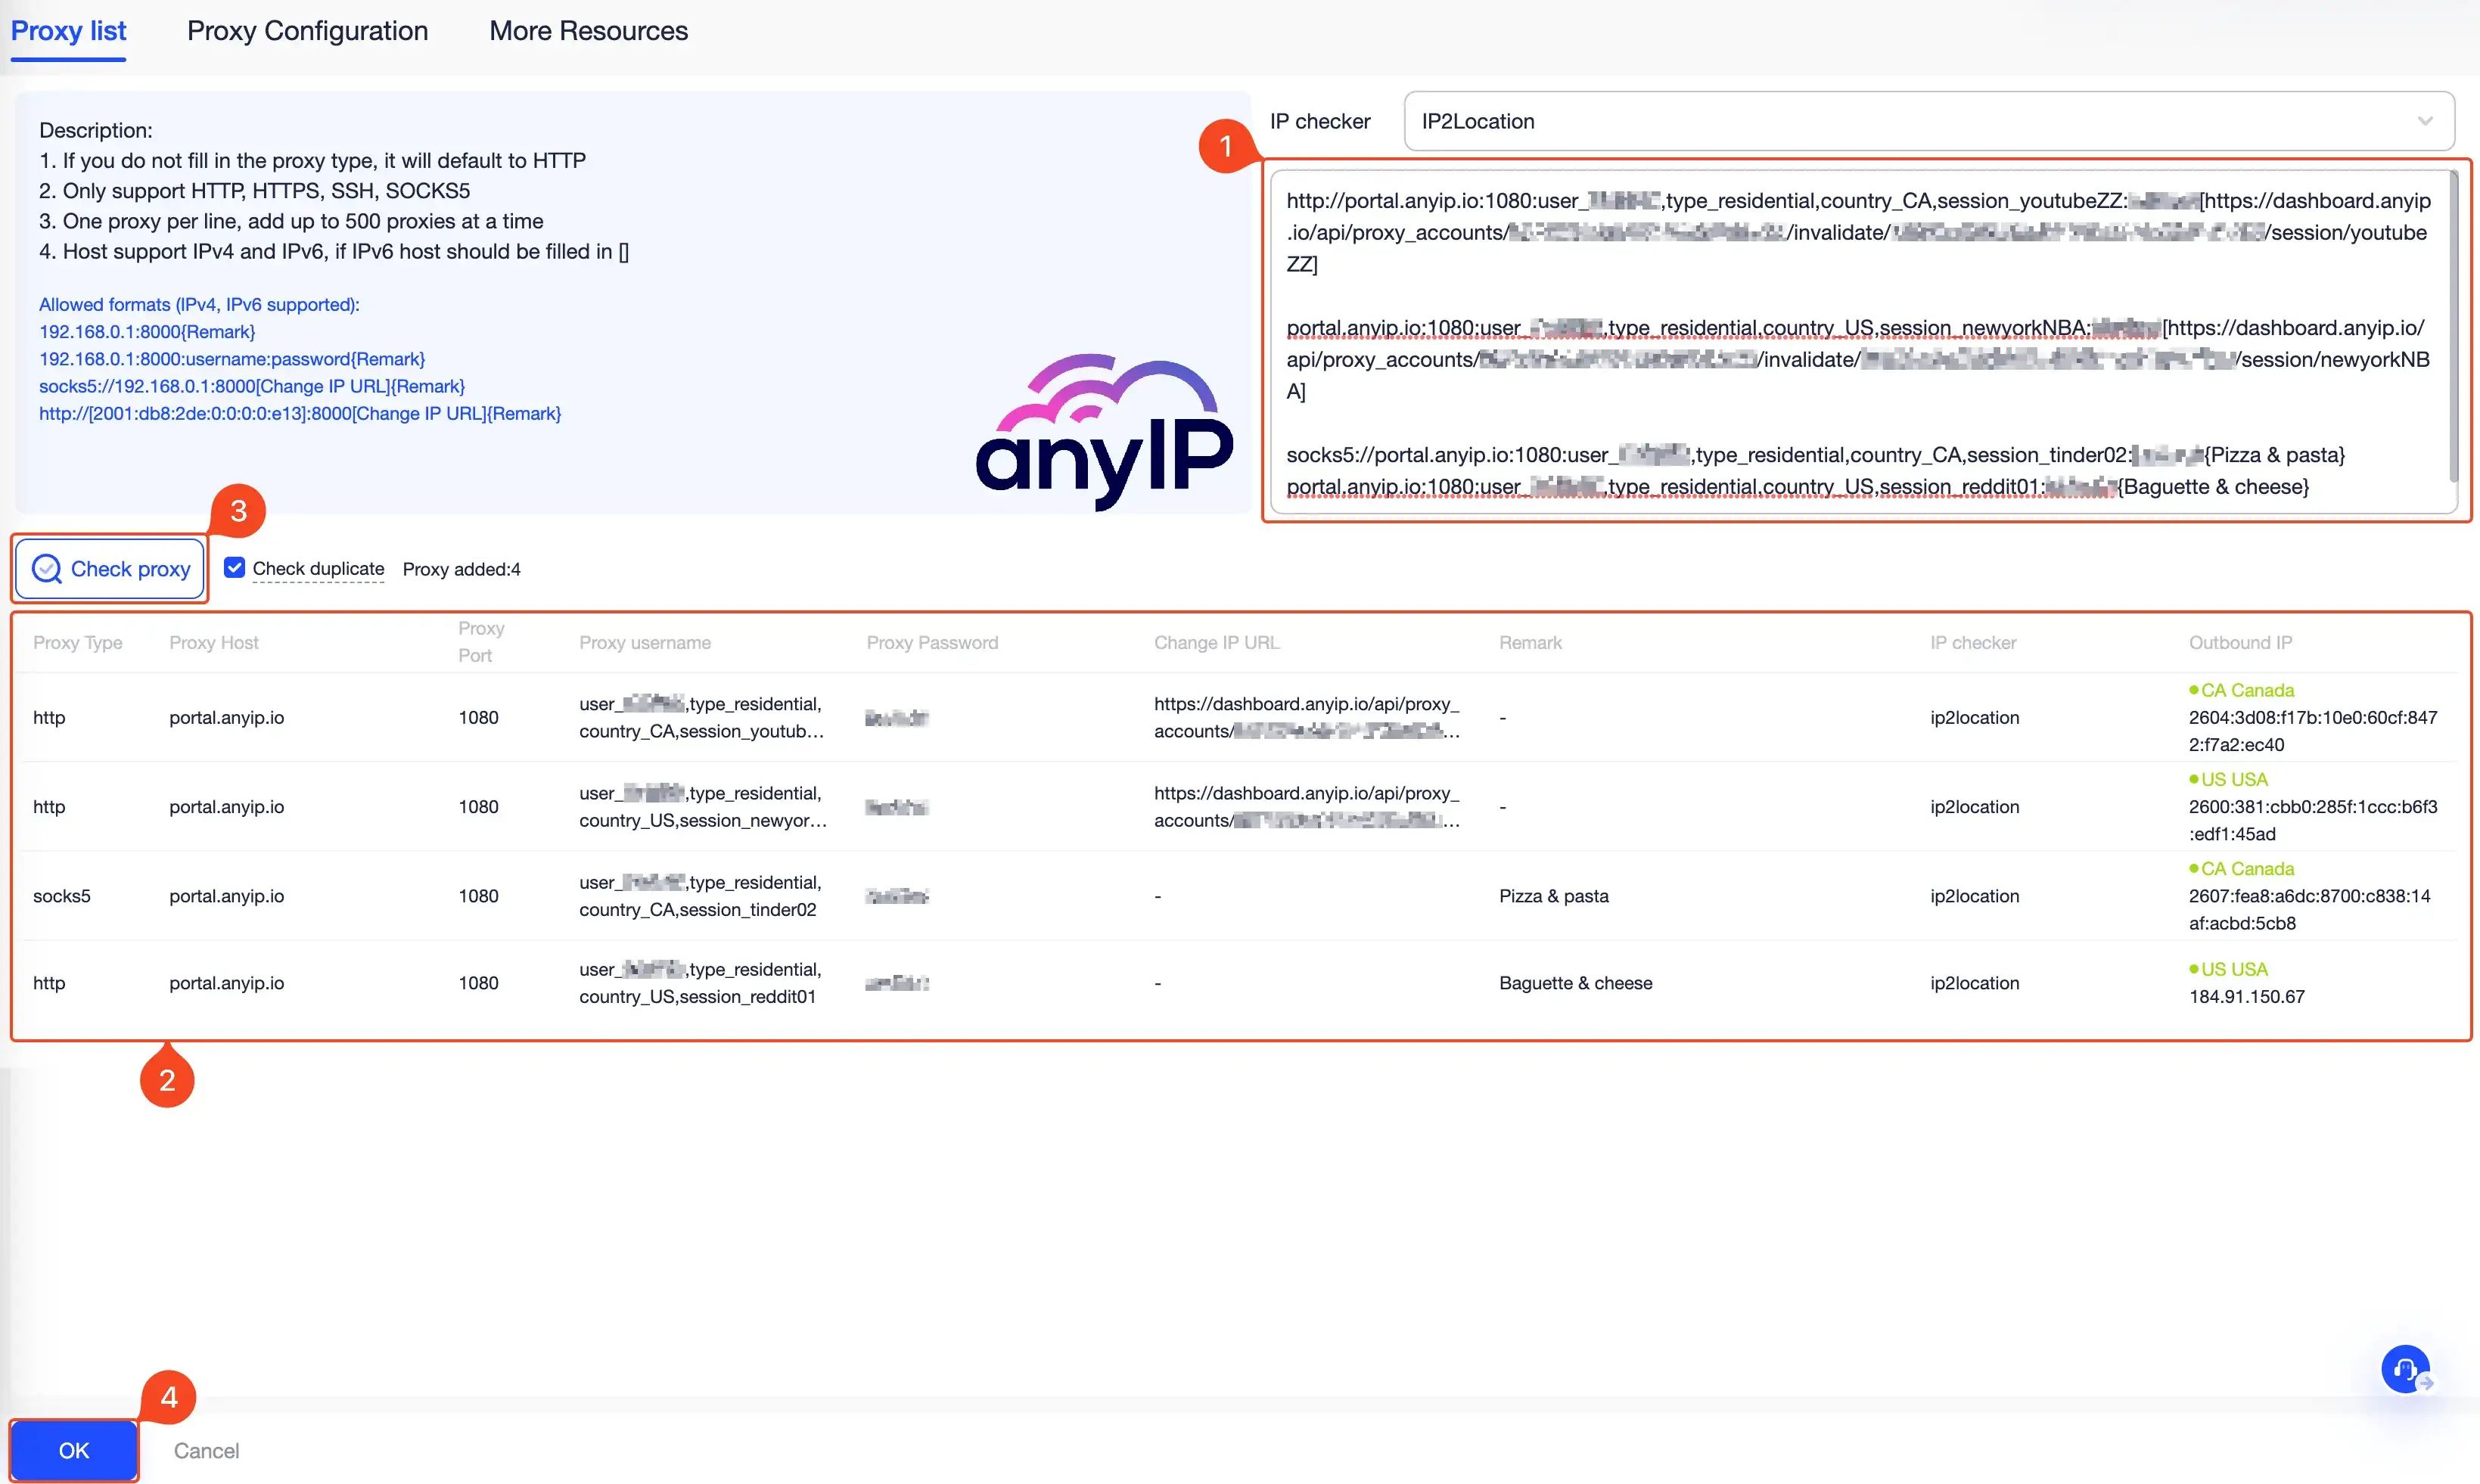
You can copy/paste here a batch of proxies
After copying/pasting the proxies, you can double-check them on the list
You can quickly test them by clicking on “check proxy”
Once you’re done, click “OK” to save your proxies.
💡 AdsPower allowed formats:
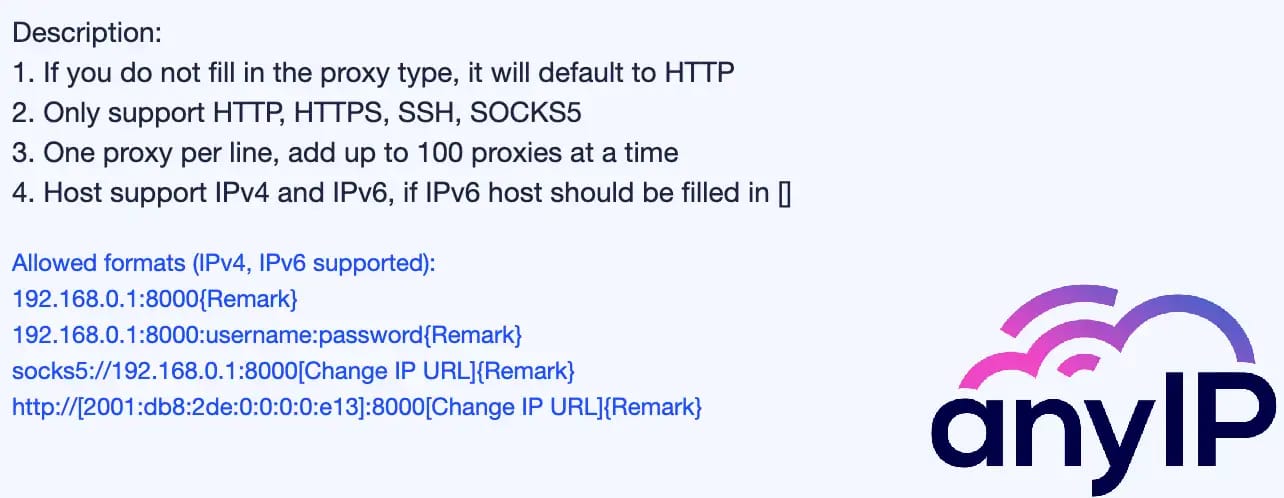
AdsPower is compatible with multiple formats for adding a proxy. Our previous screenshot provides a few examples.
Since at anyIP.io we like to make your life easier. We automatically generate a compatible format for you.
You can copy/paste it on AdsPower without issue.
This is the format anyIP.io uses:
portal.anyip.io:1080:USERNAME:PASSWORDNo matter the format, you can specify a rotating link using square brackets, like this:
portal.anyip.io:1080:USERNAME:PASSWORD[ROTATING_LINK]AdsPower allows you to easily add a “remark” to your proxy by adding it at the end of each line, like this:
portal.anyip.io:1080:USERNAME:PASSWORD[ROTATING_LINK]{My proxy Name}You can also specify the protocols you want to use for each proxies:
socks5://portal.anyip.io:1080:USERNAME:PASSWORD[ROTATING_LINK]{My proxy Name}How to manage your proxies
The proxies list view allows you to easily manage all your proxies profiles.
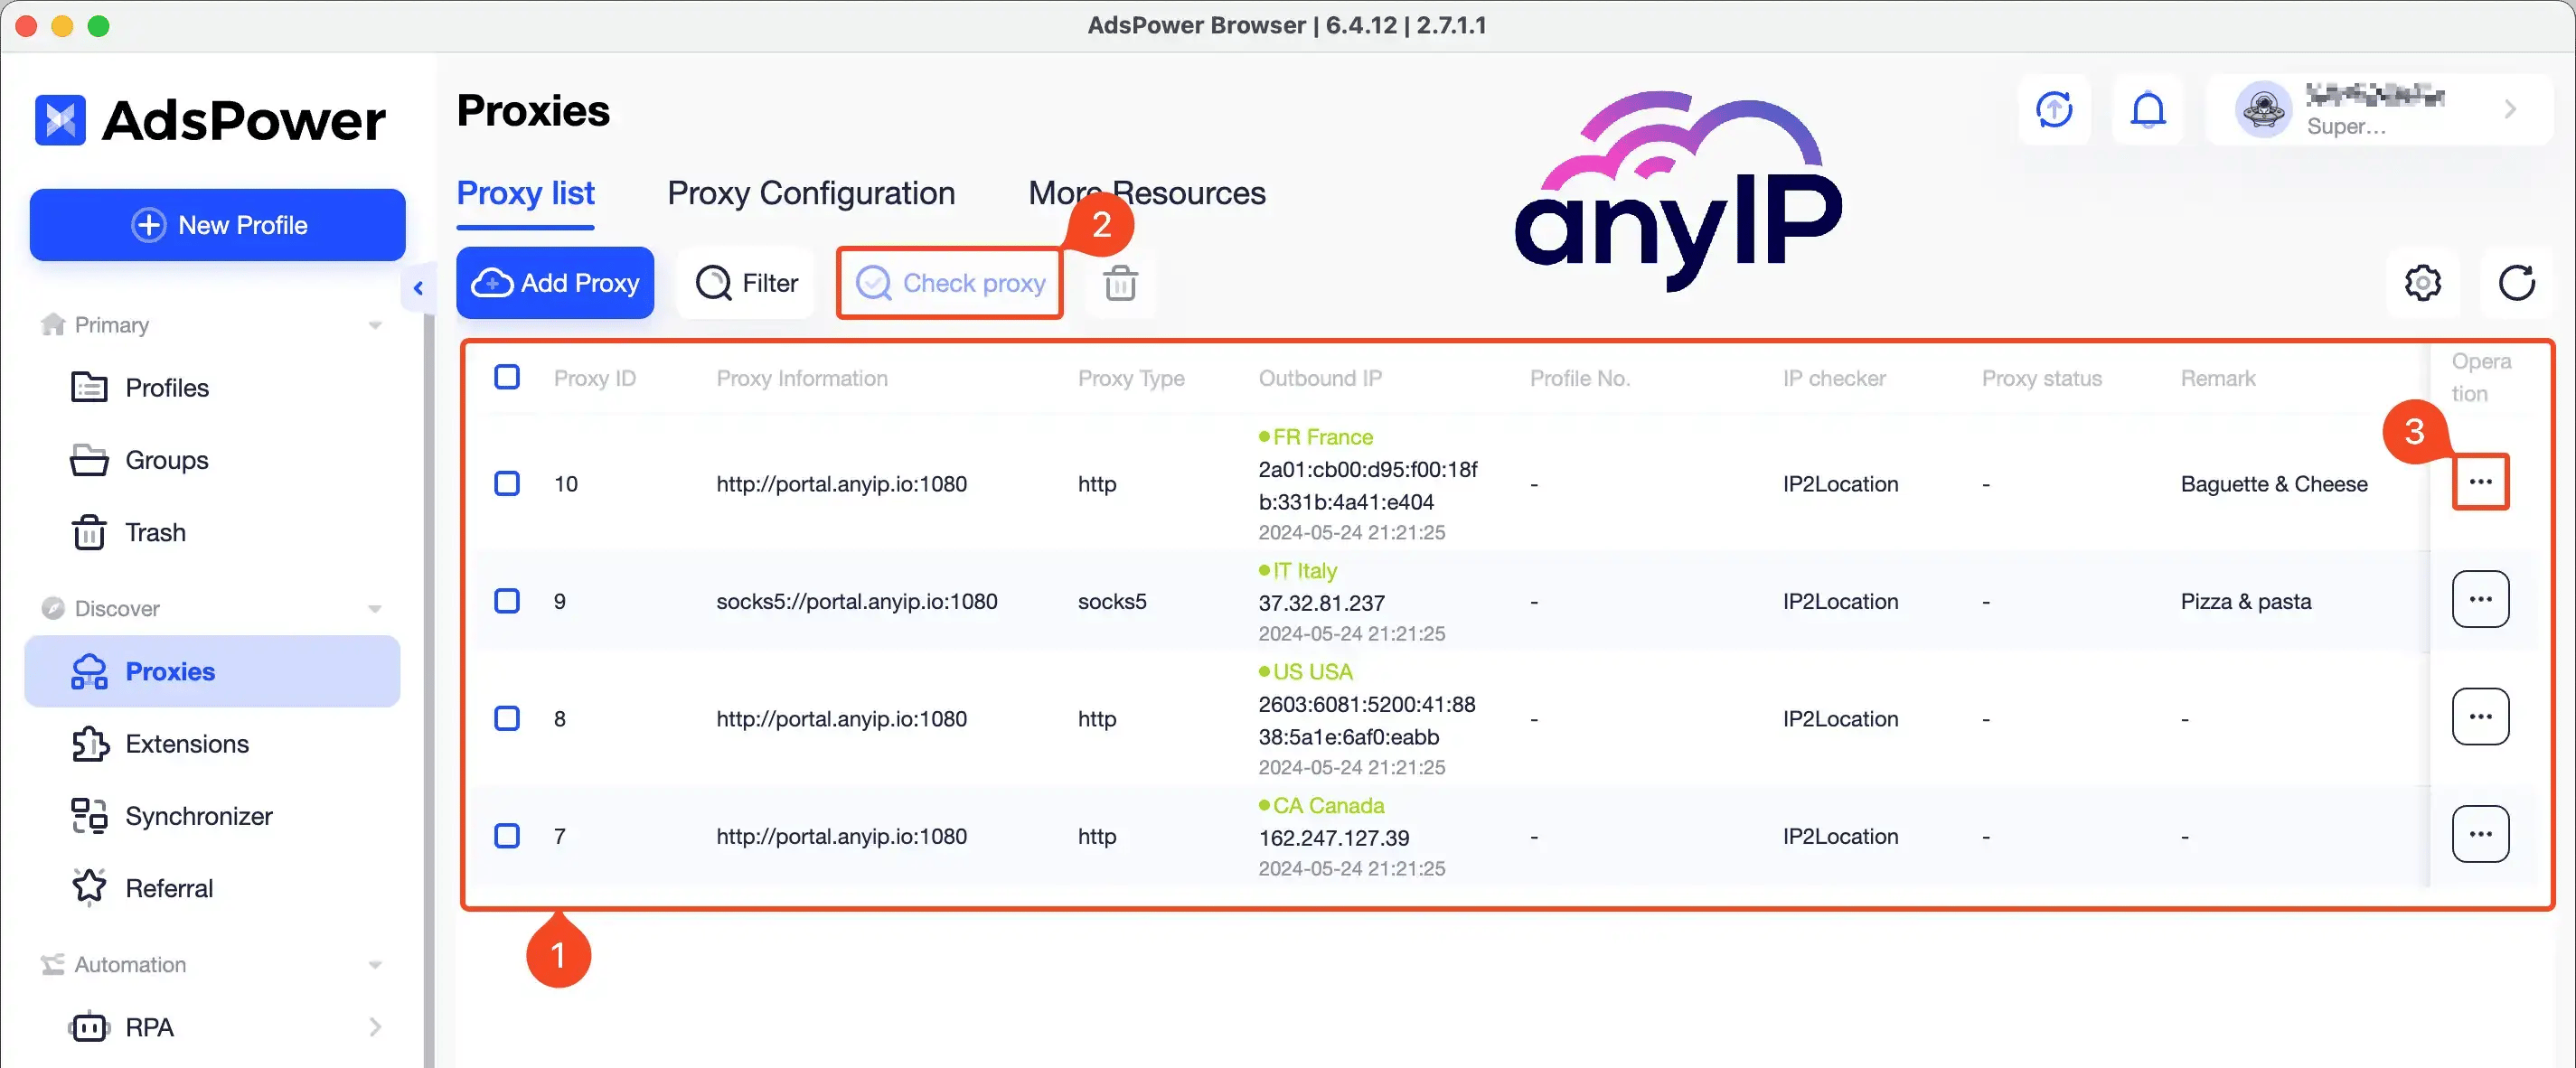
You can see all the proxies you’ve configured
You can check the proxies one by one or by checking them all
When you click on the tree dot button associated with a proxy, you'll have the option to update or delete this proxy.
Browser profile management
The browser profile management is a great solution. It gives users full control of the browser's settings. Plus, it allows you to manage multiple online accounts securely by isolating cookies, IPs, and histories. It's perfect for separating tasks, preventing cross-account issues, and supporting automation.
Basic profile configuration
The creation form can be slightly intimidating, but fear no more as we will explain everything!
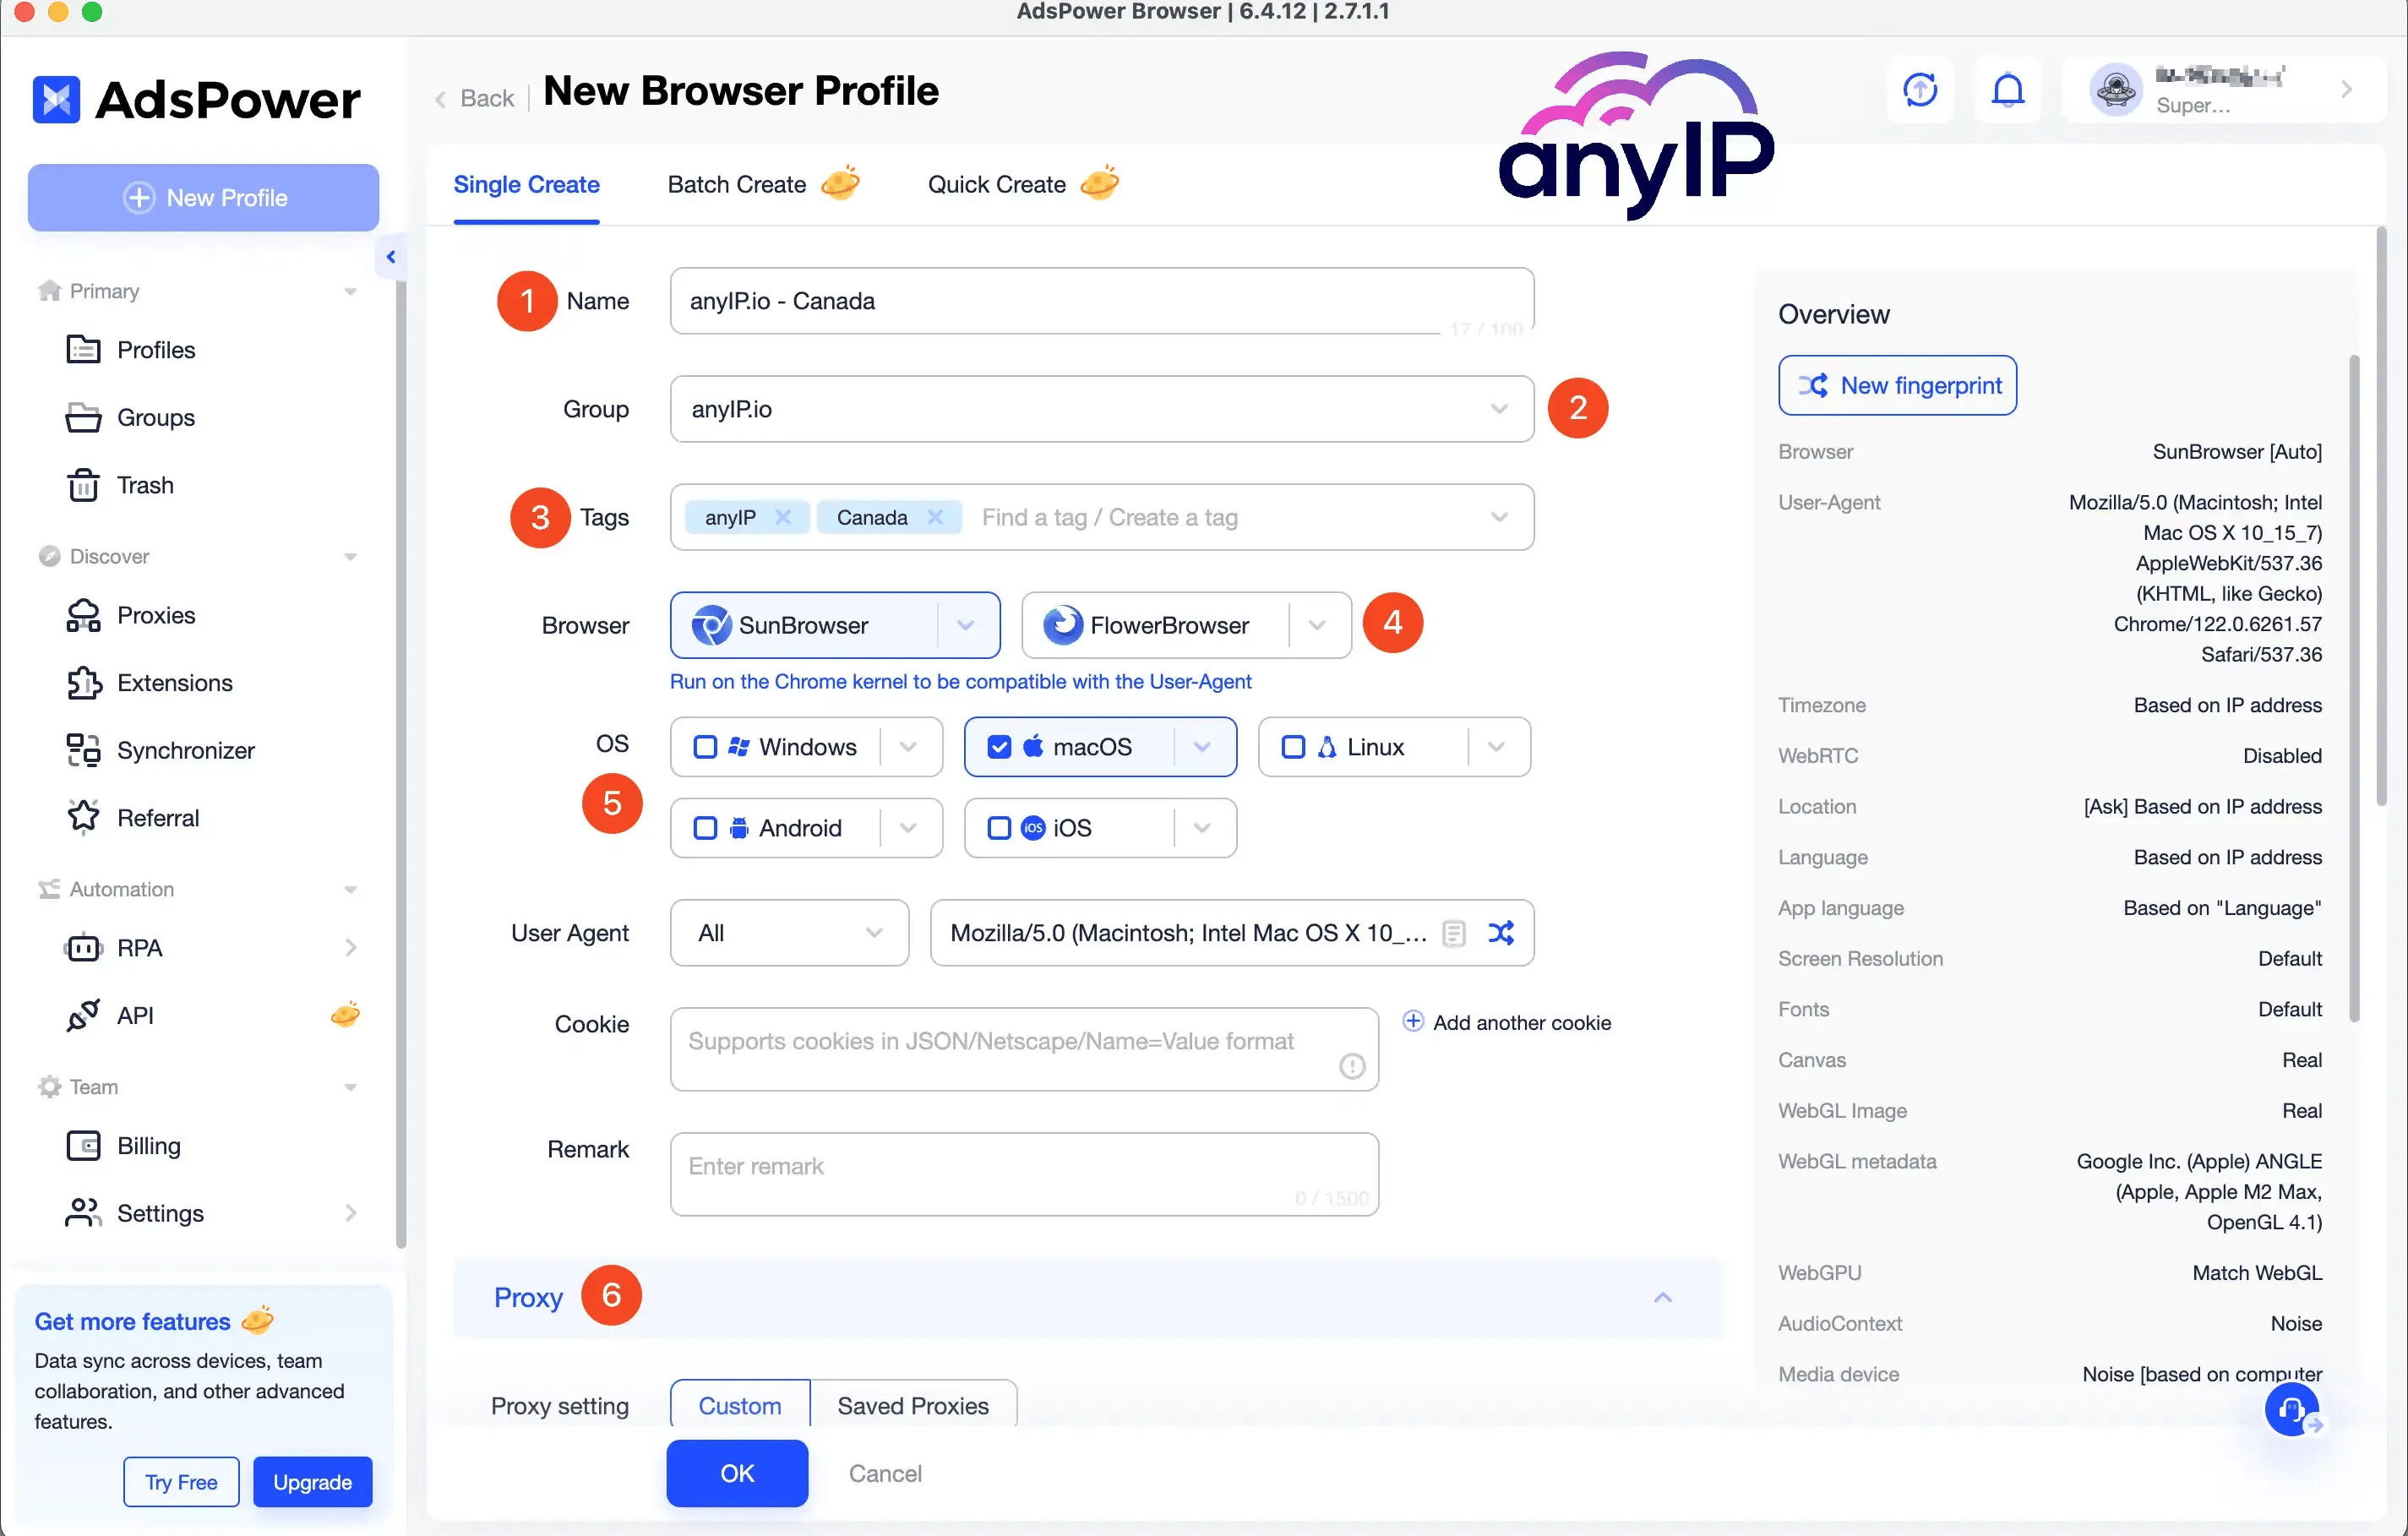
Lets start with the name. To easily find your profile, for this example we named it ”anyIP.io - Canada”

Also to help you manage your different profiles, you can create groups:

Again to help you organise your profiles, you can add tags to them:

I'm a big fan of GoLogin but a great feature that I like on AdsPower, is the option to select the browser you want to use:

💡 You can select the version of each browser you want to use:
| |
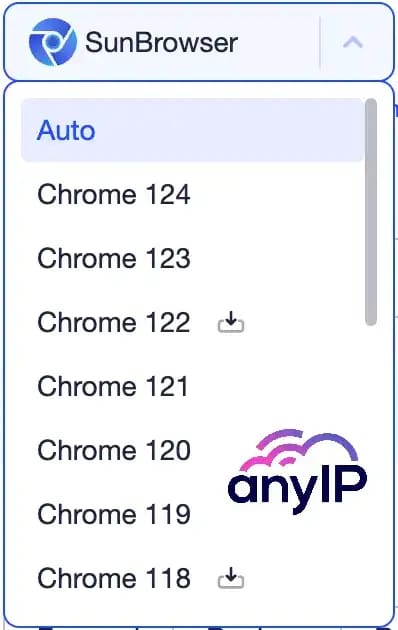
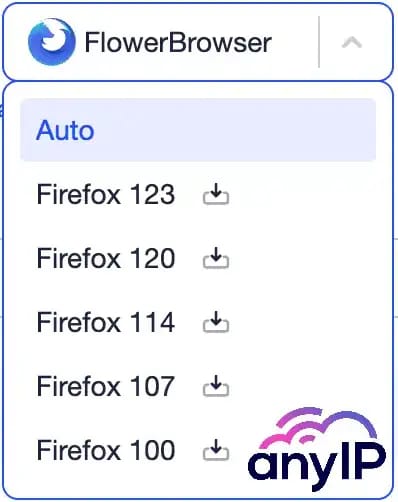
AdsPower will give you the option to download the version very easily
Choose the OS and User agent
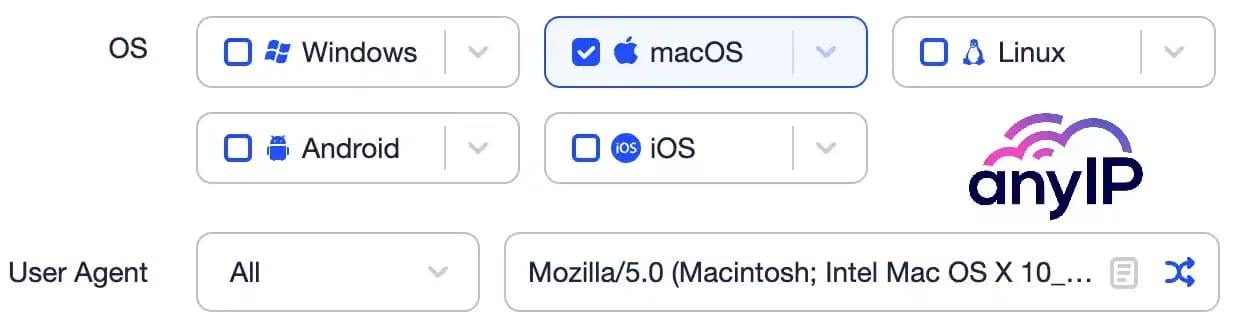
💡 Pro tips:
For better performance, you should always select the same OS as your computer OS;
Your User Agent must match the browser you want to use;
The proxy settings: Now that you know how to create bulk proxies, you can select them directly from there without having to create a custom proxy.
Edit your profile
To edit or update your profile you can clic on the triple dot button associate to your profile.
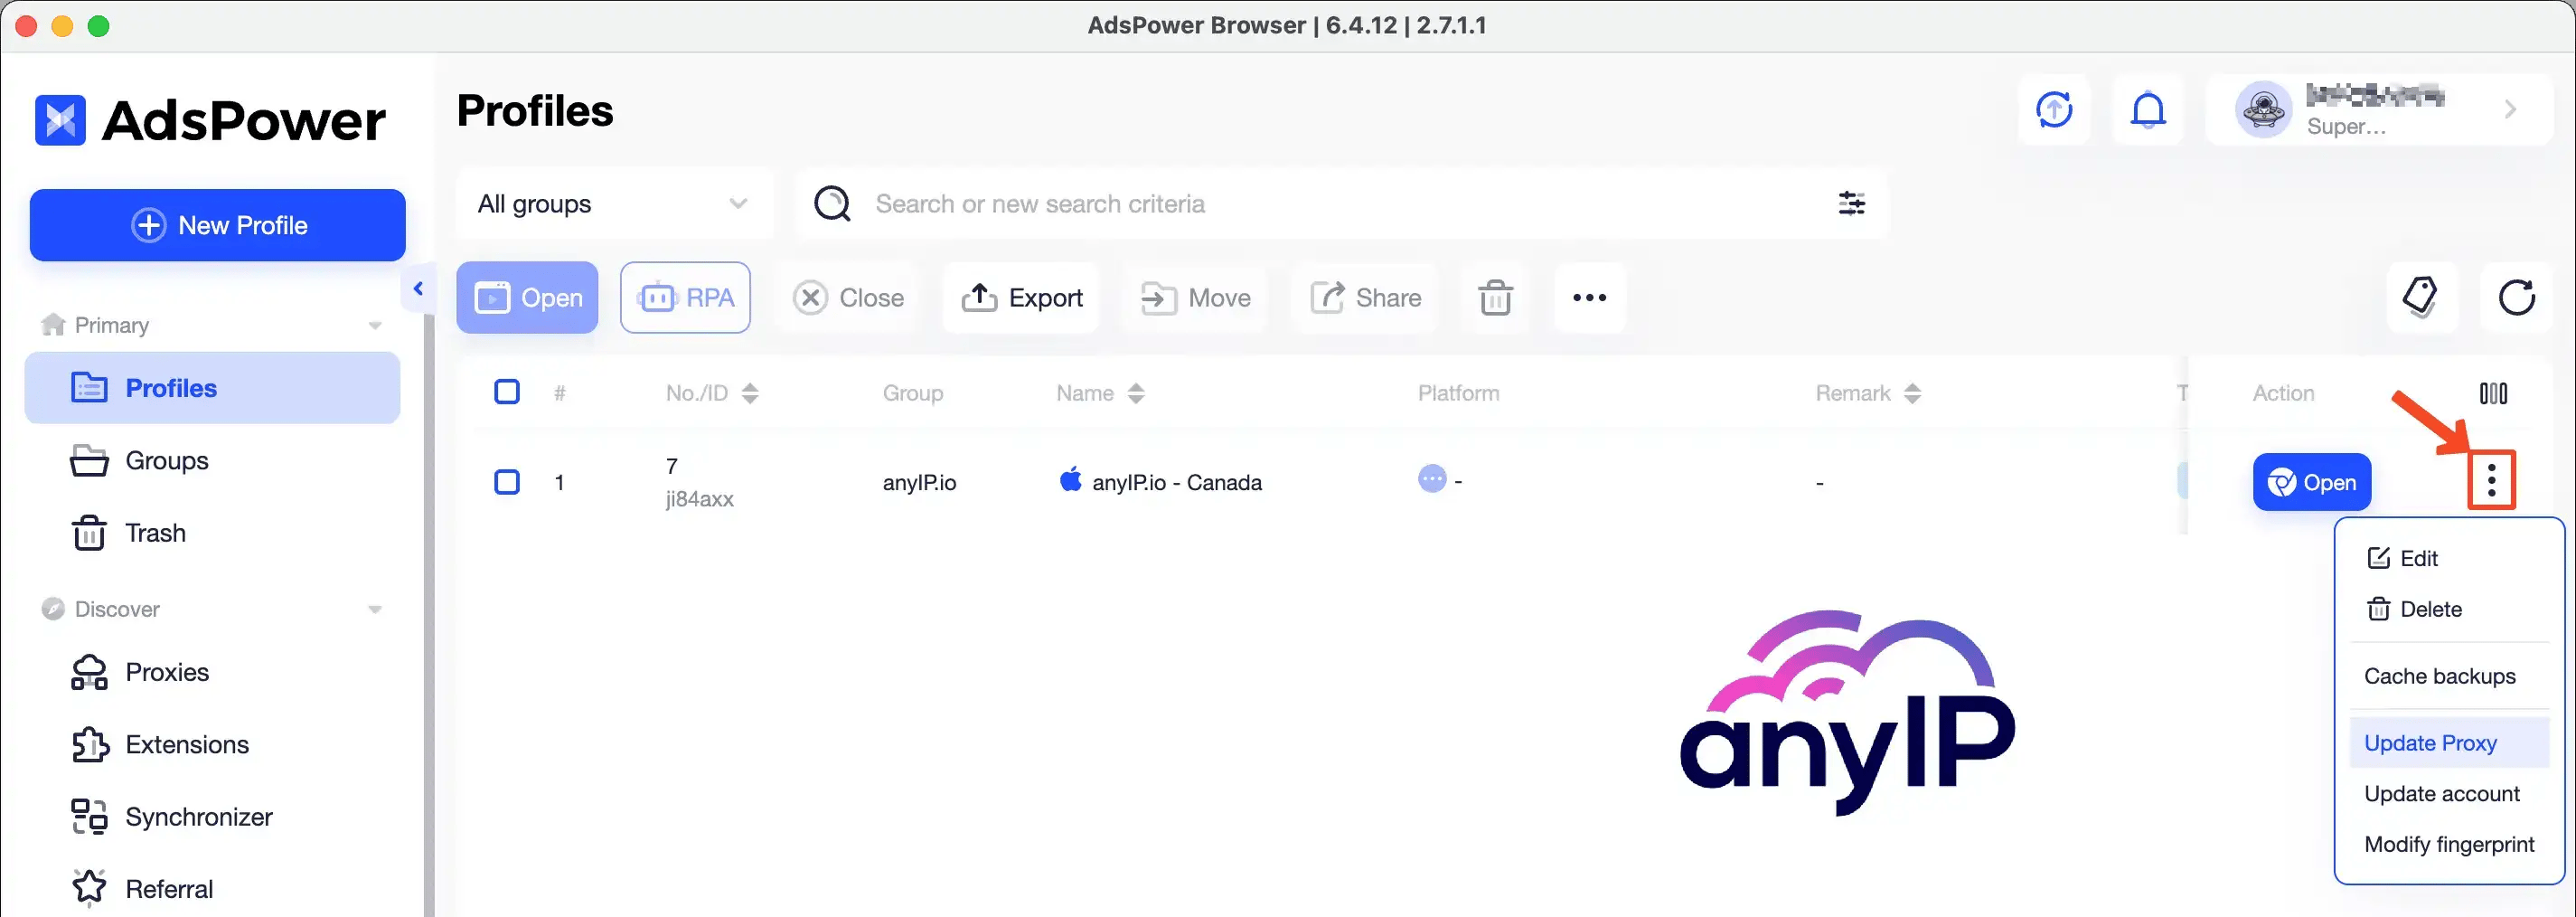
From there, you’ll be able to quickly edit or delete the profile or simply update your proxy information.
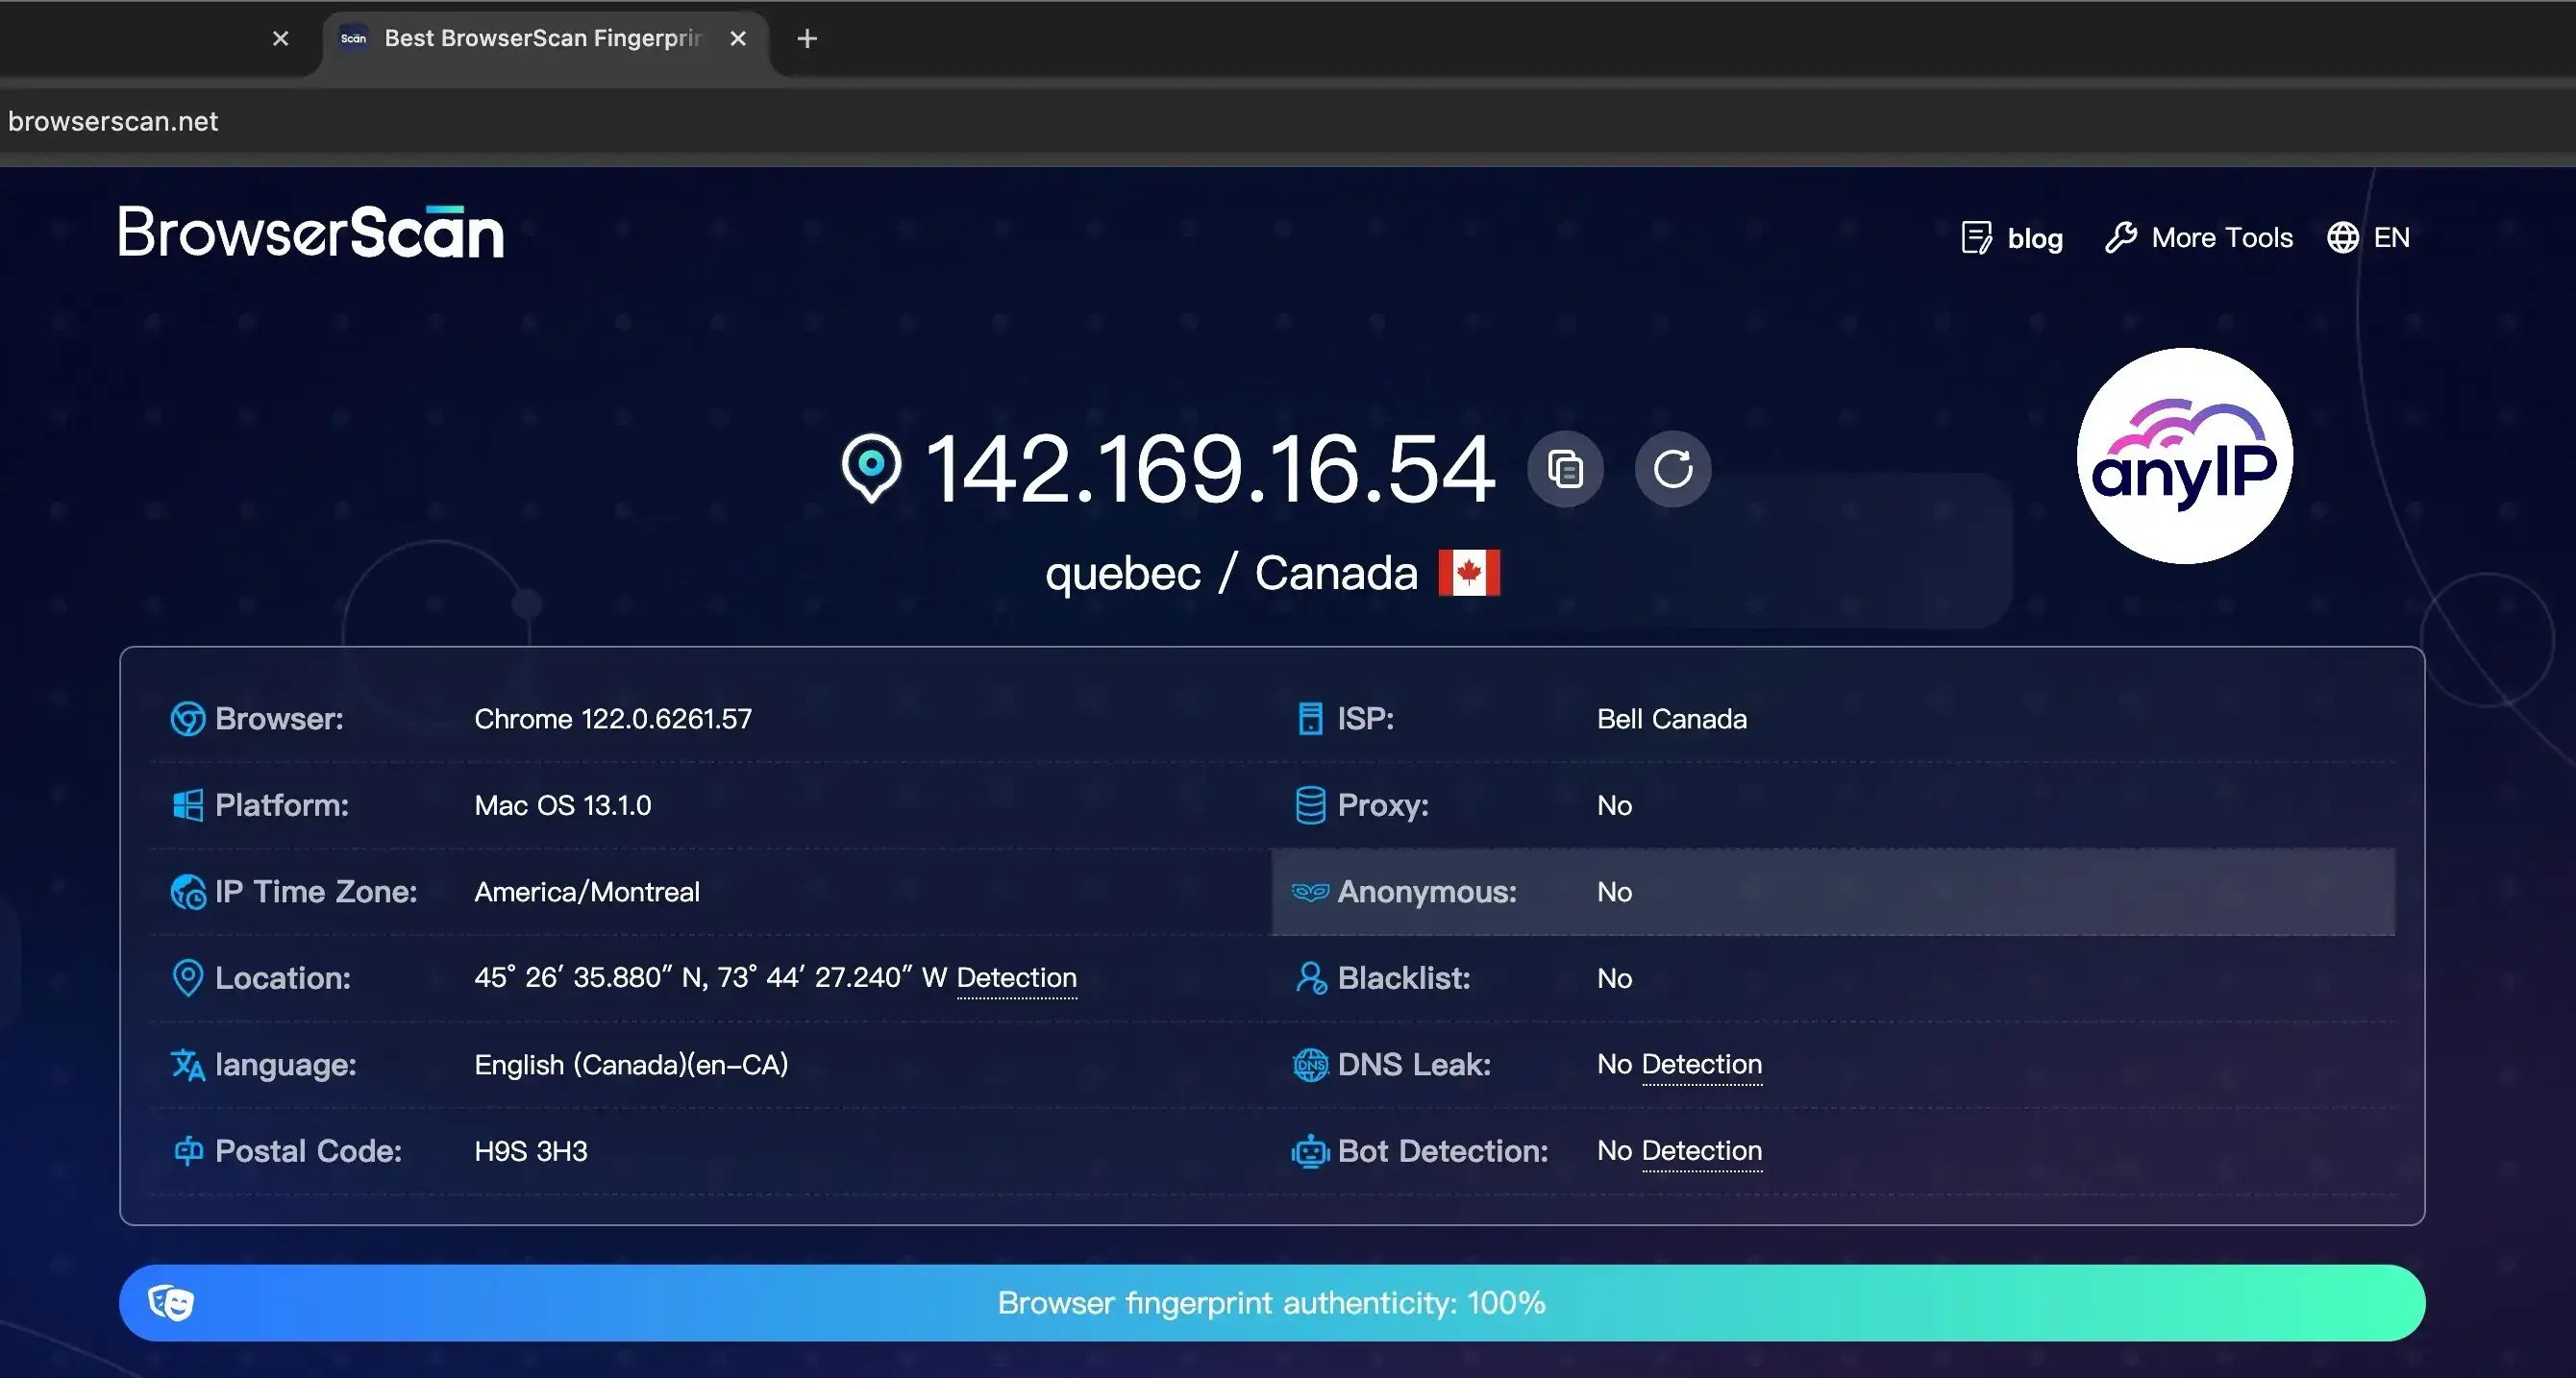
Control the Browser fingerprint
One of the main reasons to use an antidetect browser is to trick the website you want to visit.
To do so, the anti-browser generates a random browser fingerprint. And, thanks to a few useful shortcuts added by Adspower, you can easily control this fingerprint.
Click on the "BrowserScan" link or visit direct https://www.browserscan.net/ to open the online scan.
Manage your AdsPowser browser profiles through the API
As we told you earlier, AdsPower is as simple as powerful to use and a great antidetect browser.
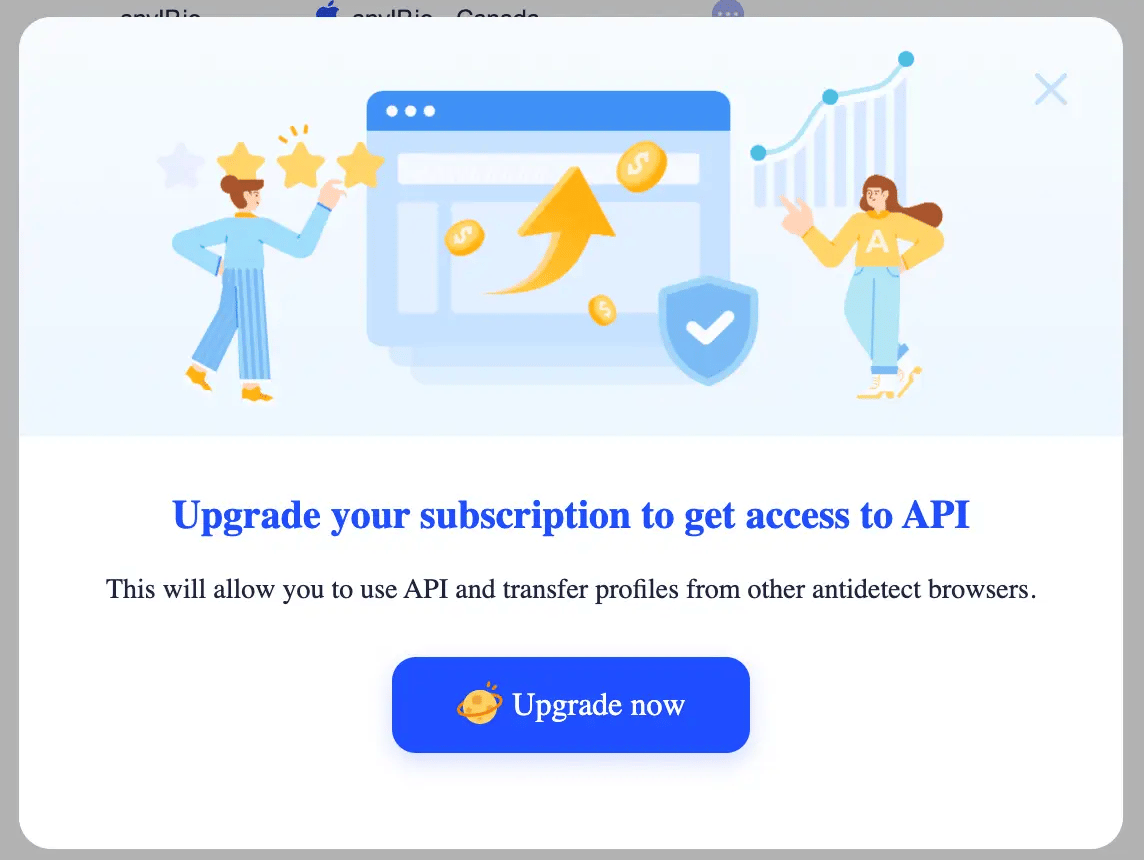
Unfortunately, if you want access to all the endpoints they offer, you'll have to subscribe to a custom plan. (Don't worry; the free plan is free for a lifetime and can suit most use cases 😉.)
The paid version comes with a lot of benefits and premium features, such as:
Enhance profile management options;
Better automation tools;
A deep control of your team members;
However, one main reason you could upgrade is the permission to use the API, which can be very useful if you want to control AdsPower through your scripts.
Have a look at the official documentation online.
Get a proxy now with anyIP.io
If you need to choose a proxy, it's important to consider key factors such as proxy type, performance, or bandwidth limitation. Residential and mobile proxies are the best option compared to datacenter, public, or ISP proxies, making them a safer choice.
They provide IP rotation and route requests through real devices with genuine IPs, ensuring greater anonymity.
Create your account in less than 5 min on anyIP.Io to enjoy a large IP pool from all over the world, starting at $2/GB.
Our 24/7 support team will be available to answer all your questions and help you configure your proxy.
Article by
Khaled Bentoumi
Khaled is a software engineer. He's been involved in many startups of different sizes. Previously, he founded Data to Page, an AI Programmatic SEO startup. He now handles all the marketing at anyIP.


Article by
Khaled Bentoumi
Khaled is a software engineer. He's been involved in many startups of different sizes. Previously, he founded Data to Page, an AI Programmatic SEO startup. He now handles all the marketing at anyIP.
Read more
How to customize Your User-Agent with Python Requests
Learn how to update and rotate user-agents in Python Requests to avoid detection and improve scraping efficiency.

