
How to use proxies on Gologin: Quick and Easy Steps
Table of Contents
Table of Contents
Key takeaways
GoLogin allows managing distinct chrome profiles with unique fingerprints.
Integrate proxies in GoLogin for enhanced browser anonymity and security.
GoLogin supports HTTP, SOCKS4, and SOCKS5 proxy protocols for versatility.
AnyIP.io provides proxy credentials and aids in proxy configuration for GoLogin.
GoLogin offers API for remote management of profiles, proxies, and settings.
Follow this step-by-step guide to easily integrate your proxies in one of the most popular anti-detect browsers: GoLogin.
Like other anti-detect browsers, GoLogin lets users manage many online identities. They do this by creating distinct chrome browser profiles, each with a unique fingerprint configuration. Such browsers, combined with proxies, offer users a great solution to maximize their anonymity.
At anyIP.io, we help our clients get access to high-quality proxies. We offer mobile and residential proxies worldwide. Clients use them for many purposes, including scraping data and online activities. Our extensive experience in the field has enabled us to provide our clients with the highest standard of service.
💡 To follow this guide, you will need:
A GoLogin account, you can test their services for a seven-days trial period.
The application is installed on your device. Download the setup file according to your Operating system: Gologin is available on Windows, Linux, macOS and even Android.
Your anyIP.io proxy credentials :
username/password;
proxy server addresses (IP + port);
How to configure a proxy on a new profile
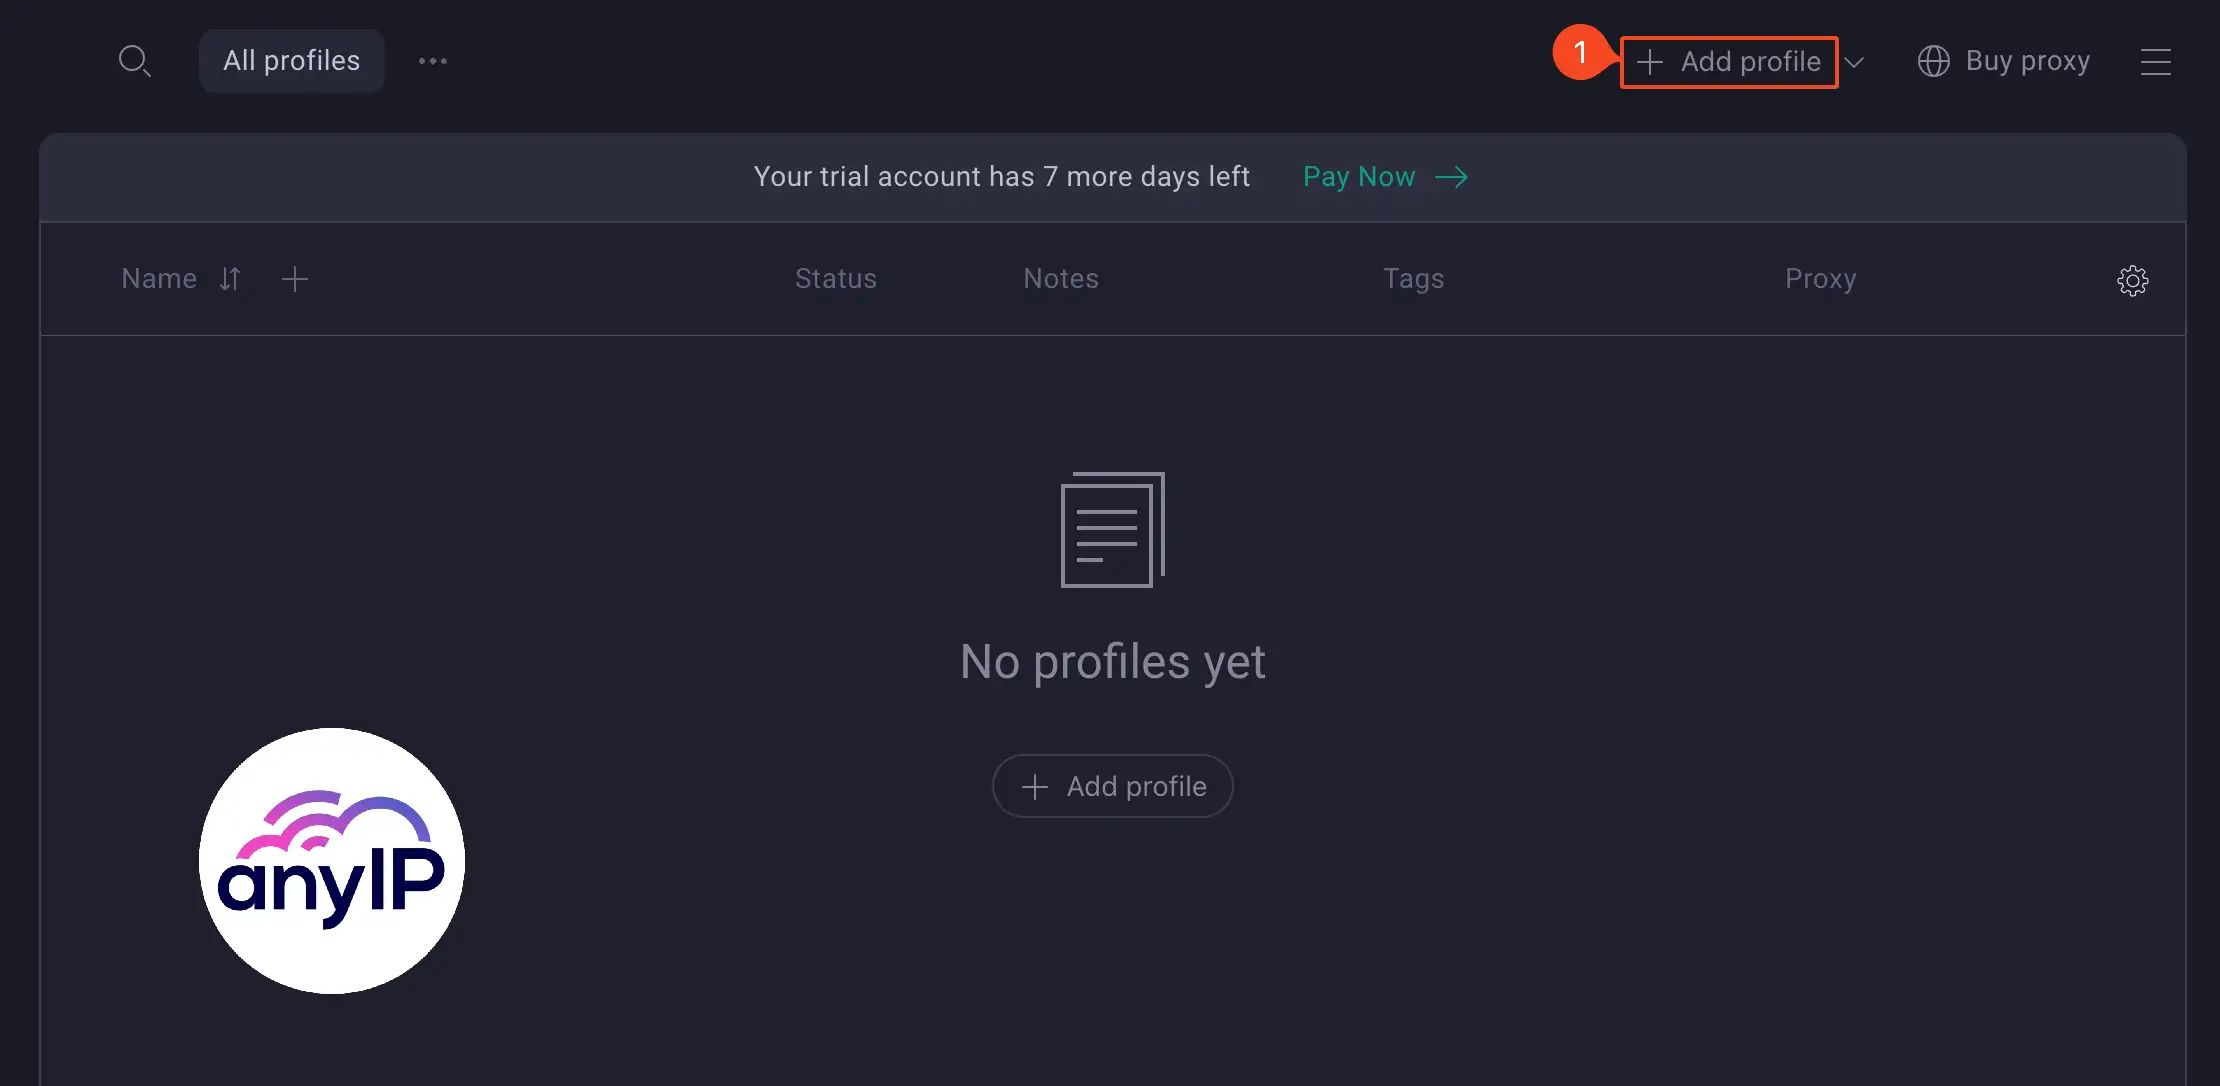
Step 1: Create a profile
Click on “+ Add profile” to open the creation form and move to the next step for the proxy integrations.
Step 2: Configure the proxy
Gologin antidetect supports a wide range of proxy protocols, including HTTP, SOCKS4, and SOCKS5. This compatibility ensures that GoLogin can be used with various online services and applications.
It's a versatile tool ideal for tasks such as web scraping, social media management, and online marketing automation.
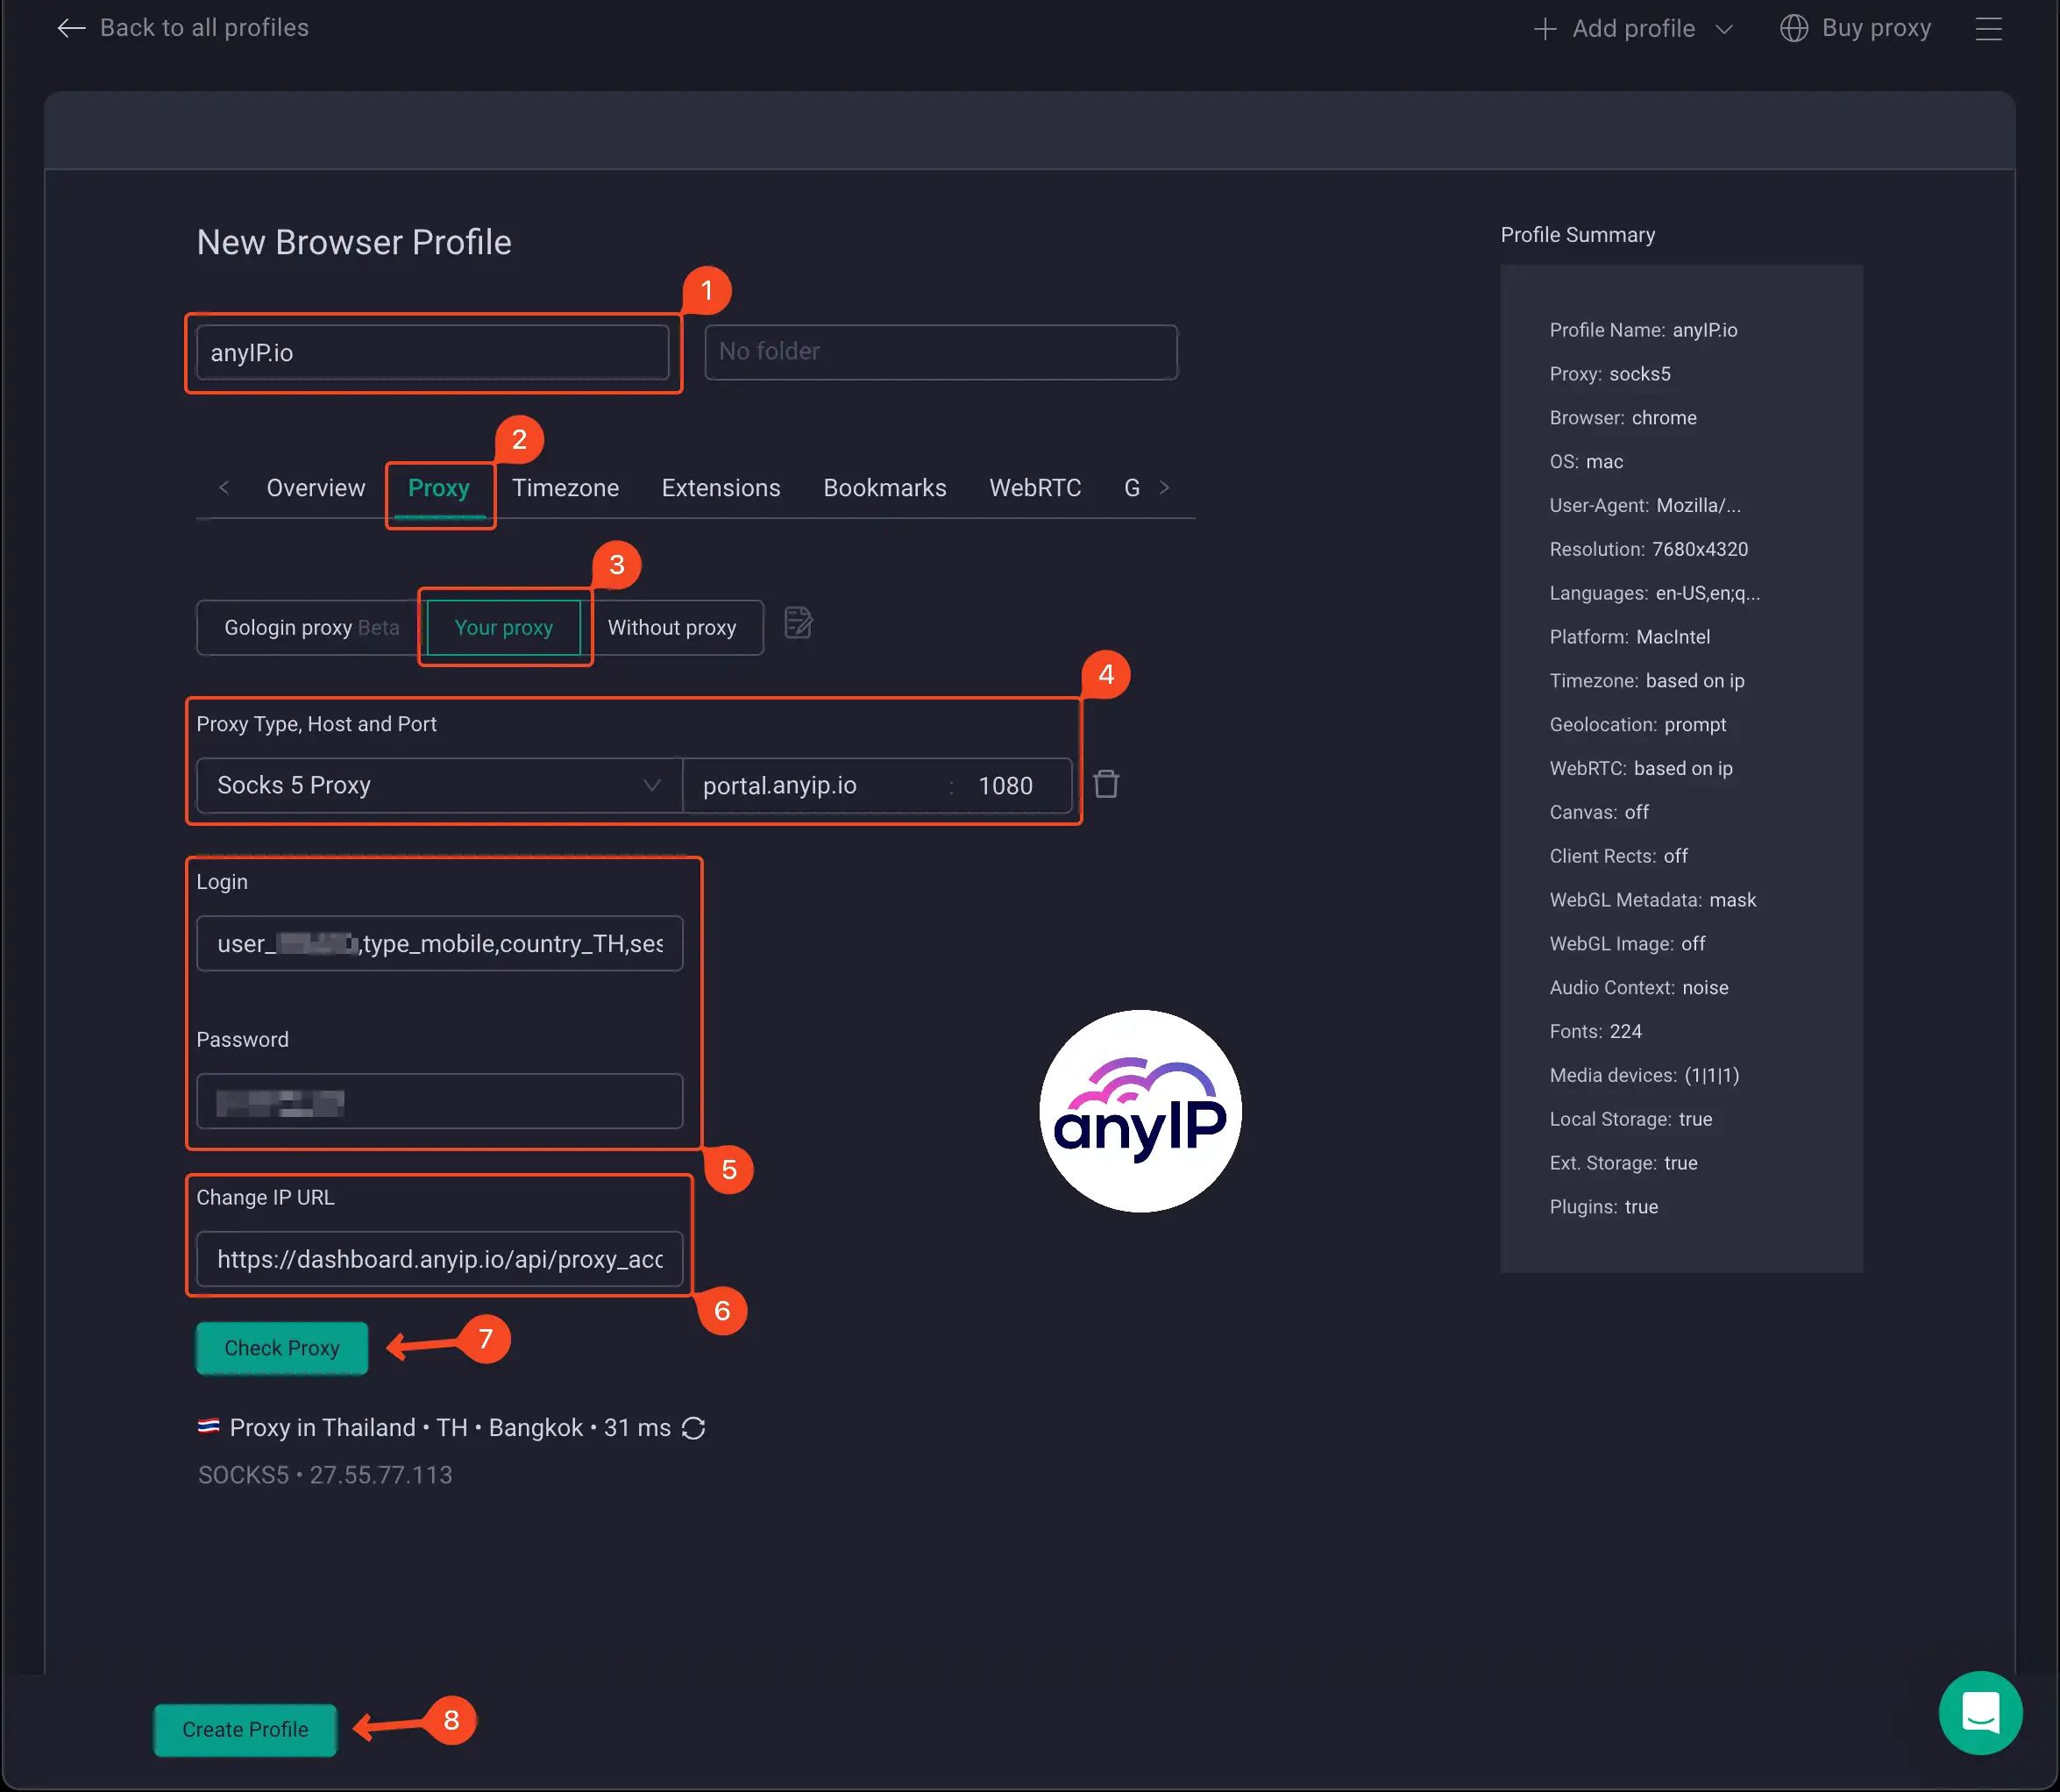
Choose a name for your new browser profile.
Make sure you are in the “Proxy” section.
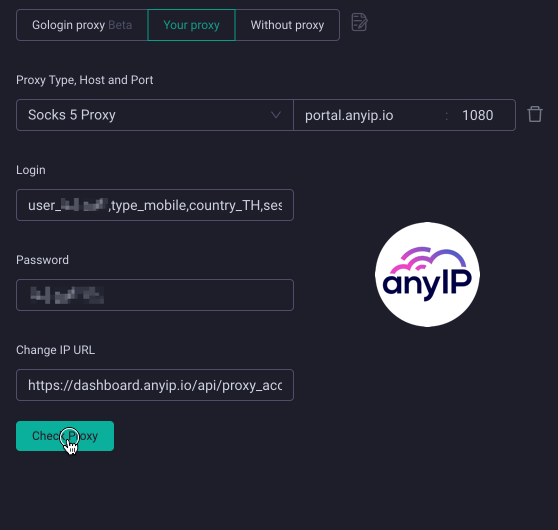
Select “Your proxy” to add a custom proxy
GoLogin is highly compatible with a wide range of proxy types, including mobile, residential, ISP, and datacenter proxies. This polyvalence ensures seamless integration with your proxy setup, providing you with the flexibility and security to choose the most suitable option for your specific needs and preferences.
Select the connection type you want to use, then add the host and port.
anyIP.io offers HTTP/HTTPS or SOCKS5 proxy. For this guide, we choose a SOCKS5
anyIP.io's host is “portal.anyip.io”
and the port is: 1080
anyIP.io offers HTTP/HTTPS or SOCKS5 proxy. For this guide, we choose a SOCKS5
anyIP.io's host is "portal.anyip.io"
and the port is: 1080
Enter here your authentication details.
If you want to use a rotating link, paste the URL here.
Using an IP change URL will allow you to instantly change the IP of your proxy. This feature is crucial for improving your success rate and controlling your IP fraud score.
Click “Check Proxy” to check if the proxy works well.
GoLogin will perform a quick connection test. In case of failure, you’ll see a “Proxy error” message, but if you correctly set all the parameters, you will see all the proxy details:
The country and city you’re connected from (+ country code)
The Latency, which is a great indicator of server performance
The protocol you use to connect
And the IP you got
Once you’ve reviewed all the settings, click “Create Profile.”
💡 GoLogin allows you to paste a proxy directly by using the following button.
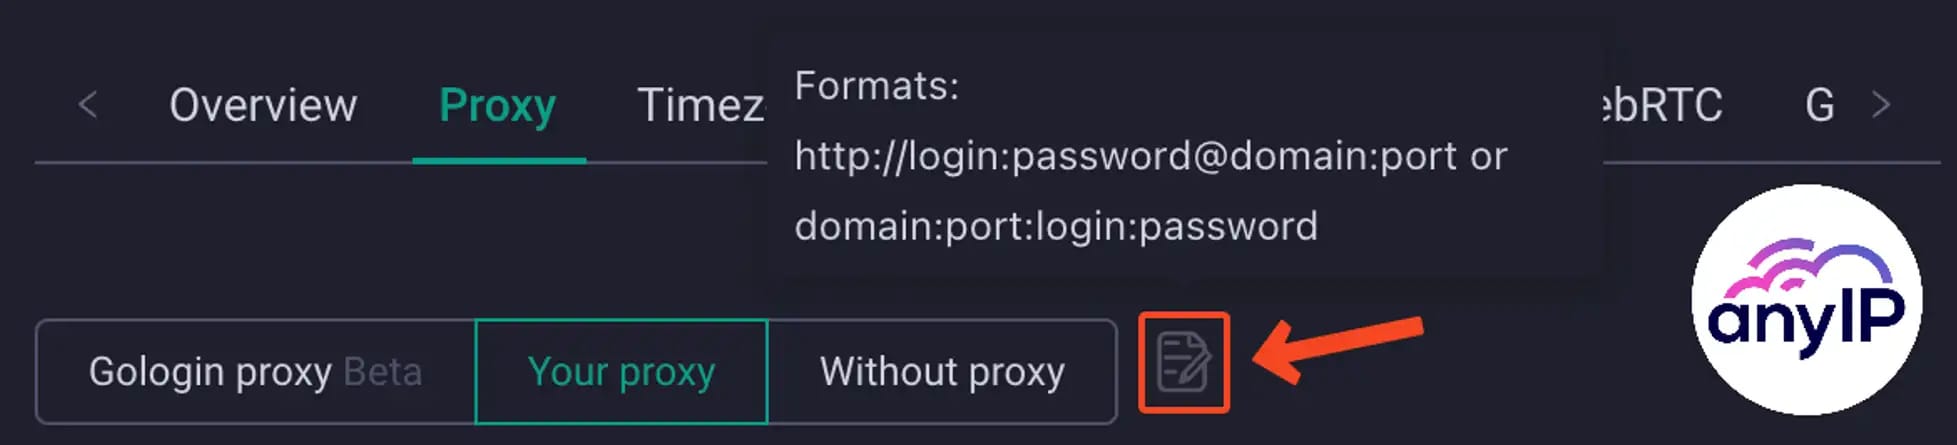
This is a must-have for a quick proxy configuration. You have the choice between two formats. Lucky for you, anyIP.io offers a proxy formatter tool that instantly makes every format compatible.
1. protocol://login:password@domain:port
SOCKS5://userXXX:password1234@portal.anyip.io:1080domain:port:login:password
portal.anyip.io:1080:userXXX:password1234Step 3: Run the browser profile
Now that you have created your first profile, it will appear in your profiles list as follows:

You can click on “Run” to execute your profile. GoLogin will open a unique instance of his web browser based on your configuration.
It’s the perfect solution to bypass website restrictions. By masking and altering your fingerprint, these browsers prevent websites from tracking your activity and identifying your device.
No more limitations and only 100% efficiency.
💡 For each browser profile you start, GoLogin will launch a new instance.
You will see a custom icon on your dock/toolbar that will look like this:
How to manage your proxies
How to add a new proxy
We saw how to configure a proxy when creating a new browser profile. While it's not as user friendly as on Dolphin Anty, you can also directly add a new proxy to an existing profile from the main view.

Click the “+” button to open the quick creation proxy form.
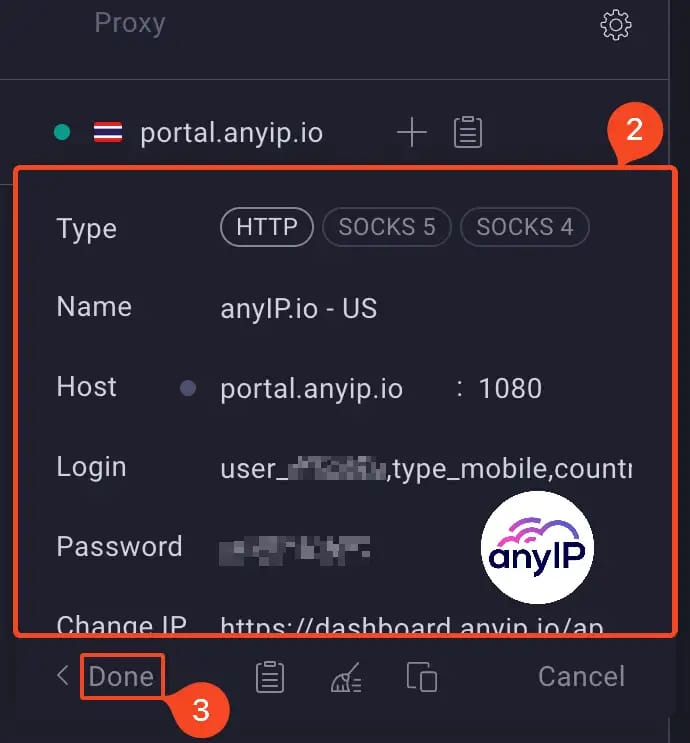
Same as before, fill the form with the proxy details:
Type: choose the protocol you want to use.
Name: choose a name for your new proxy.
Host: enter the proxy provider host and port here “portal.anyip.io:1080”
Login/password: Enter your proxy credentials.
Change IP: if your proxy provider offers a change IP feature, put the link here.
Type: choose the protocol you want to use.
Name: choose a name for your new proxy.
Host: enter the proxy provider host and port here "portal.anyip.io:1080"
Login/password: Enter your proxy credentials.
Change IP: if your proxy provider offers a change IP feature, put the link here.
Click on “Done” to save your new proxy.
How to change a browser profile proxy
Gologin's quick actions allow you to switch your browser profile's proxy directly from the profile list.
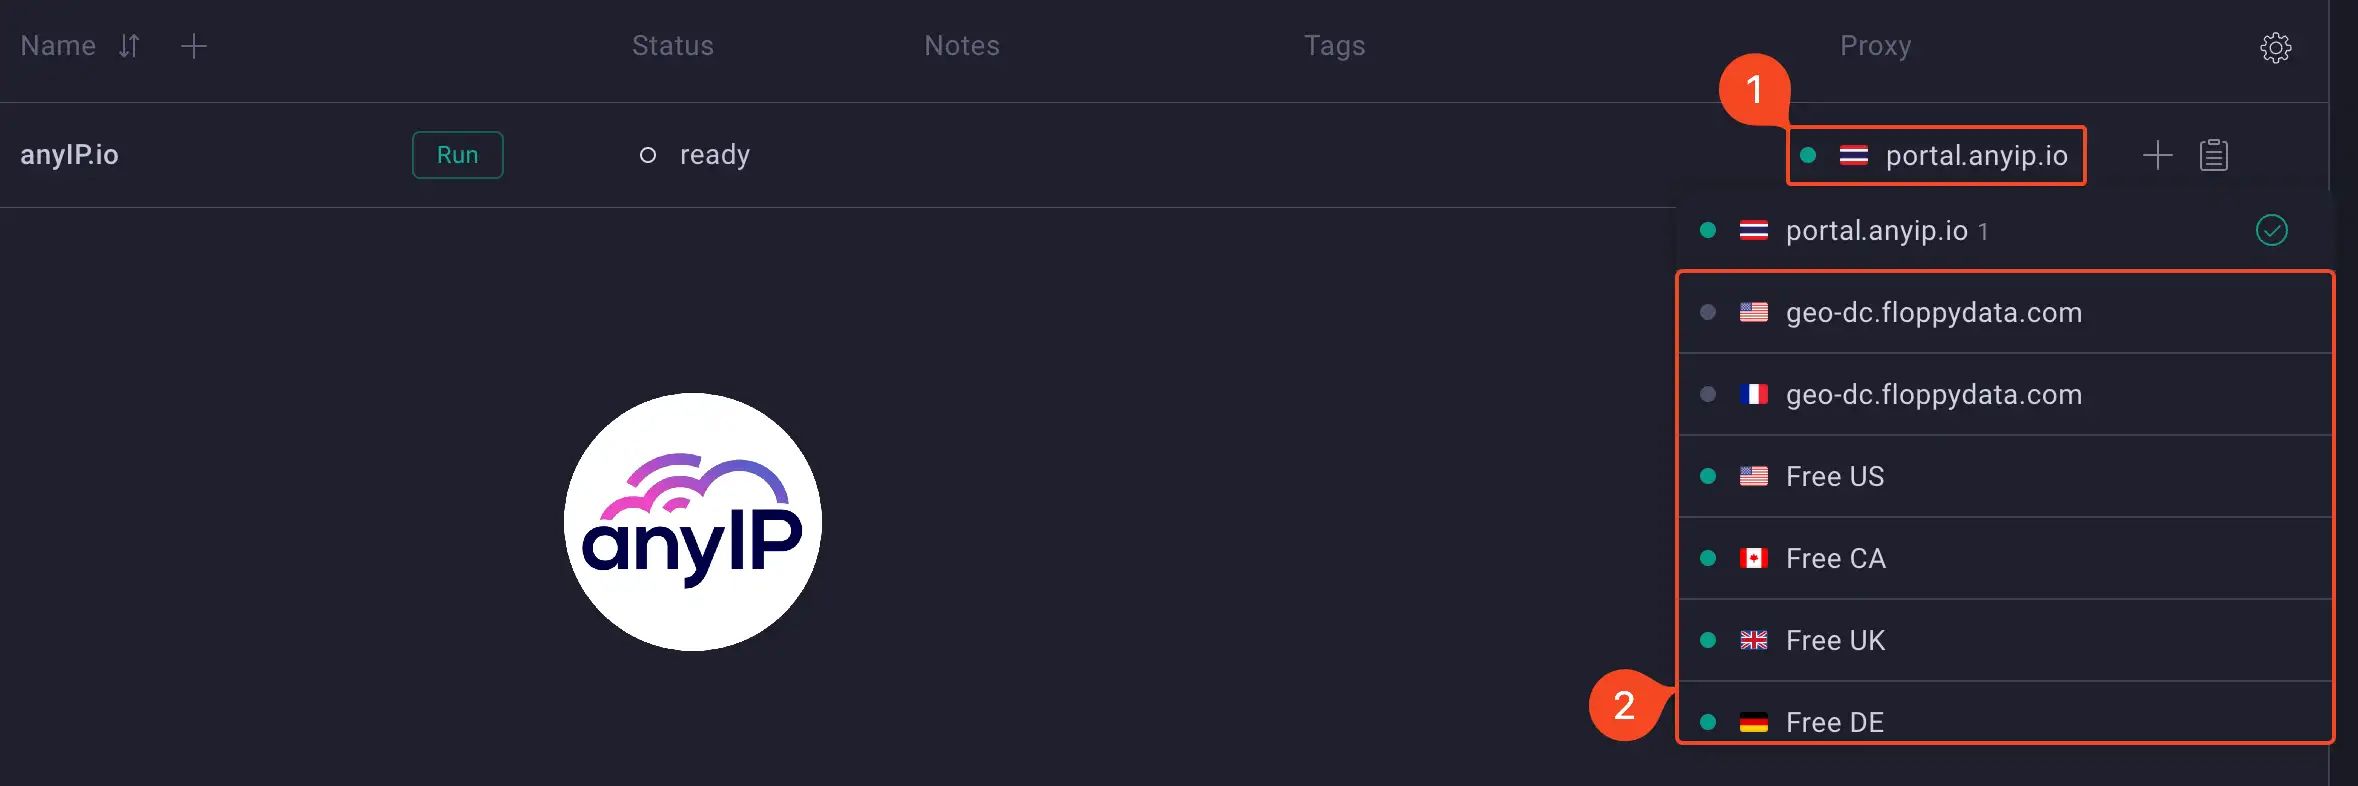
Click on your proxy.
Choose the new proxy you want to use for your browser profile.
How to delete a proxy
To remove one or multiple proxies, you can do as follows:
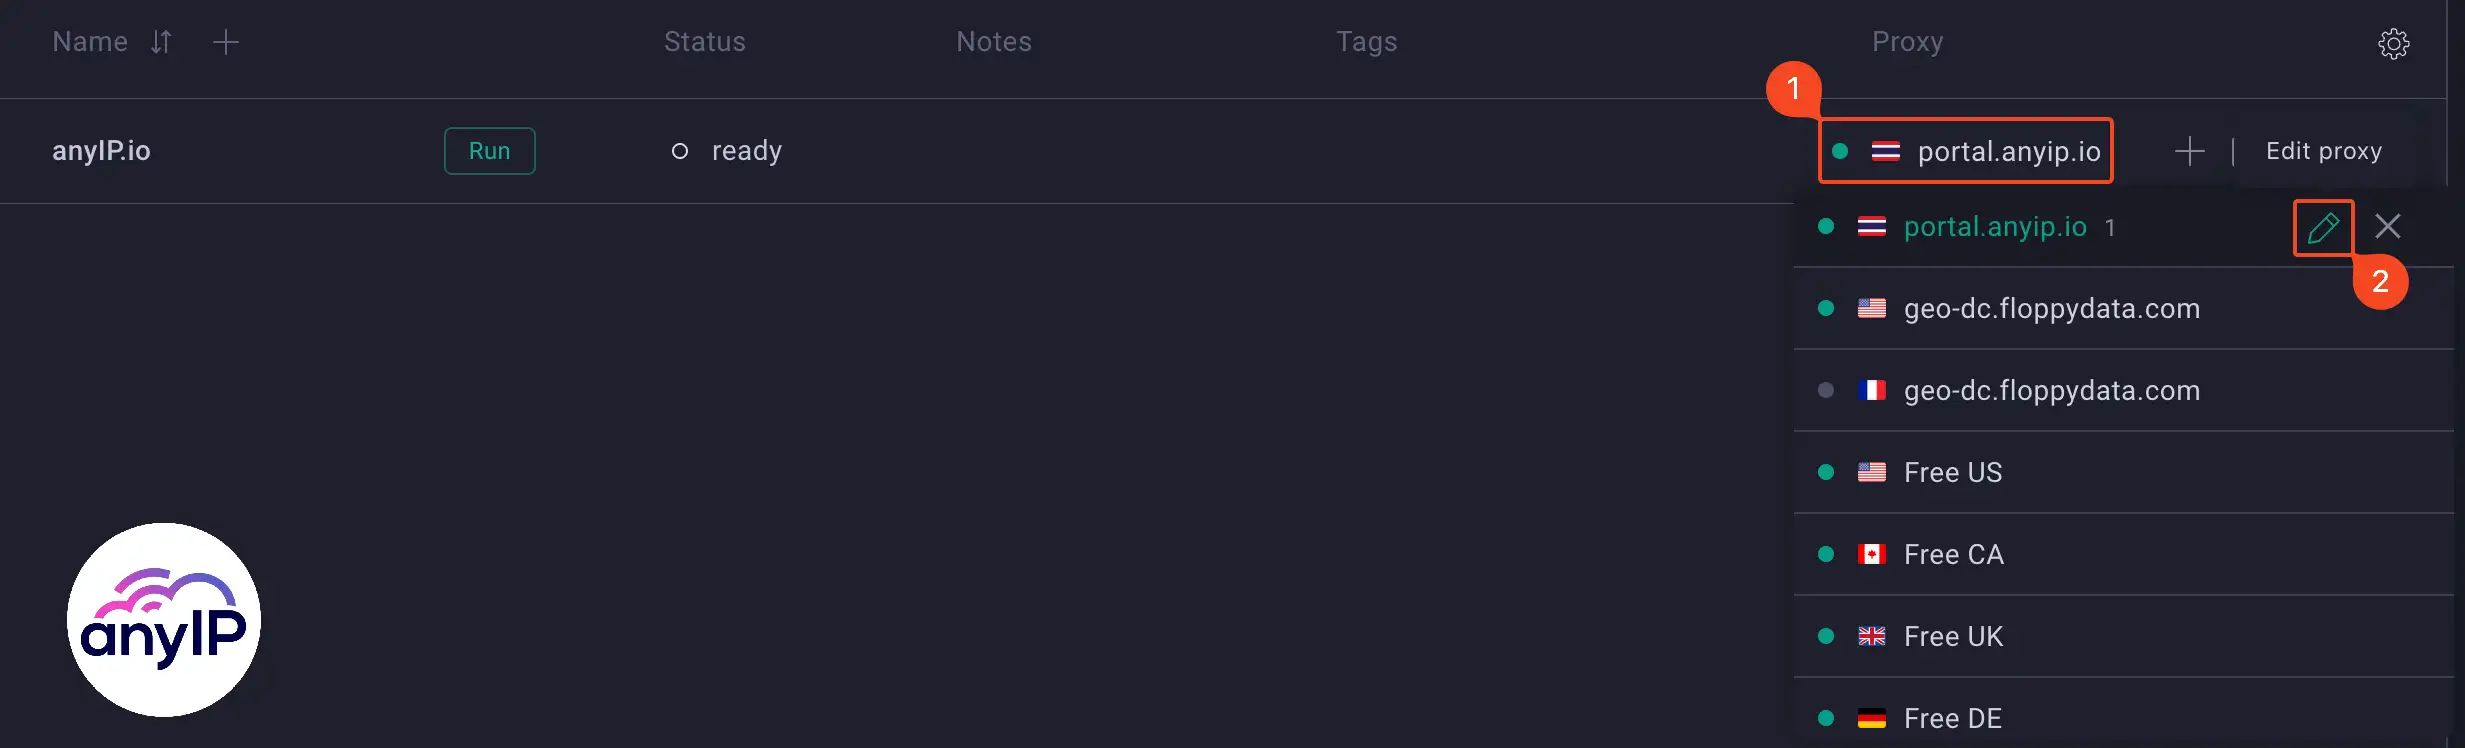
Click on the proxy.
Click on the “Edit Proxy” menu to open the edit form.
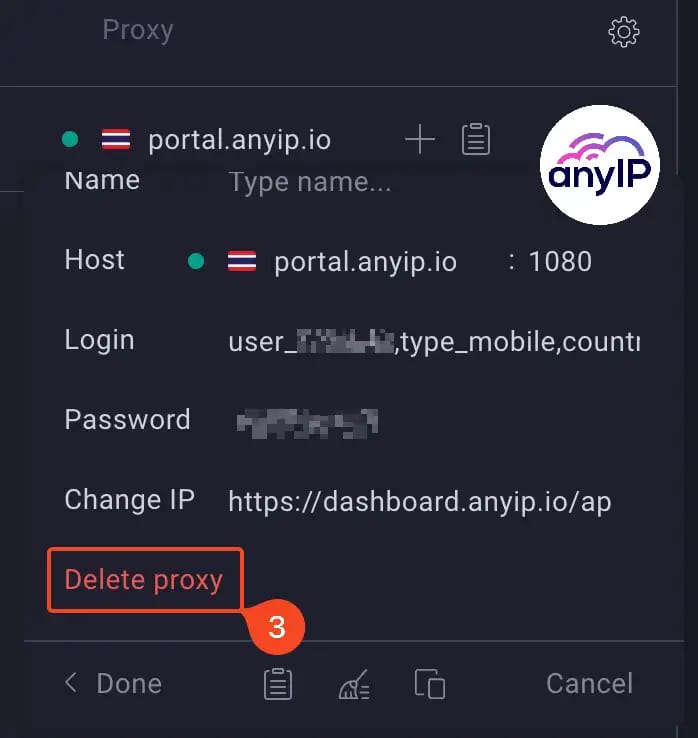
Scroll down and click “Delete proxy”. Confirm by clicking on “Delete” to remove the proxy setting permanently.
Free and trial plans: 300 requests per 1 minute.
Other plans: 1200 requests per 1 minute.
Using the quick profile settings

Finally, you can manage your proxies using the quick settings menu.
Click on “Settings” next to the “Run” button. This will open a quick access form to update the profile information easily.
From here, you can manage your proxies the same way you did before.
Take control of your proxies with the GoLogin's API
If you want another way to manage your browser profiles, GoLogin offers a remote API.
The API offers many endpoints, such as:
Managing your browser profiles.
Editing your proxies, along with the fingerprints & cookies.
Your users list.
Control instance through the cloud.
💡 GoLogin has rate limitations depending on your subscription plan:
Free and trial plans: 300 requests per 1 minute.
Other plans: 1200 requests per 1 minute.
Why choose anyIP.io?
Enhanced Privacy: Get anonymous browsing with IP rotation and real device routing for genuine IPs.
Global Access: Enjoy a massive IP pool from all over the world, starting at just $2/GB.
Quick and Easy Setup: Create your account in under 5 minutes!
Customer Support: Our 24/7 expert team is here to answer questions and help you configure your proxy.
Article by
Khaled Bentoumi
Khaled is a software engineer. He's been involved in many startups of different sizes. Previously, he founded Data to Page, an AI Programmatic SEO startup. He now handles all the marketing at anyIP.


Article by
Khaled Bentoumi
Khaled is a software engineer. He's been involved in many startups of different sizes. Previously, he founded Data to Page, an AI Programmatic SEO startup. He now handles all the marketing at anyIP.
Read more
How to customize Your User-Agent with Python Requests
Learn how to update and rotate user-agents in Python Requests to avoid detection and improve scraping efficiency.

