
Dolphin Anty Proxy Integration: Ultimate Guide
Table of Contents
Table of Contents
Key takeaways
Dolphin Anty enables multiple unique browser profiles for enhanced anonymity.
Integrating proxies is straightforward with Dolphin Anty's intuitive proxy configuration form.
You can manage and edit proxies efficiently with options for testing, sharing, and bulk edits.
Browser profile management includes customizable names, tags, and advanced fingerprint settings.
Dolphin Anty offers an API for advanced users to manage profiles and proxies programmatically.
Dolphin{anty} is a powerful anti-detect browser. It allows you to create many browser profiles on one device. Each is different and unique. Dolphin{anty} lets you hide your online identity from websites, perfect to bypass restrictions or enhance your anonymity. It does this by changing your browser fingerprint. It also uses proxies and isolates your browsing profiles.
💡 To follow this guide, you will need:
Dolphin Anty desktop application on your computer.
All the proxies needed information such as :
username/password;
proxy server addresses (URL or IP + port) ;
This article will present how to integrate anyIP proxies in Dolphin Anty.
A step-by-step guide to configure, use and manage a profile on Dolphin Anty
In this tutorial, we will focus on the basic usage of Dolphin Anty.
You will learn how to:
Create a new profile.
Integrate a proxy.
Test your proxies and profiles.
Manage your proxies.
Verify your fingerprint integrity.
Step 1: Create a profile
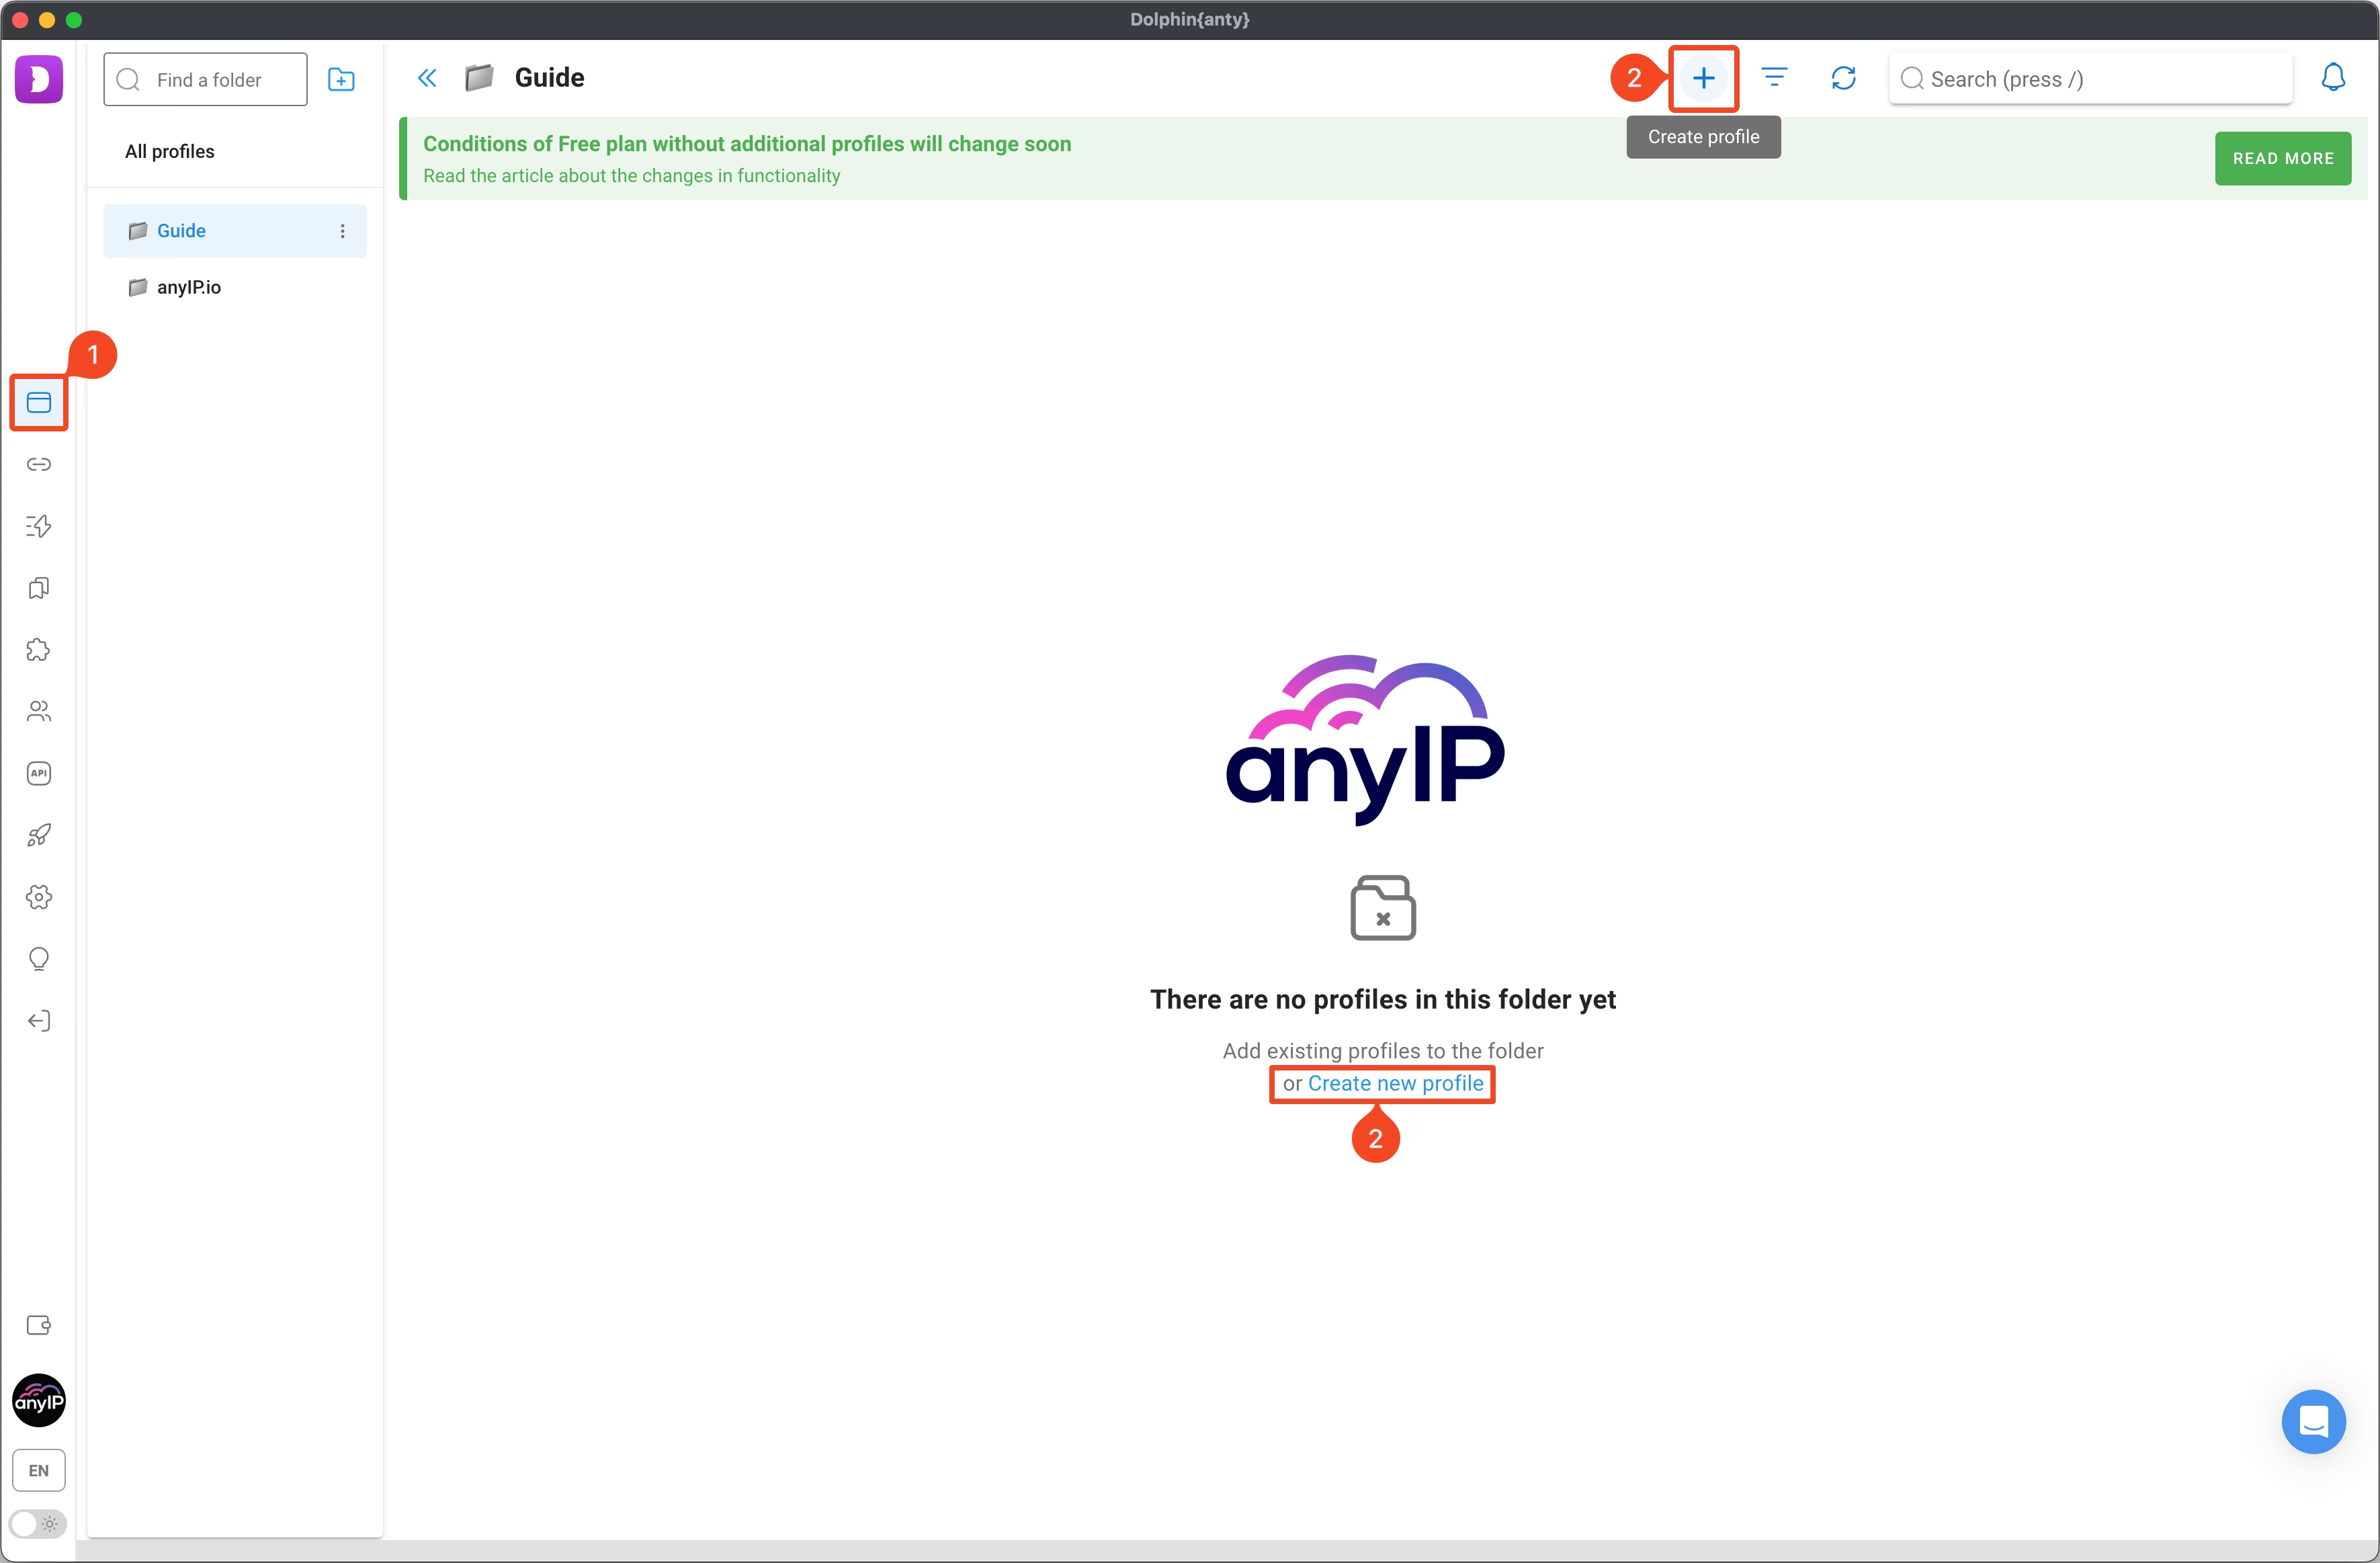
Make sure you are on the “Browsers profiles” view.
Then click on “+” or “Create new profile” to open the creation form.
Step 2: Configure your proxy
From here, you can configure your proxy quickly thanks to this intuitive form the Dolphin team offers us!
,Option 1 - Add a new proxy:
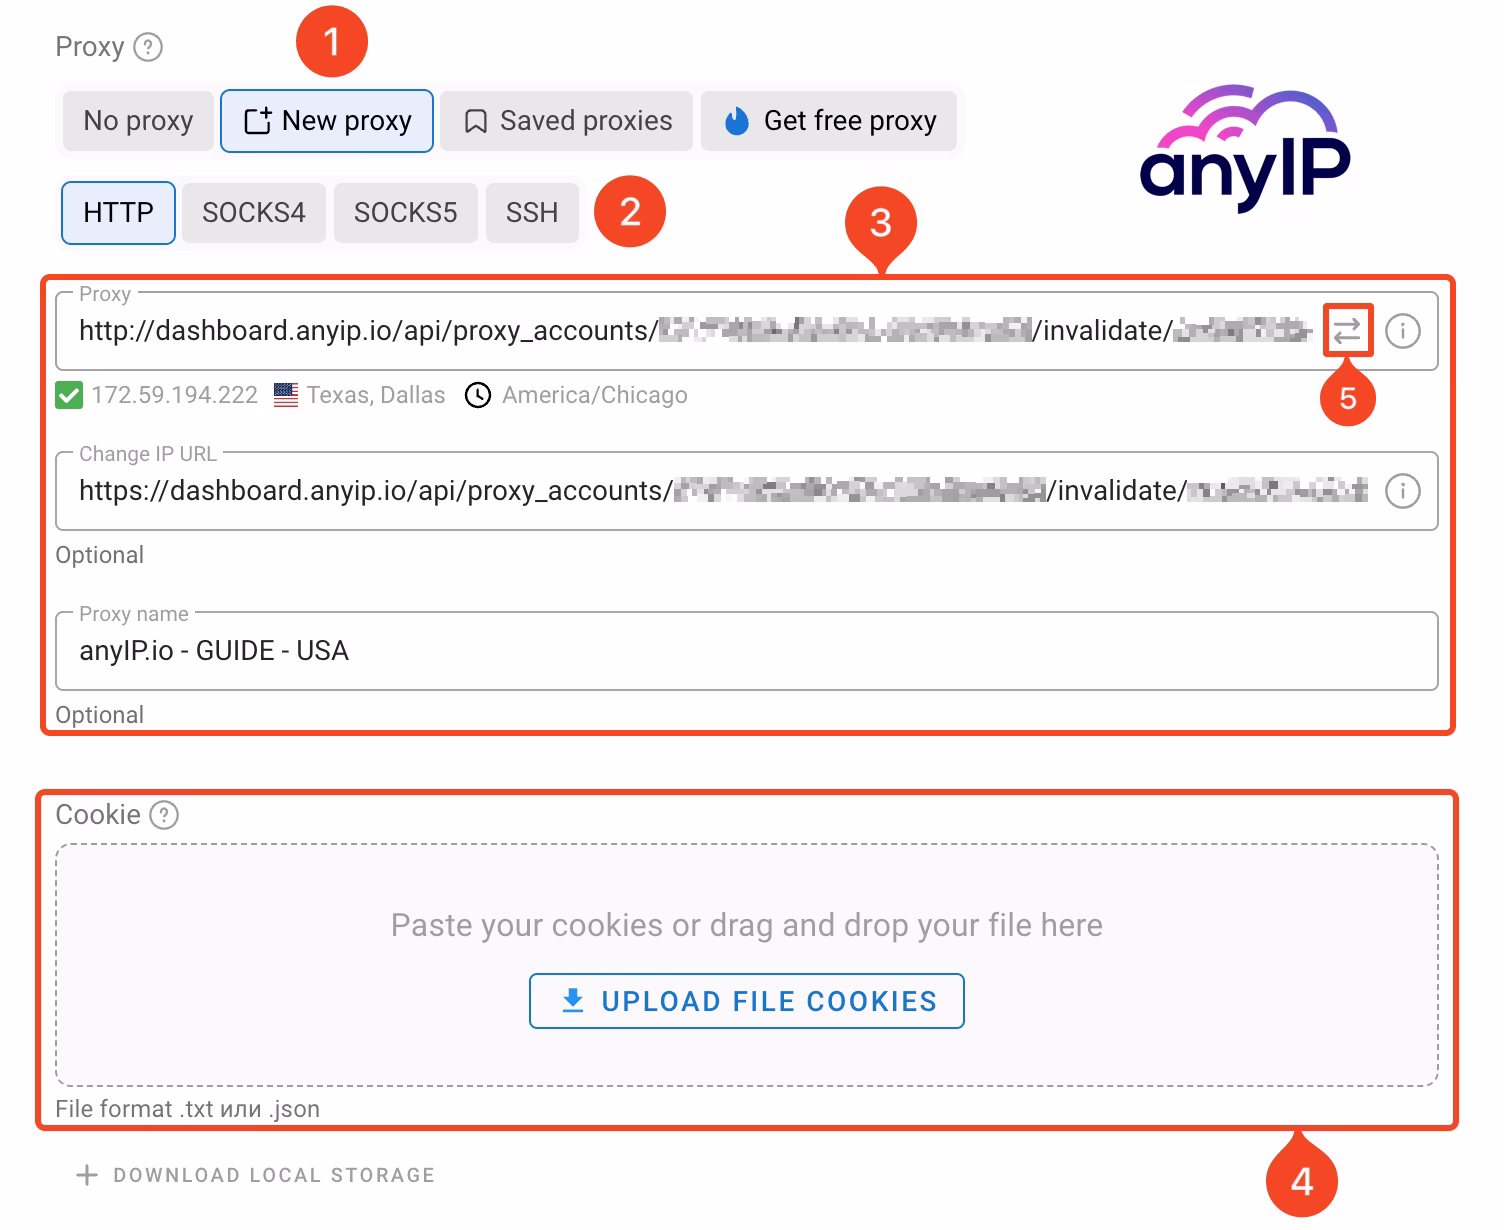
Select “New proxy” to open the proxy settings.
Select the proxy protocol you want to use. You can choose between HTTP/SOCKS4/SOCKS5 and SSH according to your needs. For this guide, we used “HTTP.”
Dolphin Anty accepts many proxy formats. AnyIP provides a compatible one-line proxy profile. You can easily copy/paste it into the “proxy” field.
Change IP URL (optional): If your proxy provider has this feature, you can specify the URL here.
Proxy name (optional): You can add a proxy name to identify that proxy profile easily.
You can also upload cookie files to enhance your navigation (optional).
Finally, click on this button to test the proxy. If you enter the correct credentials, you'll see the proxy IP, location, and timezone below the proxy field.
Option 2 - Add a saved proxy:
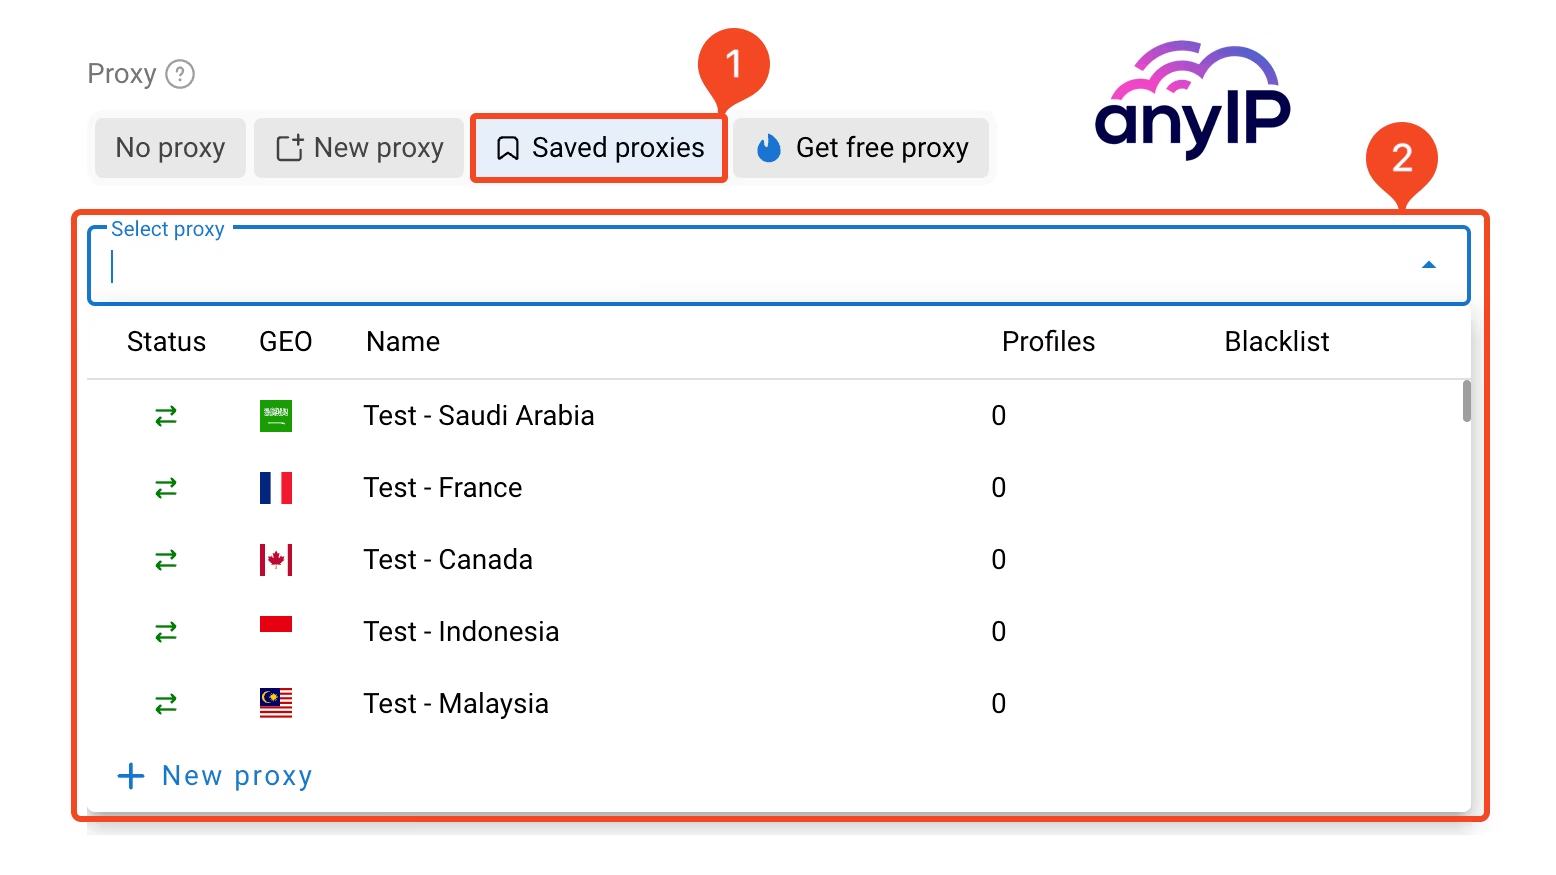
Select “Saved Proxy” to access the list of your saved proxy.
Choose the proxy you want to use within the list of your proxy.
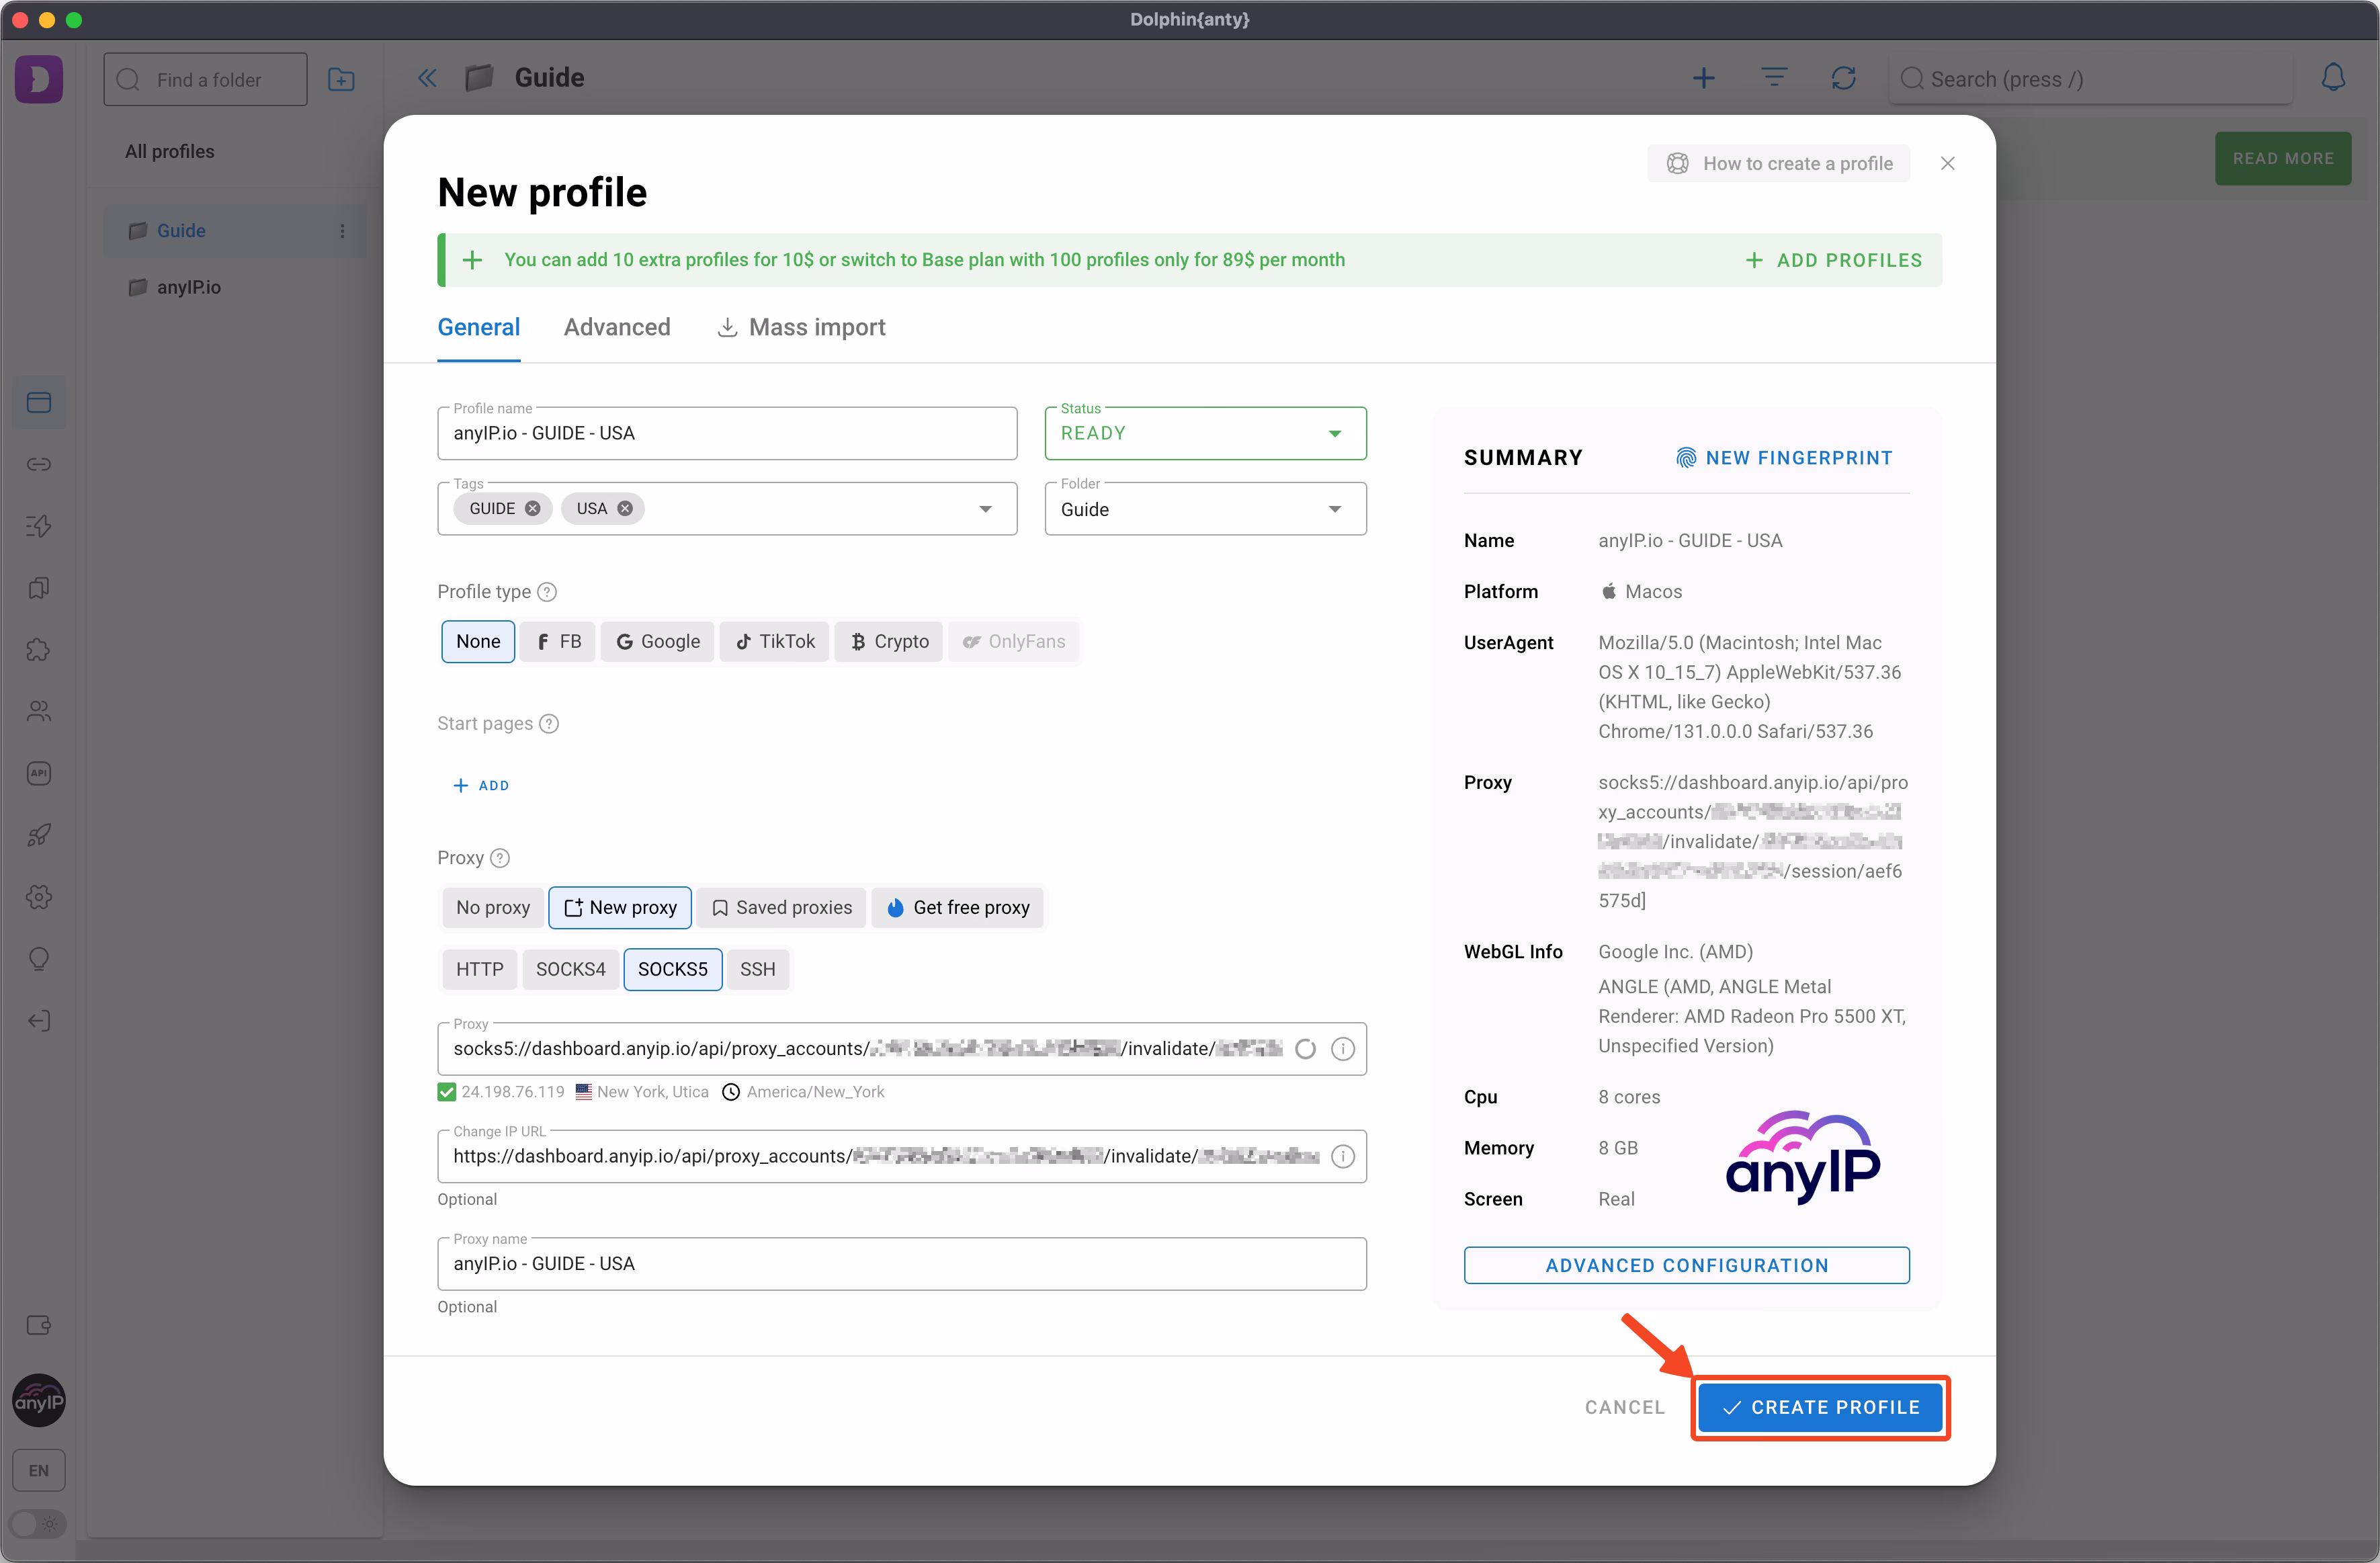
Step 3: Save the profile
Don’t forget to enter all the essential information, and save your profile by clicking the "+ CREATE" button.
Step 4: Start the profile
Click on “START” to launch the profile. Dolphin Anty will automatically launch a new instance of his browser.

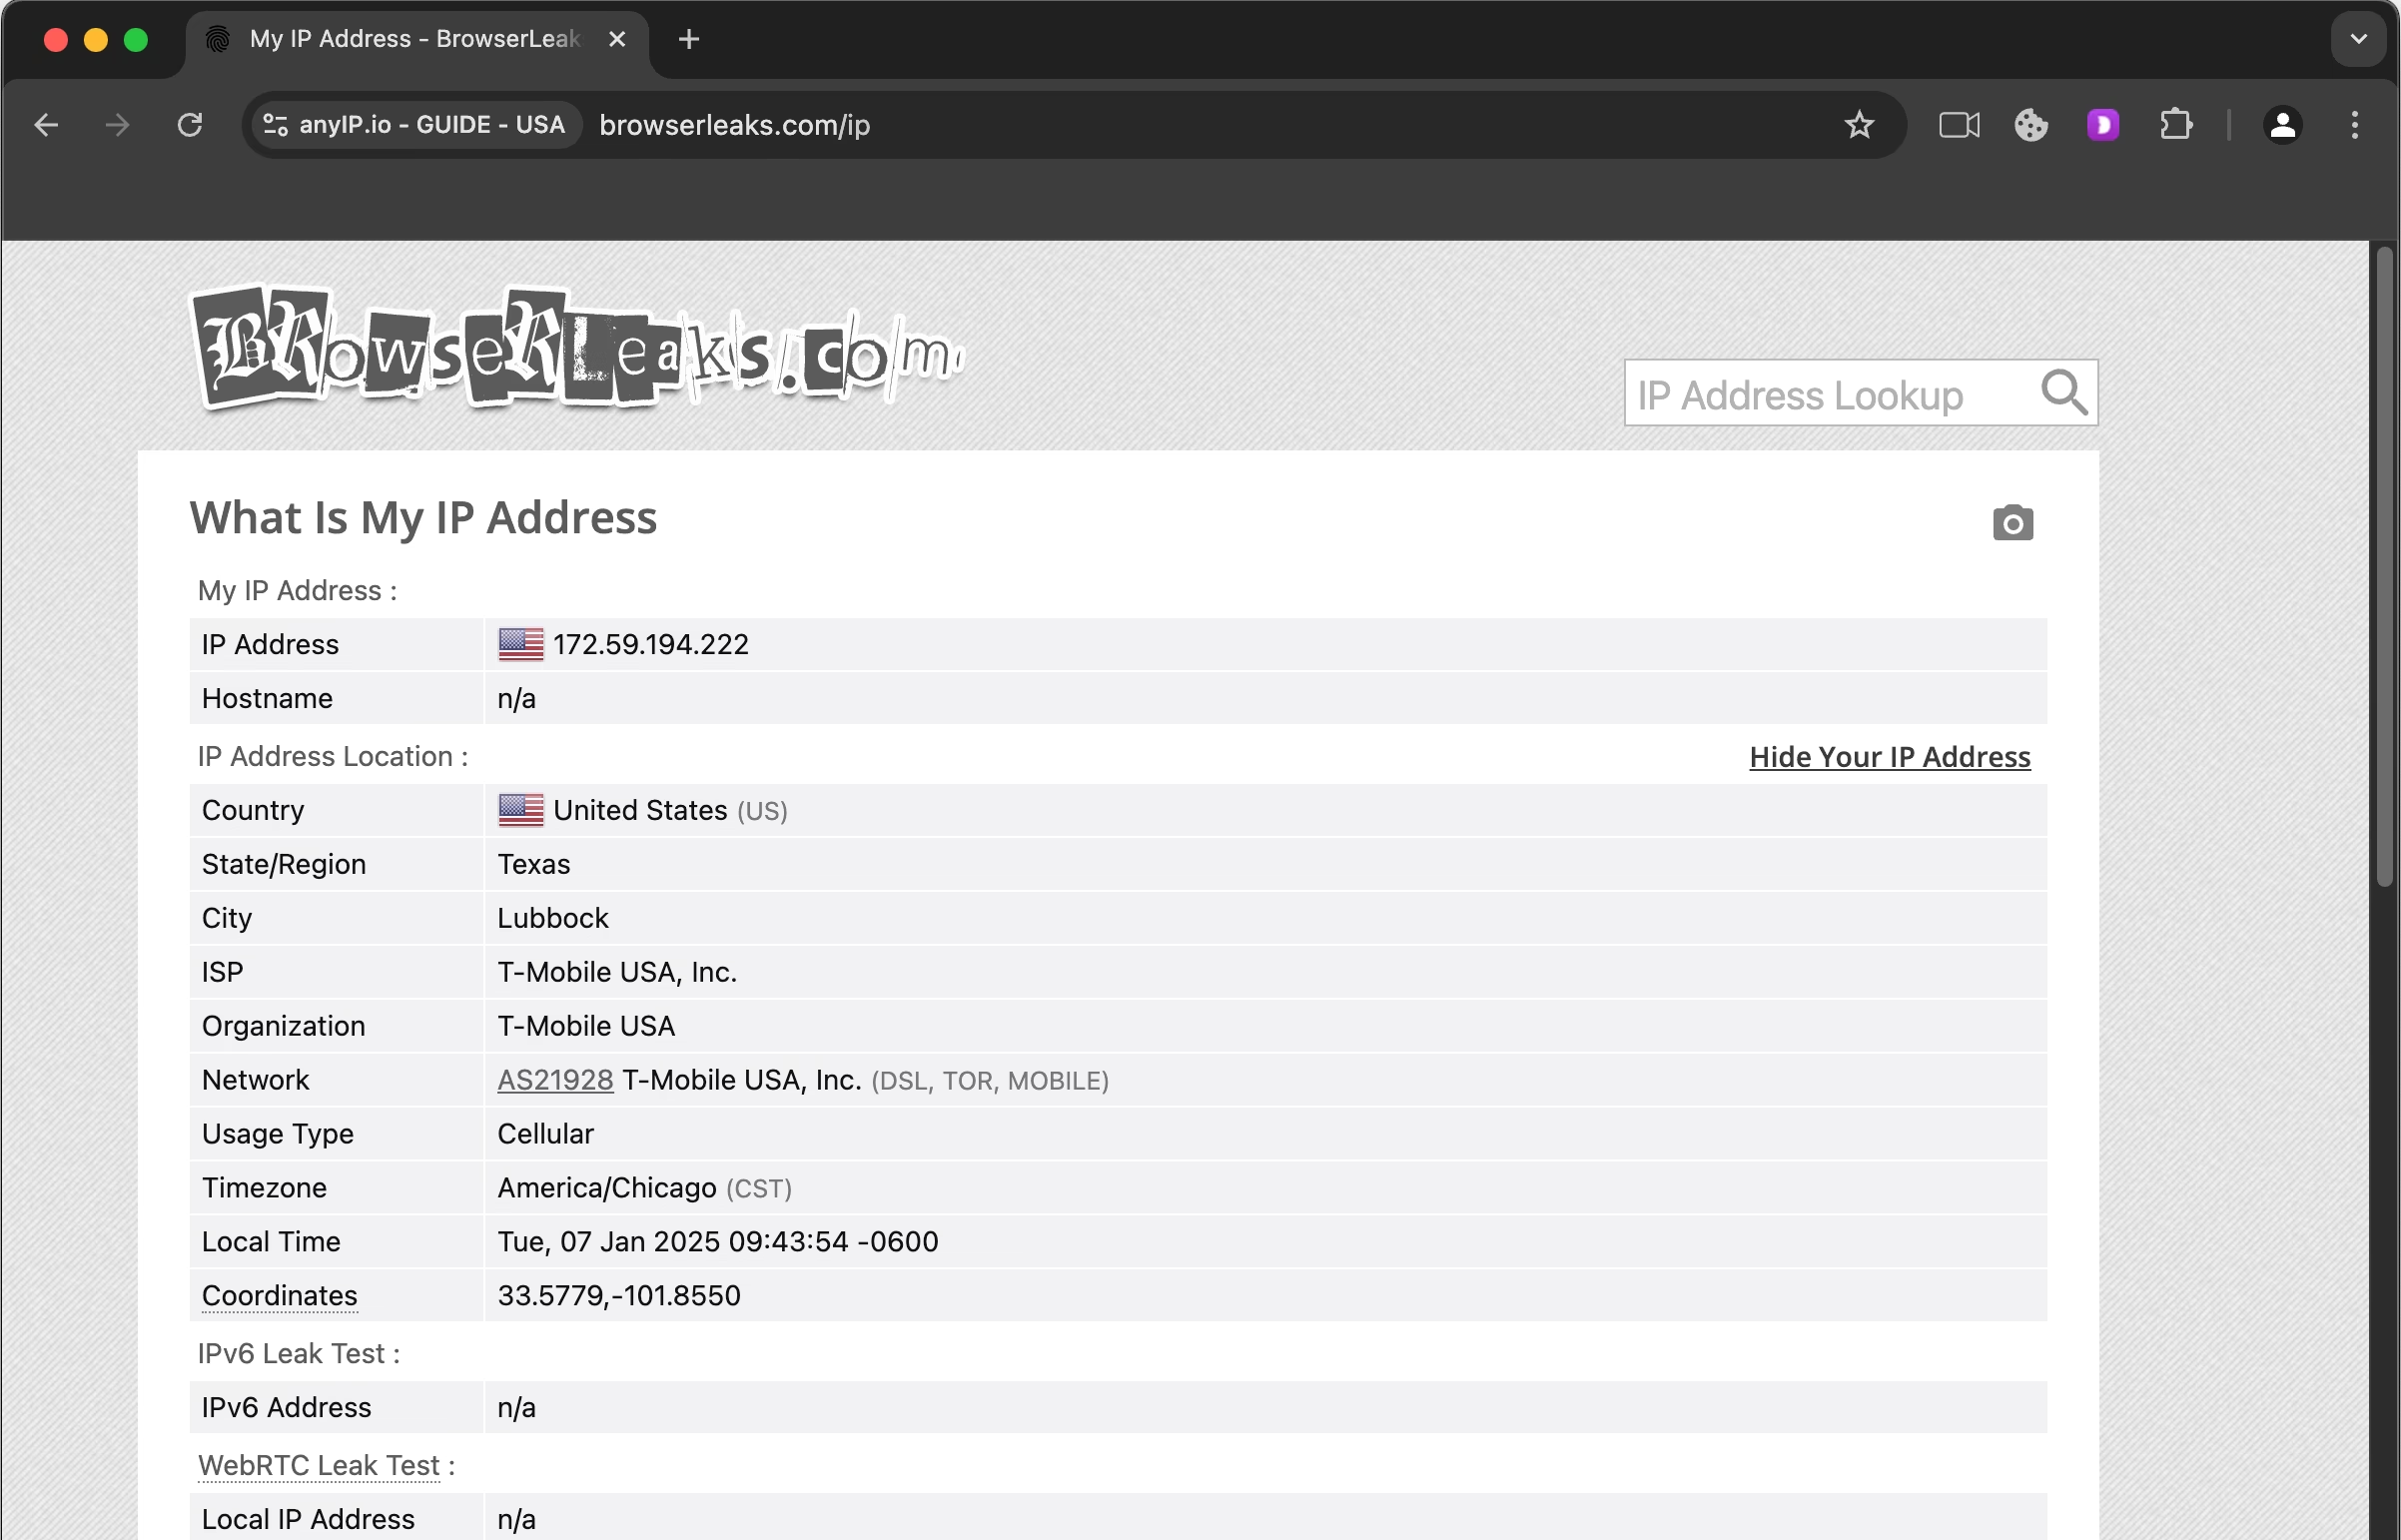
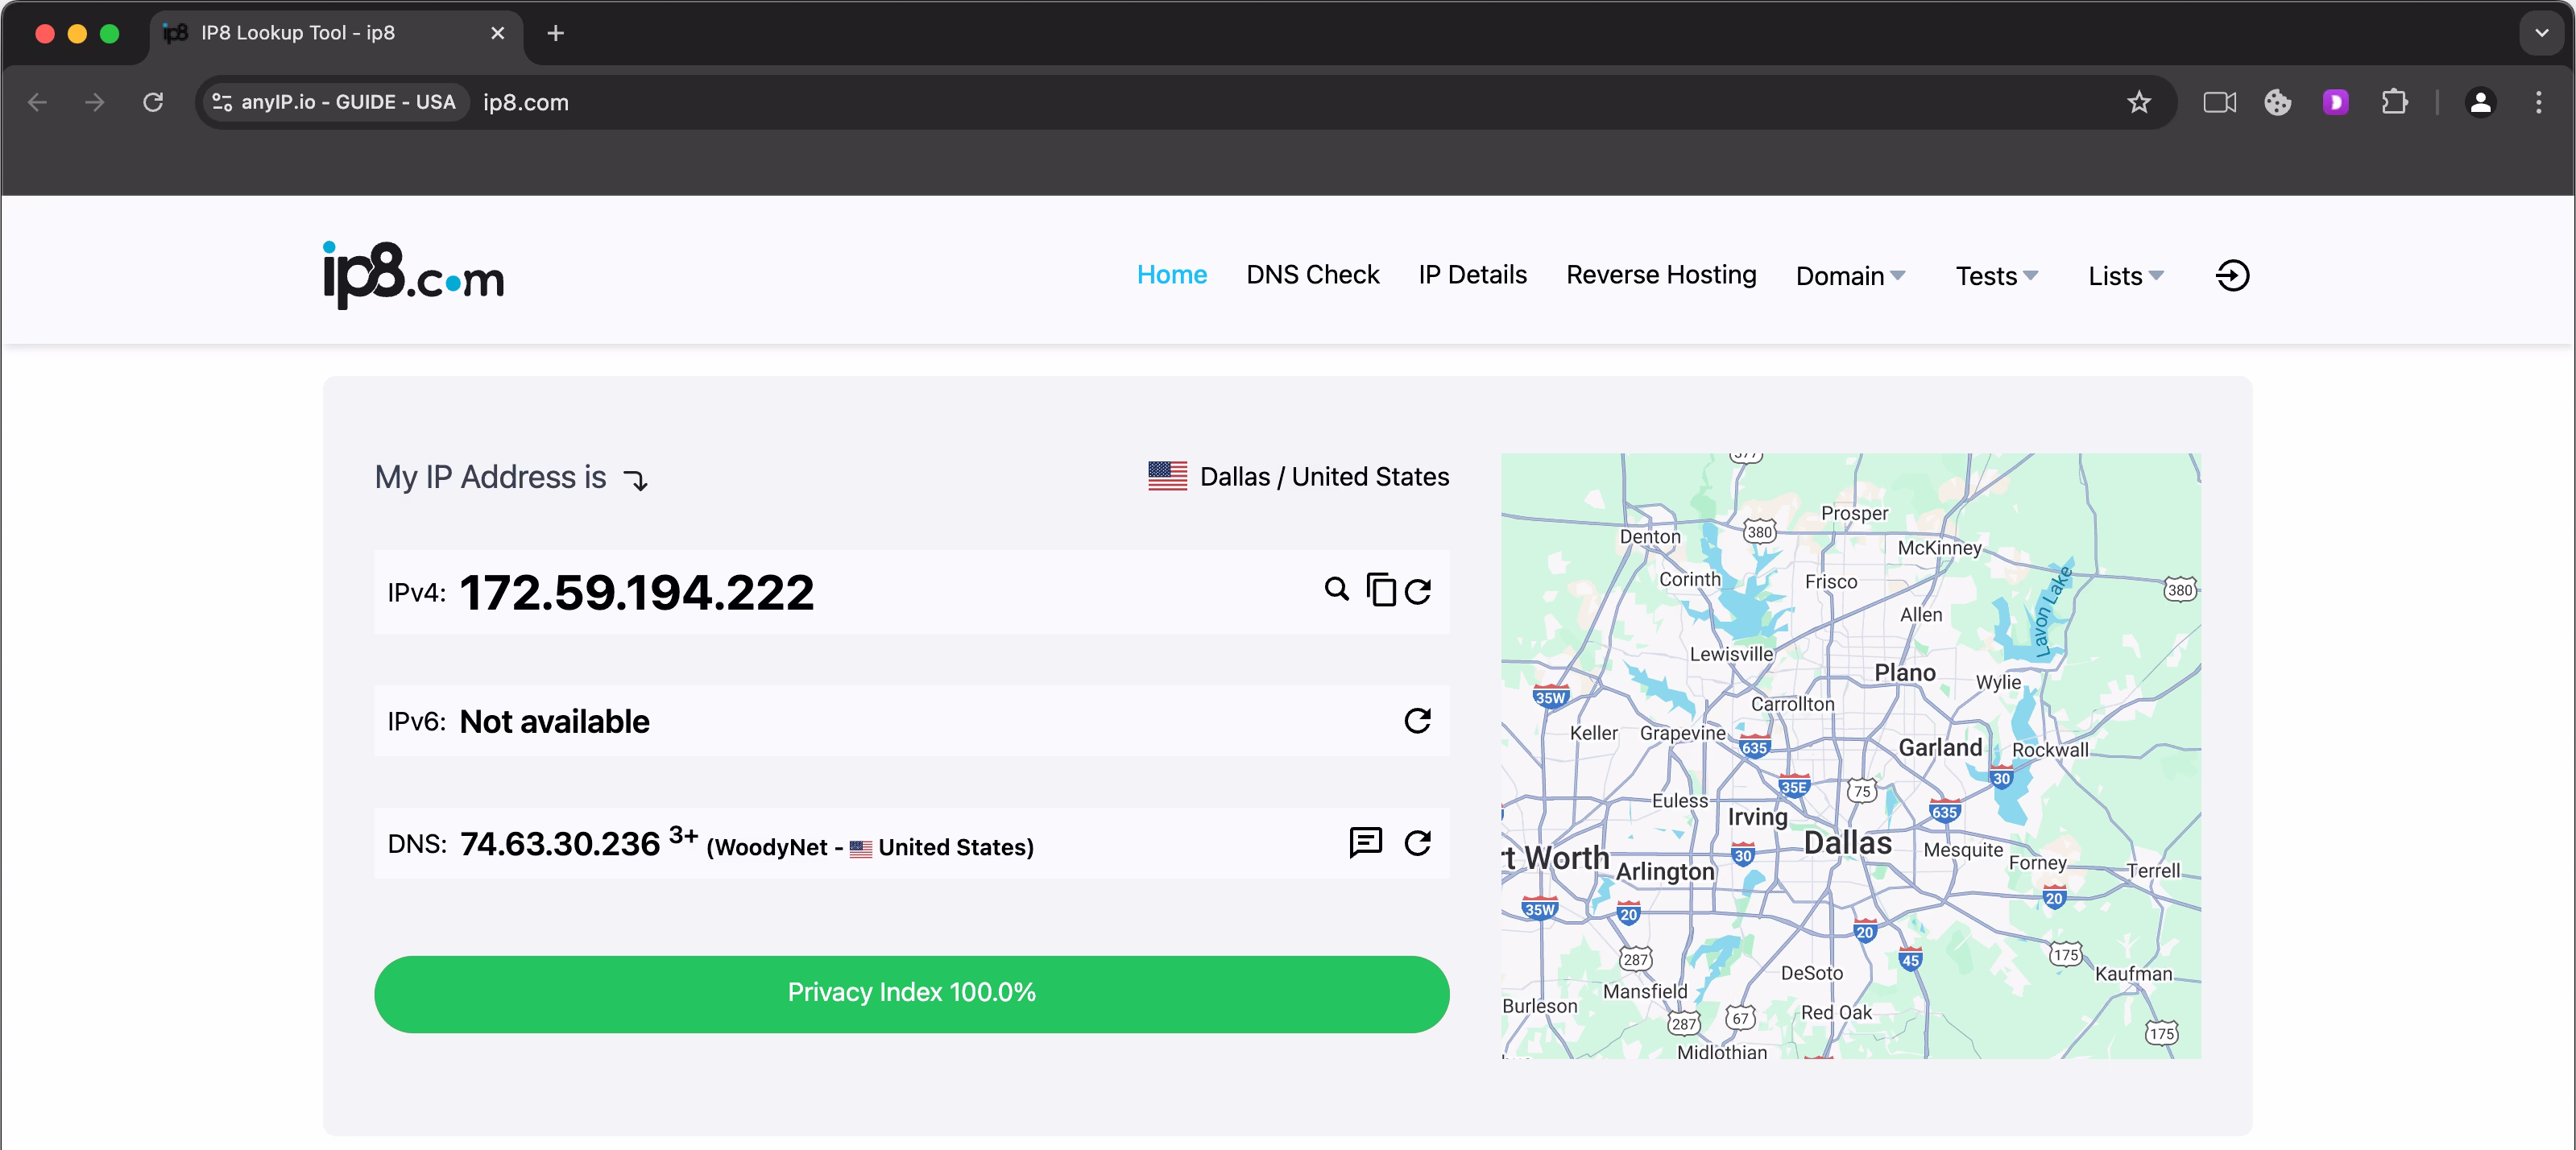
Dolphin will start an instance of his browser based on Google Chrome. The browser will look like this:
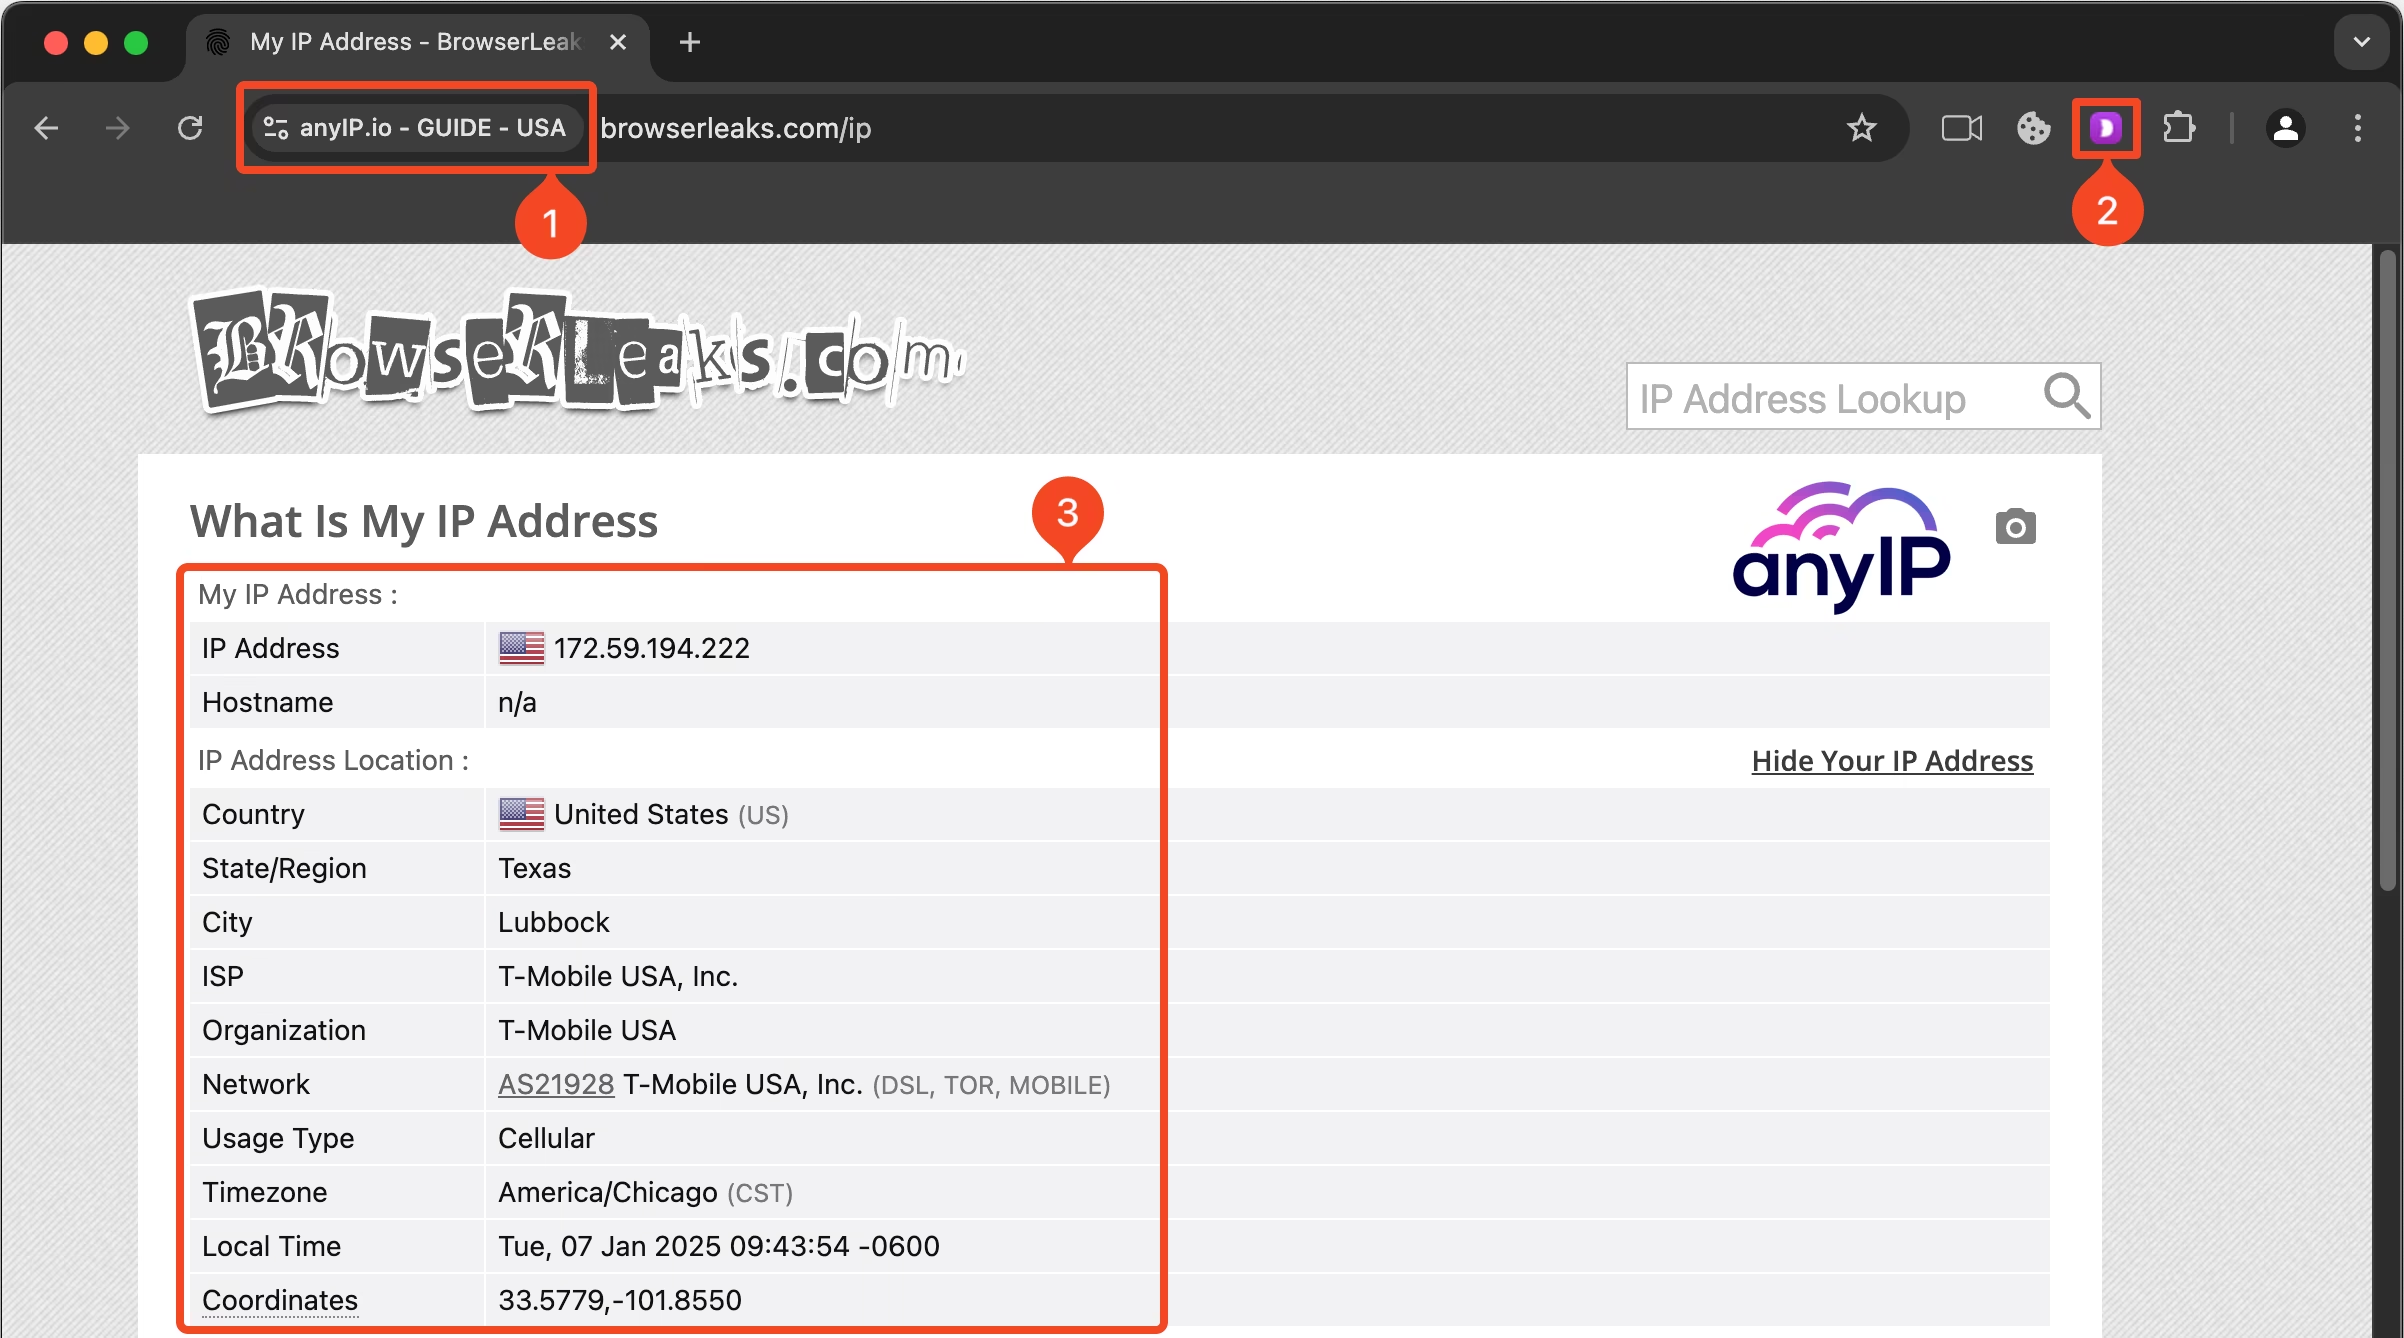
You will see the name of your profile. Here “anyIP - GUIDE - USA.”
You can see the Dolphin Anty extension. This extension gives you information about your current session.
And all your IP information. Visit browserleaks.com/ip to get more details about it ;)
You can now use this browser to navigate the internet securely and 100% anonymously.
💡 Dolphin Anty launches a new instance when you start a profile.
For each profile, you will see a custom icon on your dock/toolbar that will look like this:
How to manage your proxies
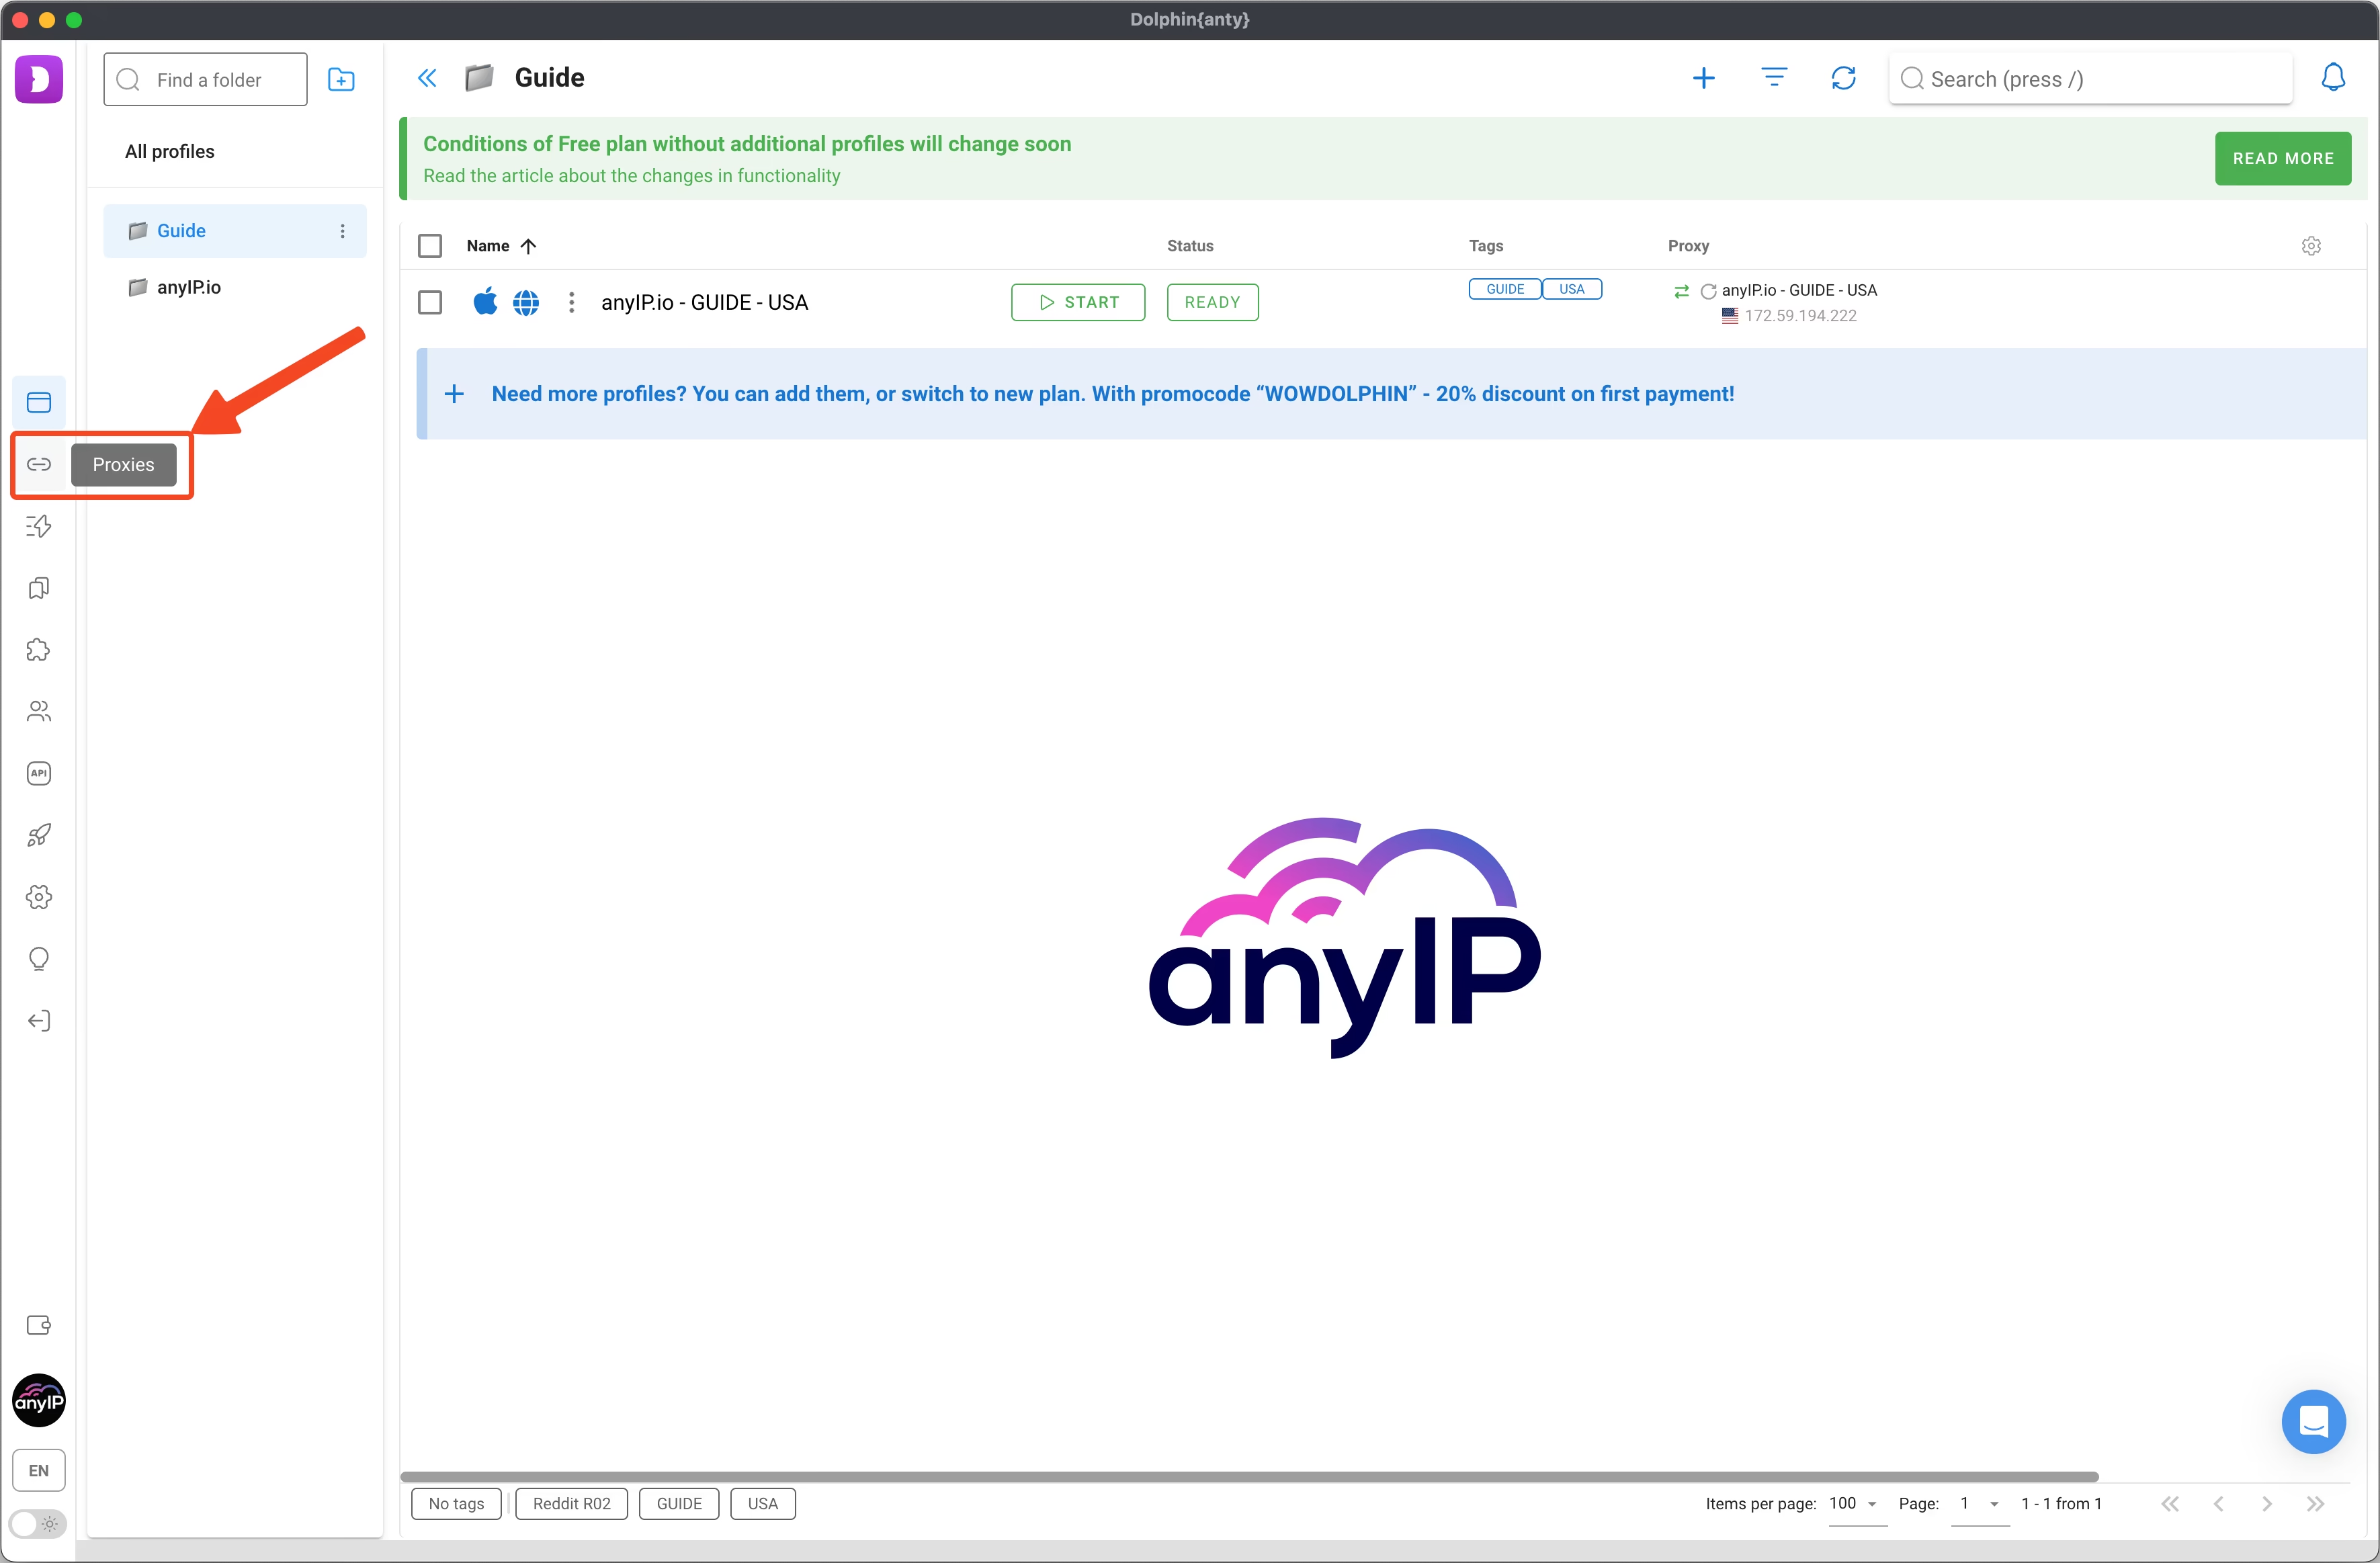
To access the proxies management view, click the “Proxies” button on the left menu.
Step 1: Create new proxy profiles

Click on the “+ ADD PROXY” button (1) to open the proxies creation form.
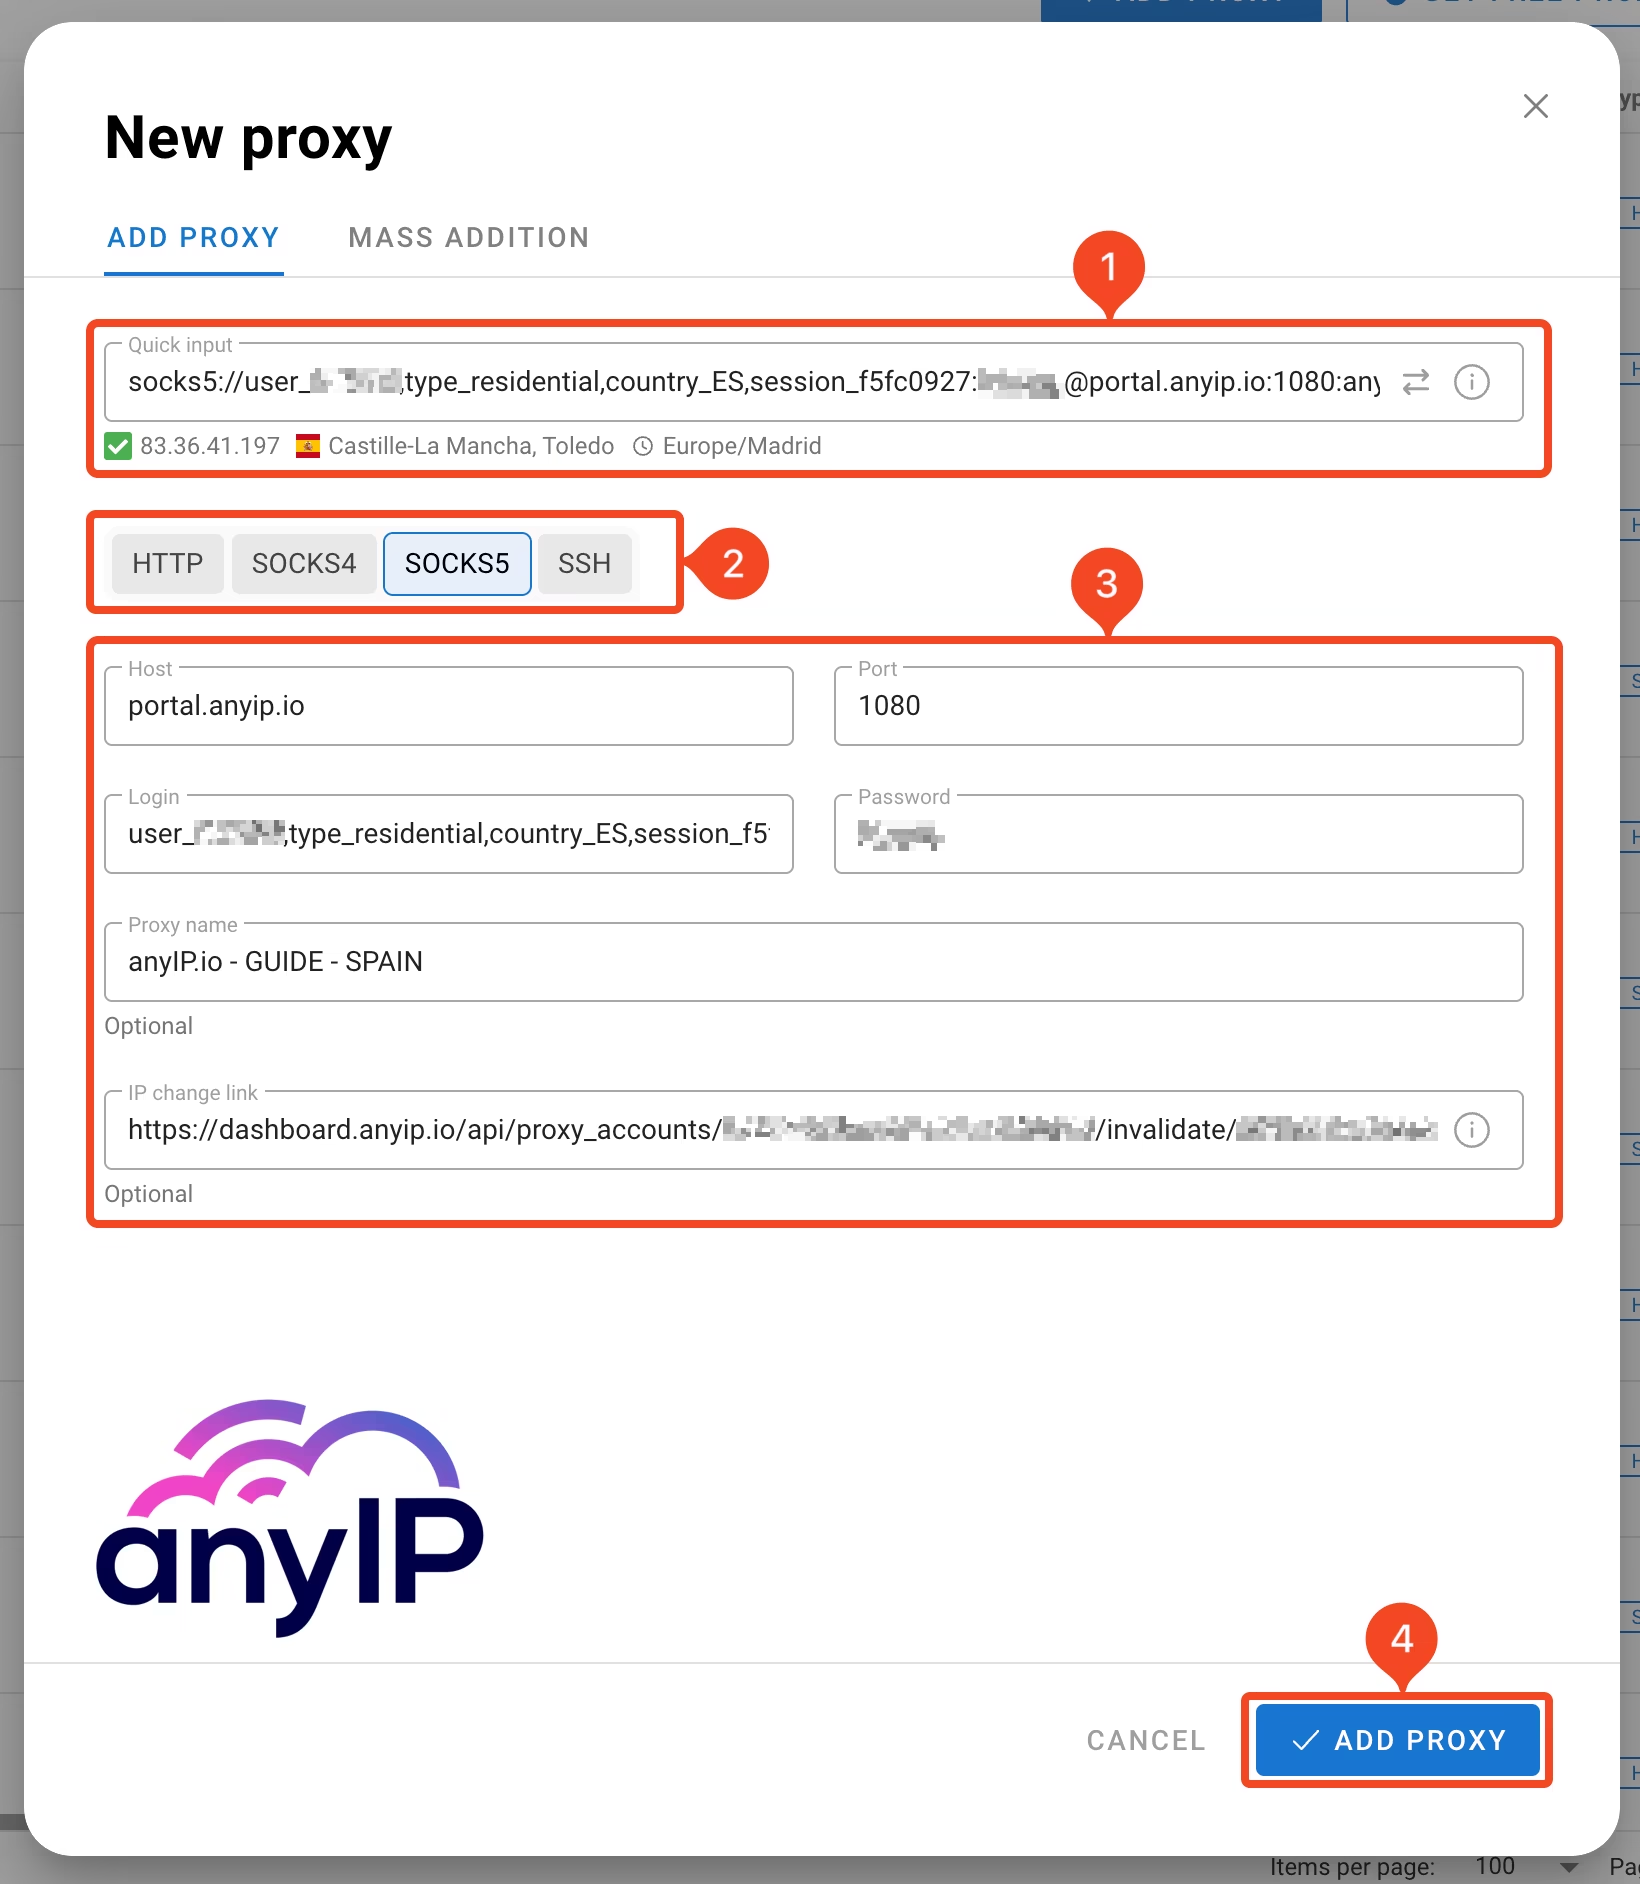
Dolphin Anty allows copying/pasting the full proxy configuration in this quick input field to ease the creation of a proxy profile.
Select the protocol you want to use.
Double-check your proxies before adding them to Dolphin Anty. As you can see, Dolphin will automatically check your proxy and display the proxy details below the quick input field.
Confirm by clicking on the “ADD PROXY” button to save your proxies.
💡 Dolphin Anty allowed formats:
Dolphin Anty allows multiple formats to add a proxy.
AnyIP.io automatically generates a compatible format. You can directly copy/paste it on Dolphin Anty.
The format anyIP.io uses looks like this:
portal.anyip.io:1080:USERNAME:PASSWORDDolphin Anty allows you to easily add a name to this proxy profile by adding it at the end of the line, like this:
portal.anyip.io:1080:USERNAME:PASSWORD:My proxy NameYou can also specify the protocols you want to use. Dolphin Anty is compatible with HTTP/SOCKS4/SOCKS5 and SSH proxy.
Specify it as follows:
socks5://portal.anyip.io:1080:USERNAME:PASSWORD:My proxy NameFinally, you can set the change IP URL at the end of the proxy, no matter the format, by using square brackets like this:
socks5://portal.anyip.io:1080:USERNAME:PASSWORD:My proxy Name[CHANGE_IP_URL]Batch option for your proxies
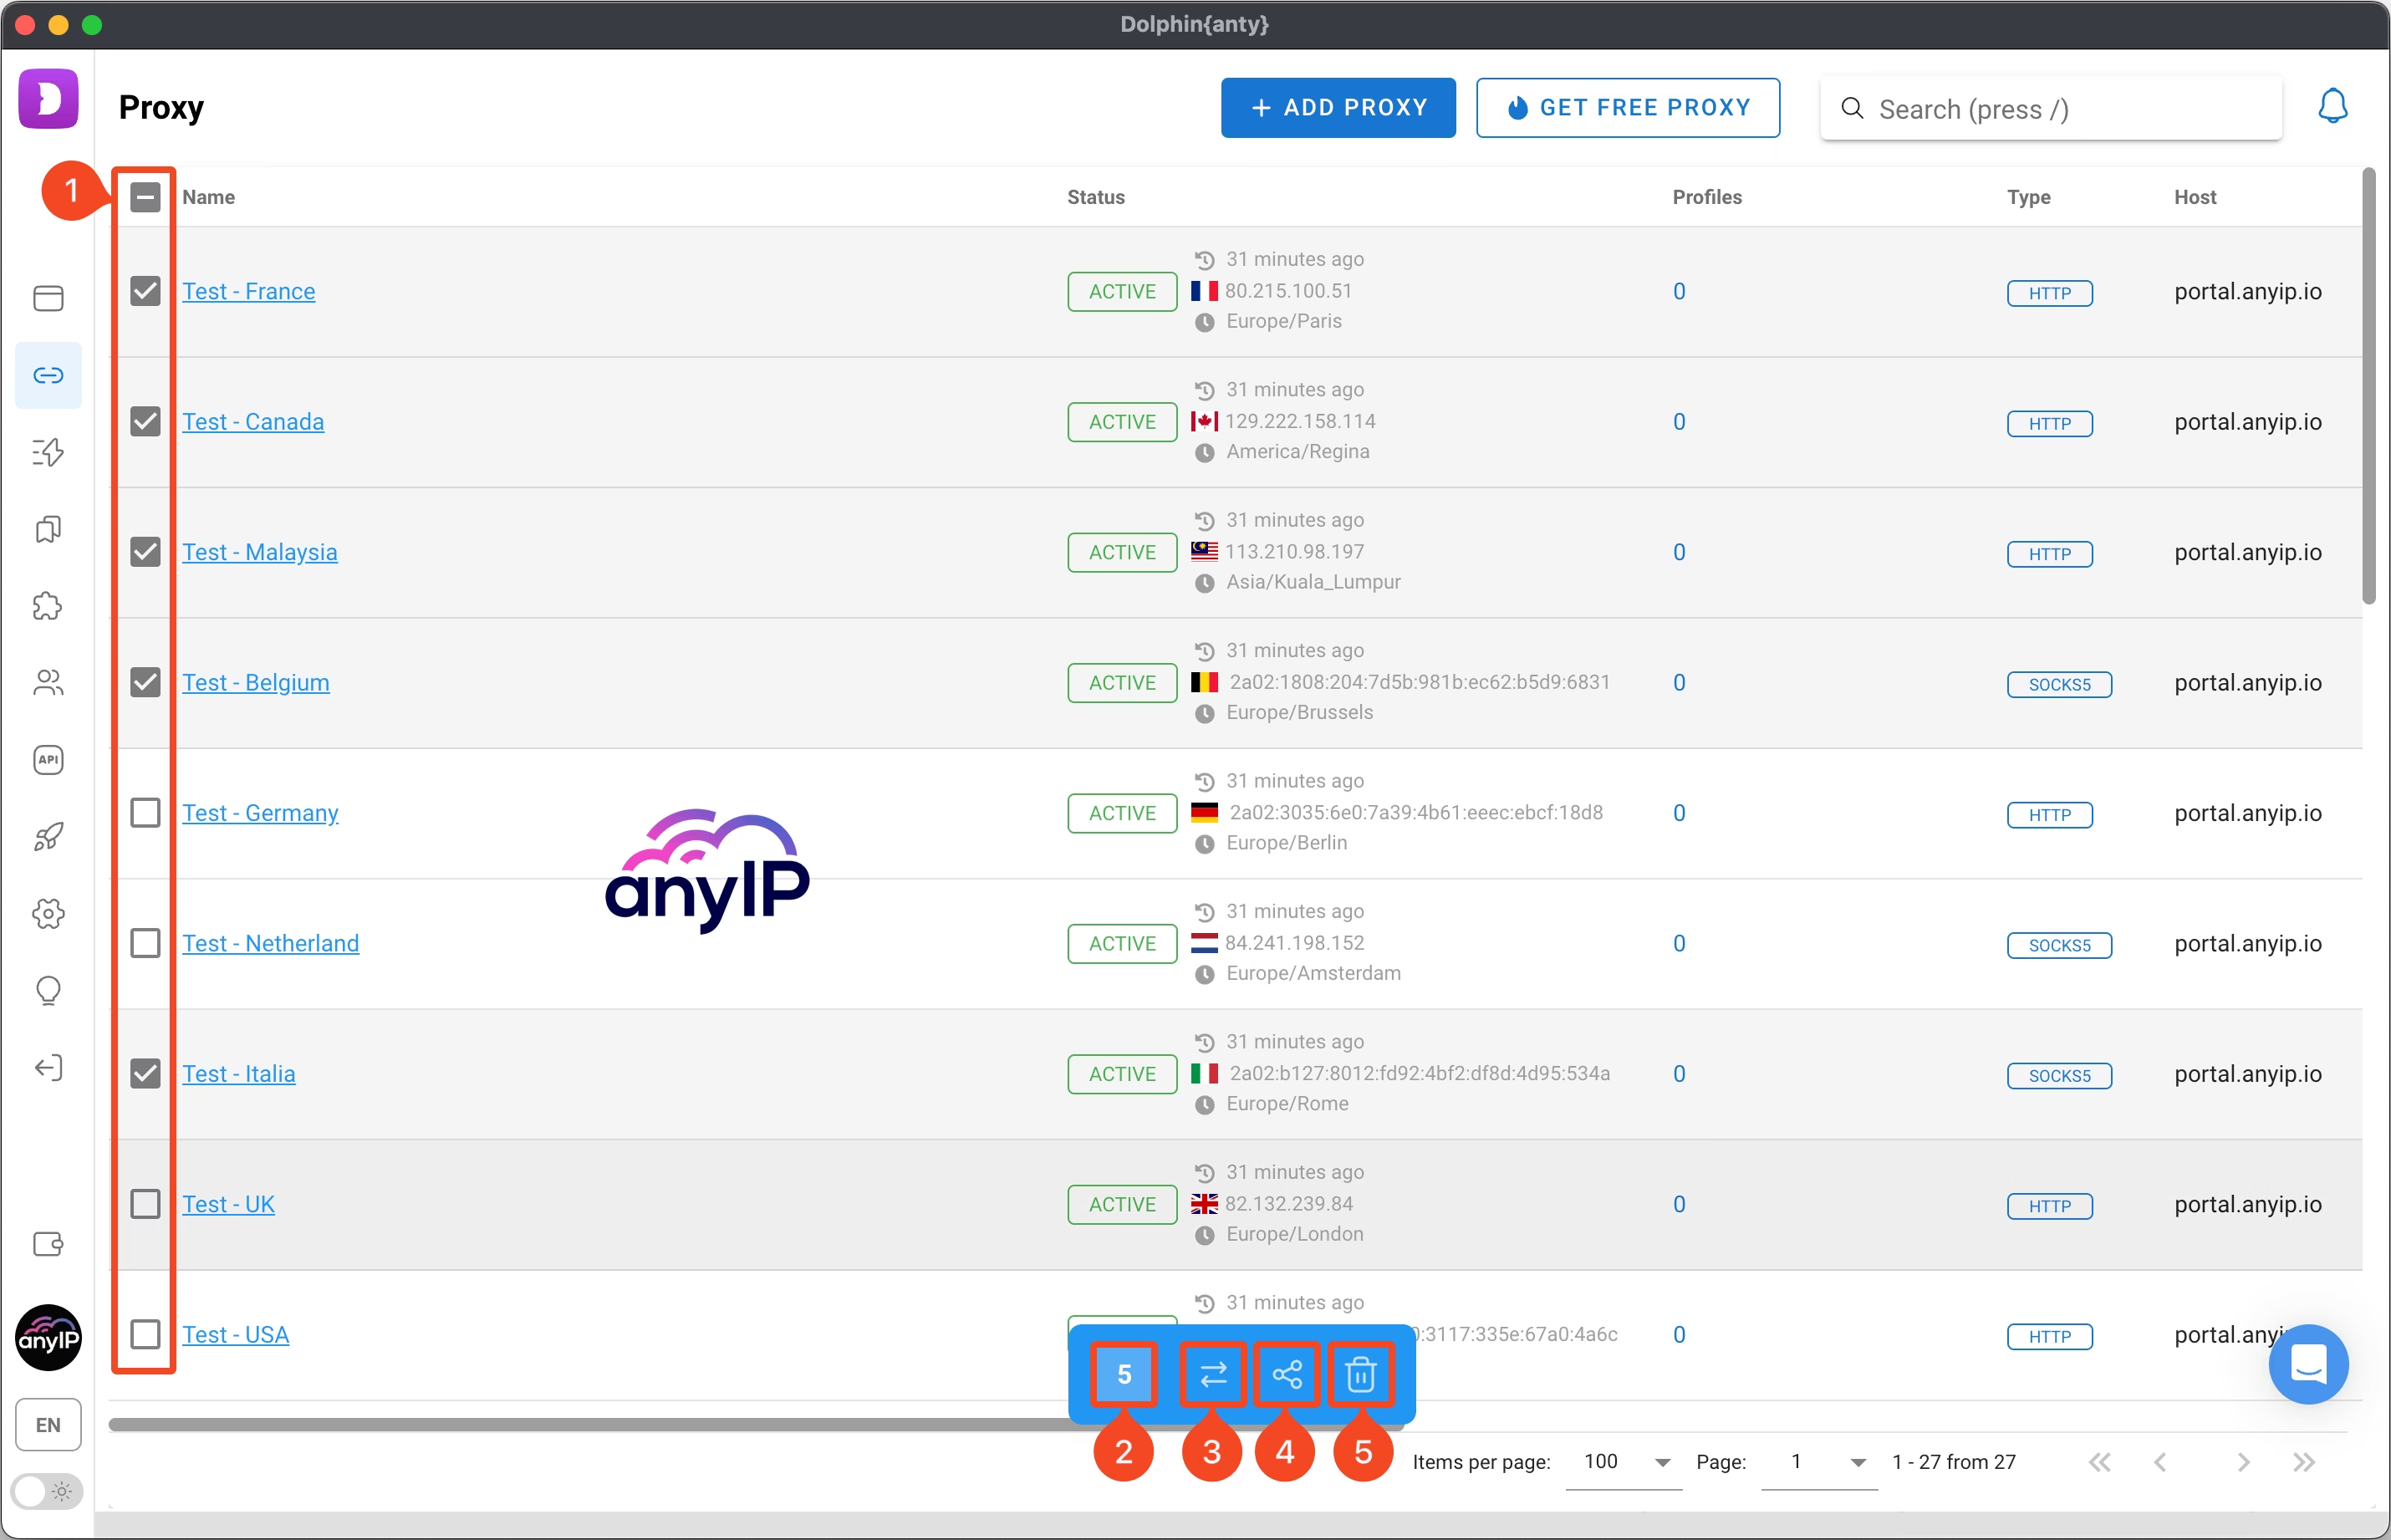
Dolphin simplifies bulk proxy management with an easy-access menu located at the bottom of the screen when you select one or more proxy profiles.
First, you need to select the proxies you want to manage (1), and then the menu will appear.
Total number of selected proxies.
Test the connection of your selected proxies to ensure they’re working
You can share the proxies.
And finally, you can delete the proxies. A confirmation modal will ask you to process.
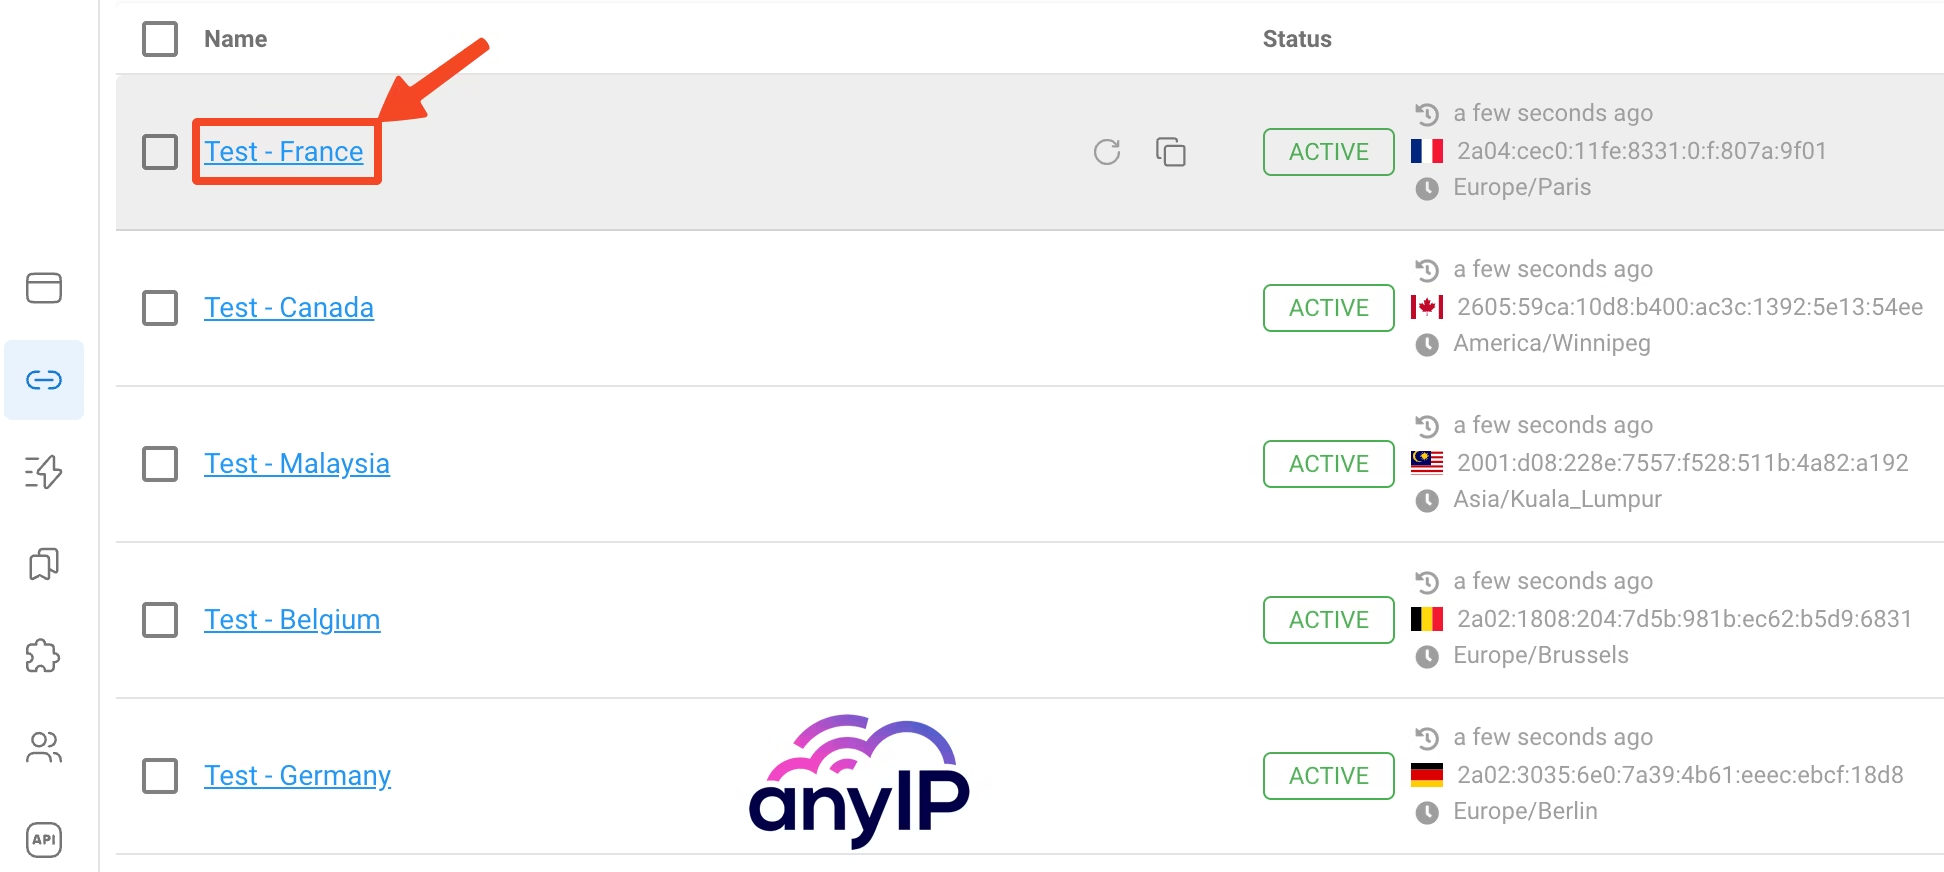
Edit a proxy
To edit a proxy, simply click on the name of the proxy you wish to modify and make the necessary changes.
Very similar to the creation form, you can edit every proxy detail you want (1) and proceed to a quick proxy connection check (2).
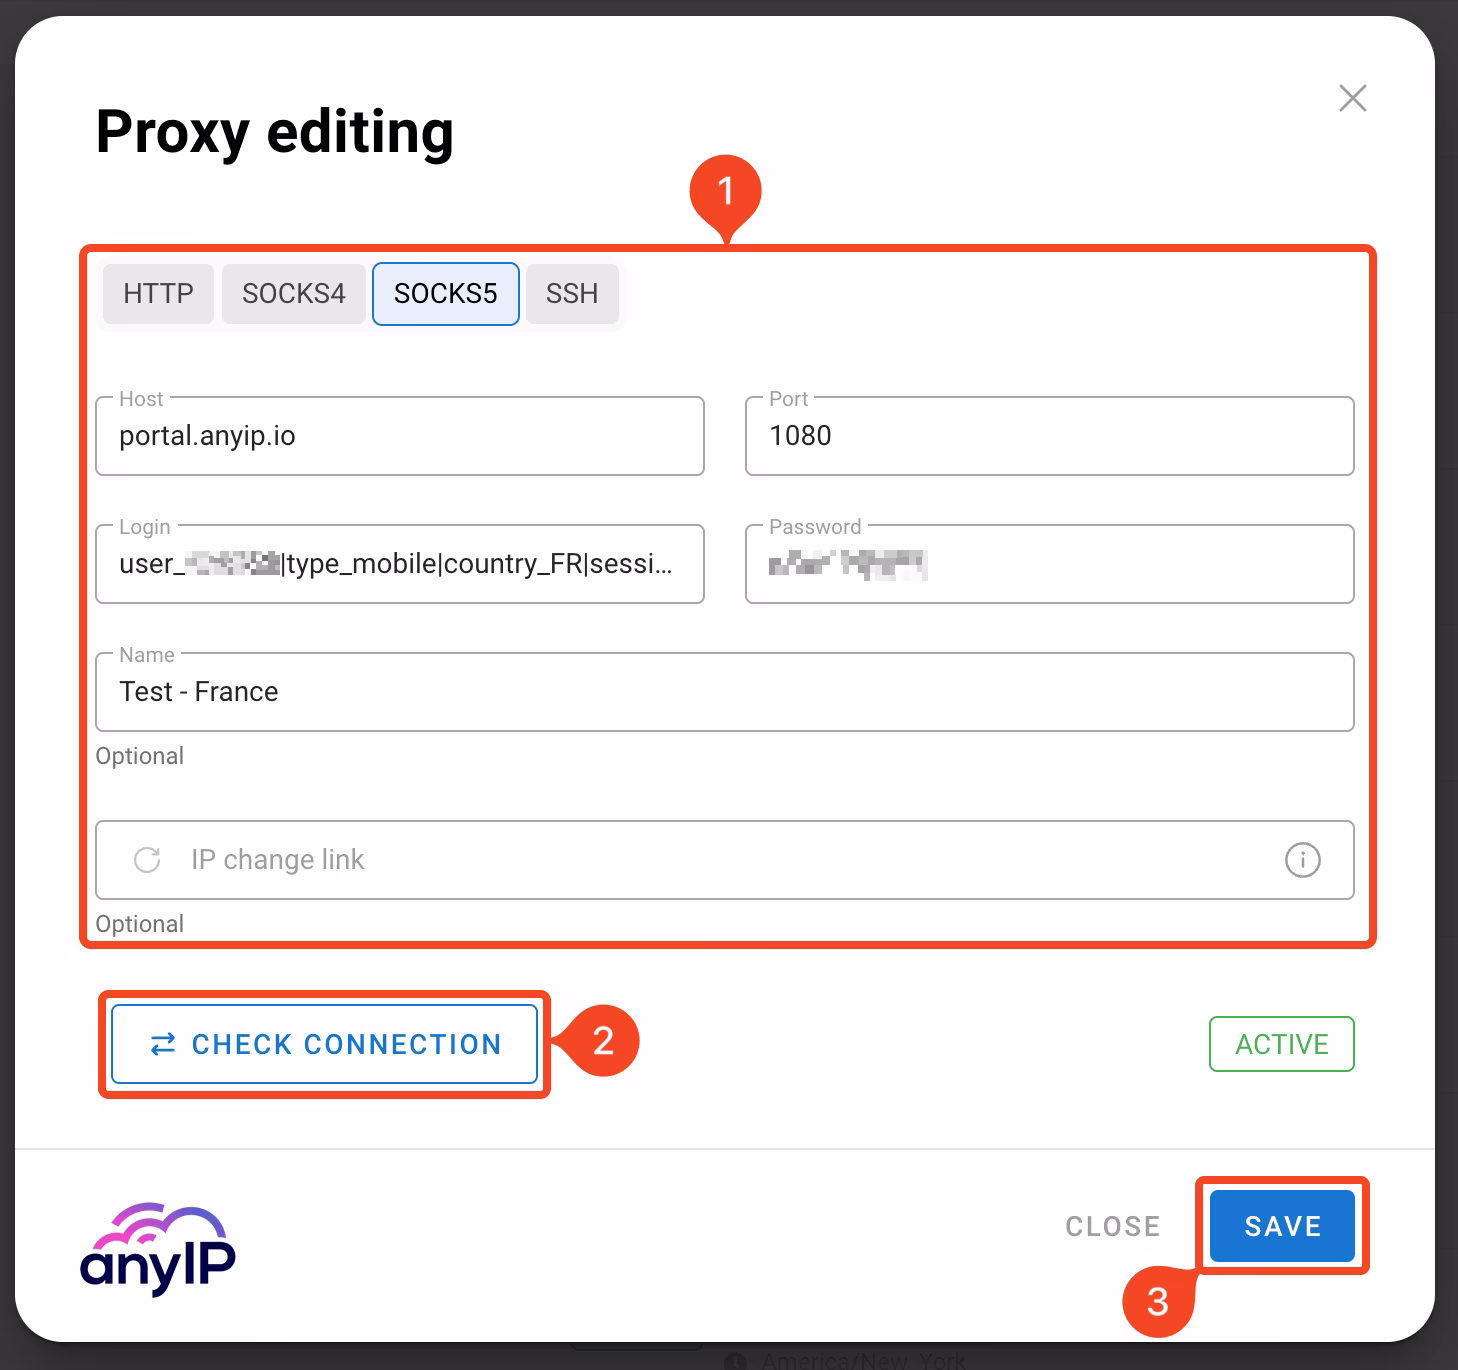
Once you've made your changes, confirm them by clicking “Save” (3).
💡 Dolphin Anty will return “ERROR” if you enter the wrong credential. Once you’ve inserted the correct information, your proxy will be active.
Browser profile Management
Profile configuration
Choose a name:
You can customize your profile with a name, tags, status, and an optional folder for better organization.

Choose a name to identify your proxy easily.
And add as many “Tags” as you need to categorize it.
You can also add a “Status” to your proxy.
Selecting a folder will allow you to be extra sleek with your profile management.
Select the OS and profile type:
You can also select a specific OS and randomize the user-agent with a simple click.
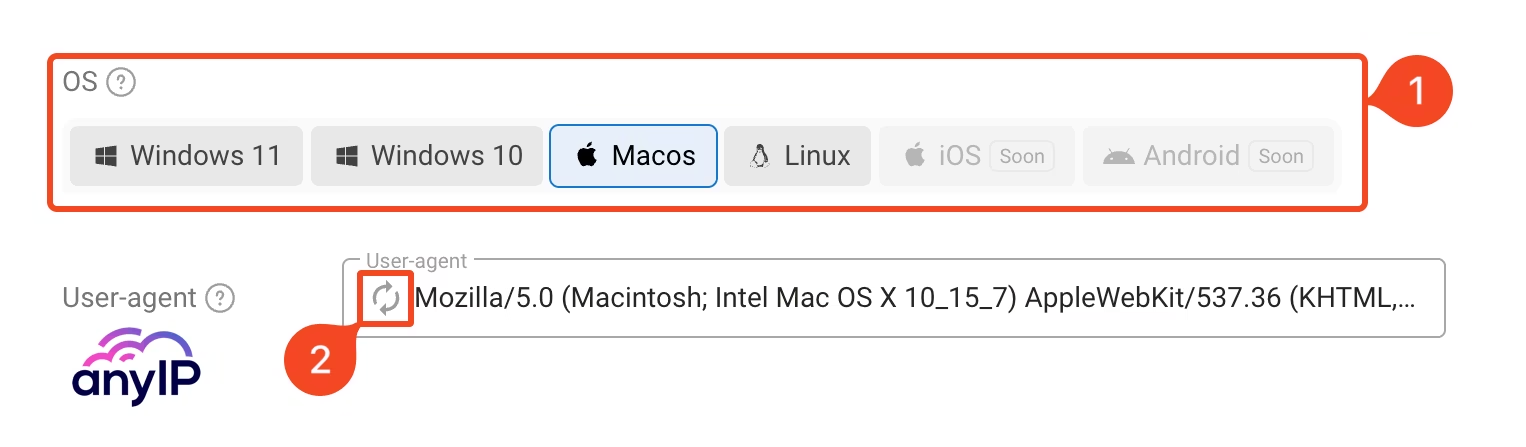
Select the OS you want among the most popular on the market.
Based on the recent update of Dolphin we can see that mobile OS will soon be available. That’s great news!
You can randomize the user-agent if needed. This is as simple as useful!
Advanced fingerprint configuration
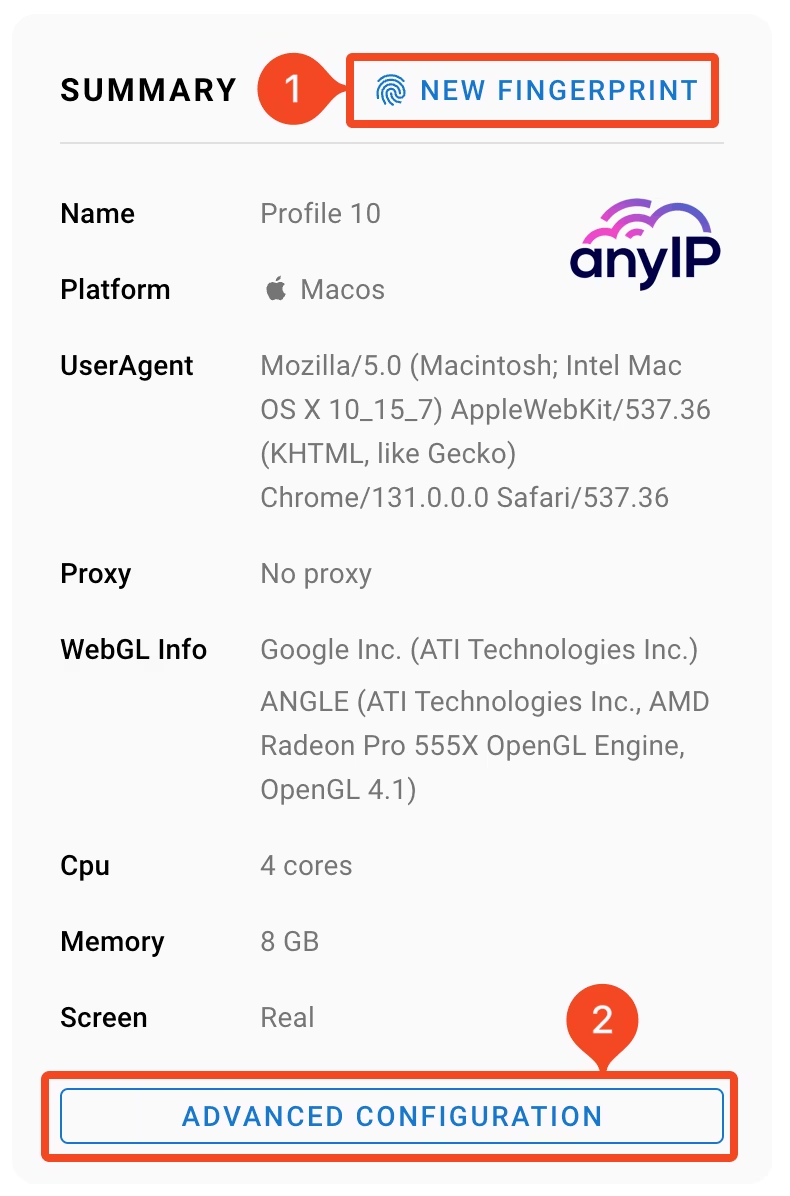
You can generate a new fingerprint by clicking the "New Fingerprint" button (1).
Alternatively, you have the option to manually adjust the fingerprint settings by clicking on "Advanced Configuration" (2).
This feature is designed for experienced users and should be used with caution, misconfiguring these settings can compromise your anonymity.
Edit your profile and more
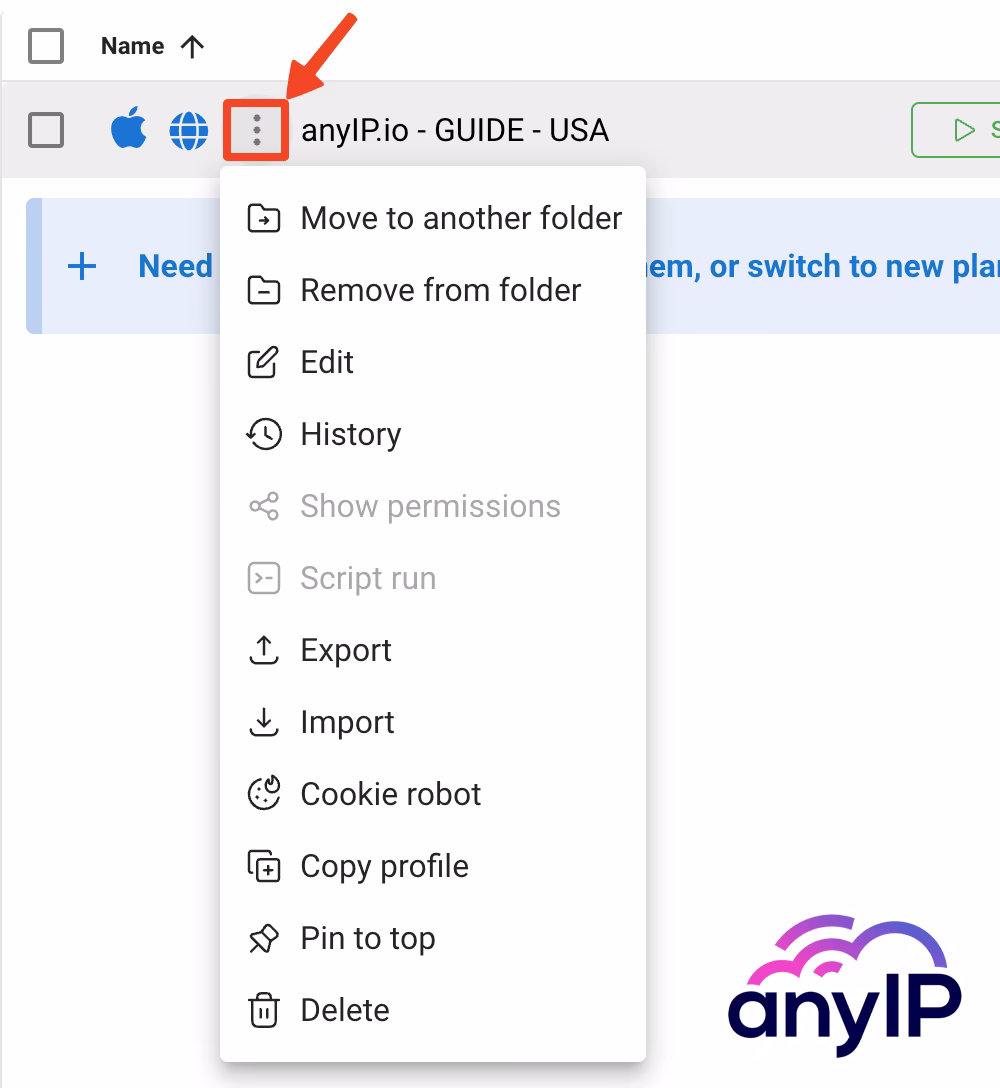
Move your cursor over the triple dot (next to your profile name) to open the contextual menu. This menu allows you to manage your profile.
It lets you:
Move or Remove your profile from the folder
Edit your profile.
Import and manage your cookies
Pin the selected profile to the top (you can pin up to 10 profiles max)
Delete your profile.
How to verify your online fingerprint
Checking your fingerprint is crucial to ensure that your online activity appears consistent and undetectable.
I've tested my profile on the most popular fingerprint scanners on the market to make sure my profile was bulletproof!
Here is what I got when testing my freshly created Dolphin Anty profile:
|
|
|
|
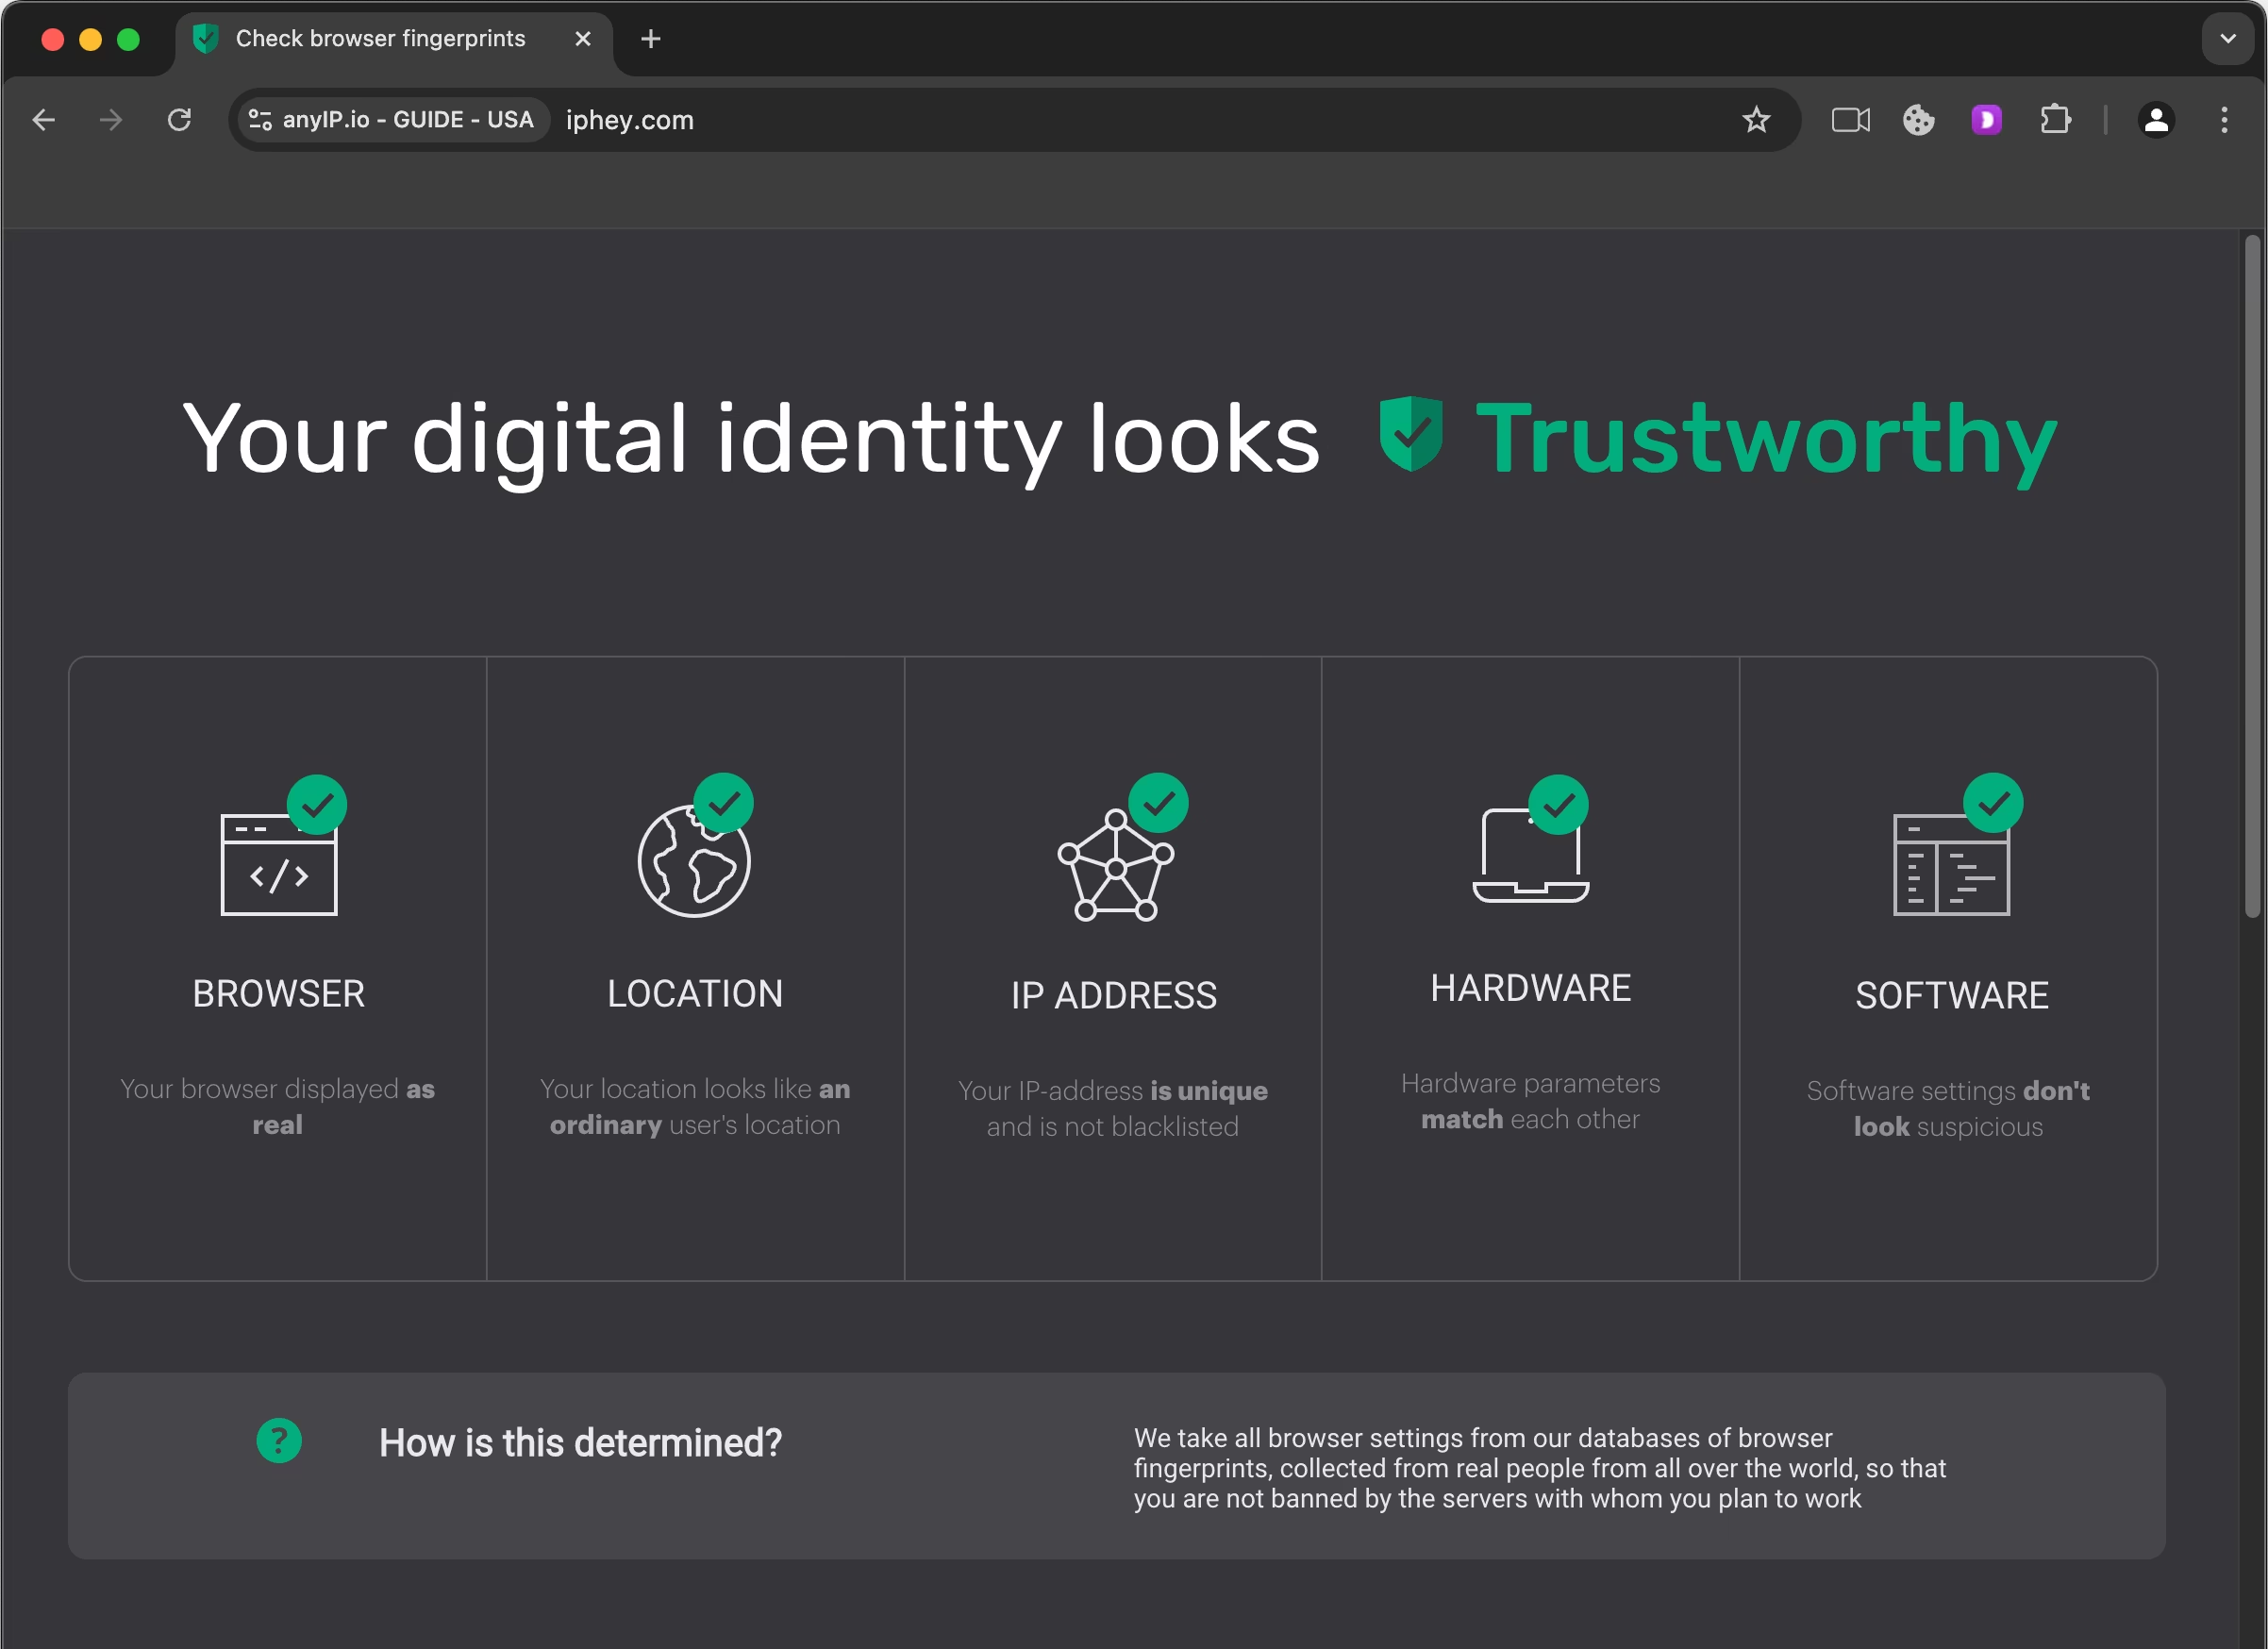
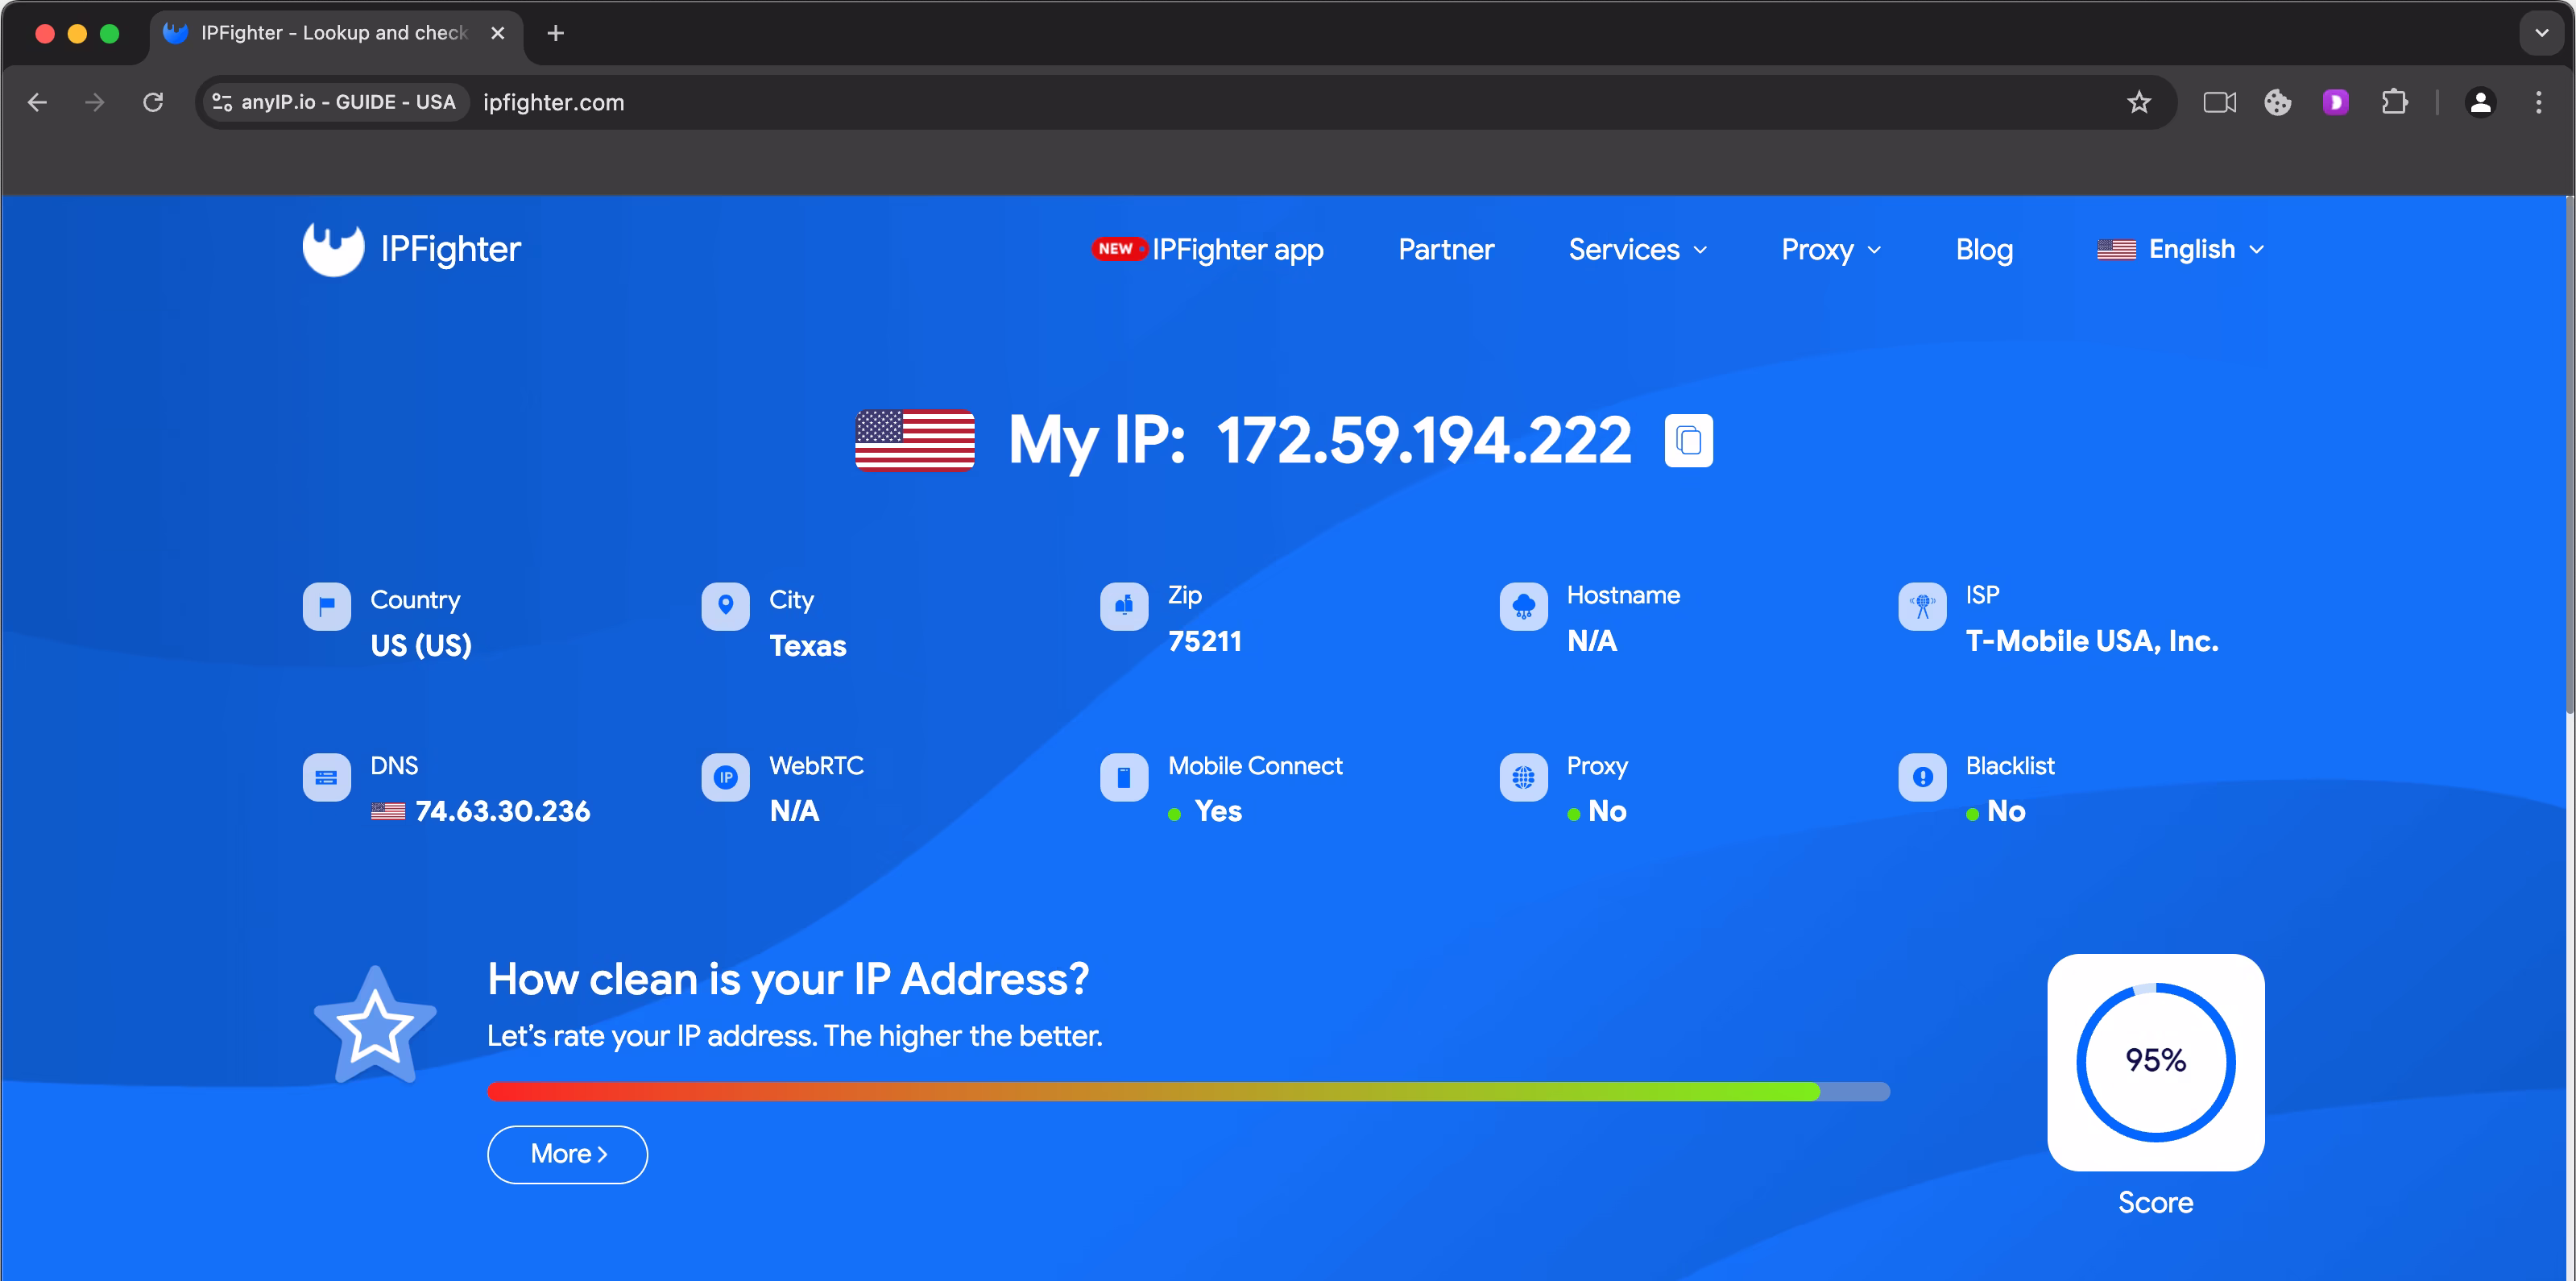
As you can see, the profile is well-configured and ready to use in real conditions! Well done, Dolphin!
Managing with Dolphin Anty API
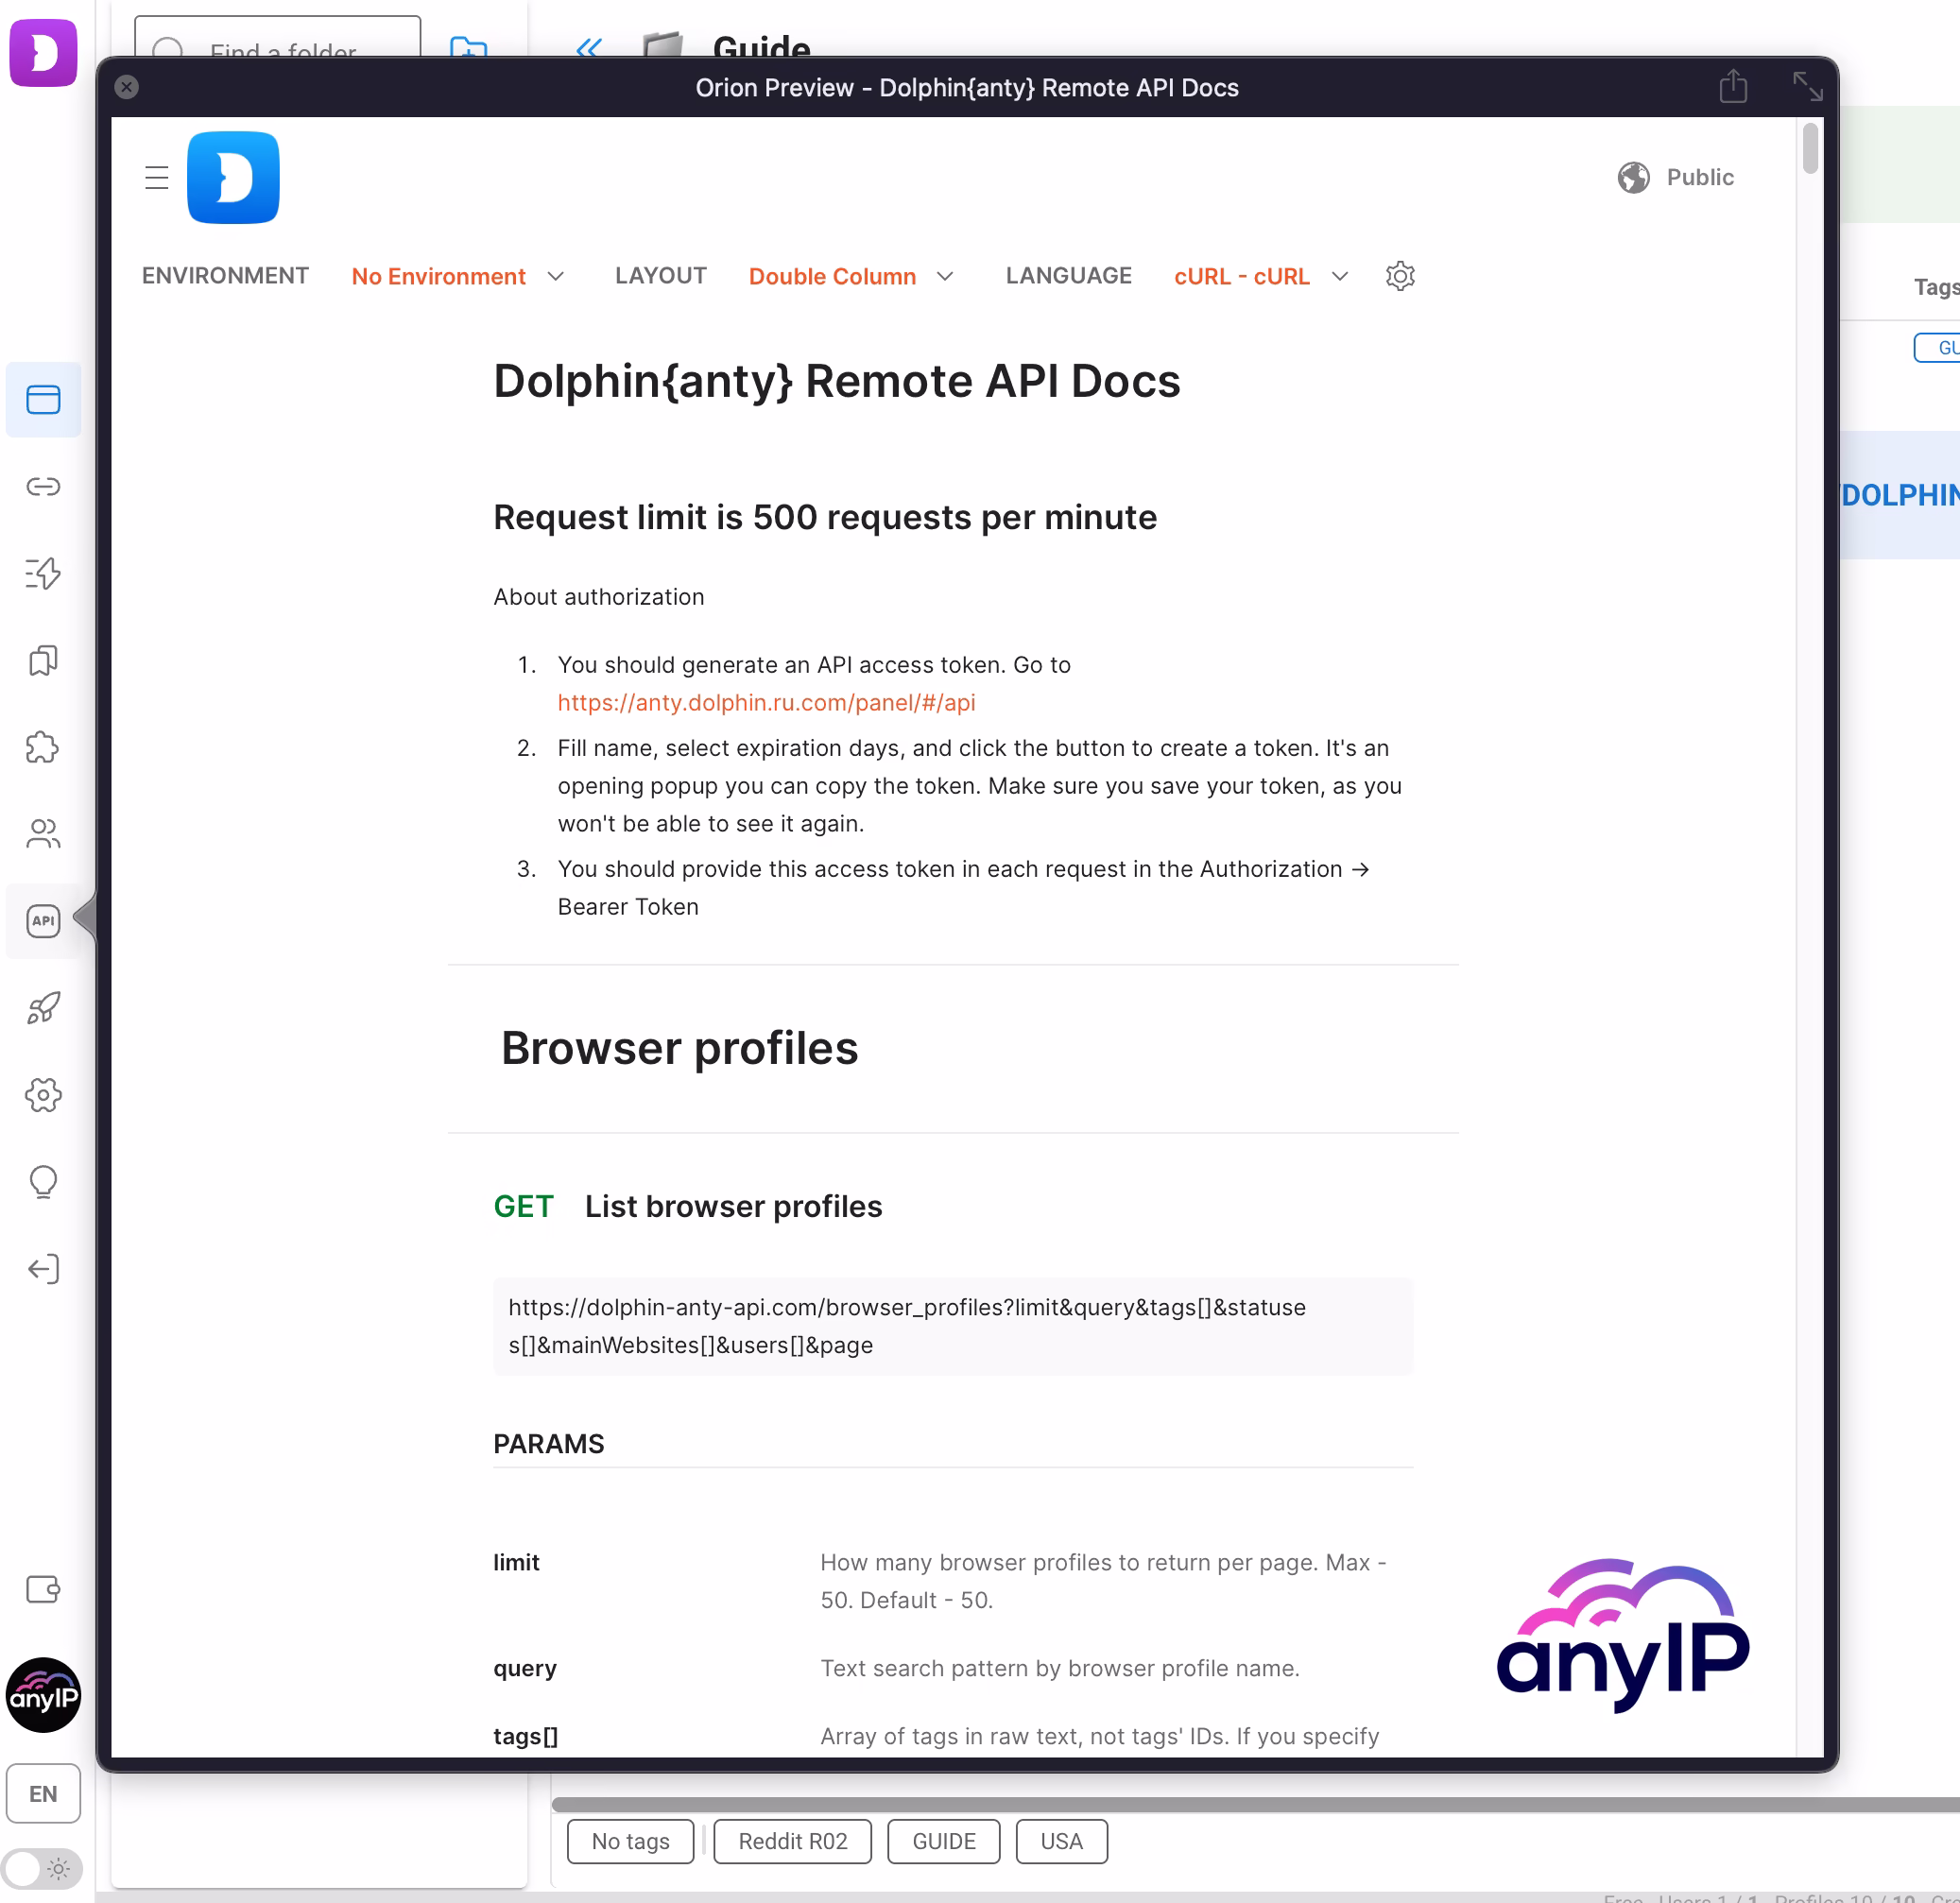
For those with more technical skills who want to try another method to manage their profiles and proxies. Dolphin Anty offers a remote API.
The API offers many endpoints and allows you to manage:
Your browser profiles, along with the fingerprints.
All yours proxies.
Your users list.
The additional cookies, bookmarks, or browser extensions.
To learn everything about the API, have a look at the official documentation using the following link Dolphin Anty API.
To access every API endpoint, you will need to have a paid subscription active
Grab Your Proxy Today with anyIP.io
Empower your online activities with top-tier proxies from anyIP.io!
Sign up in under 5 minutes and enjoy secure, dependable connections. With 24/7 support, our team is ready to assist you every step of the way for a seamless setup experience.
Article by
Khaled Bentoumi
Khaled is a software engineer. He's been involved in many startups of different sizes. Previously, he founded Data to Page, an AI Programmatic SEO startup. He now handles all the marketing at anyIP.


Article by
Khaled Bentoumi
Khaled is a software engineer. He's been involved in many startups of different sizes. Previously, he founded Data to Page, an AI Programmatic SEO startup. He now handles all the marketing at anyIP.
Read more

How to customize Your User-Agent with Python Requests
Learn how to update and rotate user-agents in Python Requests to avoid detection and improve scraping efficiency.

