
Table of Contents
Key takeaways
Hidemyacc v3 offers advanced automation for managing multiple digital identities.
anyIP.io provides premium, reliable global proxies for various online activities.
The Hidemyacc proxy integration process is intuitive with quick add and proxy manager options.
Users can customize browser fingerprints extensively for enhanced privacy.
Hidemyacc supports multiple OS and browser emulations for versatile use.
Hidemyacc is a robust anti-detection browser designed to help users manage multiple online profiles securely and anonymously. The recent v3 introduced more advanced automation features, cross-platform support, and enhanced browser compatibility, making it a powerful tool for anyone needing to maintain multiple digital identities. With continuous updates and a user-friendly interface, Hidemyacc is one of the leading solutions in the anti-detection browser market.
At anyIP, we provide premium global proxies, including mobile and residential options, to support activities like data scraping and online tasks. Backed by our industry expertise, we ensure top-quality service and practical solutions you can trust.
Follow this step-by-step guide, and you’ll know how to integrate and use your proxies on Hidemyacc.
💡 Before starting this guide, make sure you have:
An Hidemyacc account (they offer a seven-day free trial).
Hidemyacc desktop installed on your computer.
Your proxy credentials (Get your account here):
username/password;
proxy server infos (URL or IP + port) ;
How to create your first browser profile on Hidemyacc
Step 1: Create a new browser profile
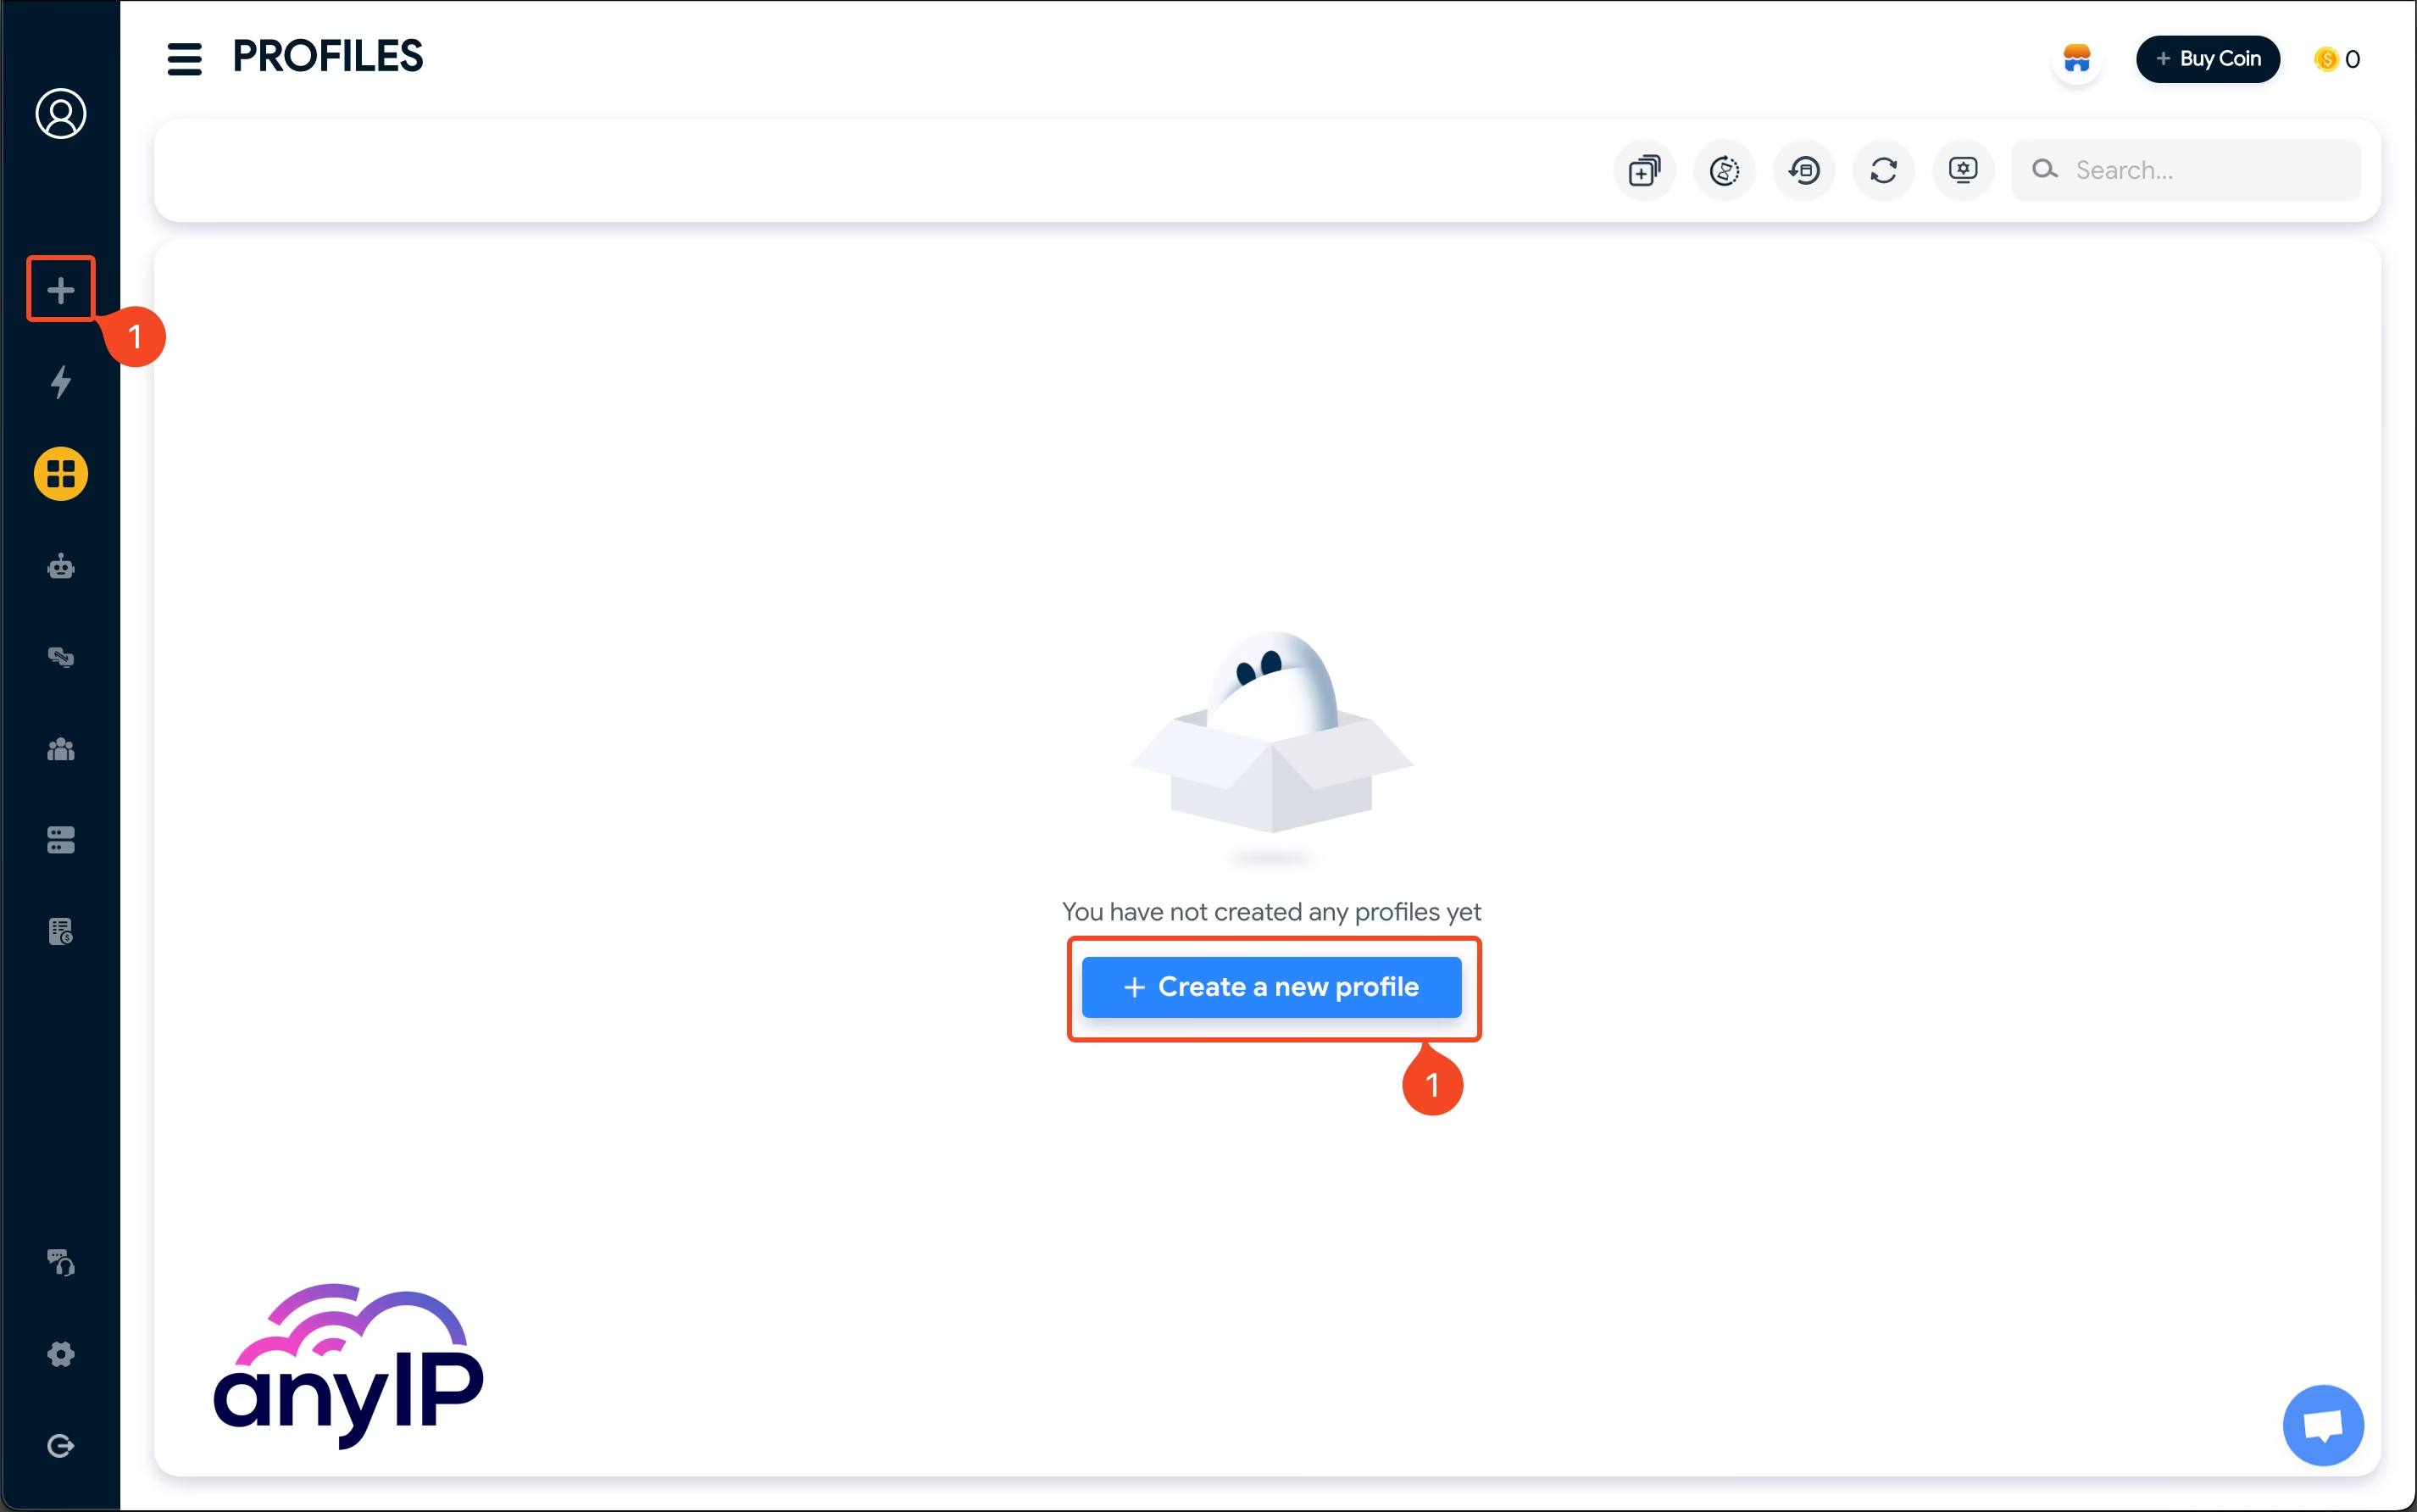
You'll have no pre-configured profile when you open the Hidemyacc app for the first time. To create your first profile (1) either:
click on “Create a new profile.”
or use the “+” button.
The form is very well segmented, start by naming your profile (1) and the essential information.

|
|
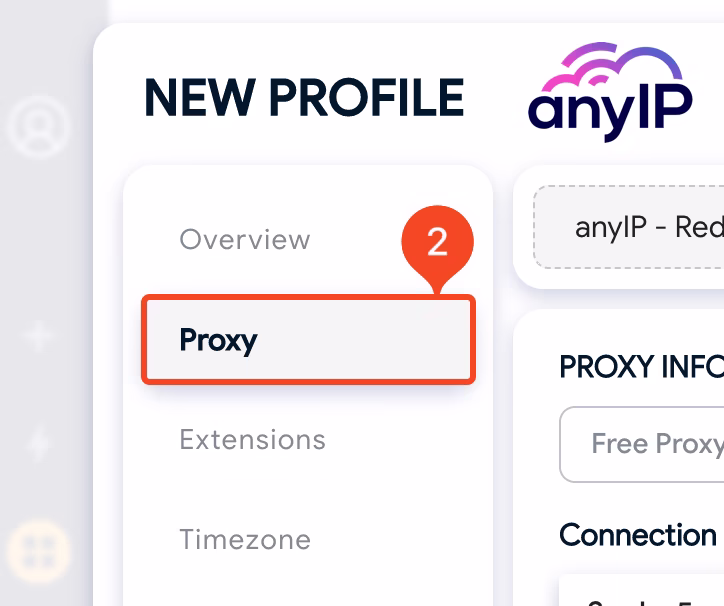
Once you’ve completed the overview information, click “Proxy” (2) to configure your proxy. |
Step 2: Configure the proxy
I like how the creation process is very well-designed and intuitive.
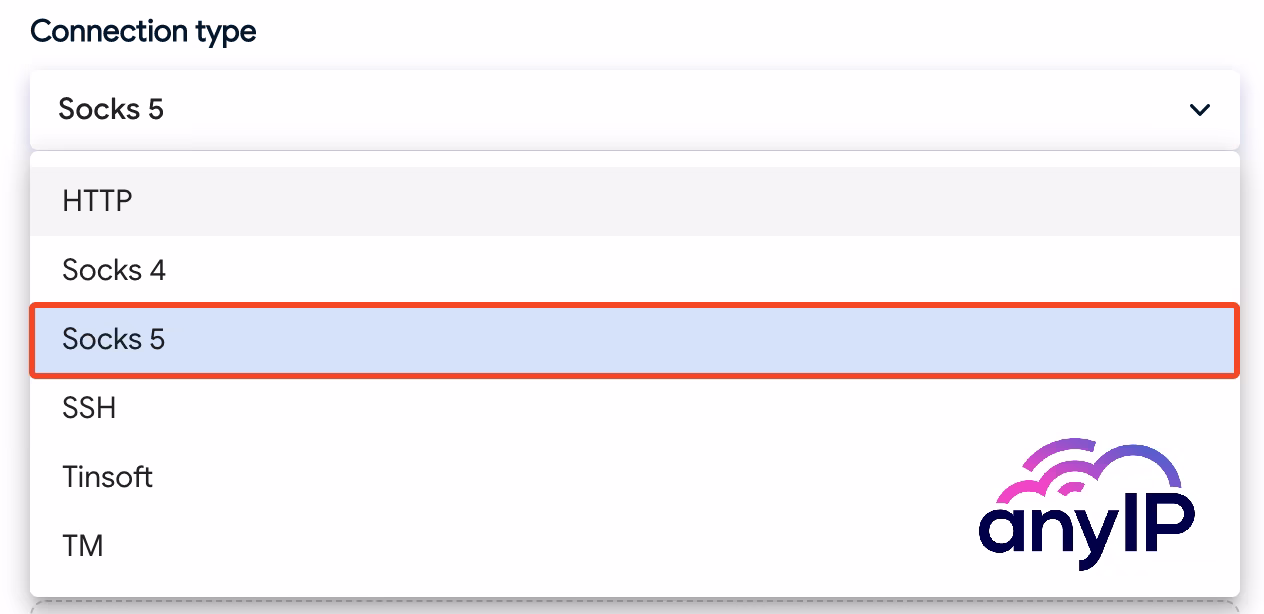
Here you select the protocol you want to use.
At anyIP.io, we offer fast and reliable HTTP/HTTPS and SOCKS5 proxies.
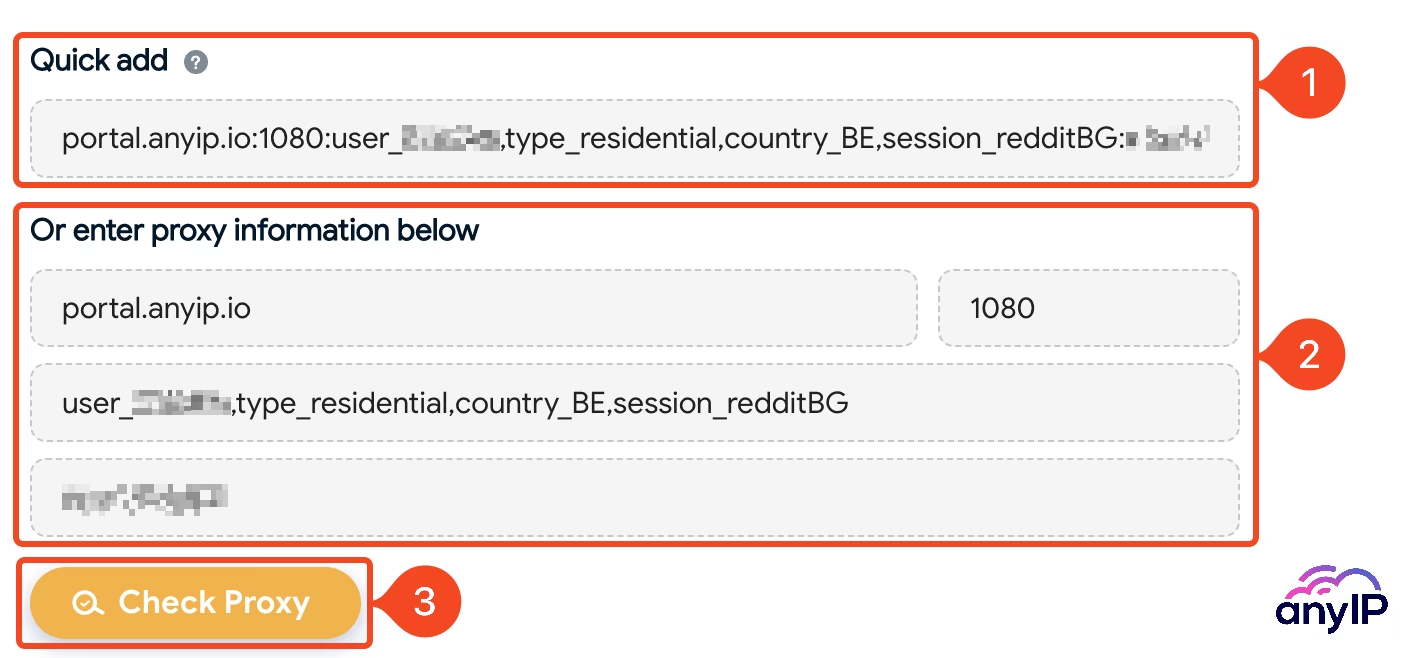
You can either copy/paste your proxy profile directly into the “Quick add” field (1) or enter each information separately on the form below (2).
No worries; either way, it works just fine.
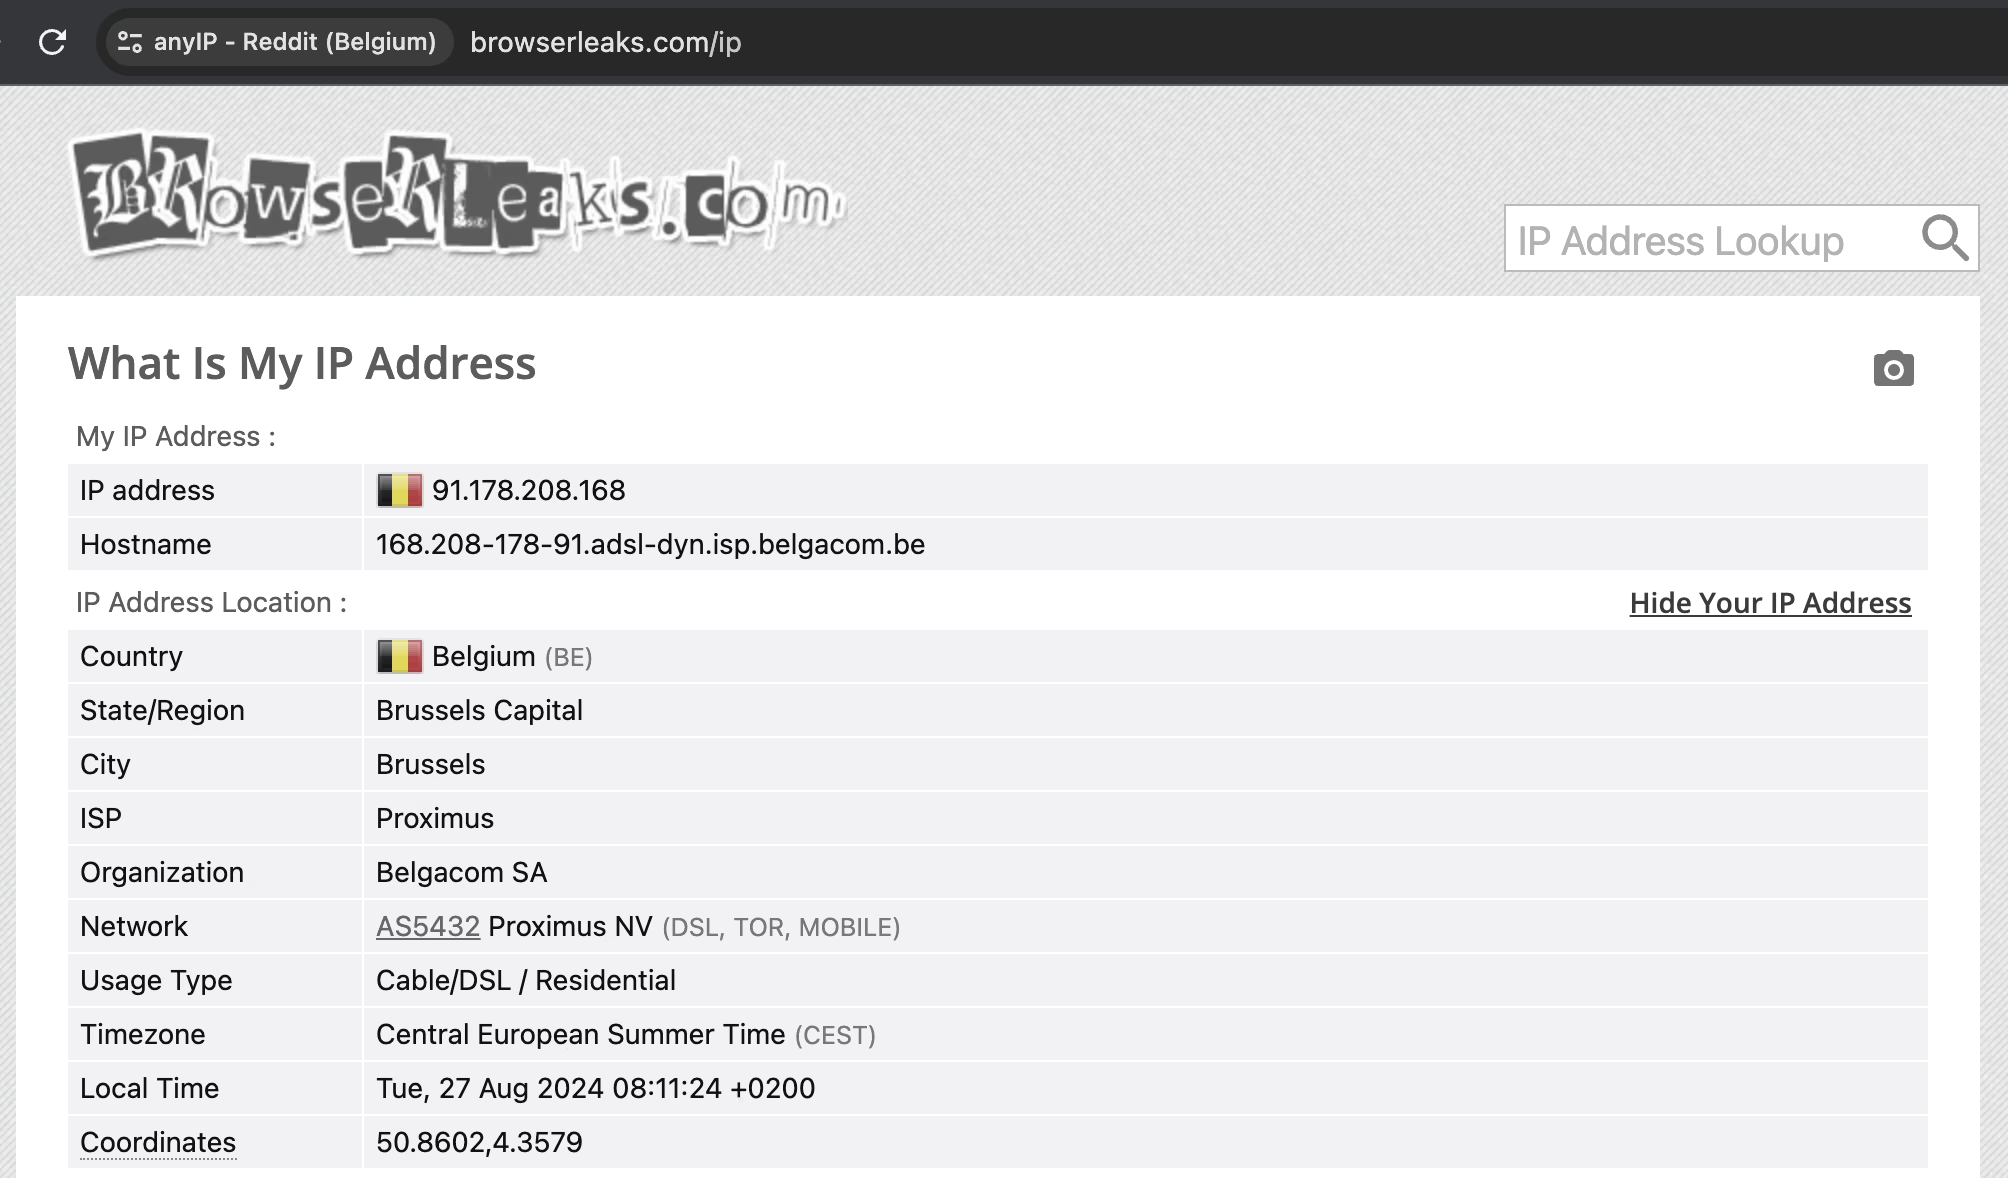
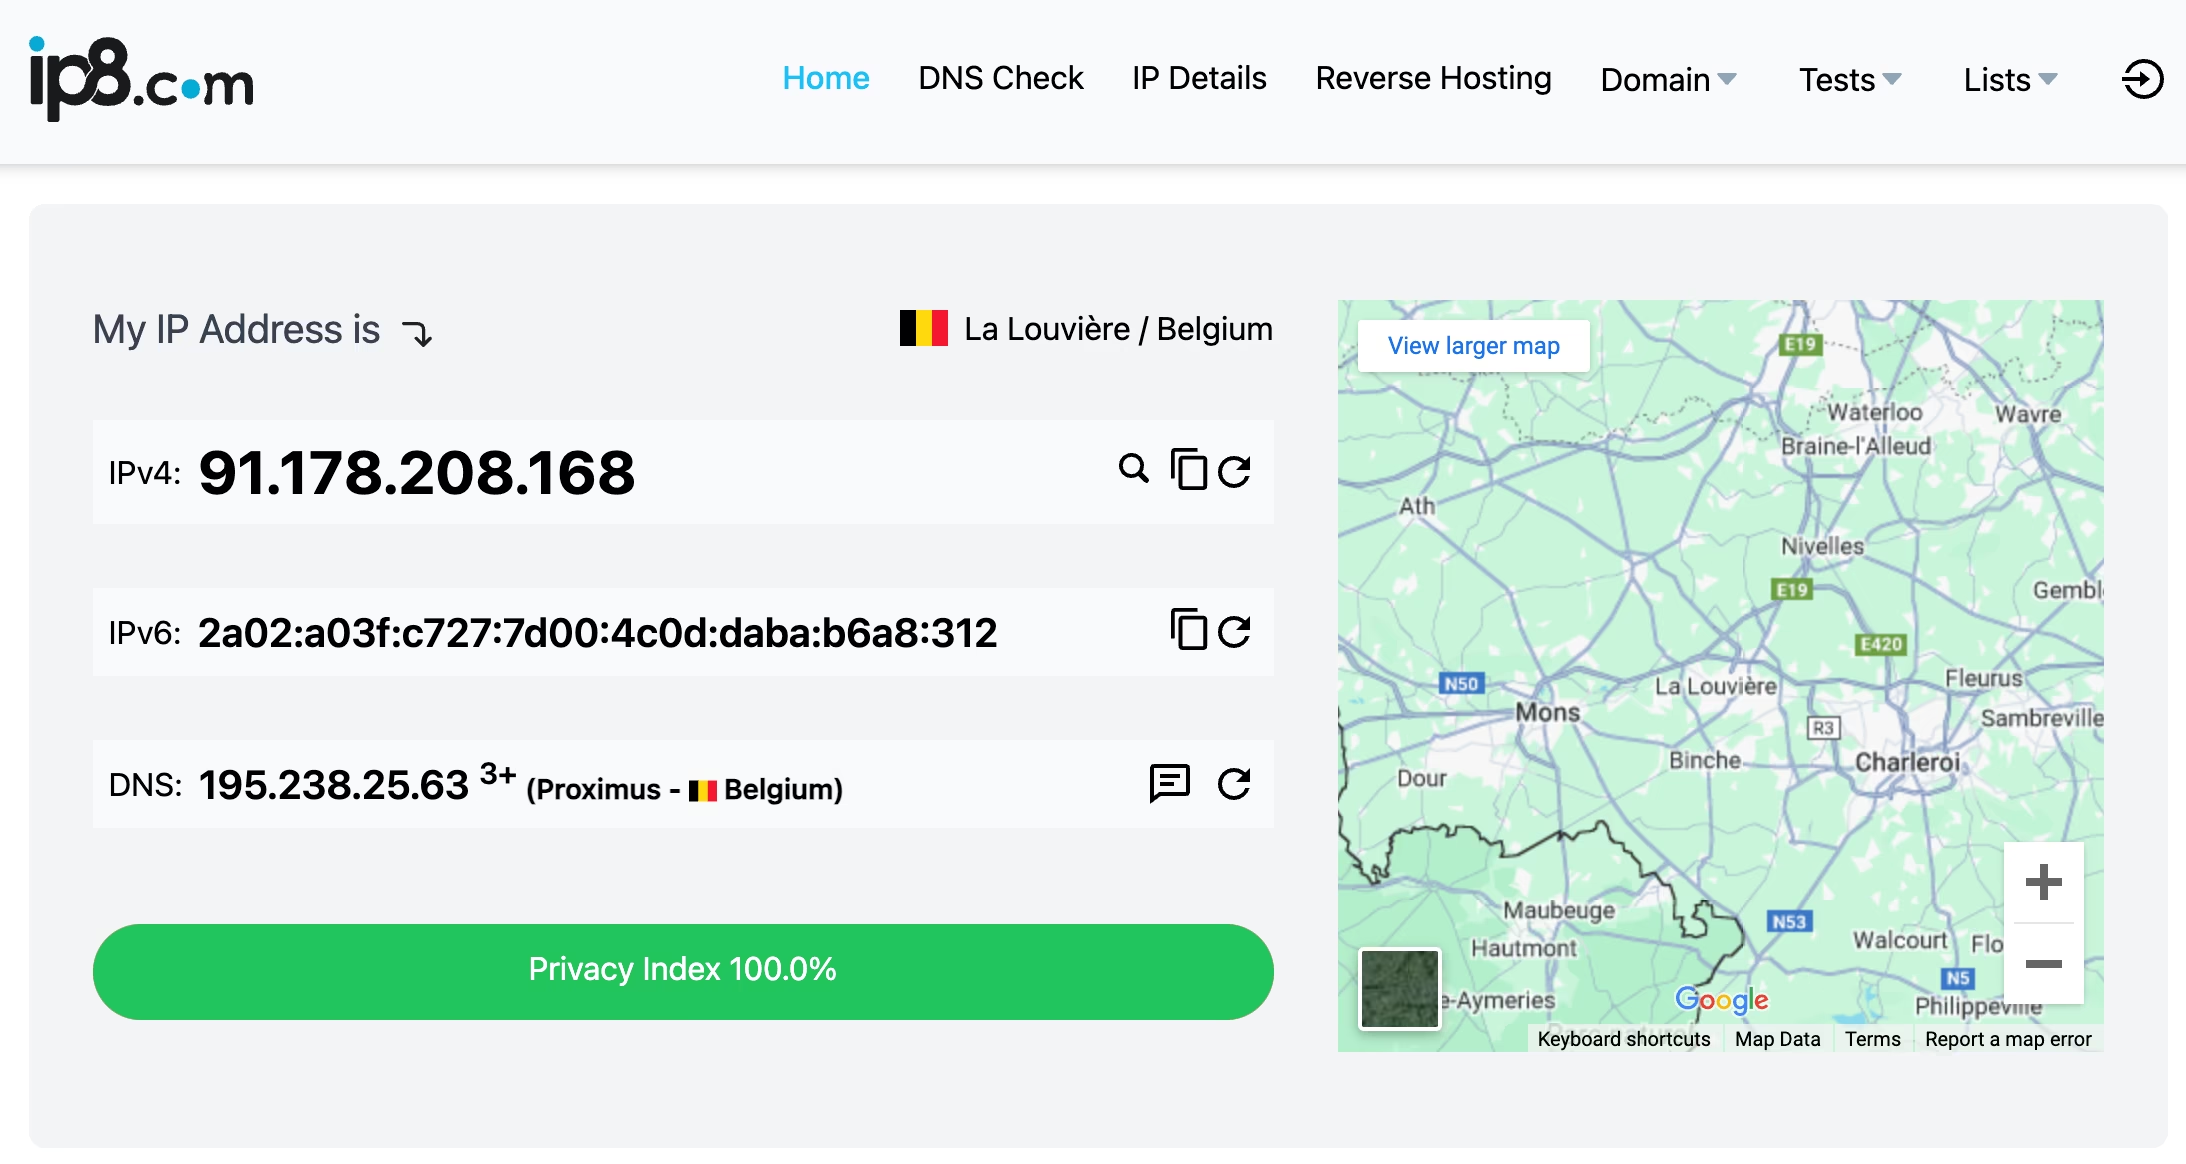
You can also click the “Check proxy” (3) button to verify the proxy connectivity. I can quickly confirm that I’m well located in Belgium, perfect!

💡 You can directly paste a proxy if you are using the proper format:

You can use this format to paste the proxy directly from your clipboard:
- IP:Port:Username:Password
portal.anyip.io:1080:user_xxxx:yourPasswordIf you choose the quick add option, you can hit “enter,” Hidemyacc will automatically convert the proxy format.
Now that your proxy is well configured (1), double-check that you’ve set a name (2) and click on “+ Create” (3) to save it.

Step 3: Save and Run your profile
With your new profile saved, you should now see it on the profile list.
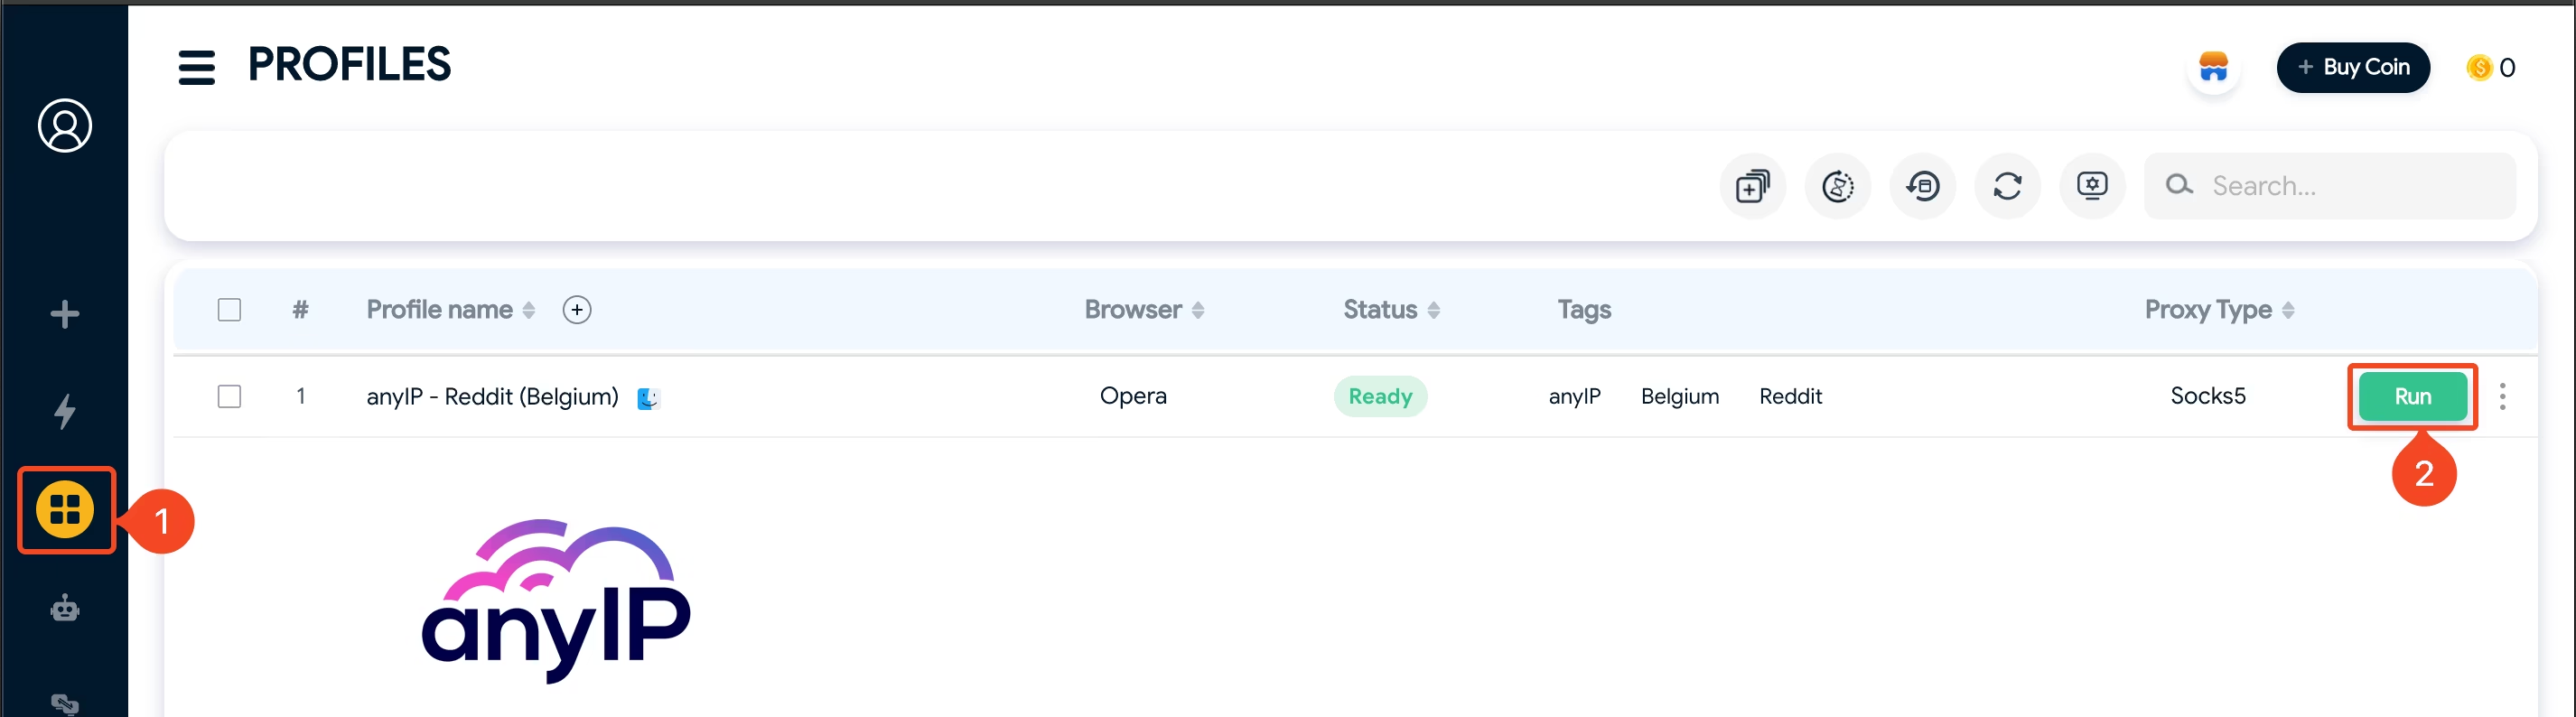
If you don't see it, click the "Profiles" button (1) on the left menu bar to open the profiles list. You can then click the green "Run" button (2) to open the browser.
How to manage your proxies on Hidemyacc
While you can configure the proxy at the same time as creating the profile, Hidemyacc offers a dedicated interface for managing your different proxy accounts.
To access it, click the “Proxy Manager” icon (1) on the left menu.
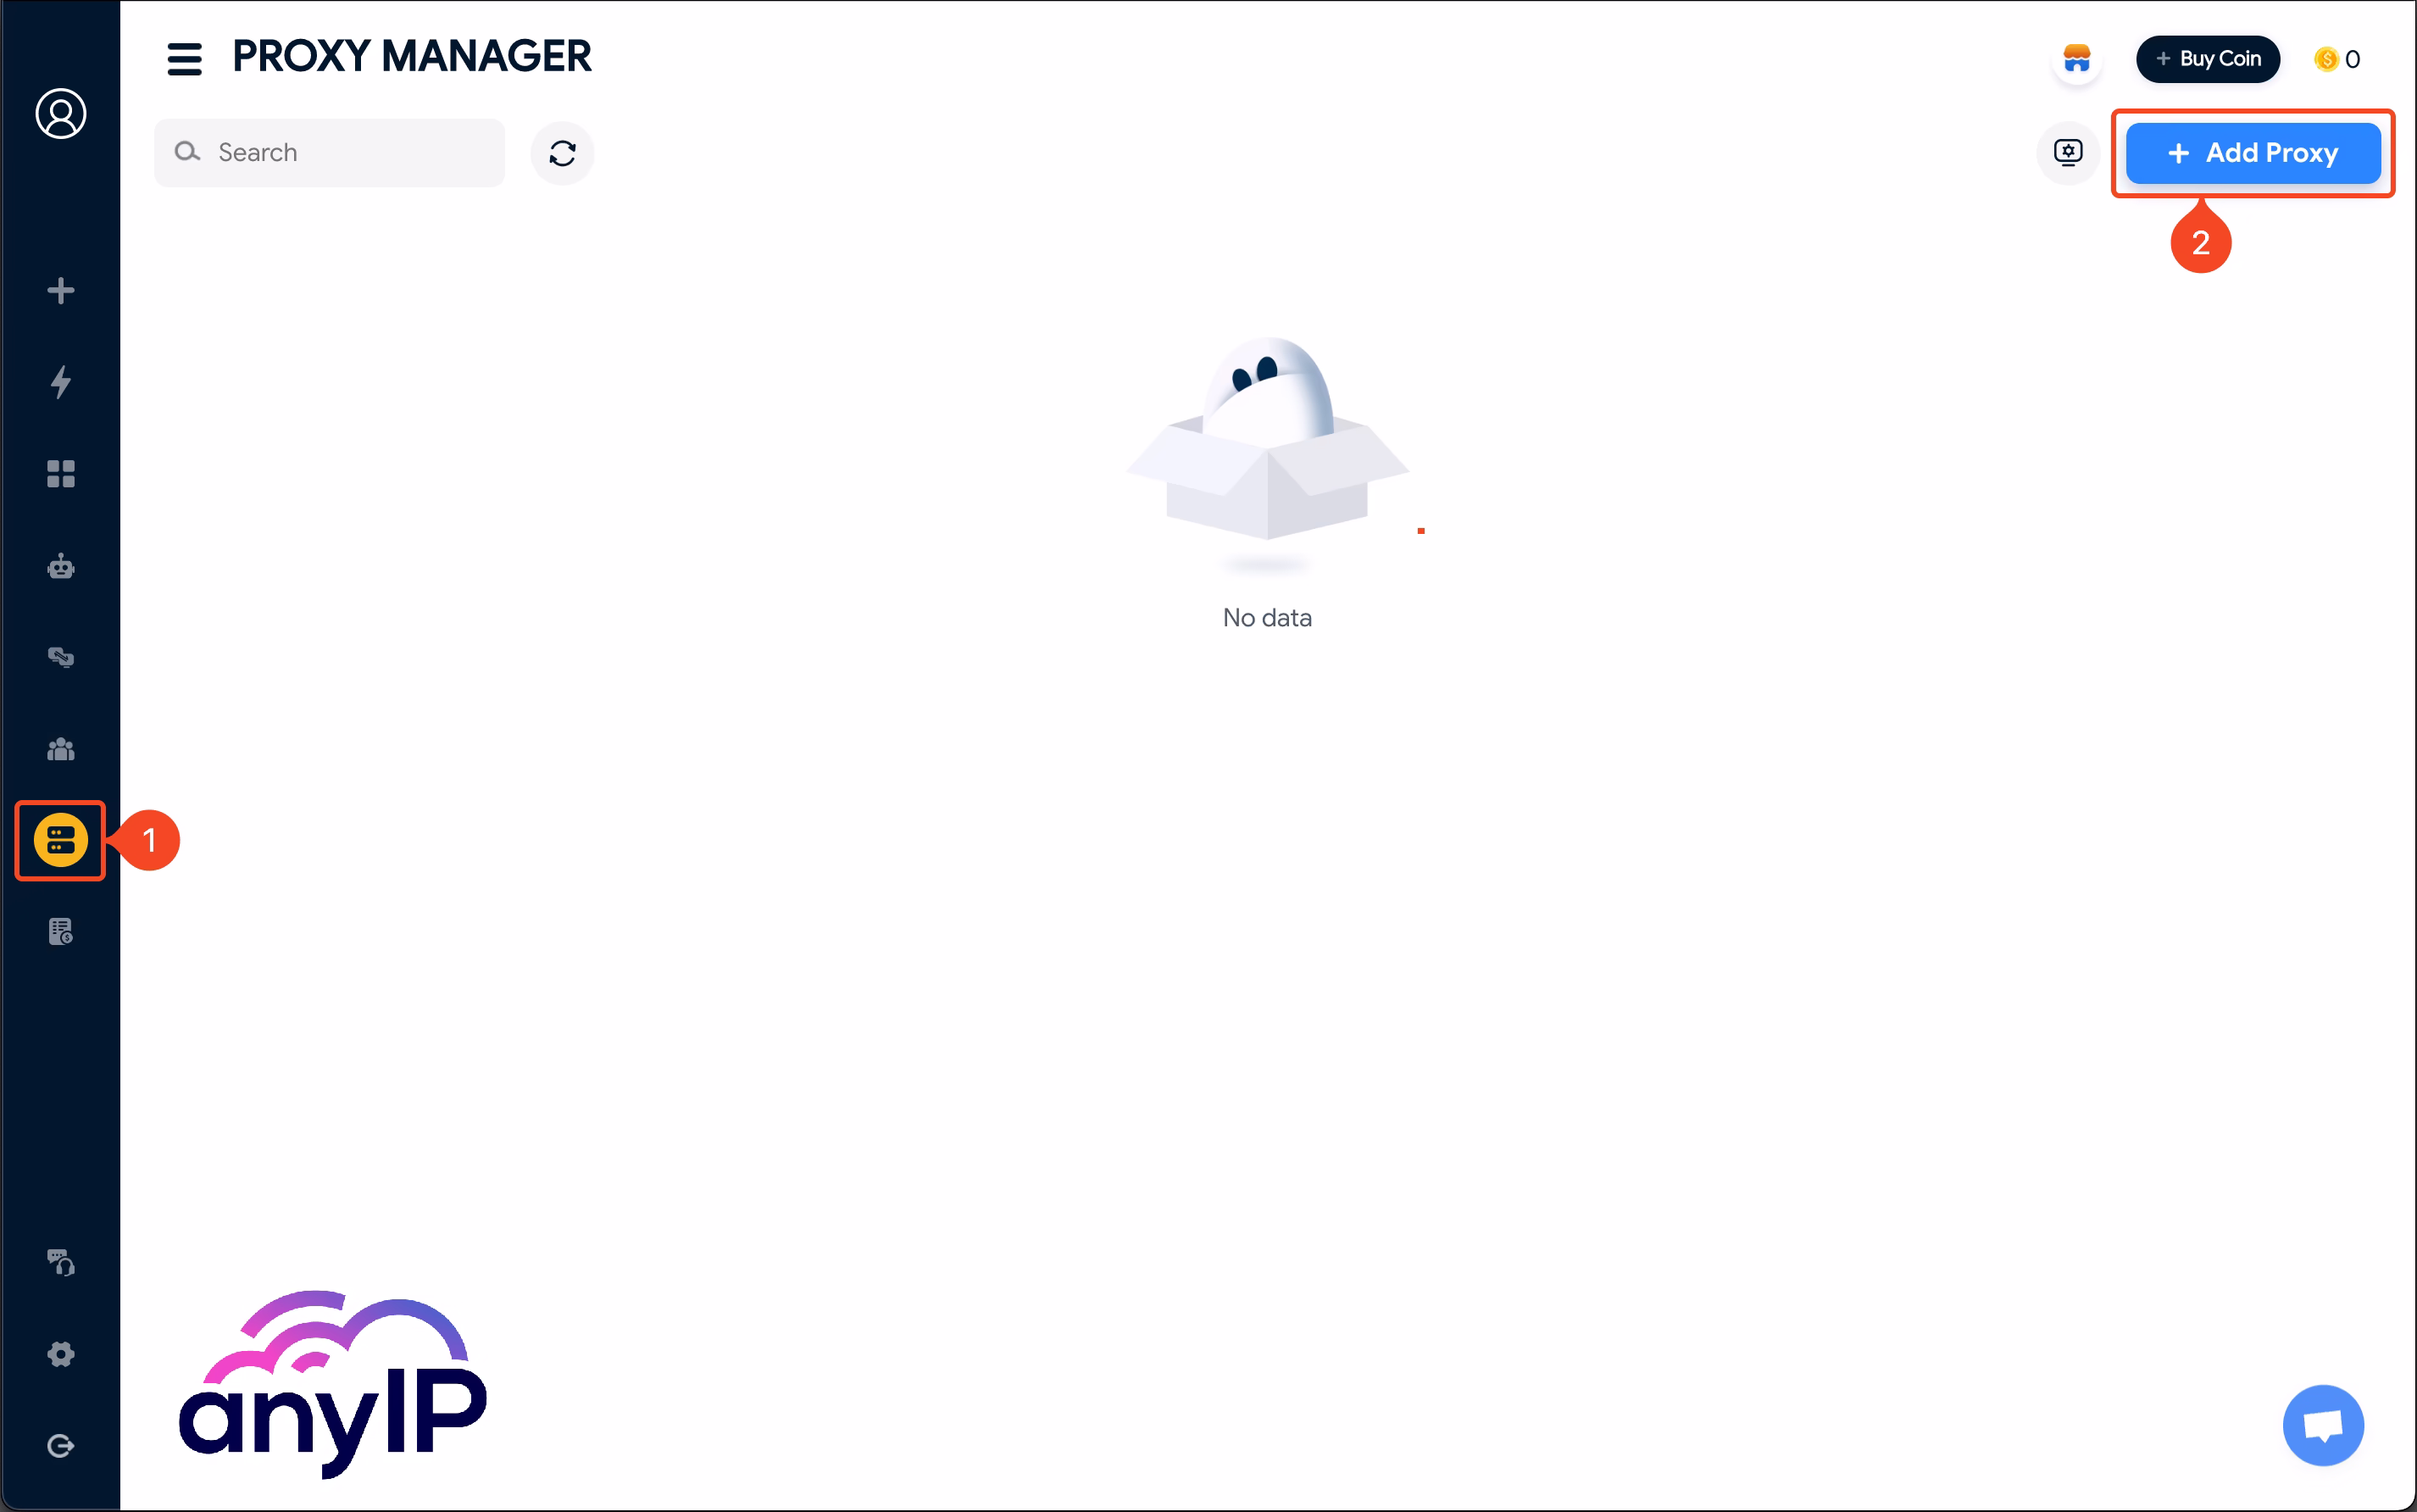
If you followed our guide and are using the application for the first time, you'll see that you have "No data" to display.
💡 Hidemyacc does not save the proxy you've configured directly in a browser profile. If you need to reuse the proxy, you need to add it using the proxy manager.
Add one or multiple proxies
Open the form by clicking “+ Add Proxy” (2). The form is easy to get and straightforward:
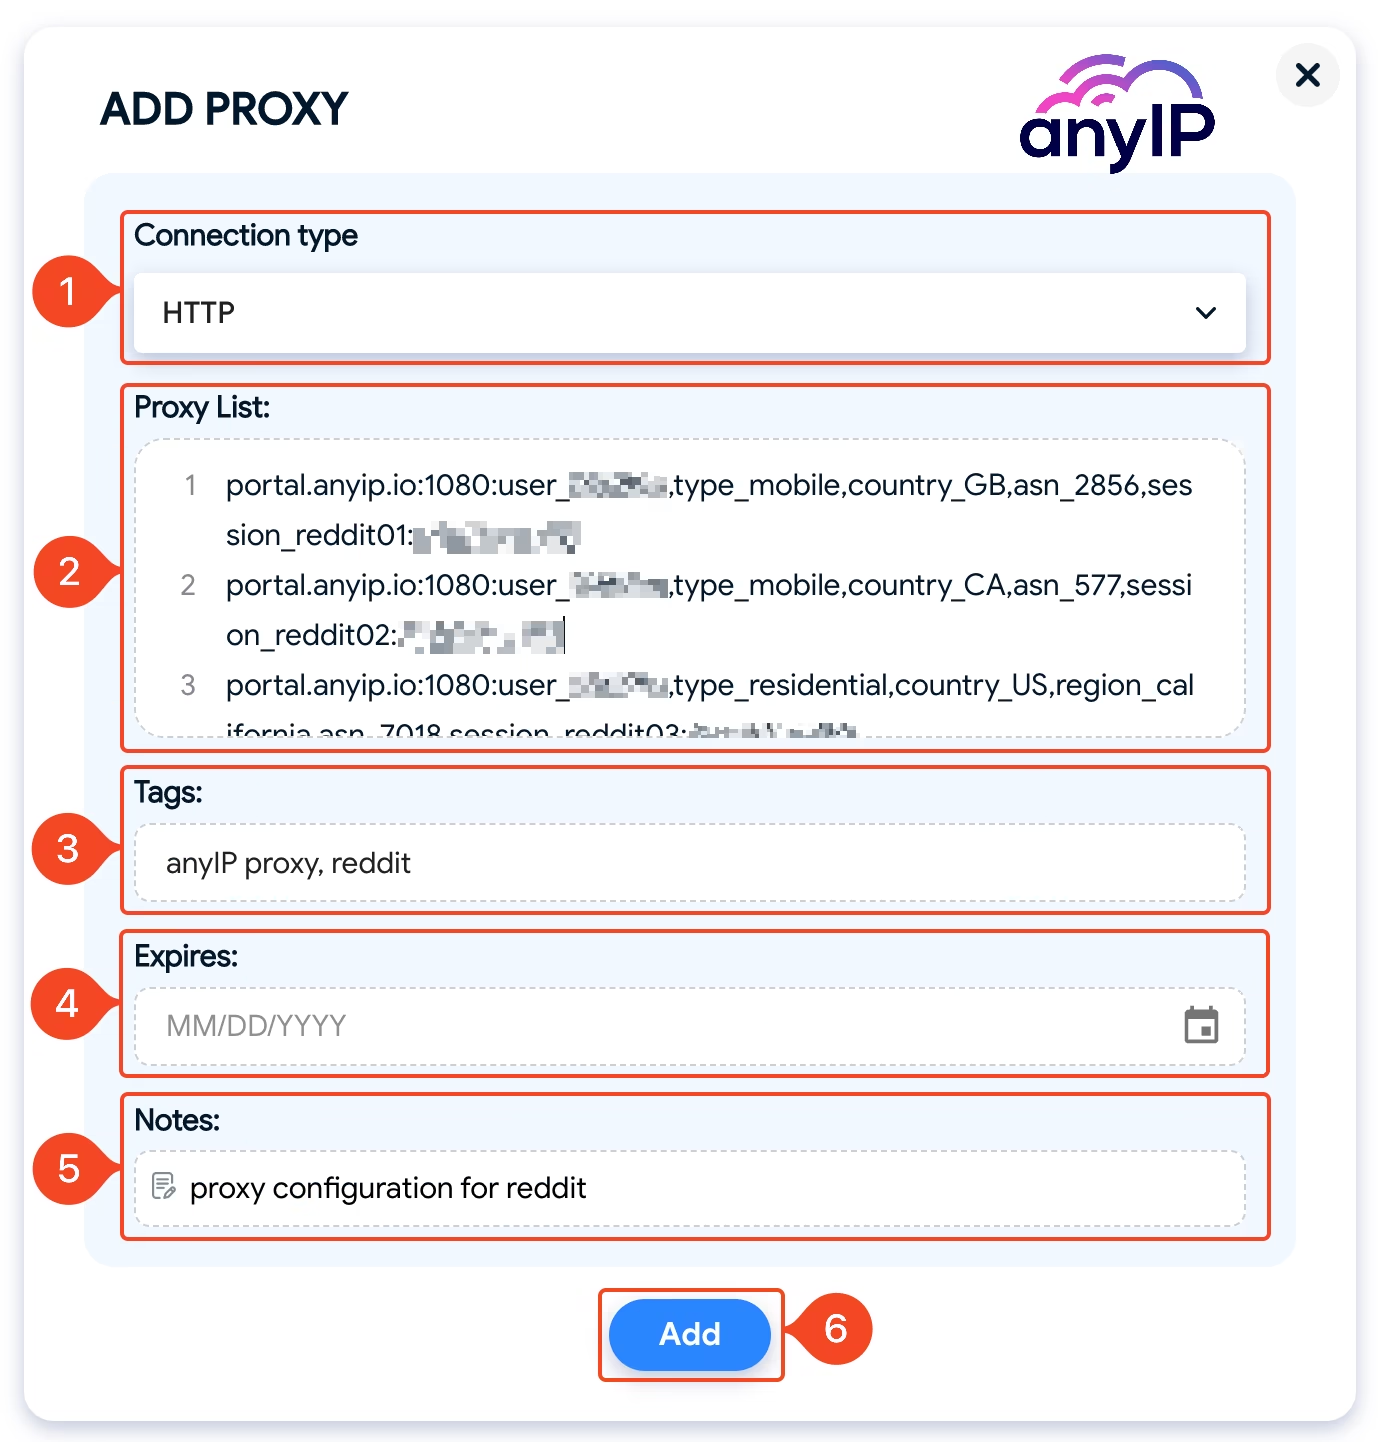
Connection type: Select the protocol you want to use. All the proxies you add to this batch will use the same protocol.
Proxy List: Copy/paste all the proxies you want to add here. One line = one proxy
💡 You can paste this format from your clipboard:
- IP:Port:Username:Password
portal.anyip.io:1080:user_xxxx:yourPasswordTags: You can specify a tag for those proxies.
Expires: If you need to set an expiration date, you can select it here.
Notes: Add a small note to describe your proxies.
Click on “Add” to save your proxies.
💡 All the proxies you'll add on this batch, we'll use the same settings.
Hopefully, in a later update, we'll have the option to directly specify the protocol and description by proxy and not for the whole batch.
The proxy manager will now list the proxies you just added:
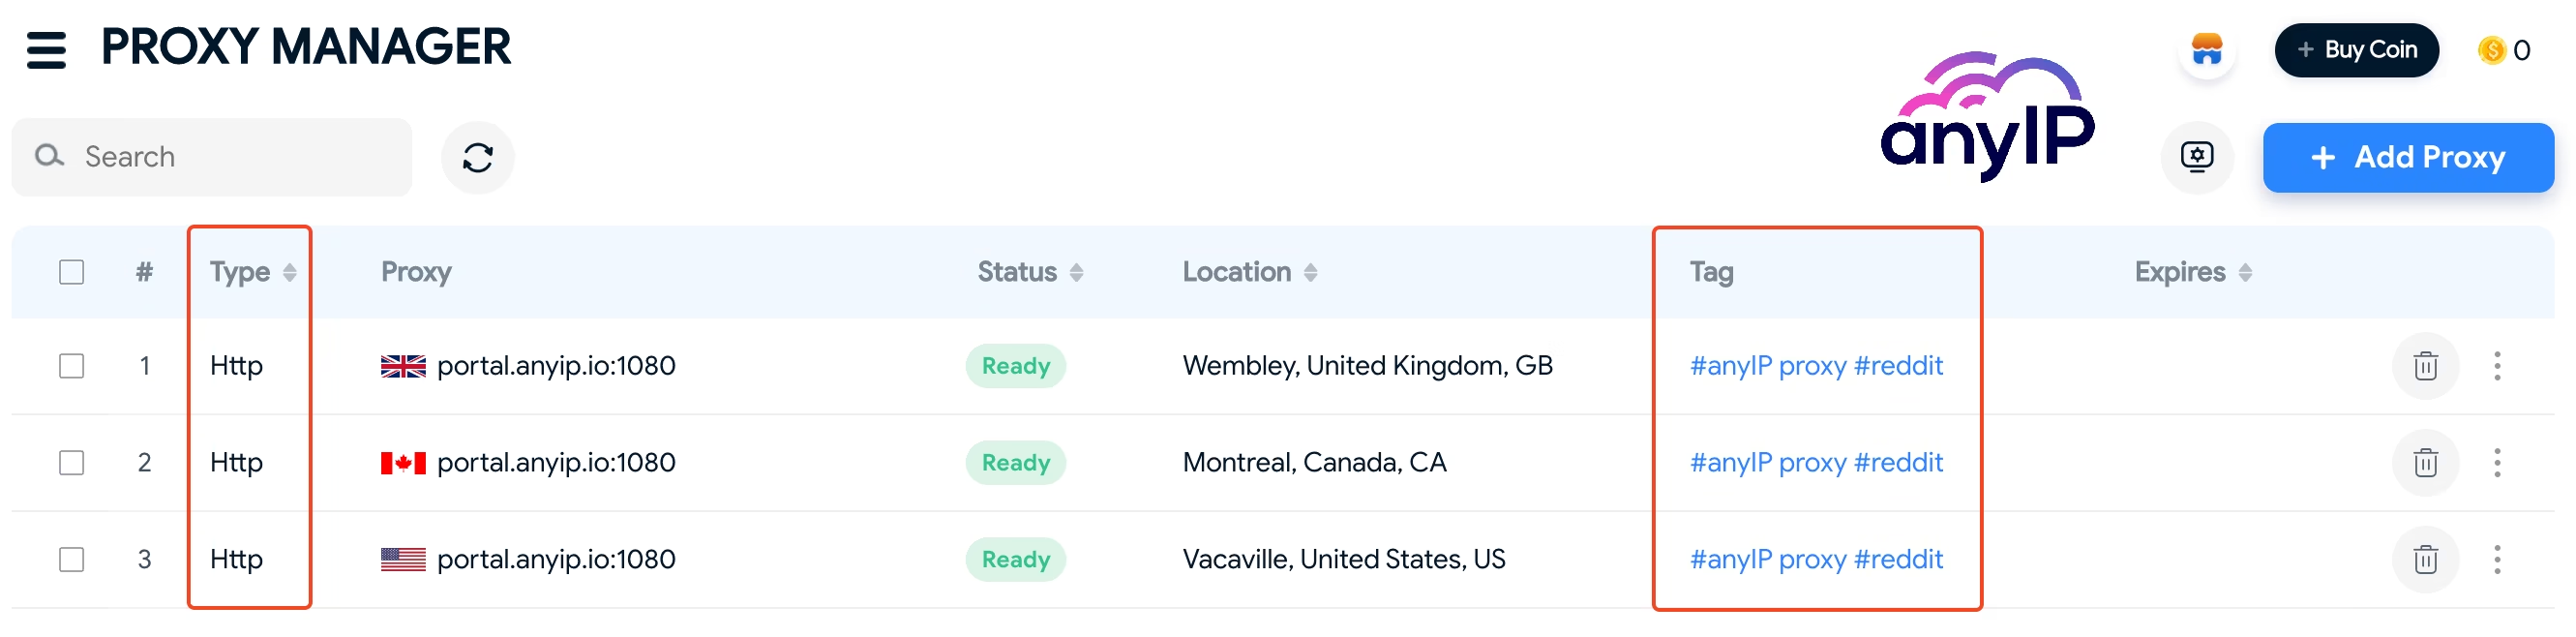
As you can see, the connection type and tags are all the same for this batch.
💡 You can now use those proxies easily on every browser profile by clicking the Proxy Manager icons during the creation or edit:

Test your proxies
One beneficial reason to first add the proxies using the proxy manager is the option to batch-test all your proxies in two clicks.
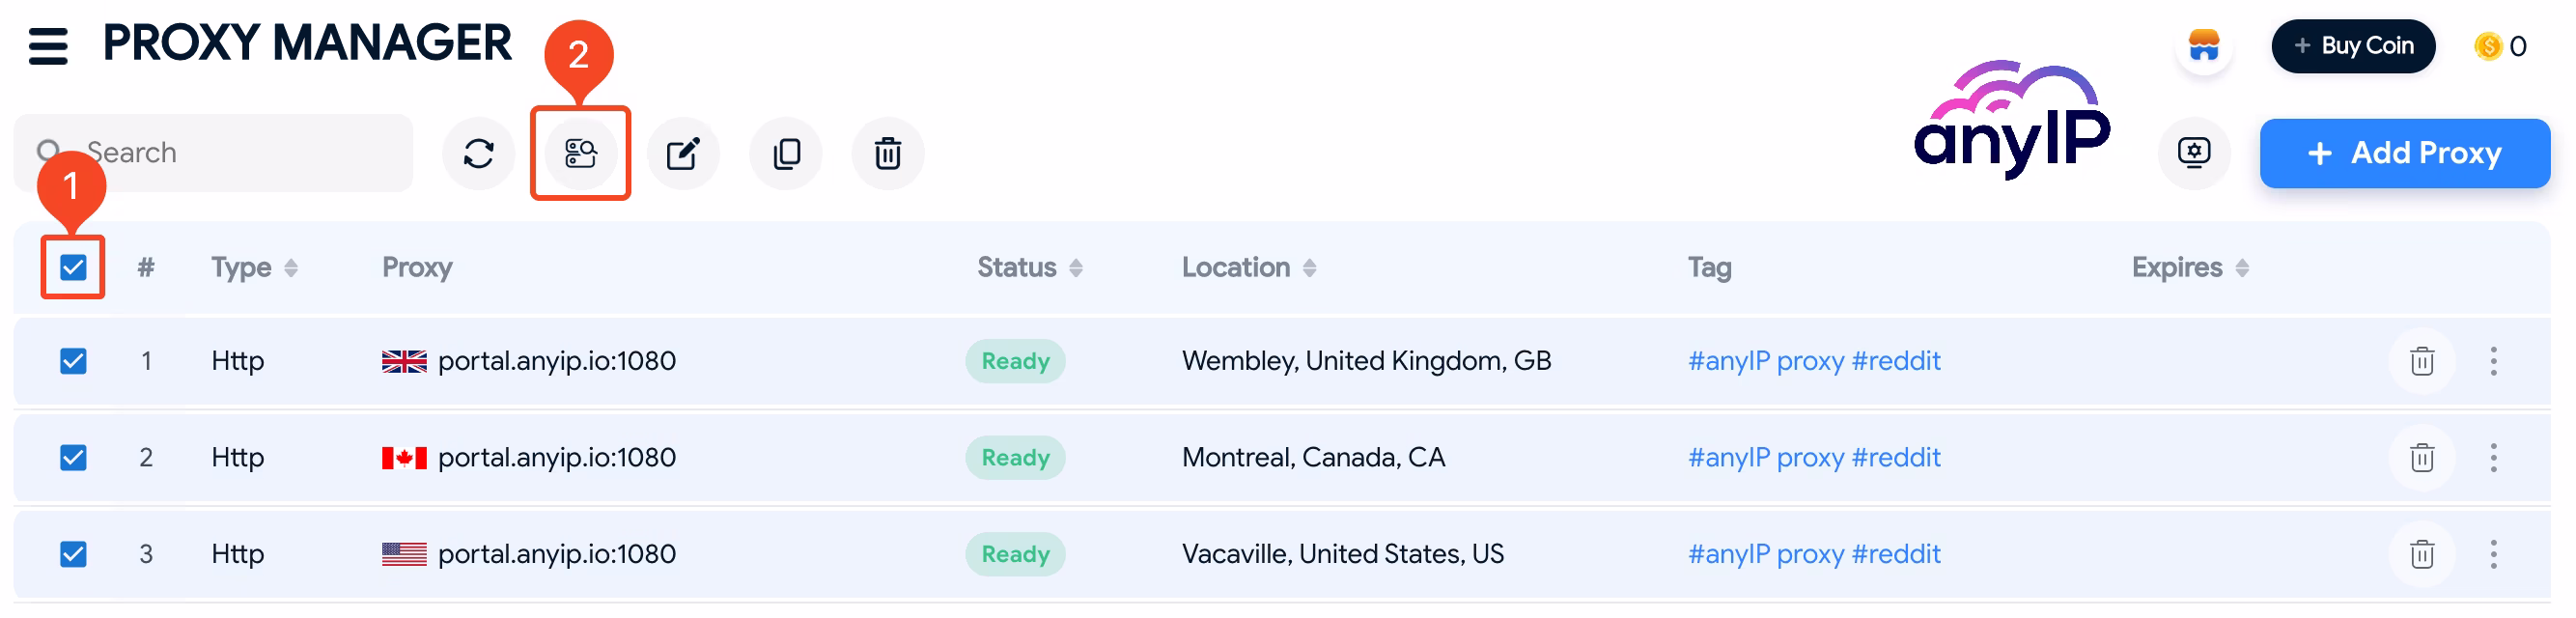
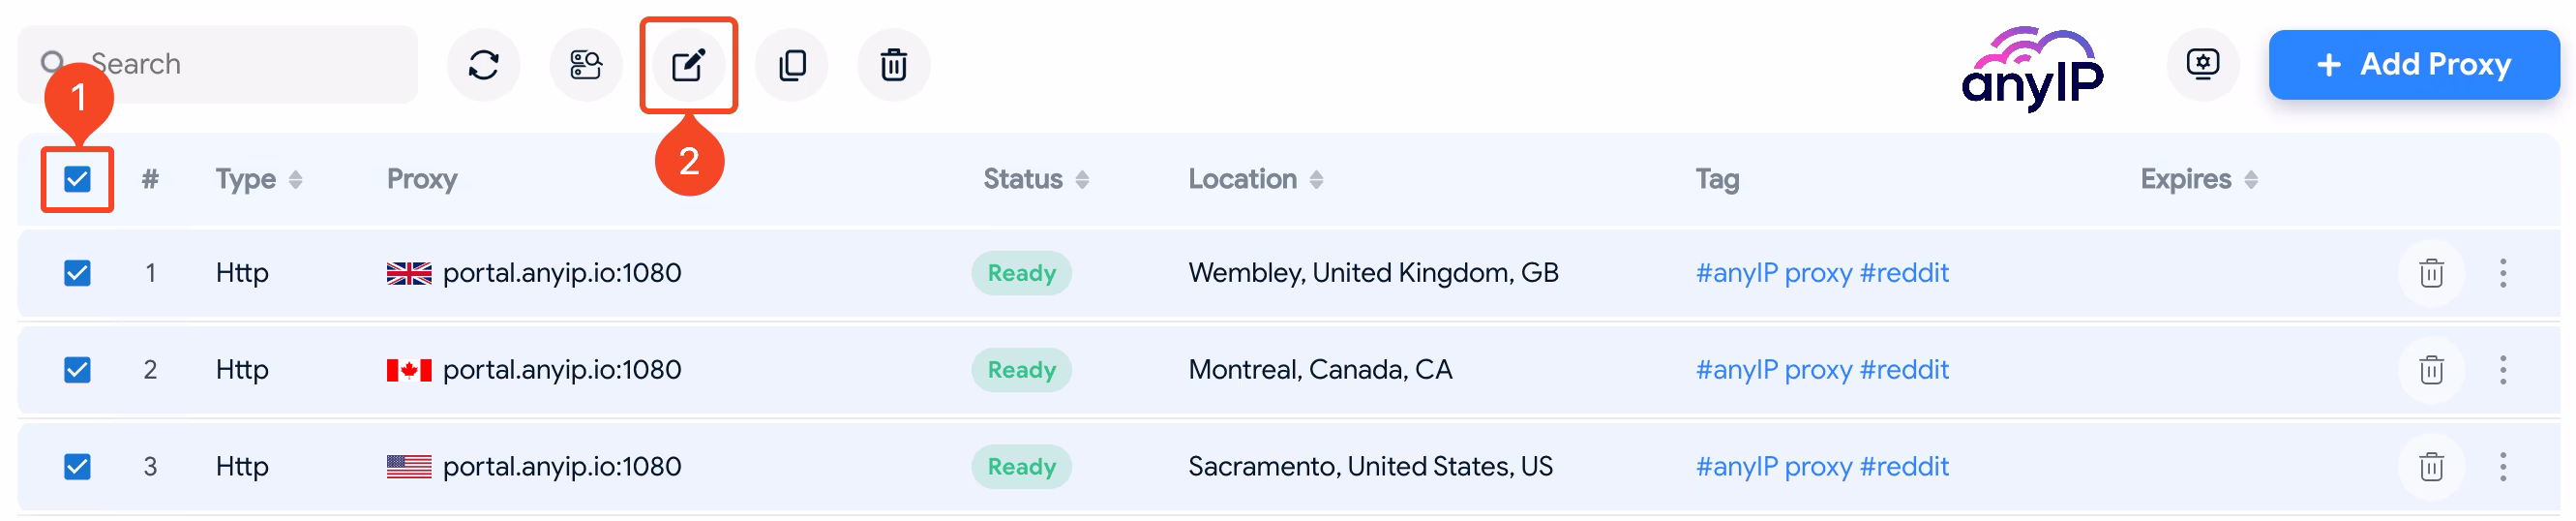
First, you need to select all the proxies using the check box on the header (you can also select only those you wish to test).
Then click on the “Check proxy” button and wait a few seconds for Hidemyacc to test all your proxies.
How to edit the proxies
Edit a single proxy

You can access each proxy's settings by clicking on the triple dot button (1) associated with it.
This menu lets you easily Pin, Edit, or duplicate the proxy.
Click on “Edit” to open the edition form that will look like this:
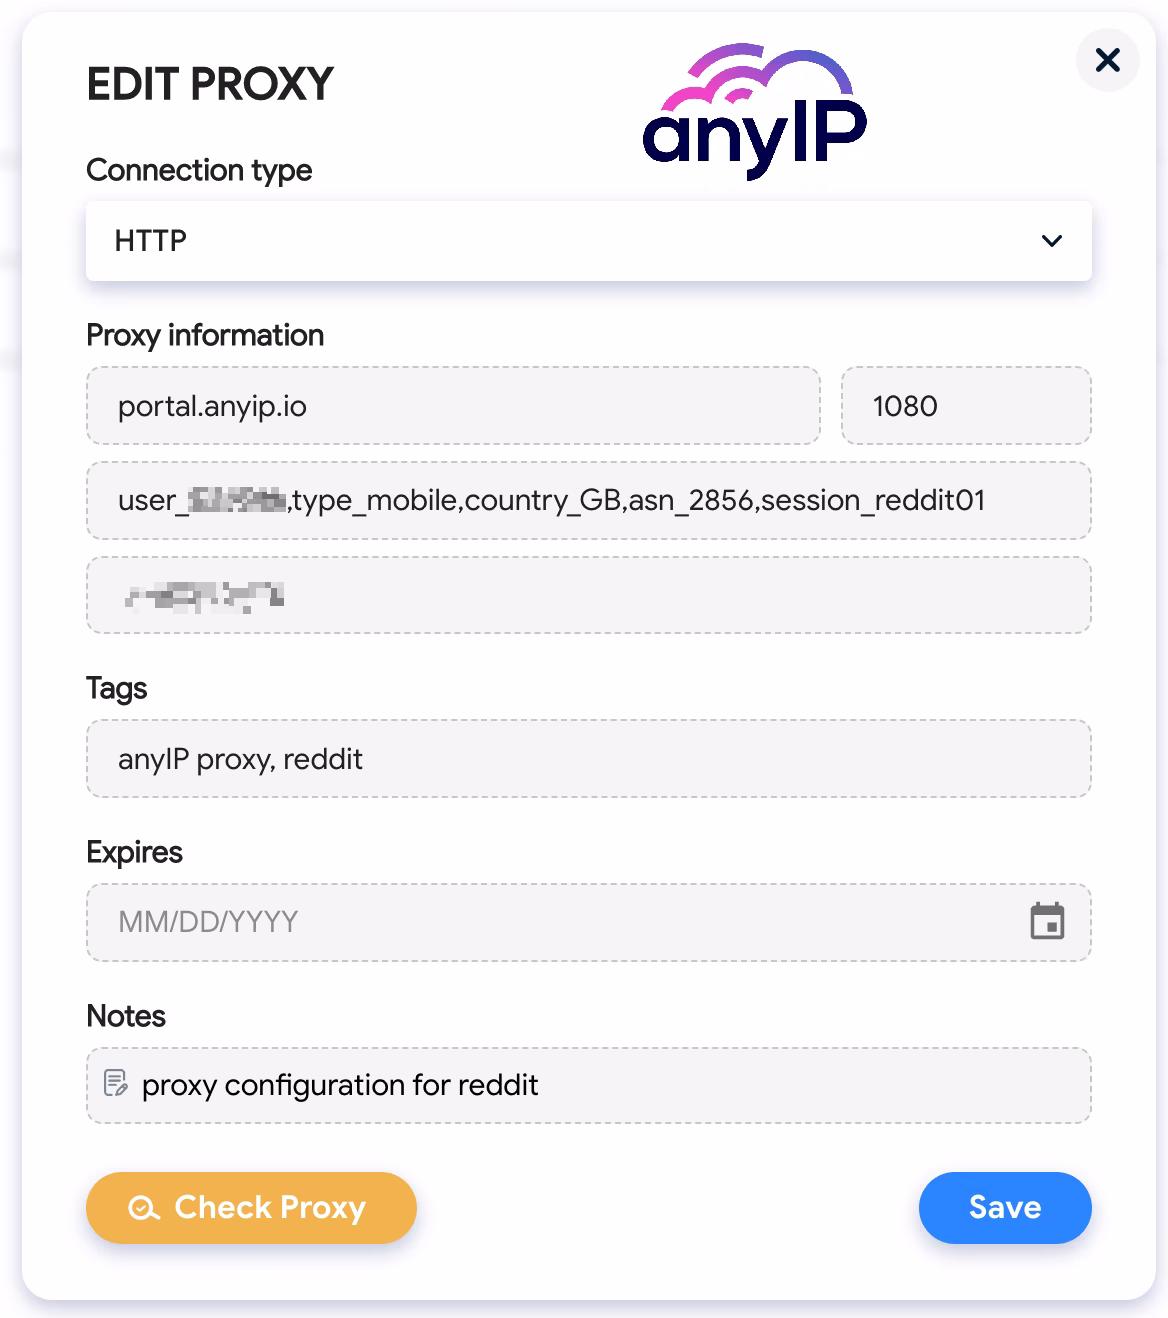
You can edit all the needed information:
Connection Type
Proxy Information (host, port, username and password)
Tags
Expiration date
Notes
Confirm your changes and click the “Save” button to update the proxy. You can also check the proxy here by clicking "Check Proxy.”
Batch editing
You can also edit your proxies by batch, but I will be honest. This is a very limited feature. It only allows you to edit a few settings, such as the tags, the expiration date, and the Notes.
First, use the check box in the header to select all the proxies you want to edit.
Then click on the “Edit proxies” button to open the following edit form:
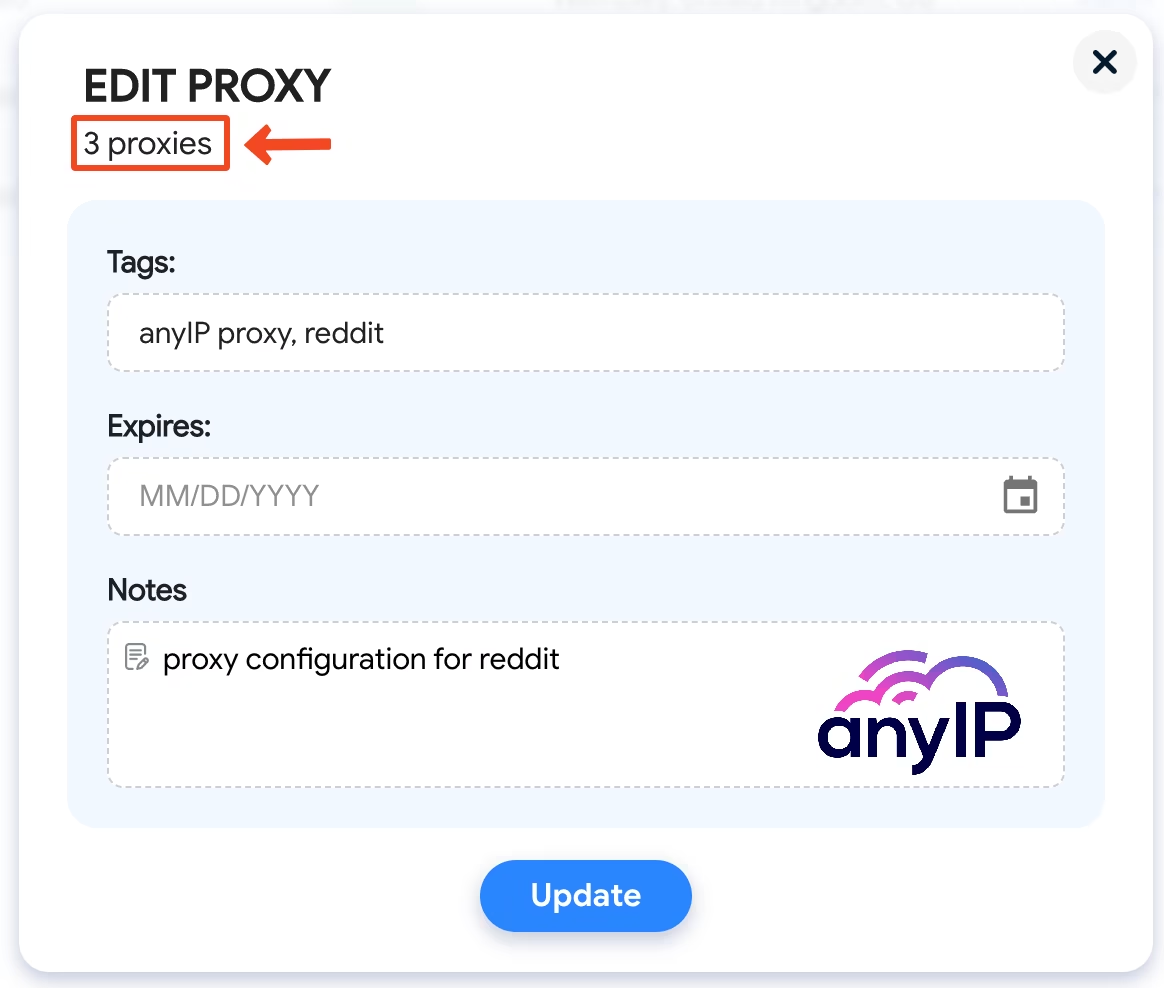
You can see that I’m currently editing three different proxies.
Update the values you wanted to edit and click “Update” to confirm the changes.
Browser profile management
Need a specific OS?
Hidemyacc offers to emulate all the popular OSs on the market; for our guide, we chose “MacOS.”

We recommend using the same OS as your real Operating system to avoid fingerprint issues.
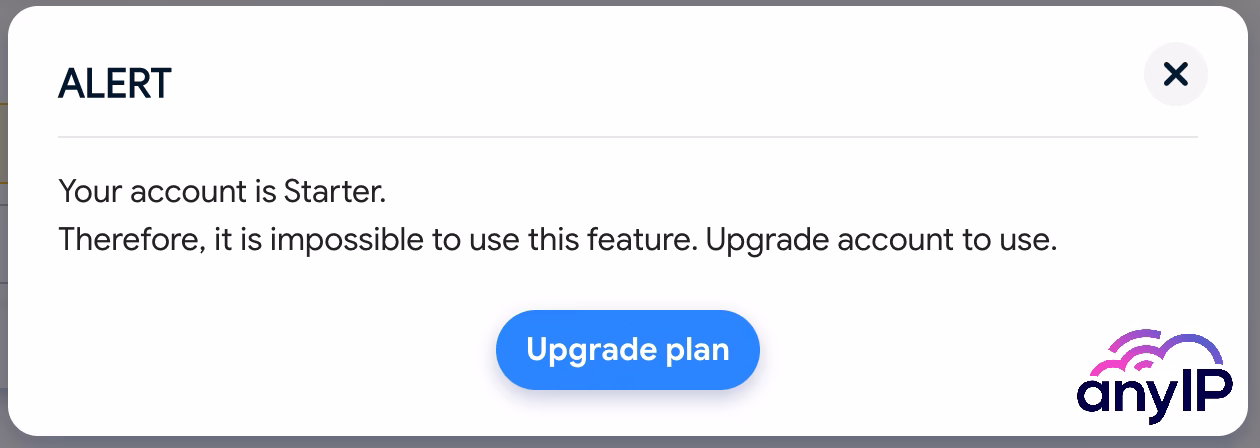
💡 The starter plan offers access only to the desktop OS (Windows, MacOS, and Linux). You have no choice but to upgrade to a higher plan if you need to use Android and iOS.
You said browser?
Like AdsPower or Multilogin, Hidemyacc is one of the few anti-browsers to offer multiple Browsers selection.

But unlike others, Hidemyacc offers to use a bunch of popular browsers like:
Brave
Opera
Edge
Yandex
Safari
In my opinion, this is a really nice feature for those who need to use other browsers than chrome.
Advanced options
If you go to the “Advanced” section (1), you’ll have a few excellent features that will enhance your productivity and profile management.
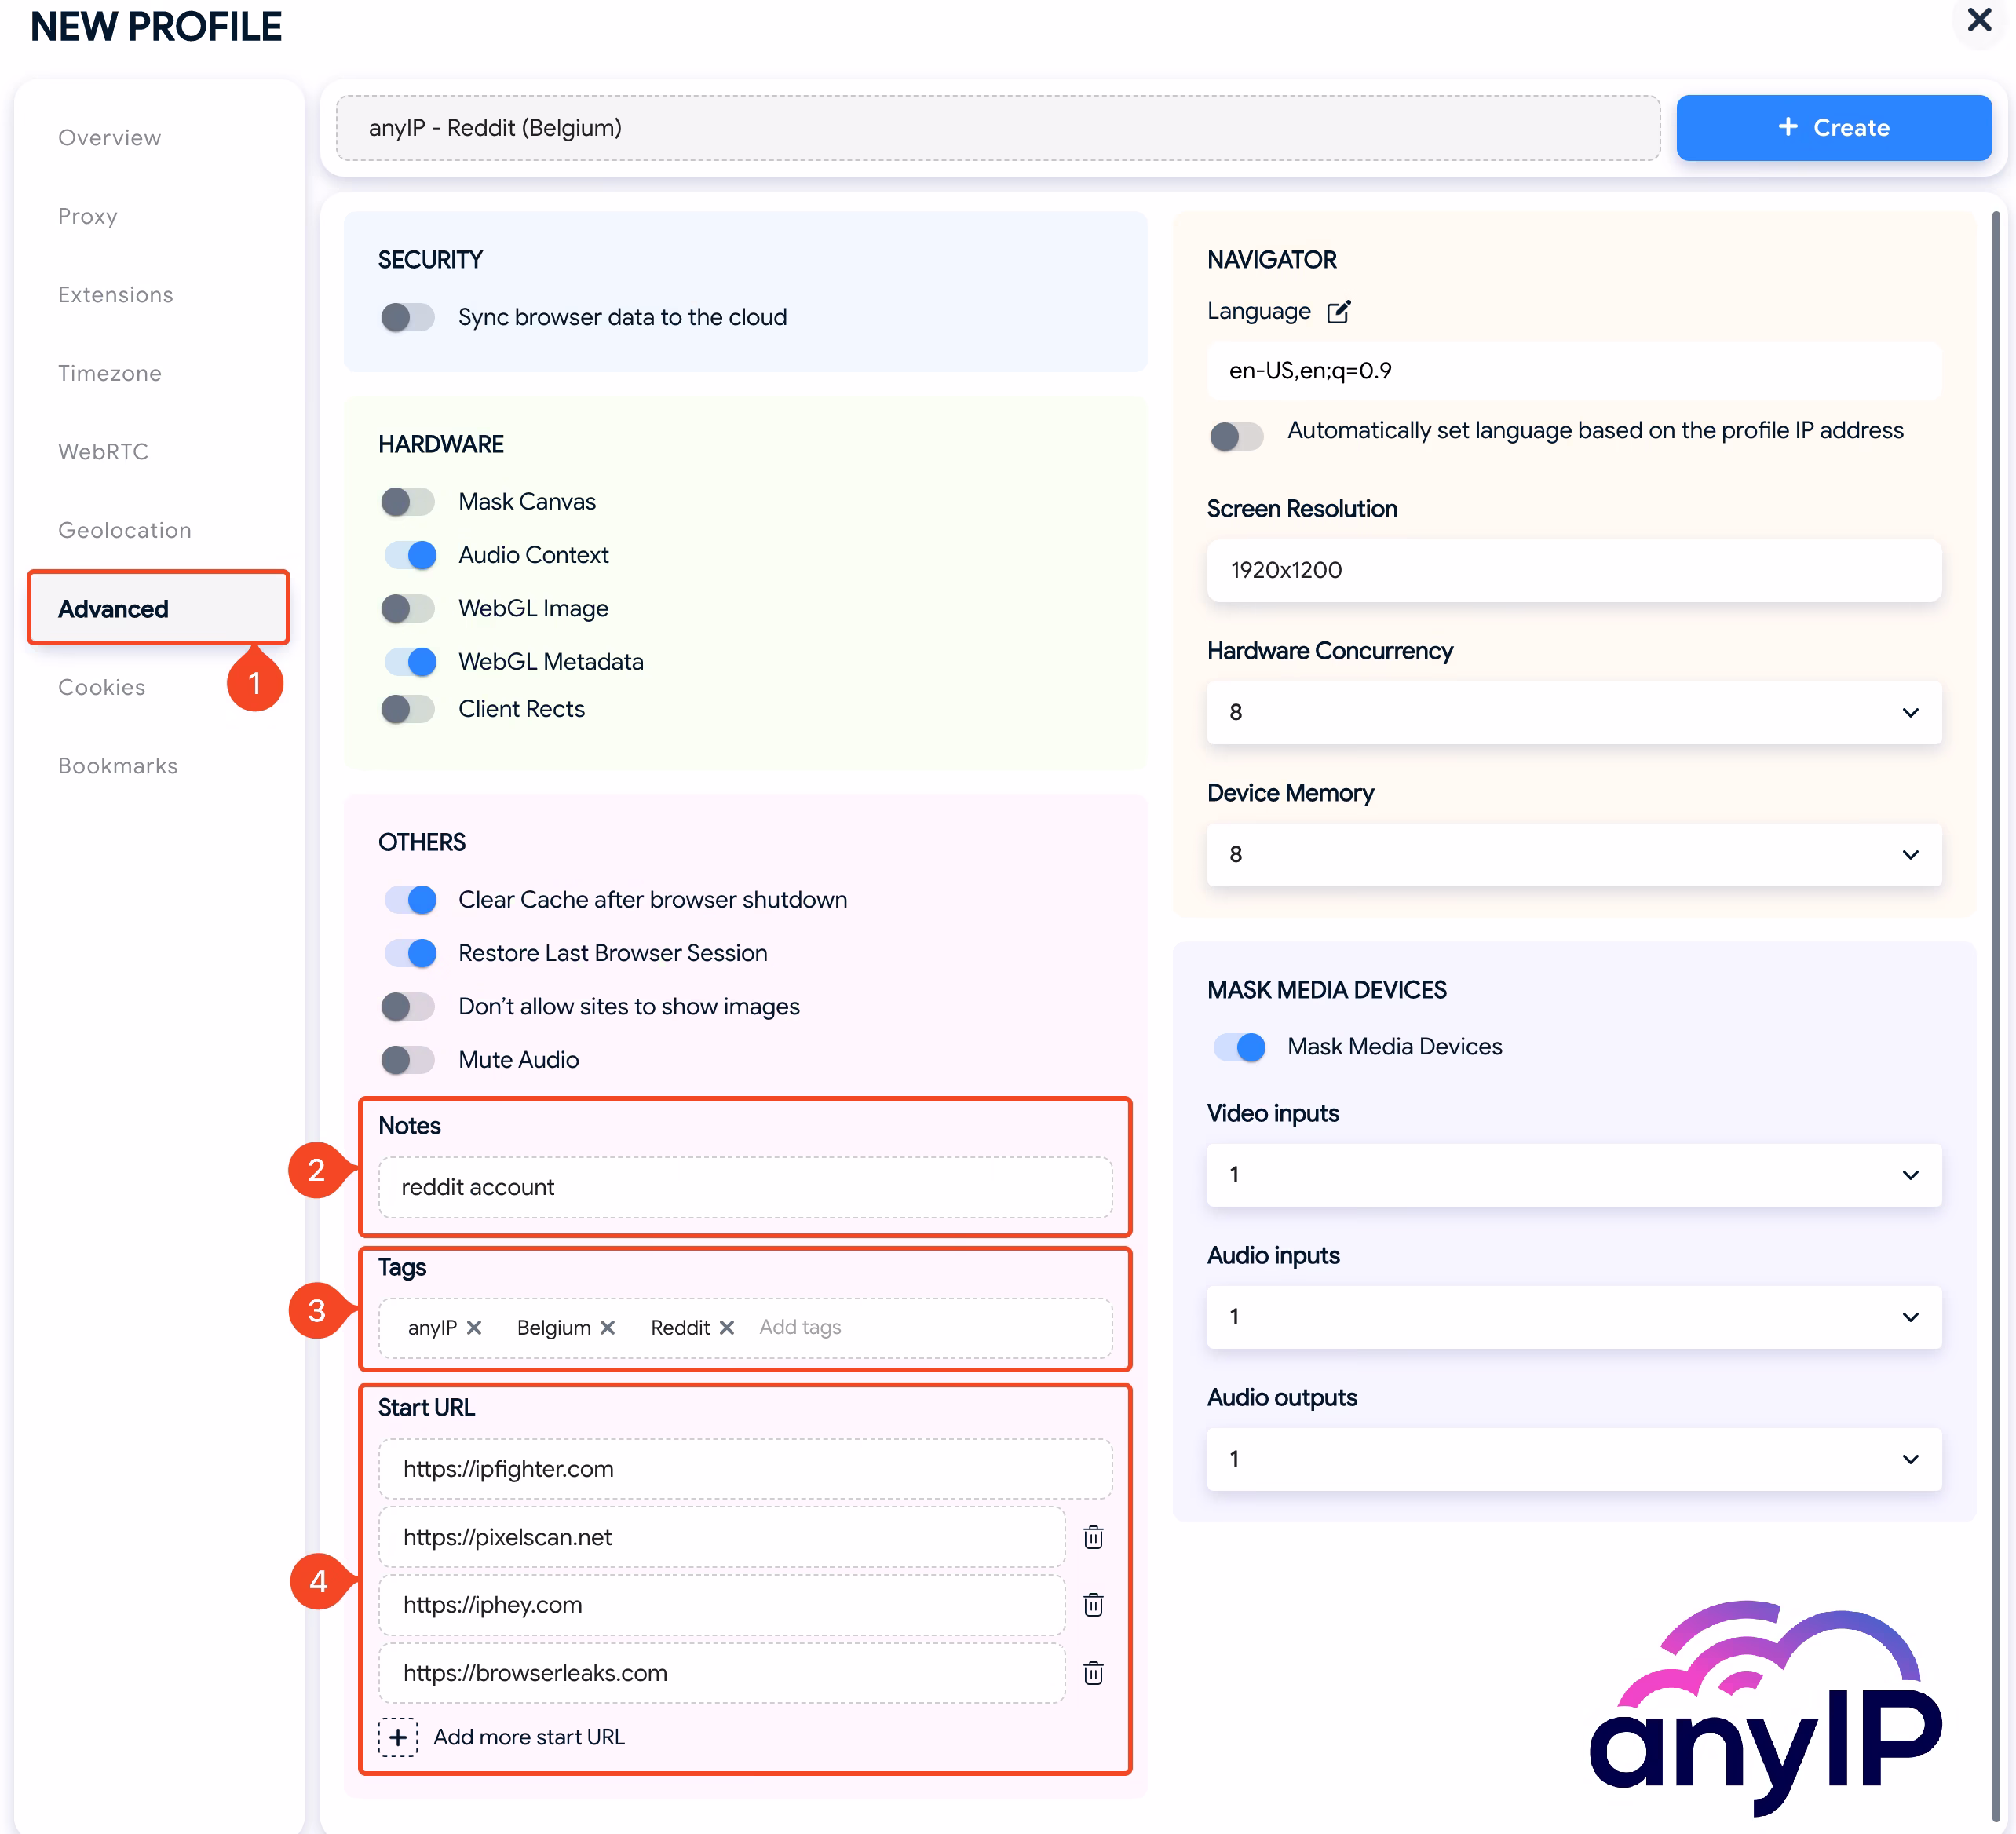
You can add a small description of your profile here;
If you manage multiple profiles, I recommend adding a few tags. This way, your profile library will always be well organized, and you’ll be able to categorize them easily.
You can set one or many "Start URLs" to load when you launch the browser profile here.
Hidemyacc gives you complete control of the fingerprint. You can alter every single setting to build your custom fingerprint, such as:
Select a custom timezone;
Alter the WebRTC;
Manage the geolocation of your browser;
Use custom cookies/bookmarks;
💡 To avoid compromising your privacy, we advise not to alter those settings unless you know exactly what you’re doing.
How to edit a profile on Hidemyacc
One by one
To edit your profile, you can open the contextual menu by clicking on the triple dot button (1) associated with your profile:
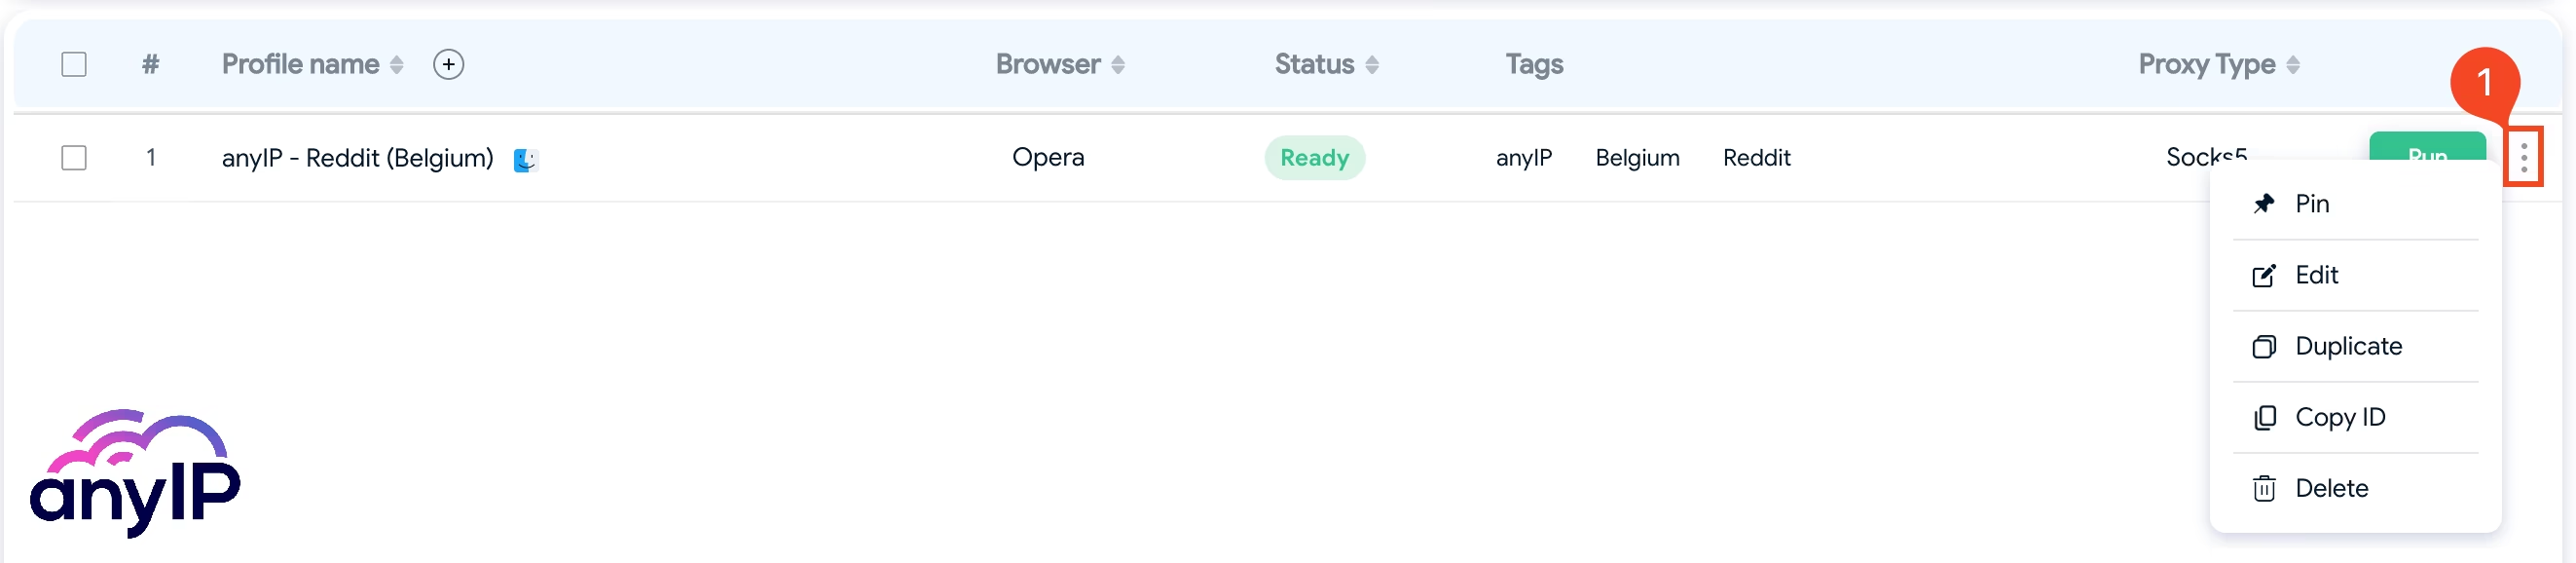
You’ll have the option to:
Pin your profile. It could be handy if you have many profiles but are using one on top of all.
Edit your profile. The form will be the same as the creation. Update what you need and confirm.
The profile can be easily Duplicate from here.
Use Copy ID to back up your profile ID.
You can delete the profile from this menu.
Batch edit:

If you select one or more profiles (1), you'll see more options to manage your profiles in batches.
Again, it is an excellent feature if you need to manage multiple profiles simultaneously.
How to control your fingerprint
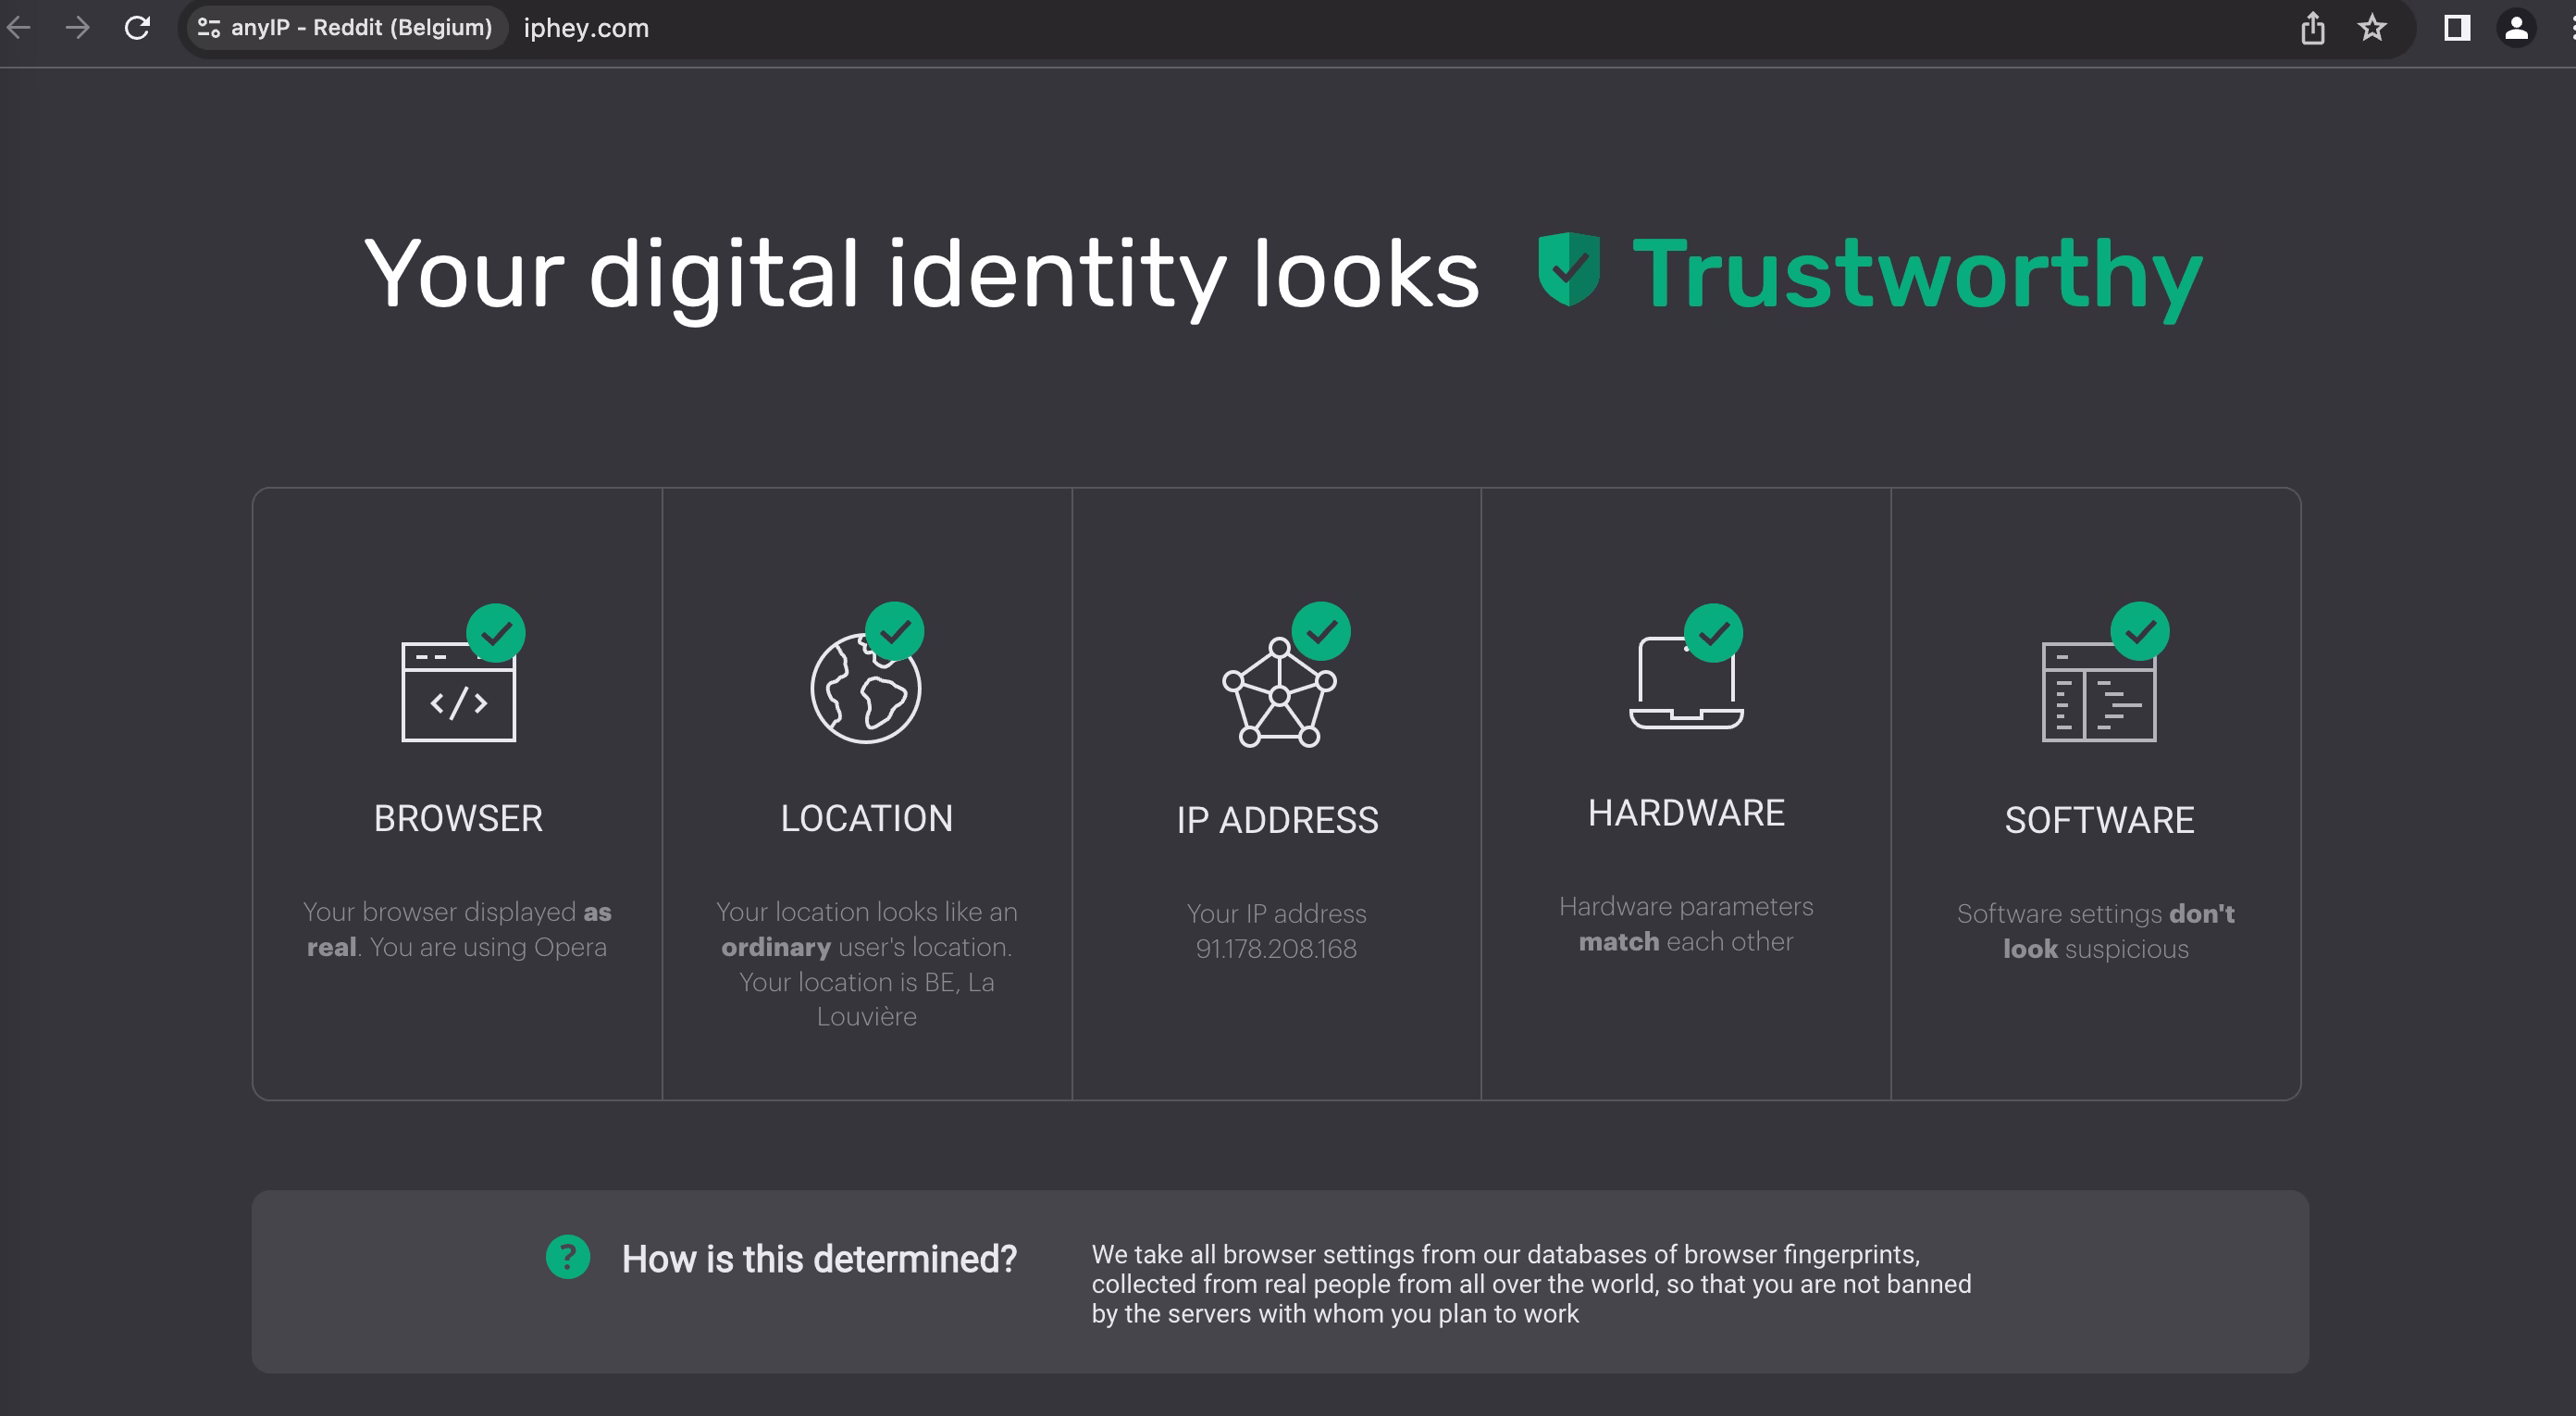
The primary use of an anti-detect browser is to preserve your anonymity. To achieve that, the application customizes the browser fingerprint.
We've tested all the browsers Hidemyacc offers; only Brave did not pass all the tests. This can be explained by its native options to block trackers.
So does Hidemyacc is effective? The short answer is a big YES!
I've tested it on the most popular fingerprint scanner on the market, and the results were close to perfect every time.
|
|
|
|
|
|

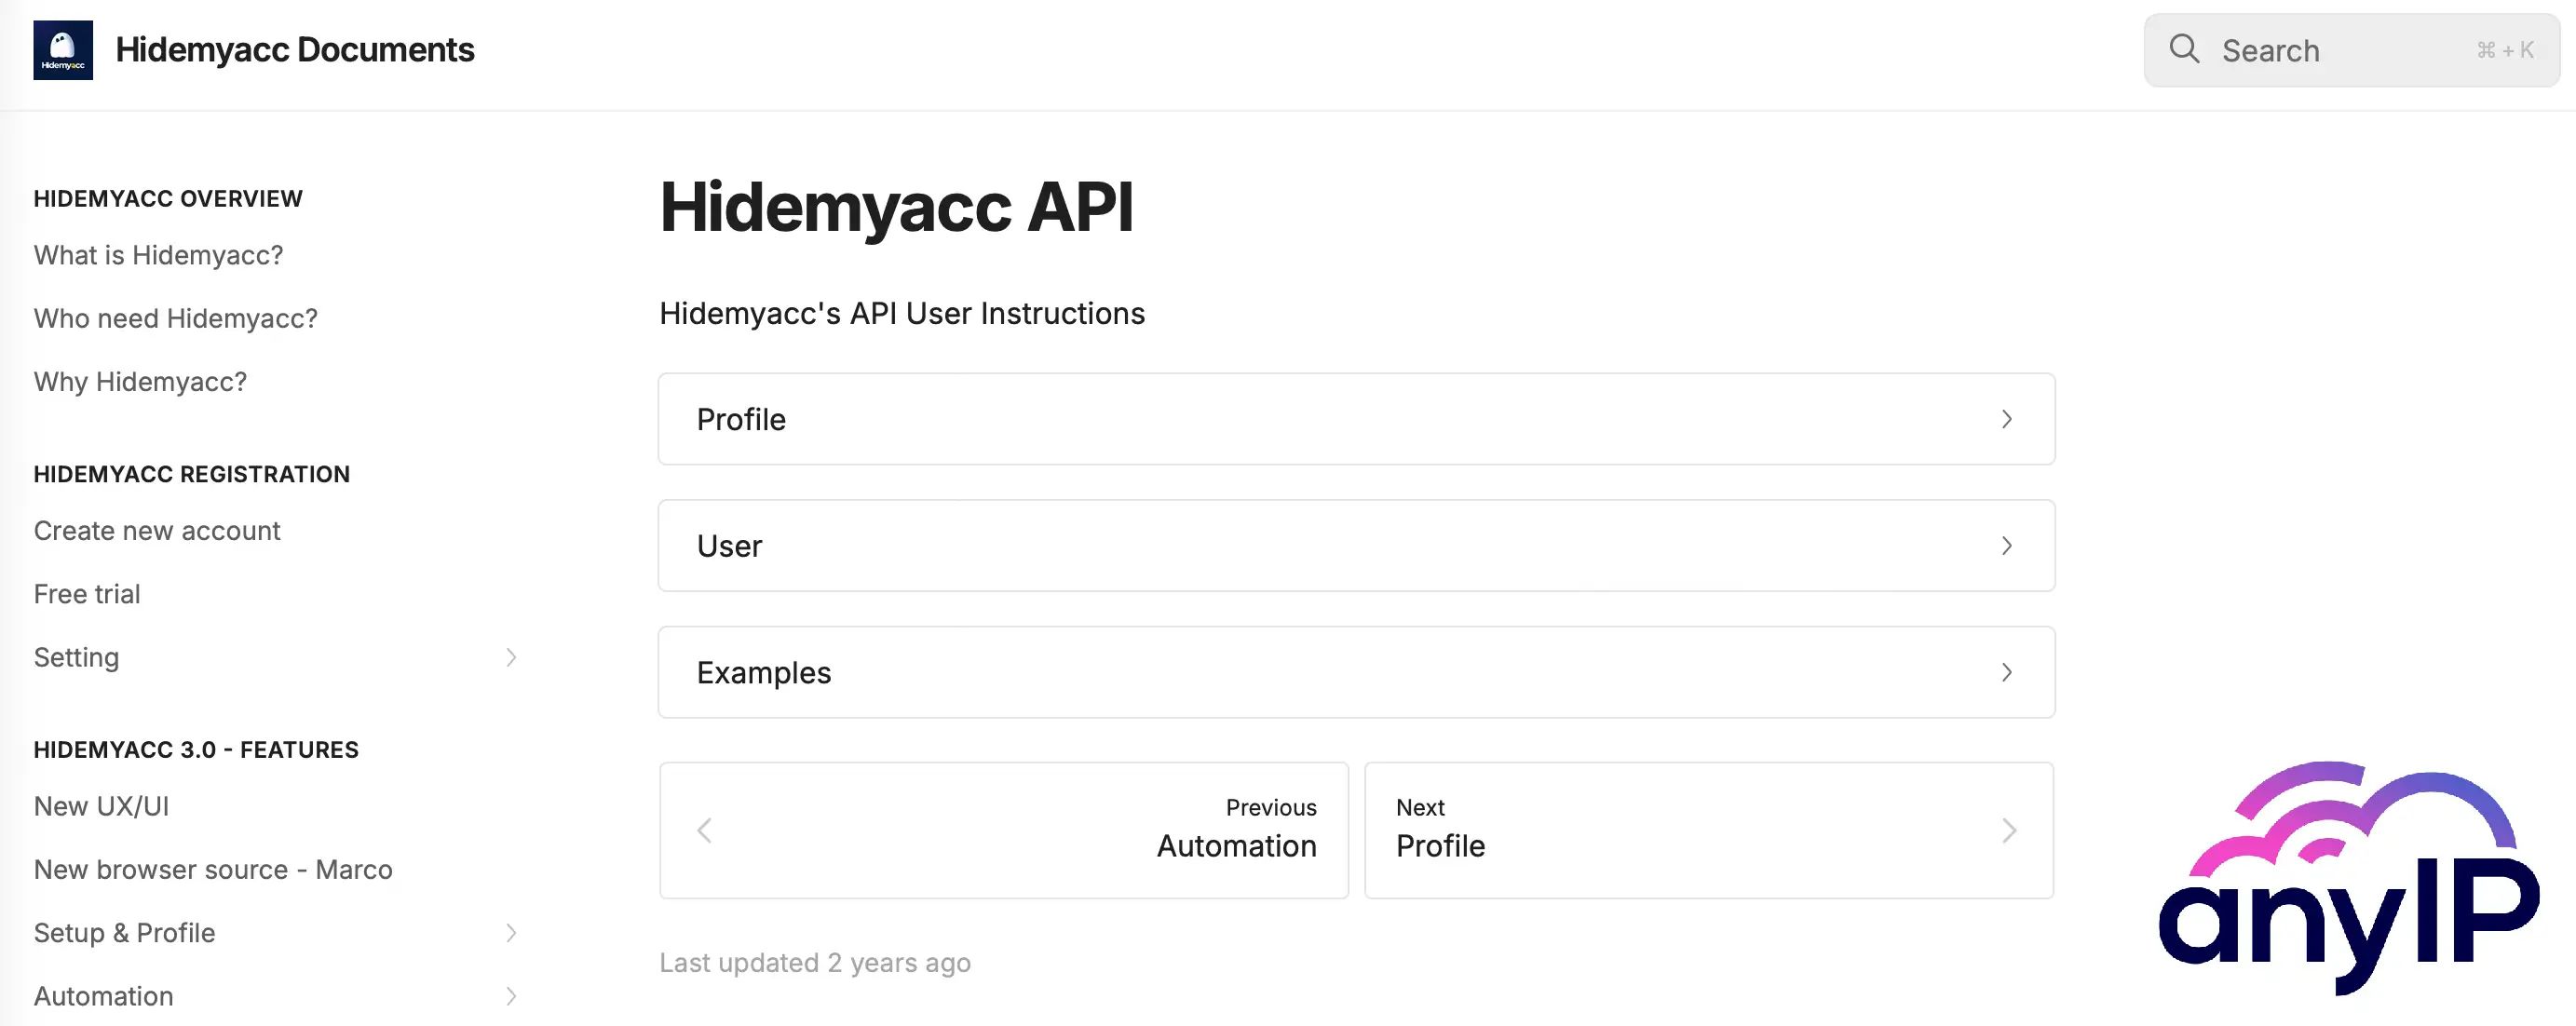
How use the Hidemyacc API to manage your account
For tech-savvy users looking for a more hands-off approach to profile and proxy management, Hidemyacc offers a remote API. Have a look at the documentation here
While the trial is great for discovering the app, a subscription is required to use Hidemyacc.
Get your proxy now with anyIP.io
Unlock the power of high-quality proxies with anyIP.io!
Create your account in less than 5 minutes and experience the benefits of reliable connections. Our dedicated support team is available 24/7 to answer your questions and ensure a smooth setup.