
ixBrowser Proxy Integration: Ultimate Guide
Table of Contents
Table of Contents
Key takeaways
ixBrowser offers advanced fingerprint masking to prevent account association issues.
Proxy configuration on ixBrowser supports HTTP, HTTPS, SOCKS5, and SSH protocols.
Users can manage profiles, proxies, and perform batch operations easily in ixBrowser.
ixBrowser provides strong encryption, multiple profile management, and extension support.
A free plan is available, with paid options starting at $3.99/month for additional features.
As a rising star, ixBrowser has an excellent fingerprint masking technique. It can generate unlimited independent and unique digital fingerprints for your accounts, effectively preventing account association problems. ixBrowser performs well on most popular fingerprint detection websites and has a very high pass rate.
Register an ixBrowser account now!
💡 Before starting this guide, make sure you have:
ixBrowser desktop installed on your computer.
Your proxy credentials (Get your account here):
proxy server infos (URL or IP + port) ;
username/password;
How To configure My Proxy On ixBrowser
Like many anti-browsers, you’ll have no data to display on the first launch. Follow this guide and ixBrowser will have no secret for you!
Step 1: Create a Profile
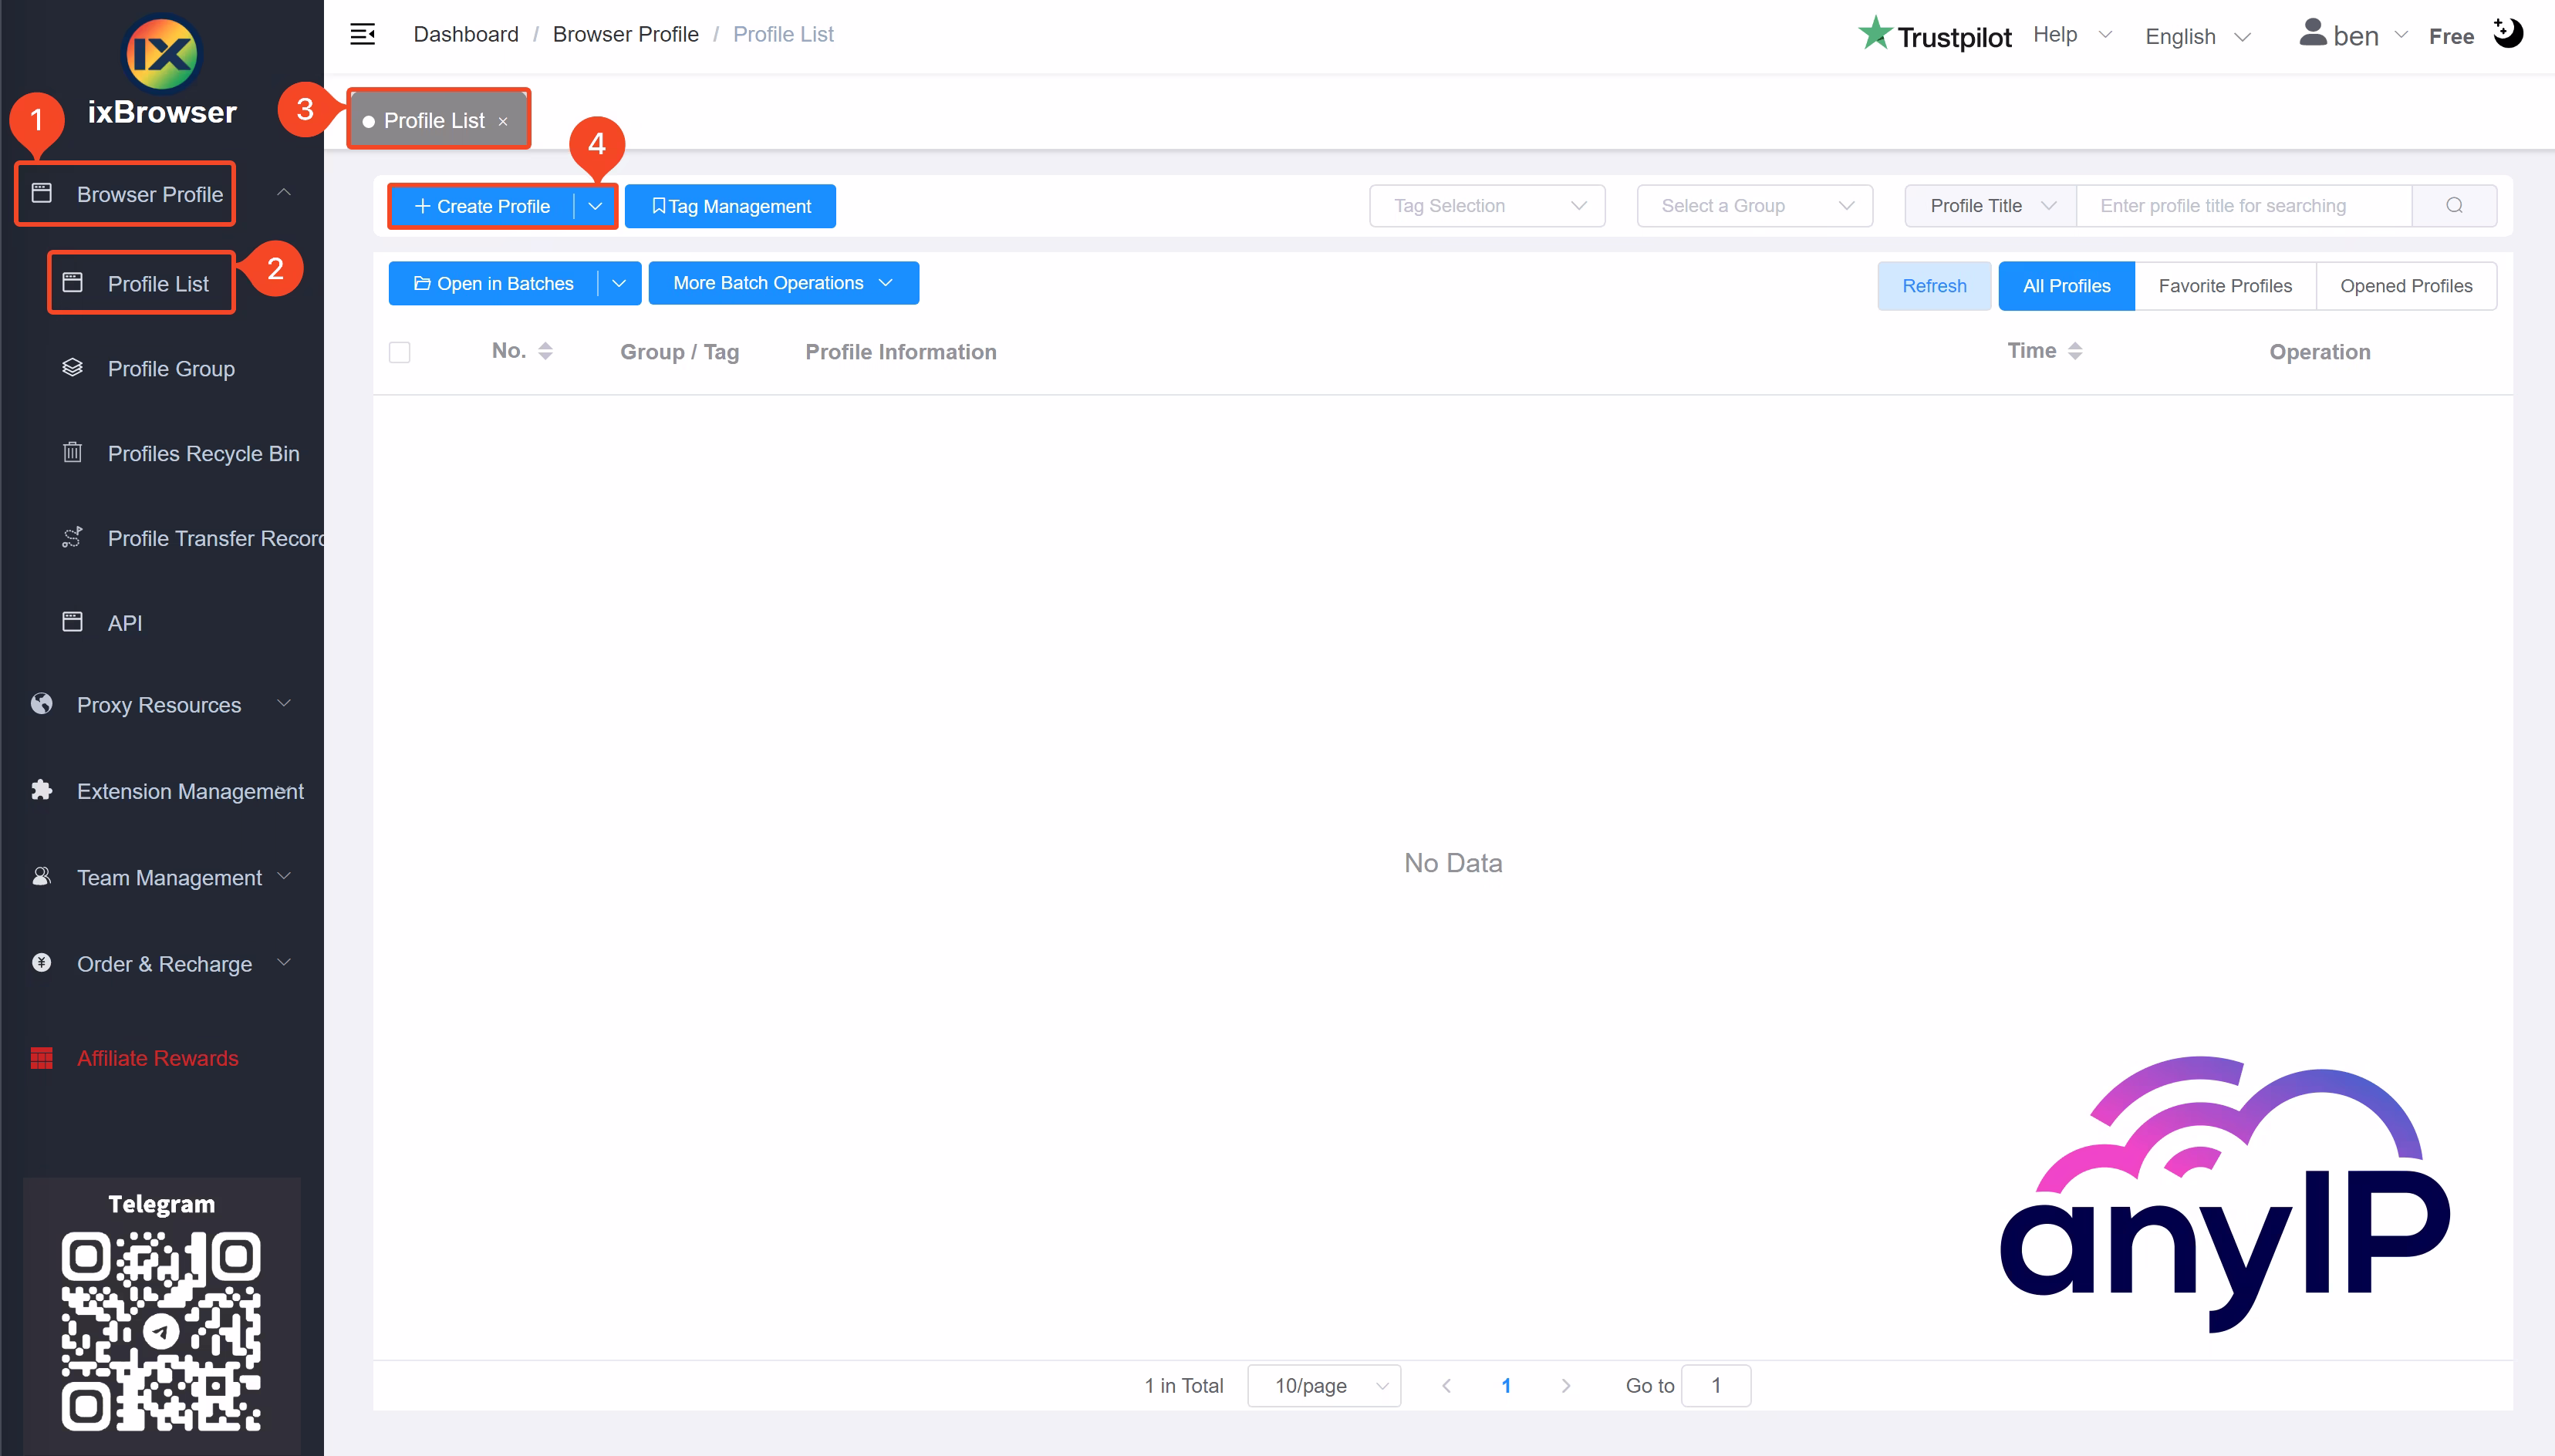
To create a new profile, make sure that you are in the Profile List section:
→ Browser Profile (1) → Profile List (2) → Double-check the tab (3)
To open the creation form, click on “+ Create Profile” (4).
💡 If you try to create a profile with no pre-configured proxy, ixBrowser will display this message:

You can either:
Purchase a dynamic or static proxy
Or continue the creation process using your own proxy
Since, for this guide, we will use only proxies provided by anyIP.io, you can click on “Continue to Create” to resume the creation process using a custom proxy configuration.
Step 2: Configure The Proxy
The form is well-designed and separated into different sections.

Open the “Proxy Configuration” tab to configure your proxy.
As we told you earlier, for this guide, we will use a custom proxy provided by anyIP.io
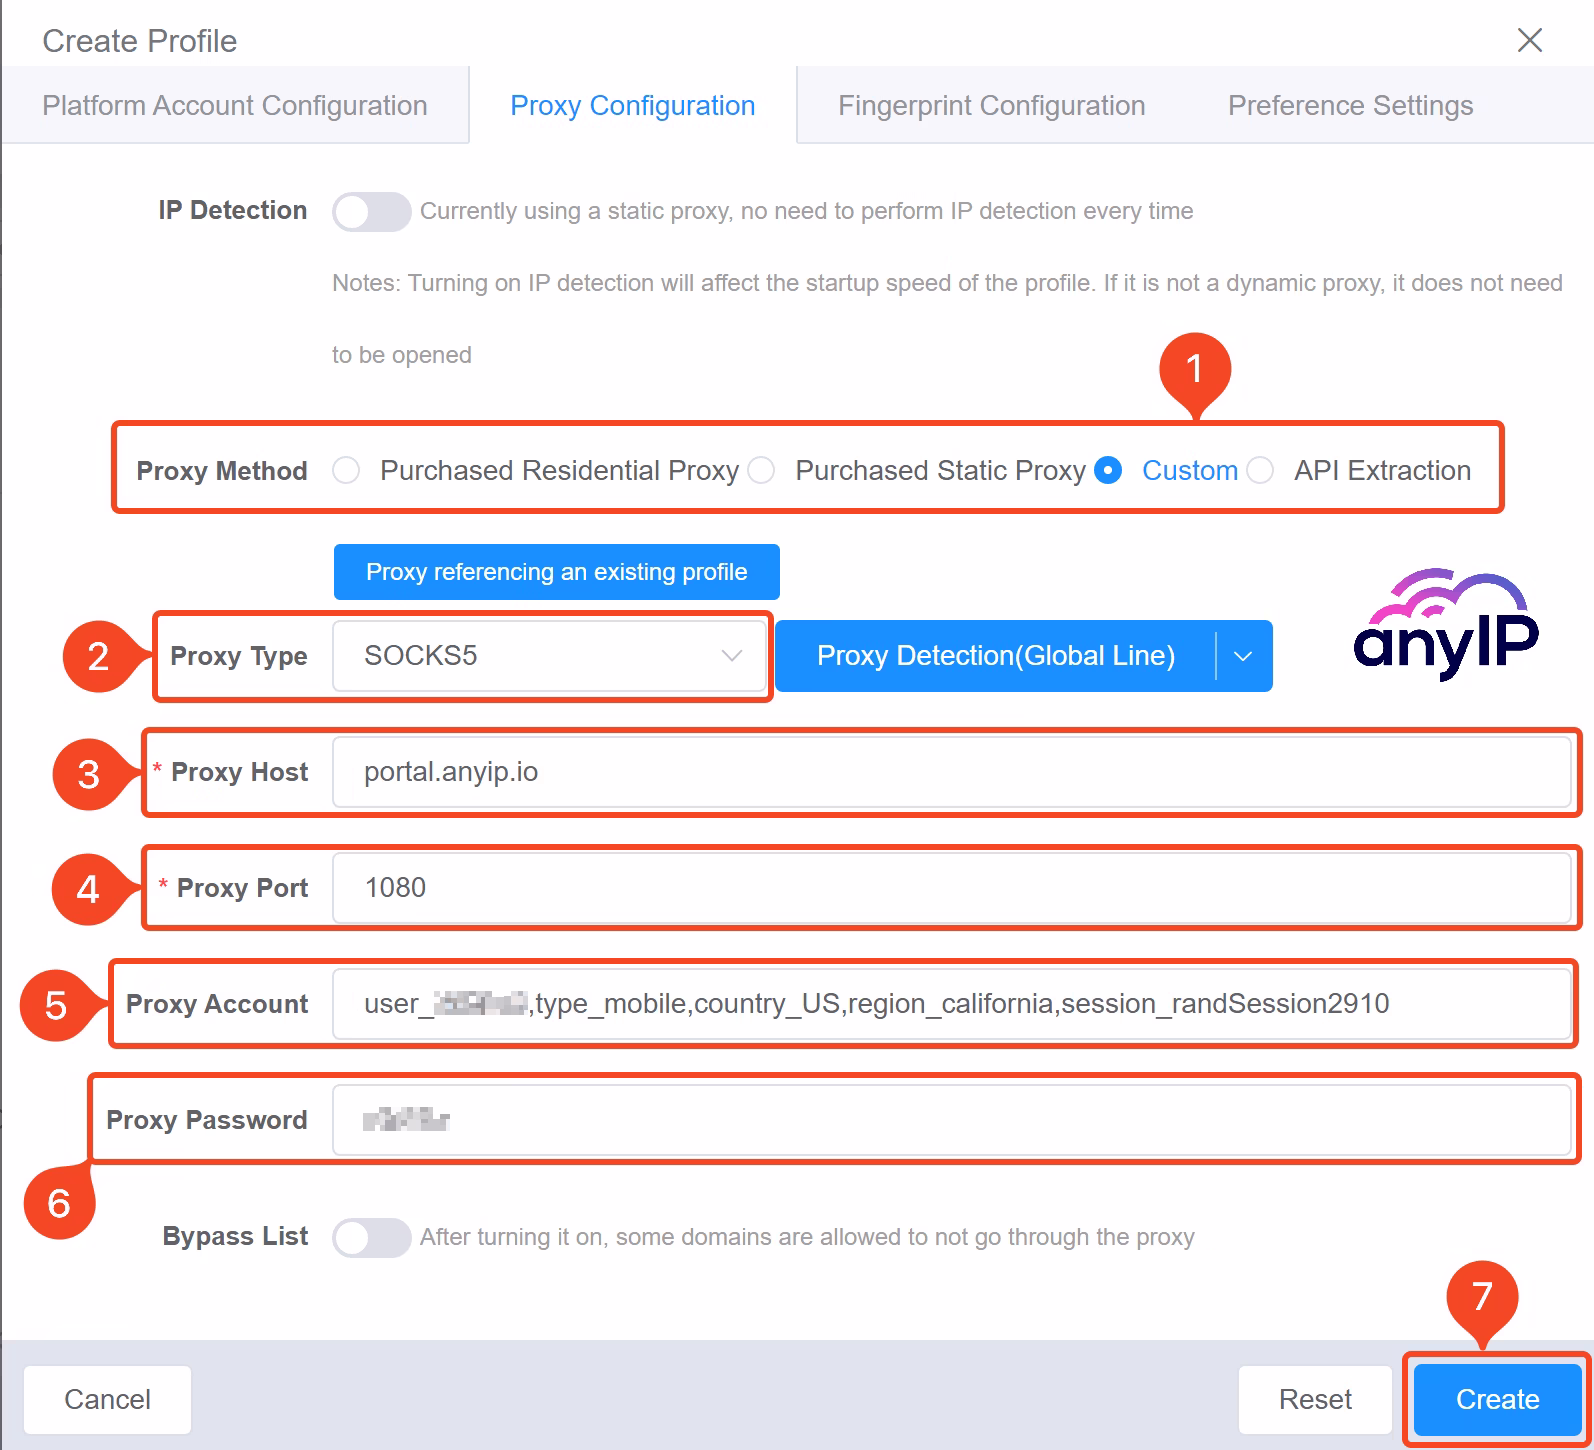
First, you need to select the “Proxy Method,” to specify a personal proxy, you need to select “custom.”
You can quickly get a fast and reliable proxy from anyIP.io.
Select the Proxy type. For our example we’ve configured a SOCKS5 proxy.
💡 ixBrowser allows you to choose among the most popular protocols available on the market, such as:
HTTP
HTTPS (I’m glad to see HTTPS here. Not many anti-browser offer this option)
SOCKS5
SSH
Specify the proxy host, for this guide: portal.anyip.io
Then enter the proxy port, here: 1080
Finally, you need to copy/paste the proxy username
and your proxy password
💡 Before creating your profile, you can perform a quick proxy connection test by clicking on “Proxy Detection”
Finally, click “Create” (7) to save and create your profile.

Step 3: Run The Profile
Once you’ve saved your profile, you will see it in the Profile List as follow:
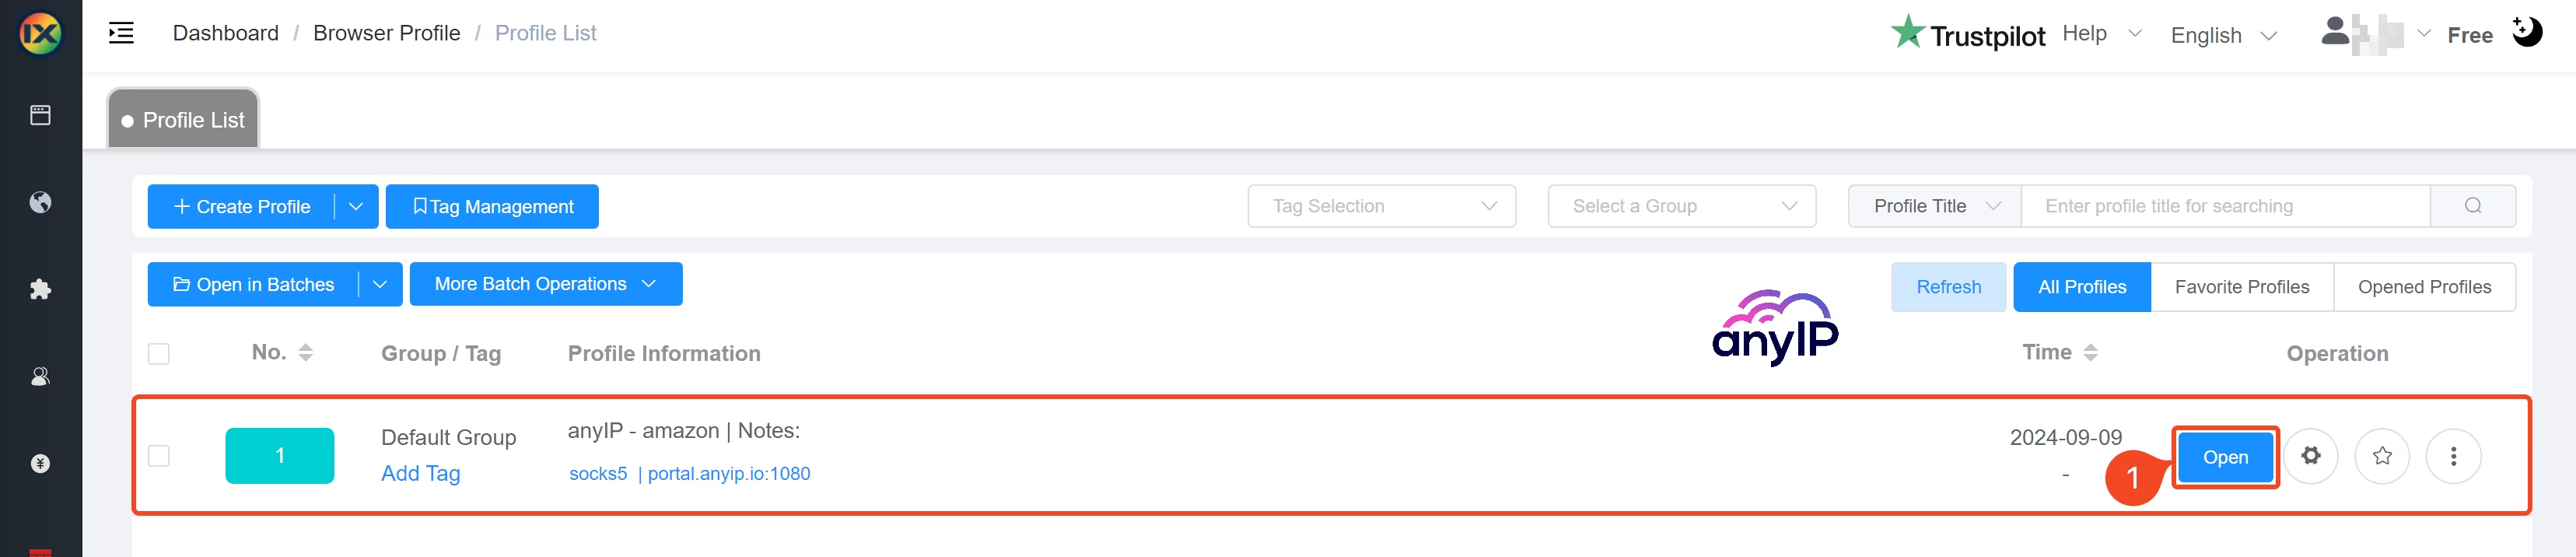
Click on “Open” (1) to start the profile, and you’ll see a new instance of your browser opening with this icon on the taskbar:
The number and color you see on the icon help identify your profile.
It is a simple yet very handy addition, especially when managing multiple profiles simultaneously.
💡 Little tips: you can open multiple profiles simultaneously by using this button:

The starting page look like this:
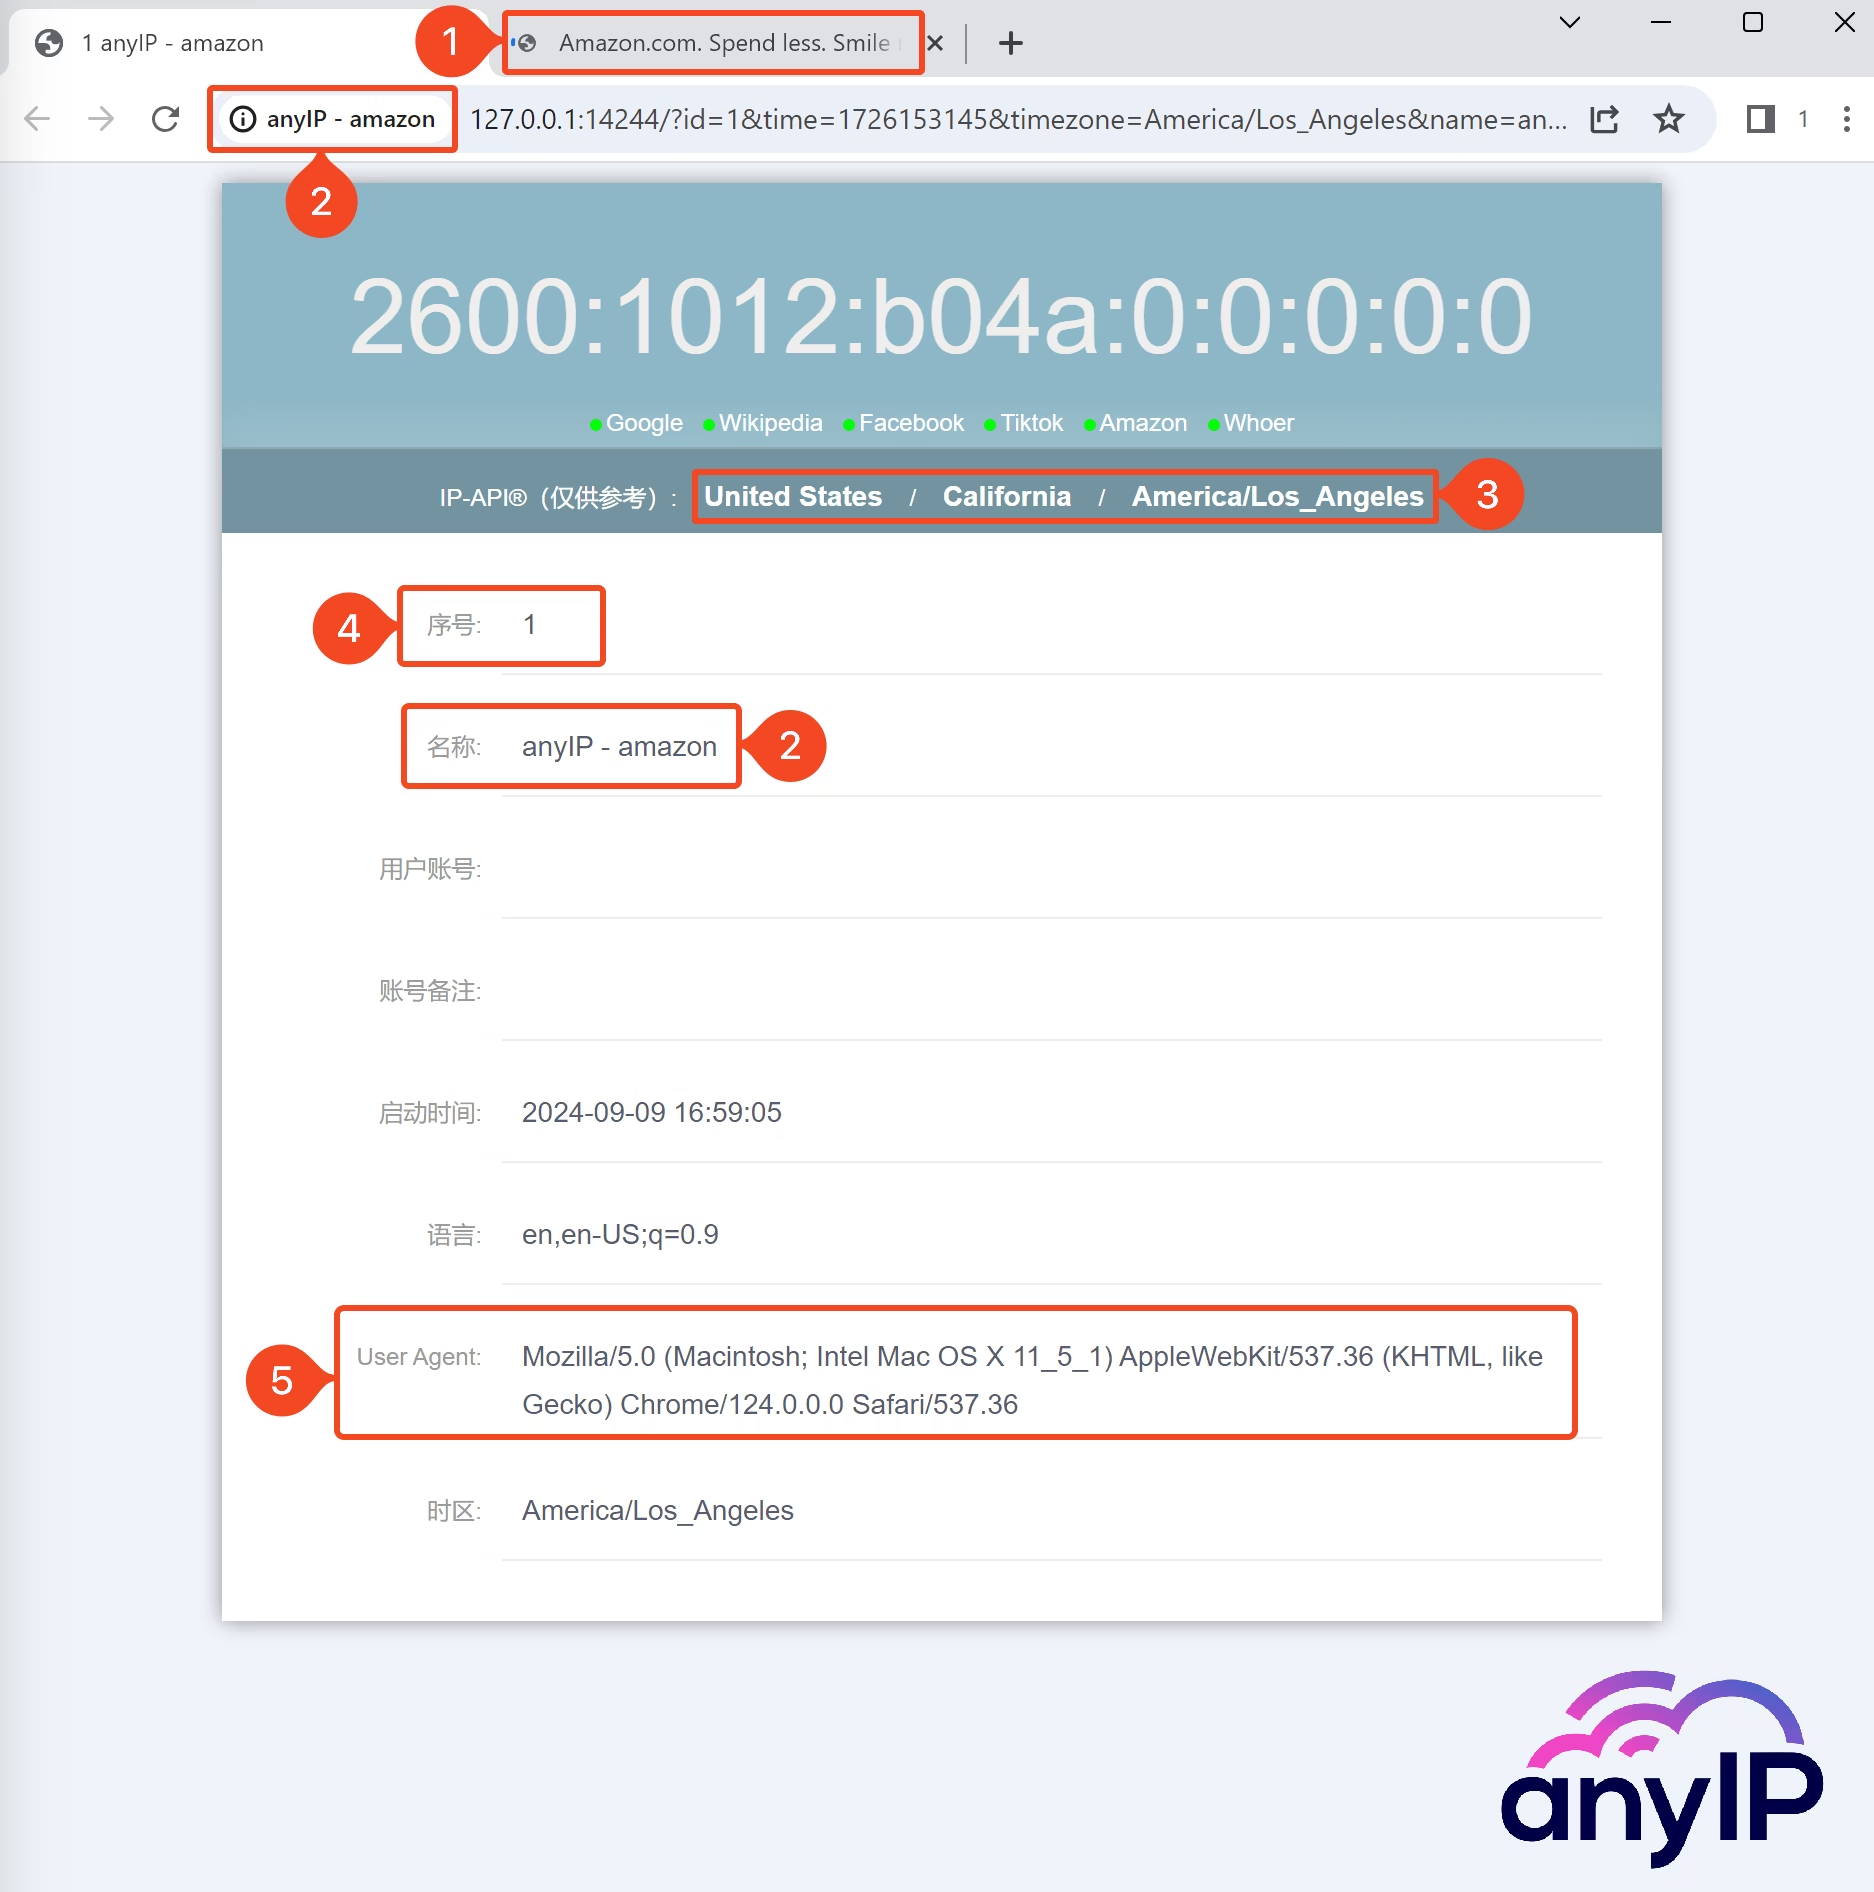
Since we choose an “Amazon” platform profile, the browser automatically opens a tab with the Amazon website
You can see the profile name: here “anyIP - amazon”
Since we used a US proxy located in California, you can double-check your location
Here is the profile ID. It can be helpful to make sure you’re using the correct profile
A quick recap of the user agent you’re using (randomly generated by ixBrowser or manually by you)
Once you finish with your tasks, you can quickly stop a profile by closing the browser as you would with a classic browser or clicking on the “turn off” icon on the profile list.

How To Manage Your Proxies On ixBrowser
ixBrowser offers an excellent dedicated interface to manage your proxies.
To access it, you need to click on “Proxy Ressources” (1) and then “Static Proxy” (2).
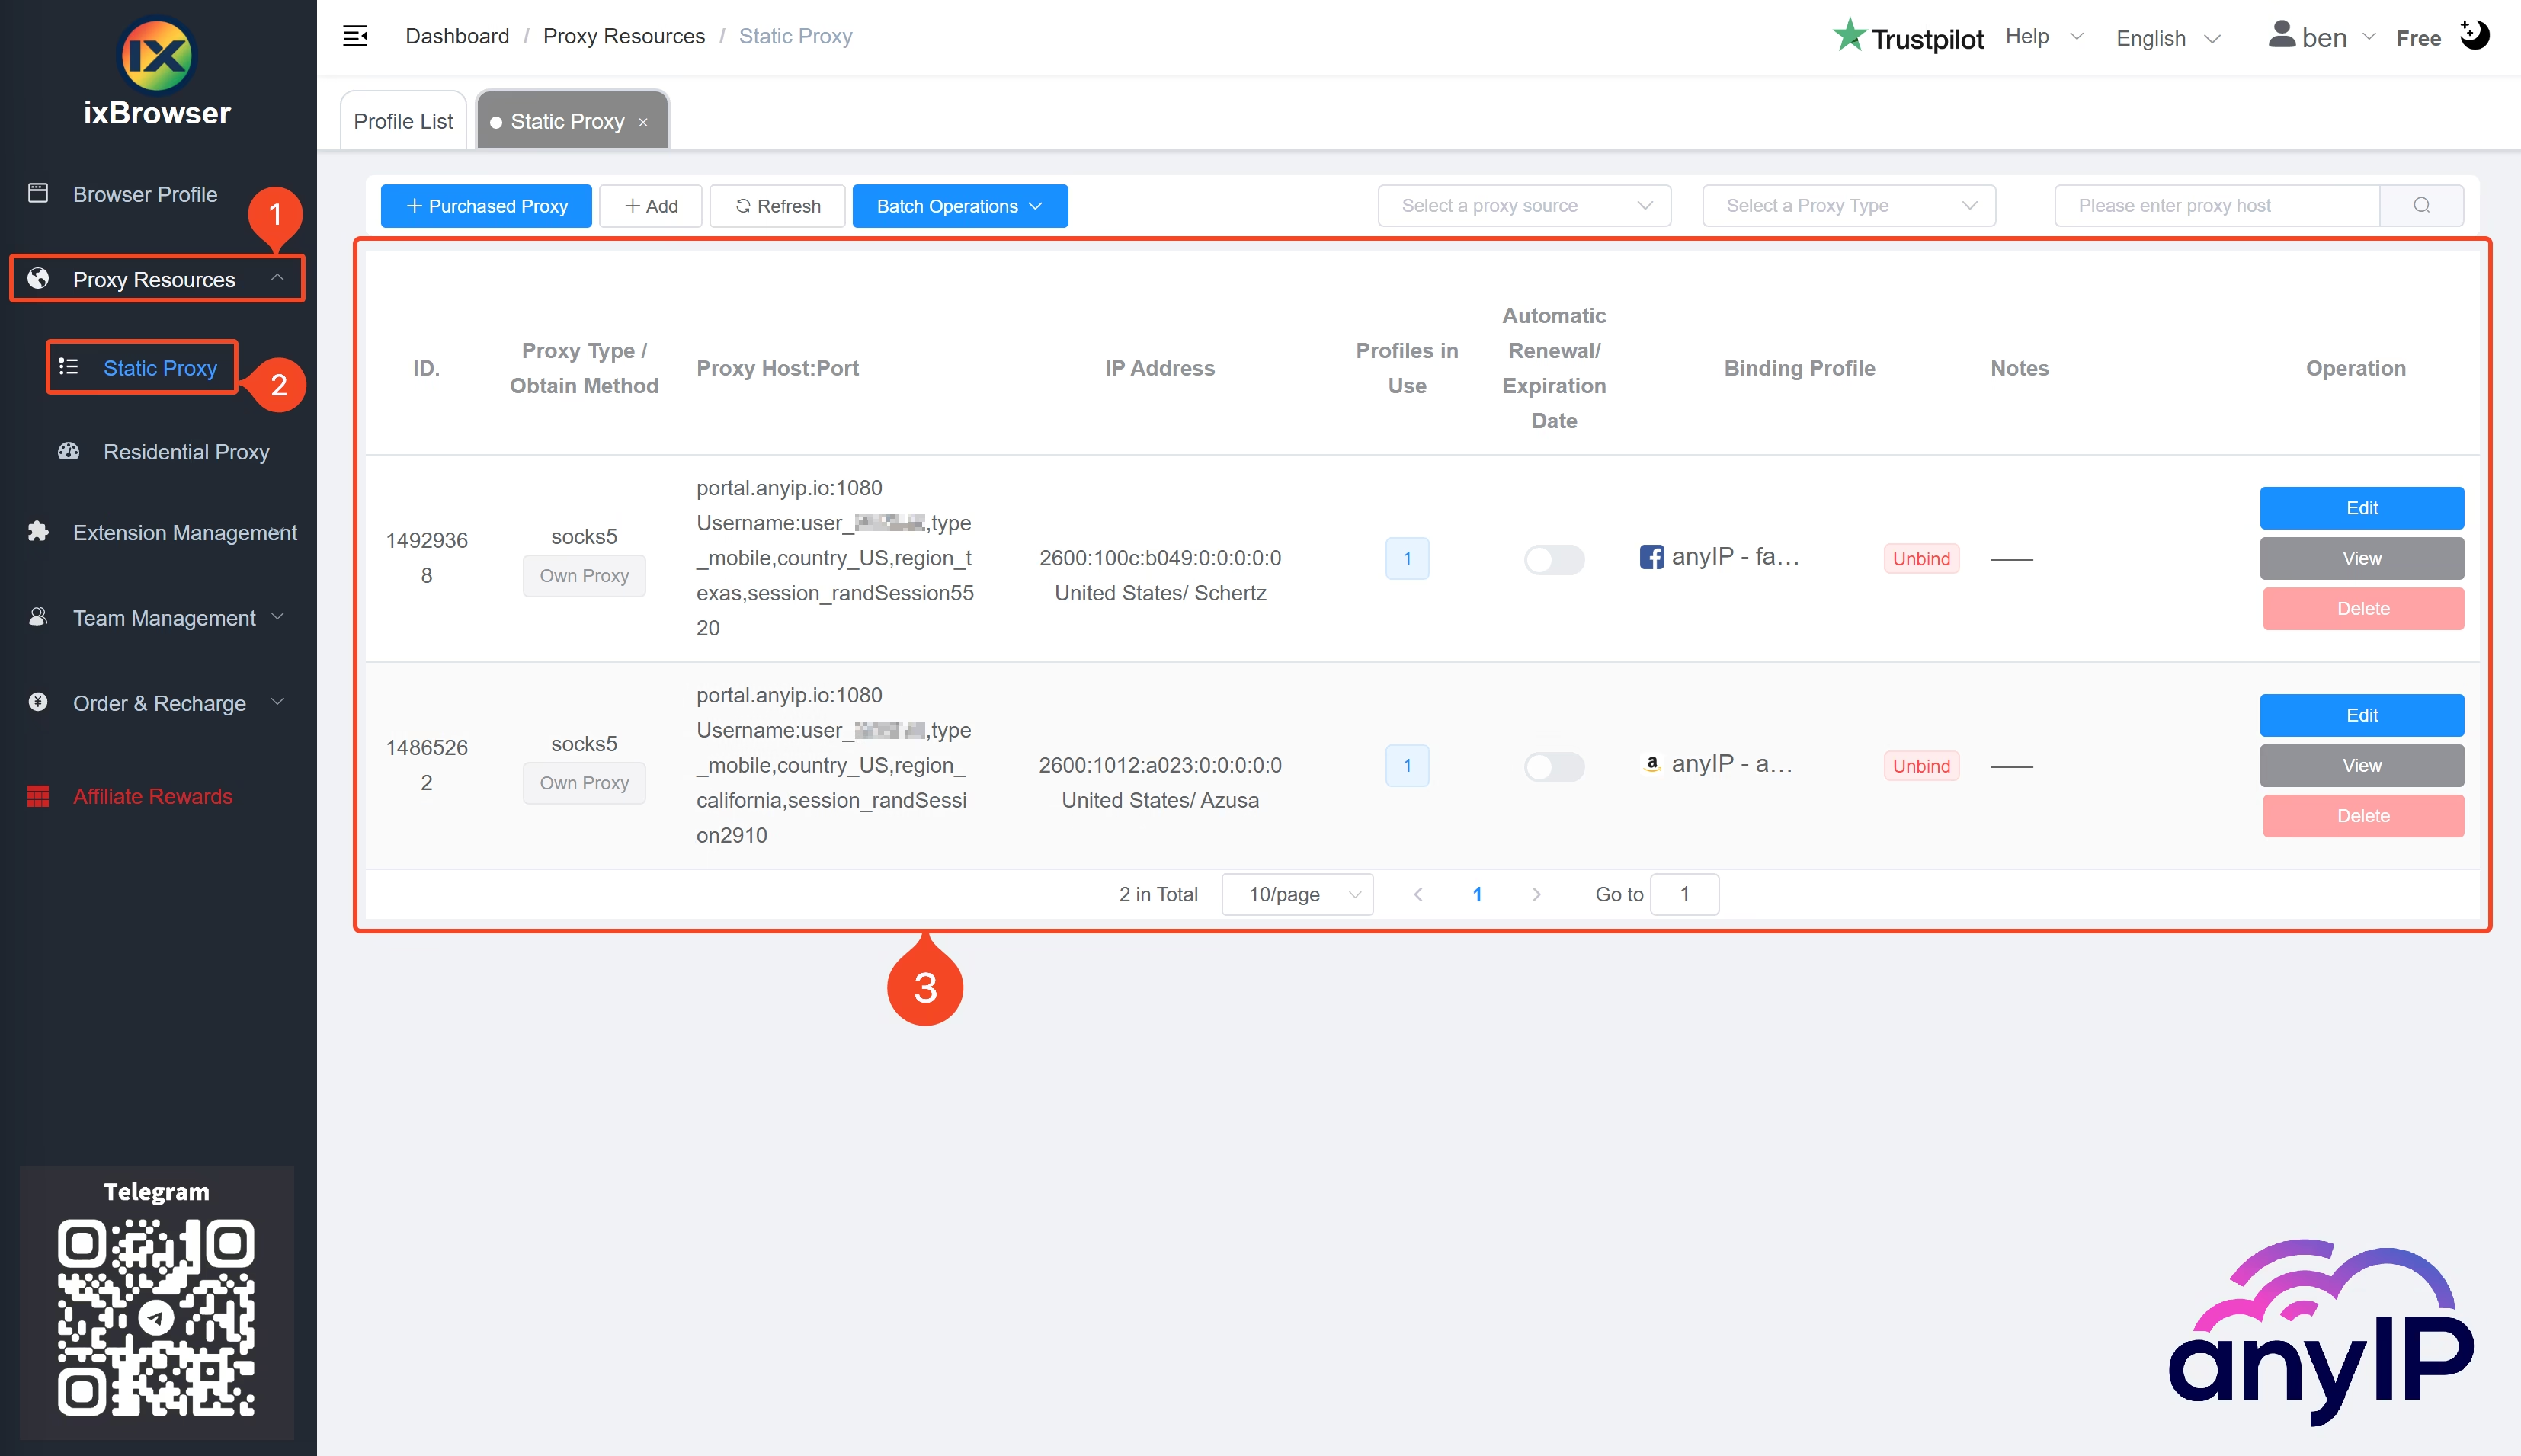
If you have followed this guide from the beginning, you’ll see at least one proxy on the list (3).
This is a nice view where you can directly see the basic, yet essential, information:
number of proxies available
proxy type and all associated credential
how many times the proxy is being used, and by which profiles
Add a Single Proxy
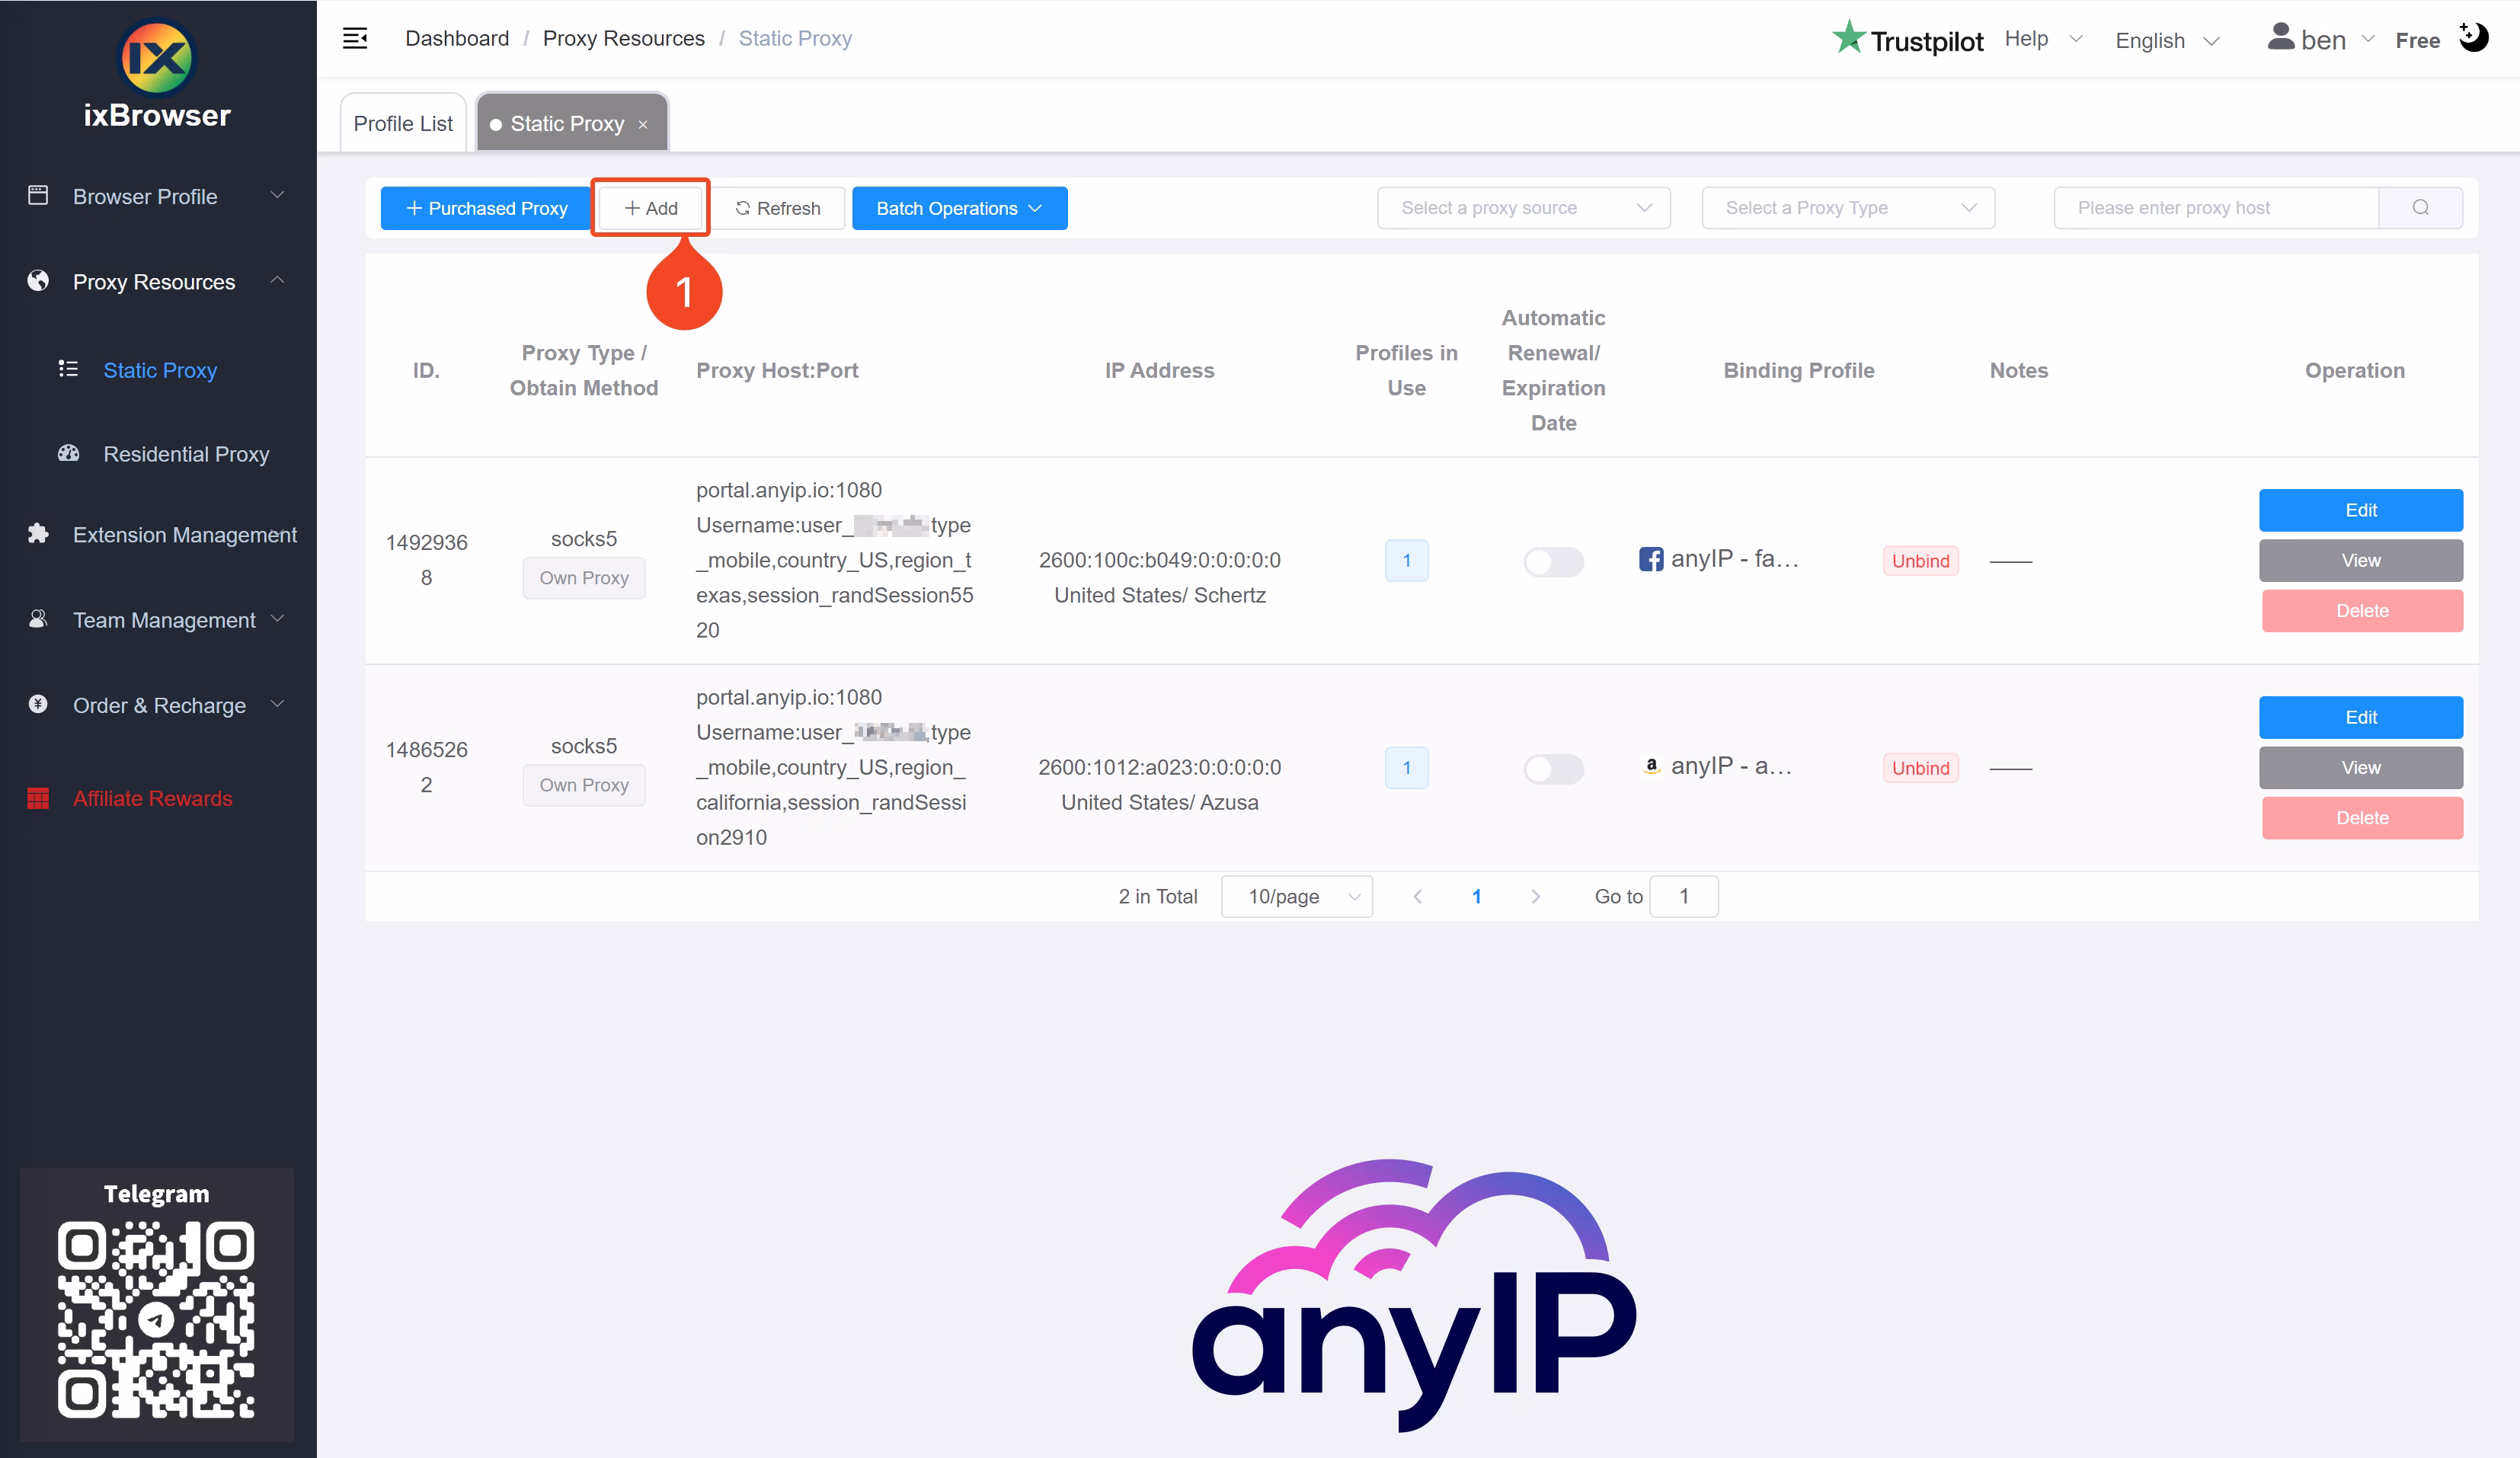
Open the form by clicking “+ Add” (1) and fill the form with all the needed information:
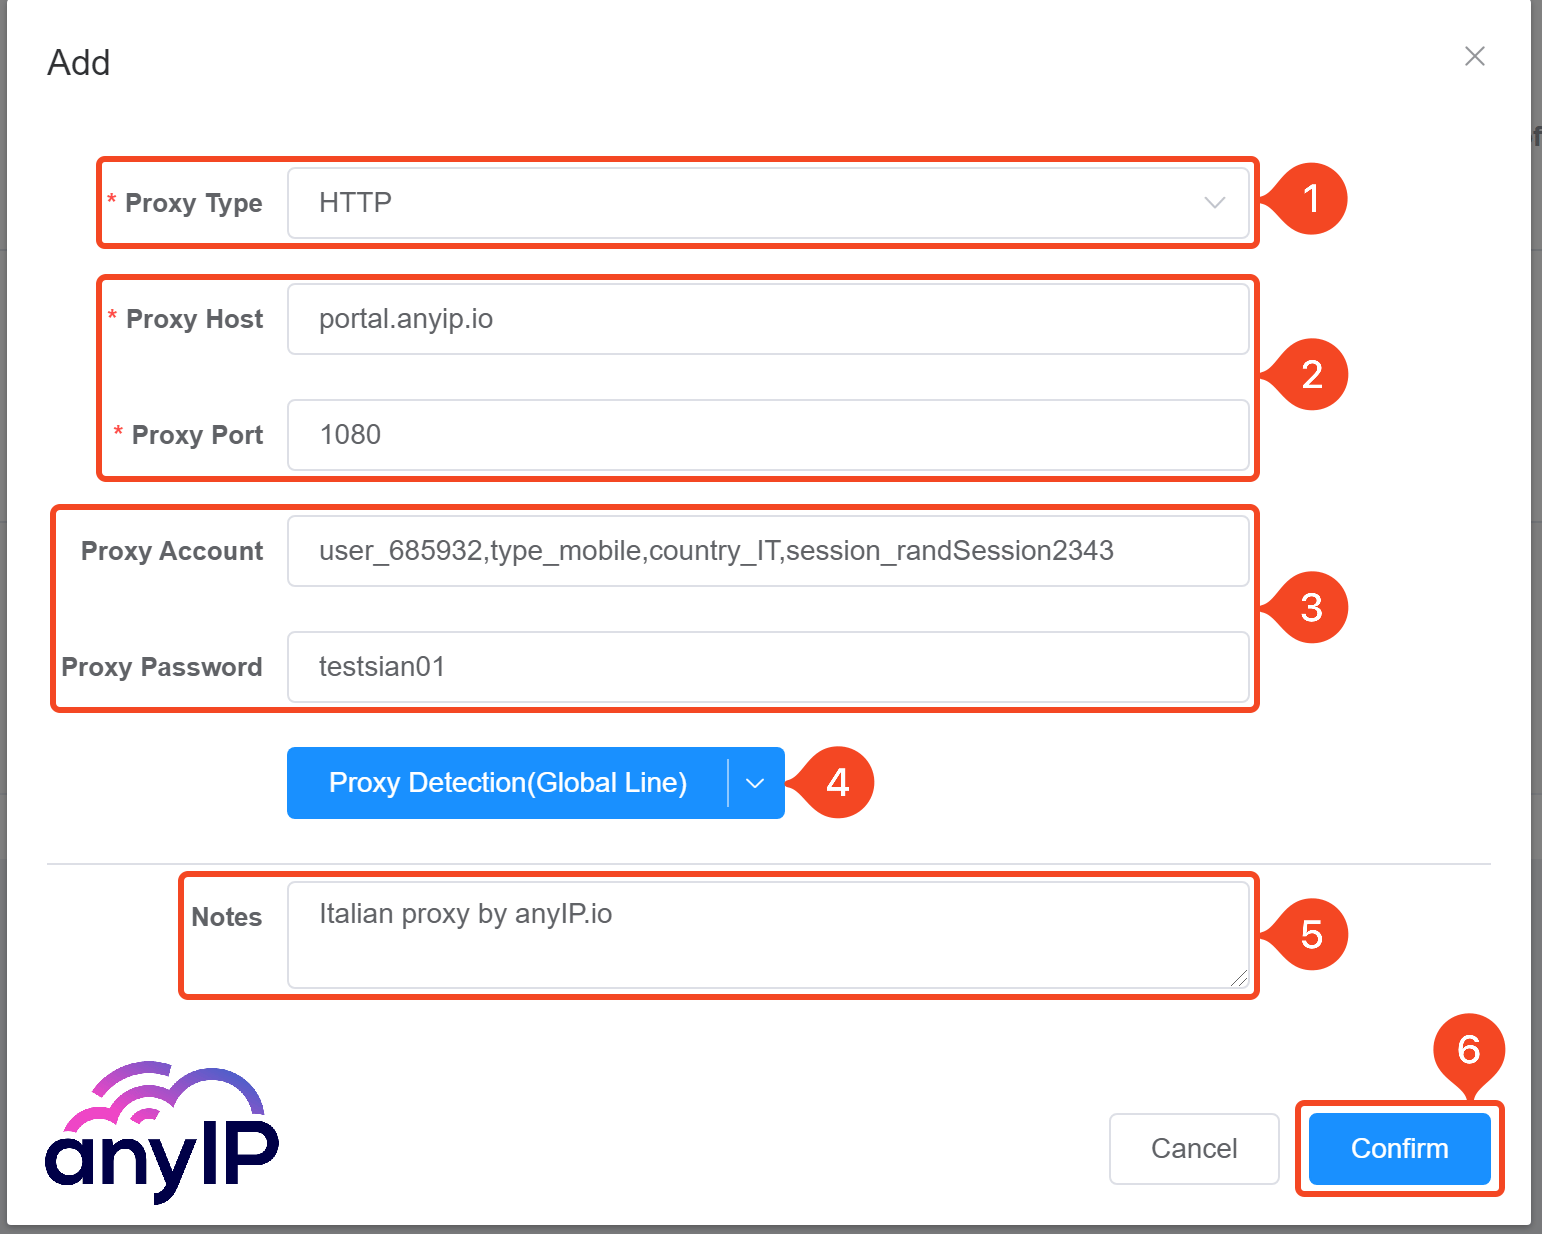
Select the proxy protocol you want to use. For this new proxy, we’ve selected HTTP
Enter here the hostname and port. For an anyIP.io HTTP proxy, it’s portal.anyip.io:1080
If your proxy requires authentication, you need to add the username and password
You can test your proxy using this button
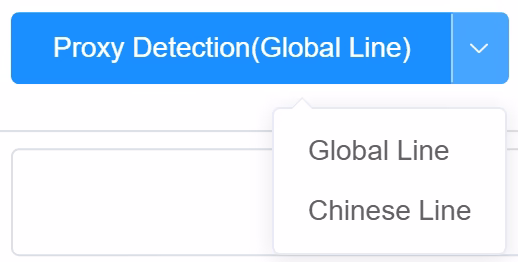
💡 ixBrowser offers a nice feature for Chinese users. You can either test your proxy using the Global line or through the Chinese line:
You can add a small description/note to your proxy
Once you’re done and the proxy is tested, you can save it by clicking on “Confirm”
Your new proxy will be in the proxy list.
Add a Proxy Batch
Adding a proxy one by one is easy and can be enough for most users. But if you need to manage 100 proxies, ixBrowser will make you happy :)
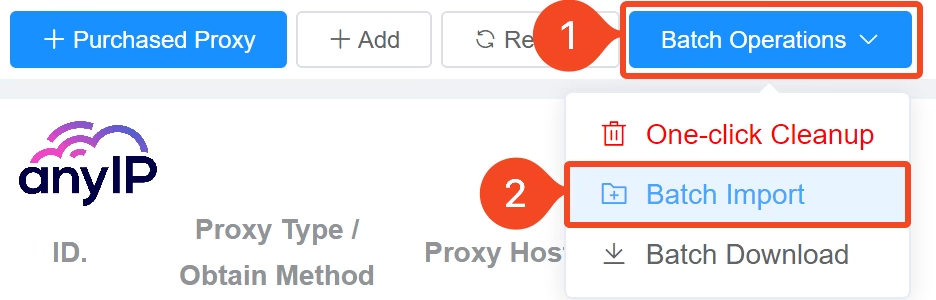
Click on “Batch Operation” (1), then “Batch Import” (2).
While I would prefer to have a big HTML textarea field to copy/paste all my proxies instantly, the batch importation process is quite similar to the process in Ghost Browser, and it’s working just fine.
You’ll need to edit an XLSX file to prepare all your proxies for the importation.
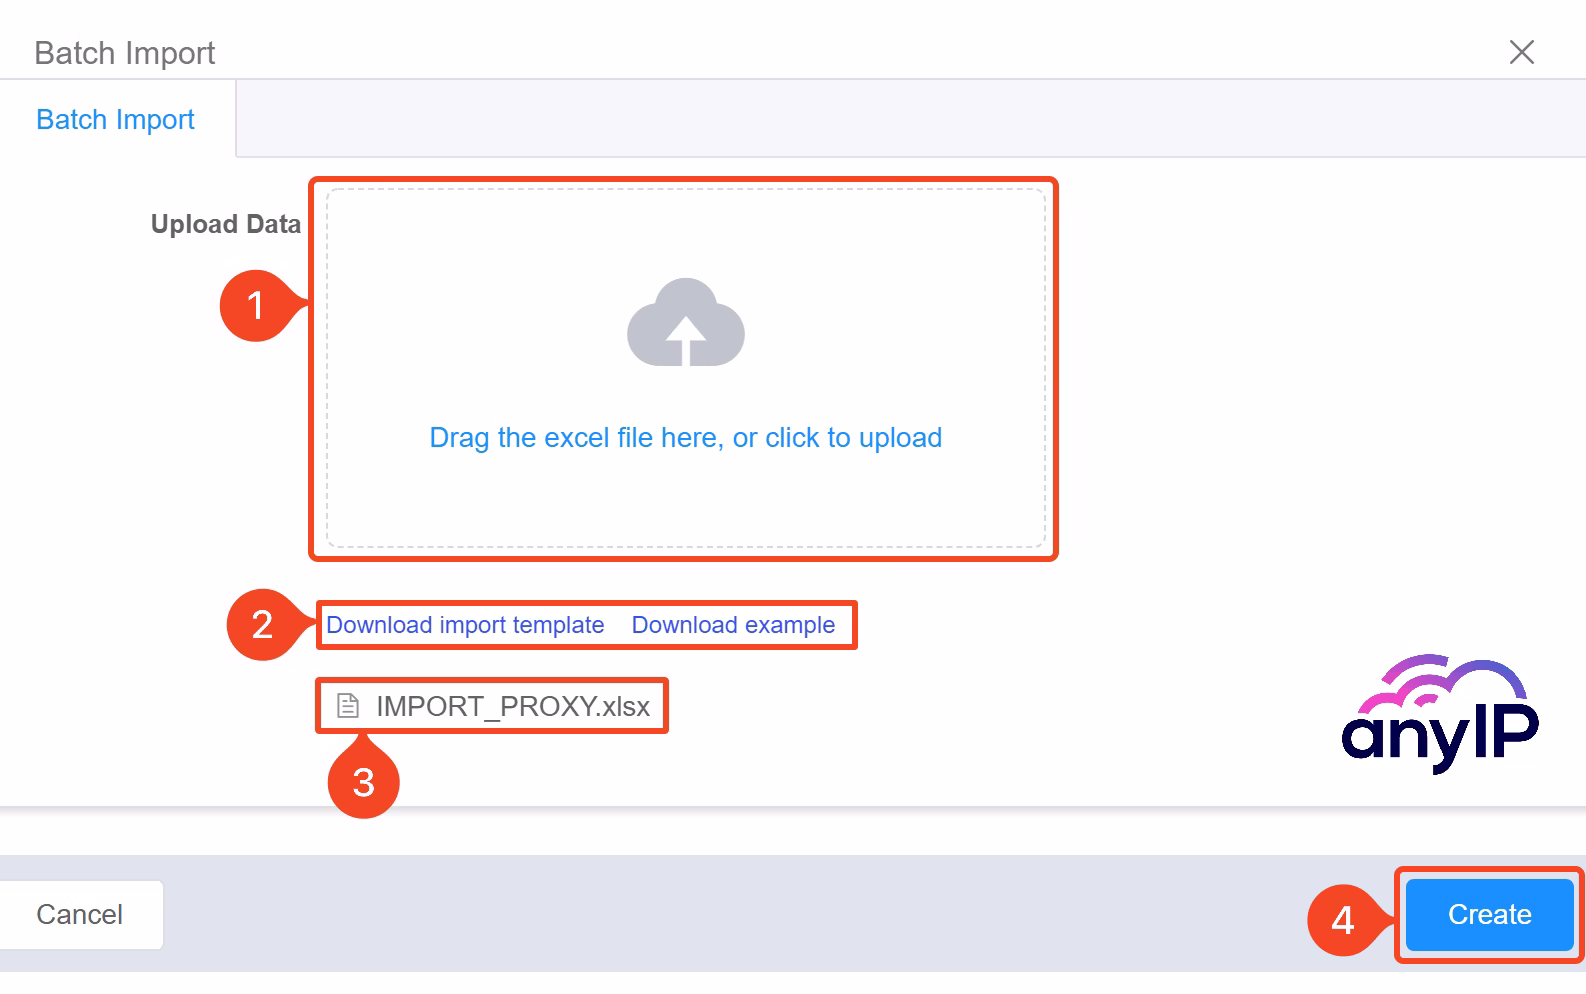
You can upload your file here
ixBrowser allows you to download a template and example file. It is very useful to avoid any issues.
💡 here is the quick test we’ve made using the sample document

Once you’ve uploaded your file, you’ll see it here
You can start the importation by clicking on “Create”
The importation can take a few seconds depending on how many profiles you’re creating. You’ll then see your new proxy in the Proxy List.
Edit Your Proxy
It’s super easy to edit your proxies; you simply need to click on the “edit” (1) button that you’ll see in the “Operation” column

You’ll also find a view and a delete button.
The view button will open a wider view of your proxy information, which is much easier to read than the list.
Browser Profile Management
Advanced Fingerprint Configuration
A crucial part of an anti-detect browser is the fingerprint quality.
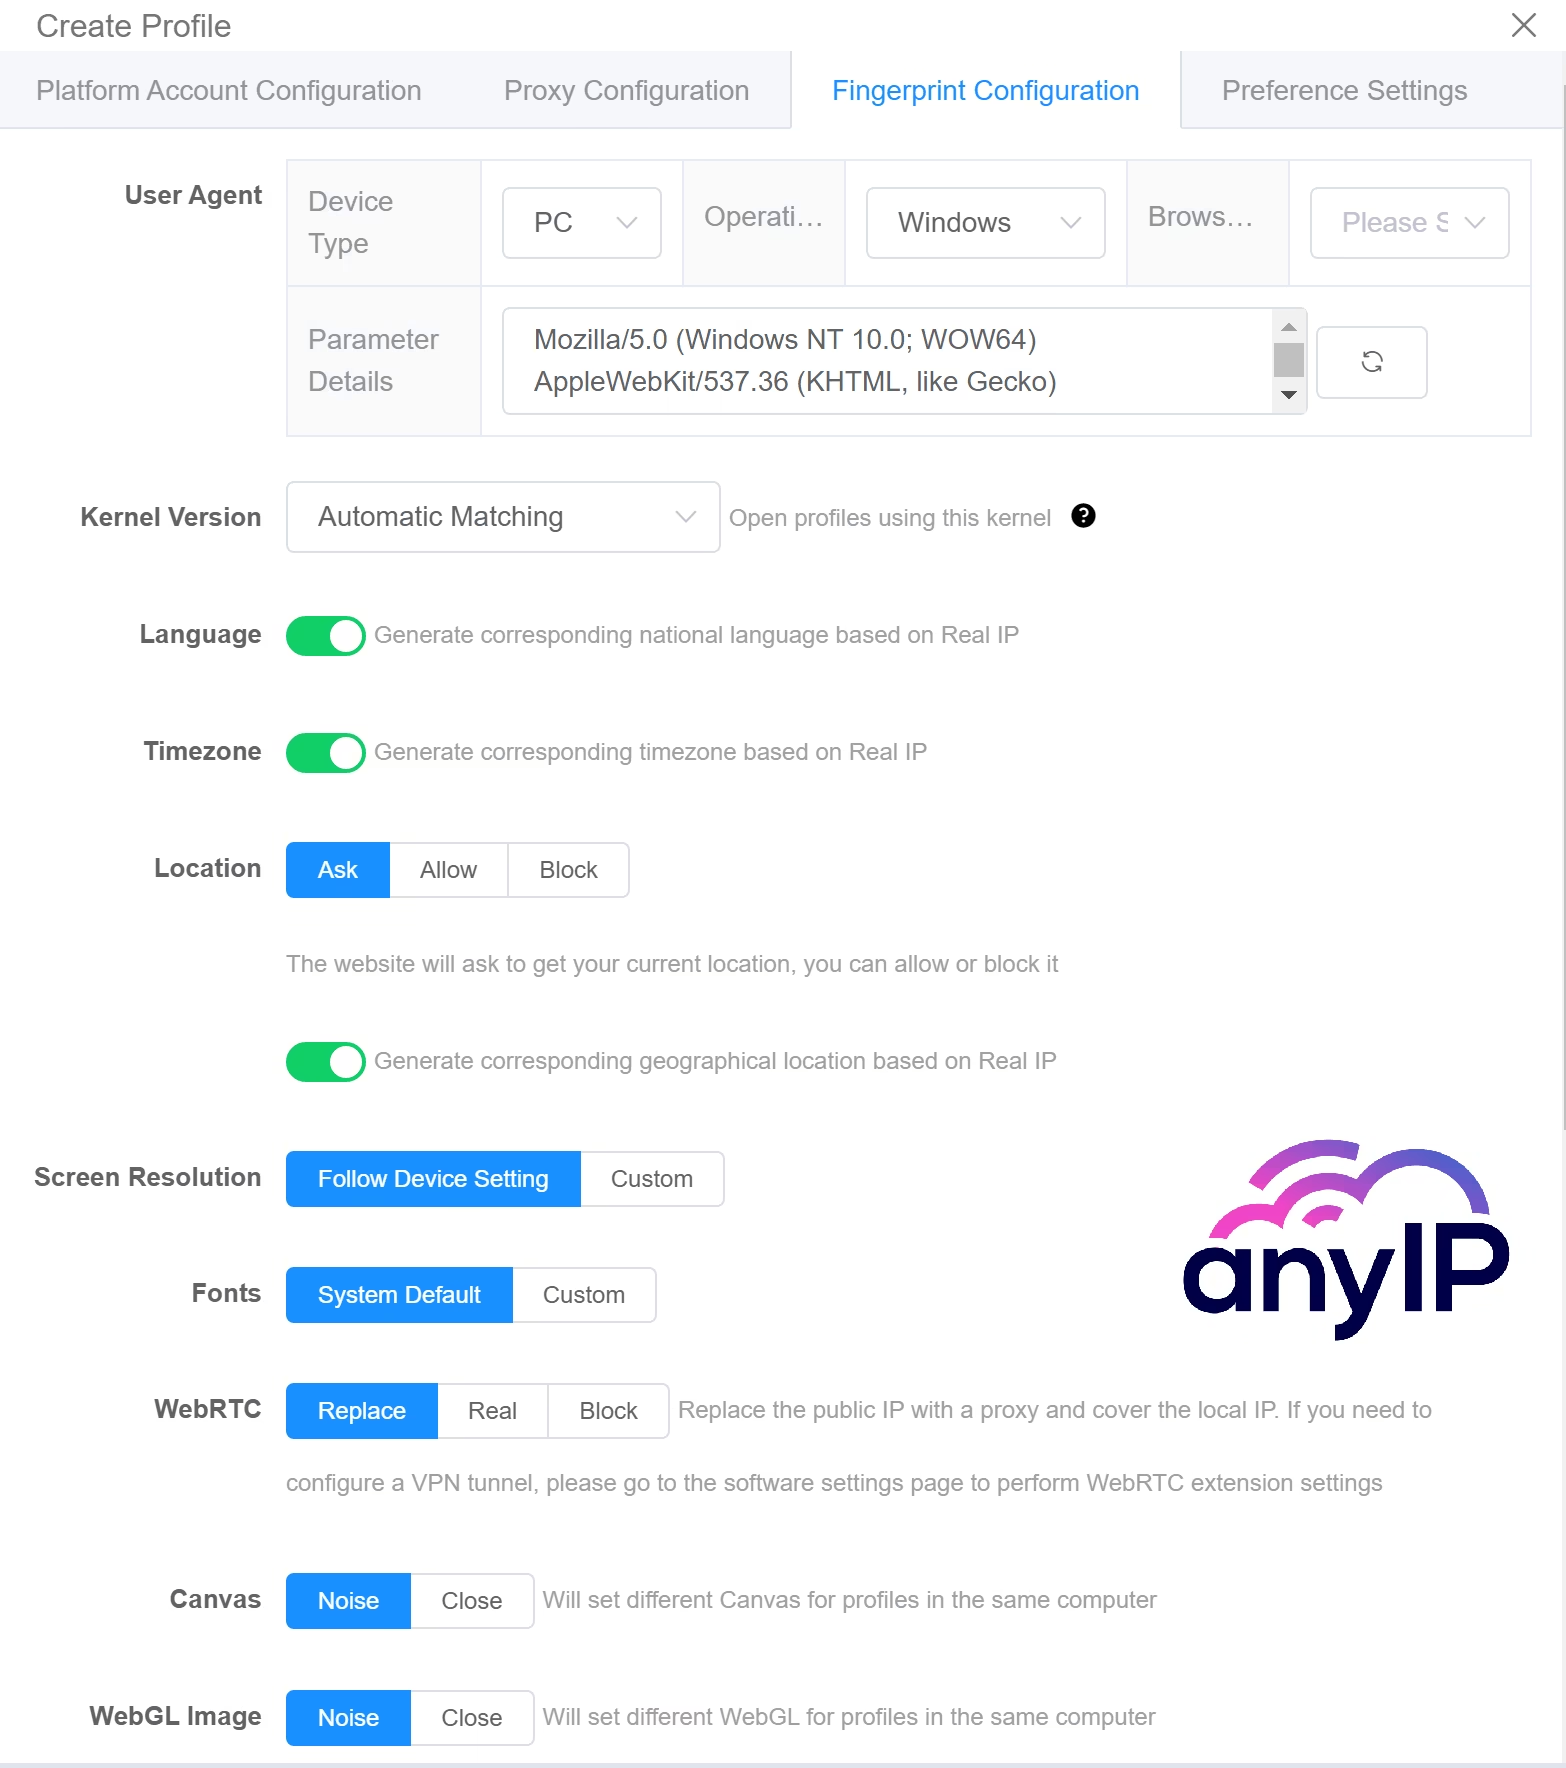
ixBrowser gives you the option to customize your fingerprint.
Depending on your skills, I would not recommend editing those settings. . Unless you’re misconfiguring it, ixBrowser offers a great and solid fingerprint for your usage!
The following screenshots show my results on iphey.com and pixelscan.net, which are excellent online services for controlling your fingerprint.
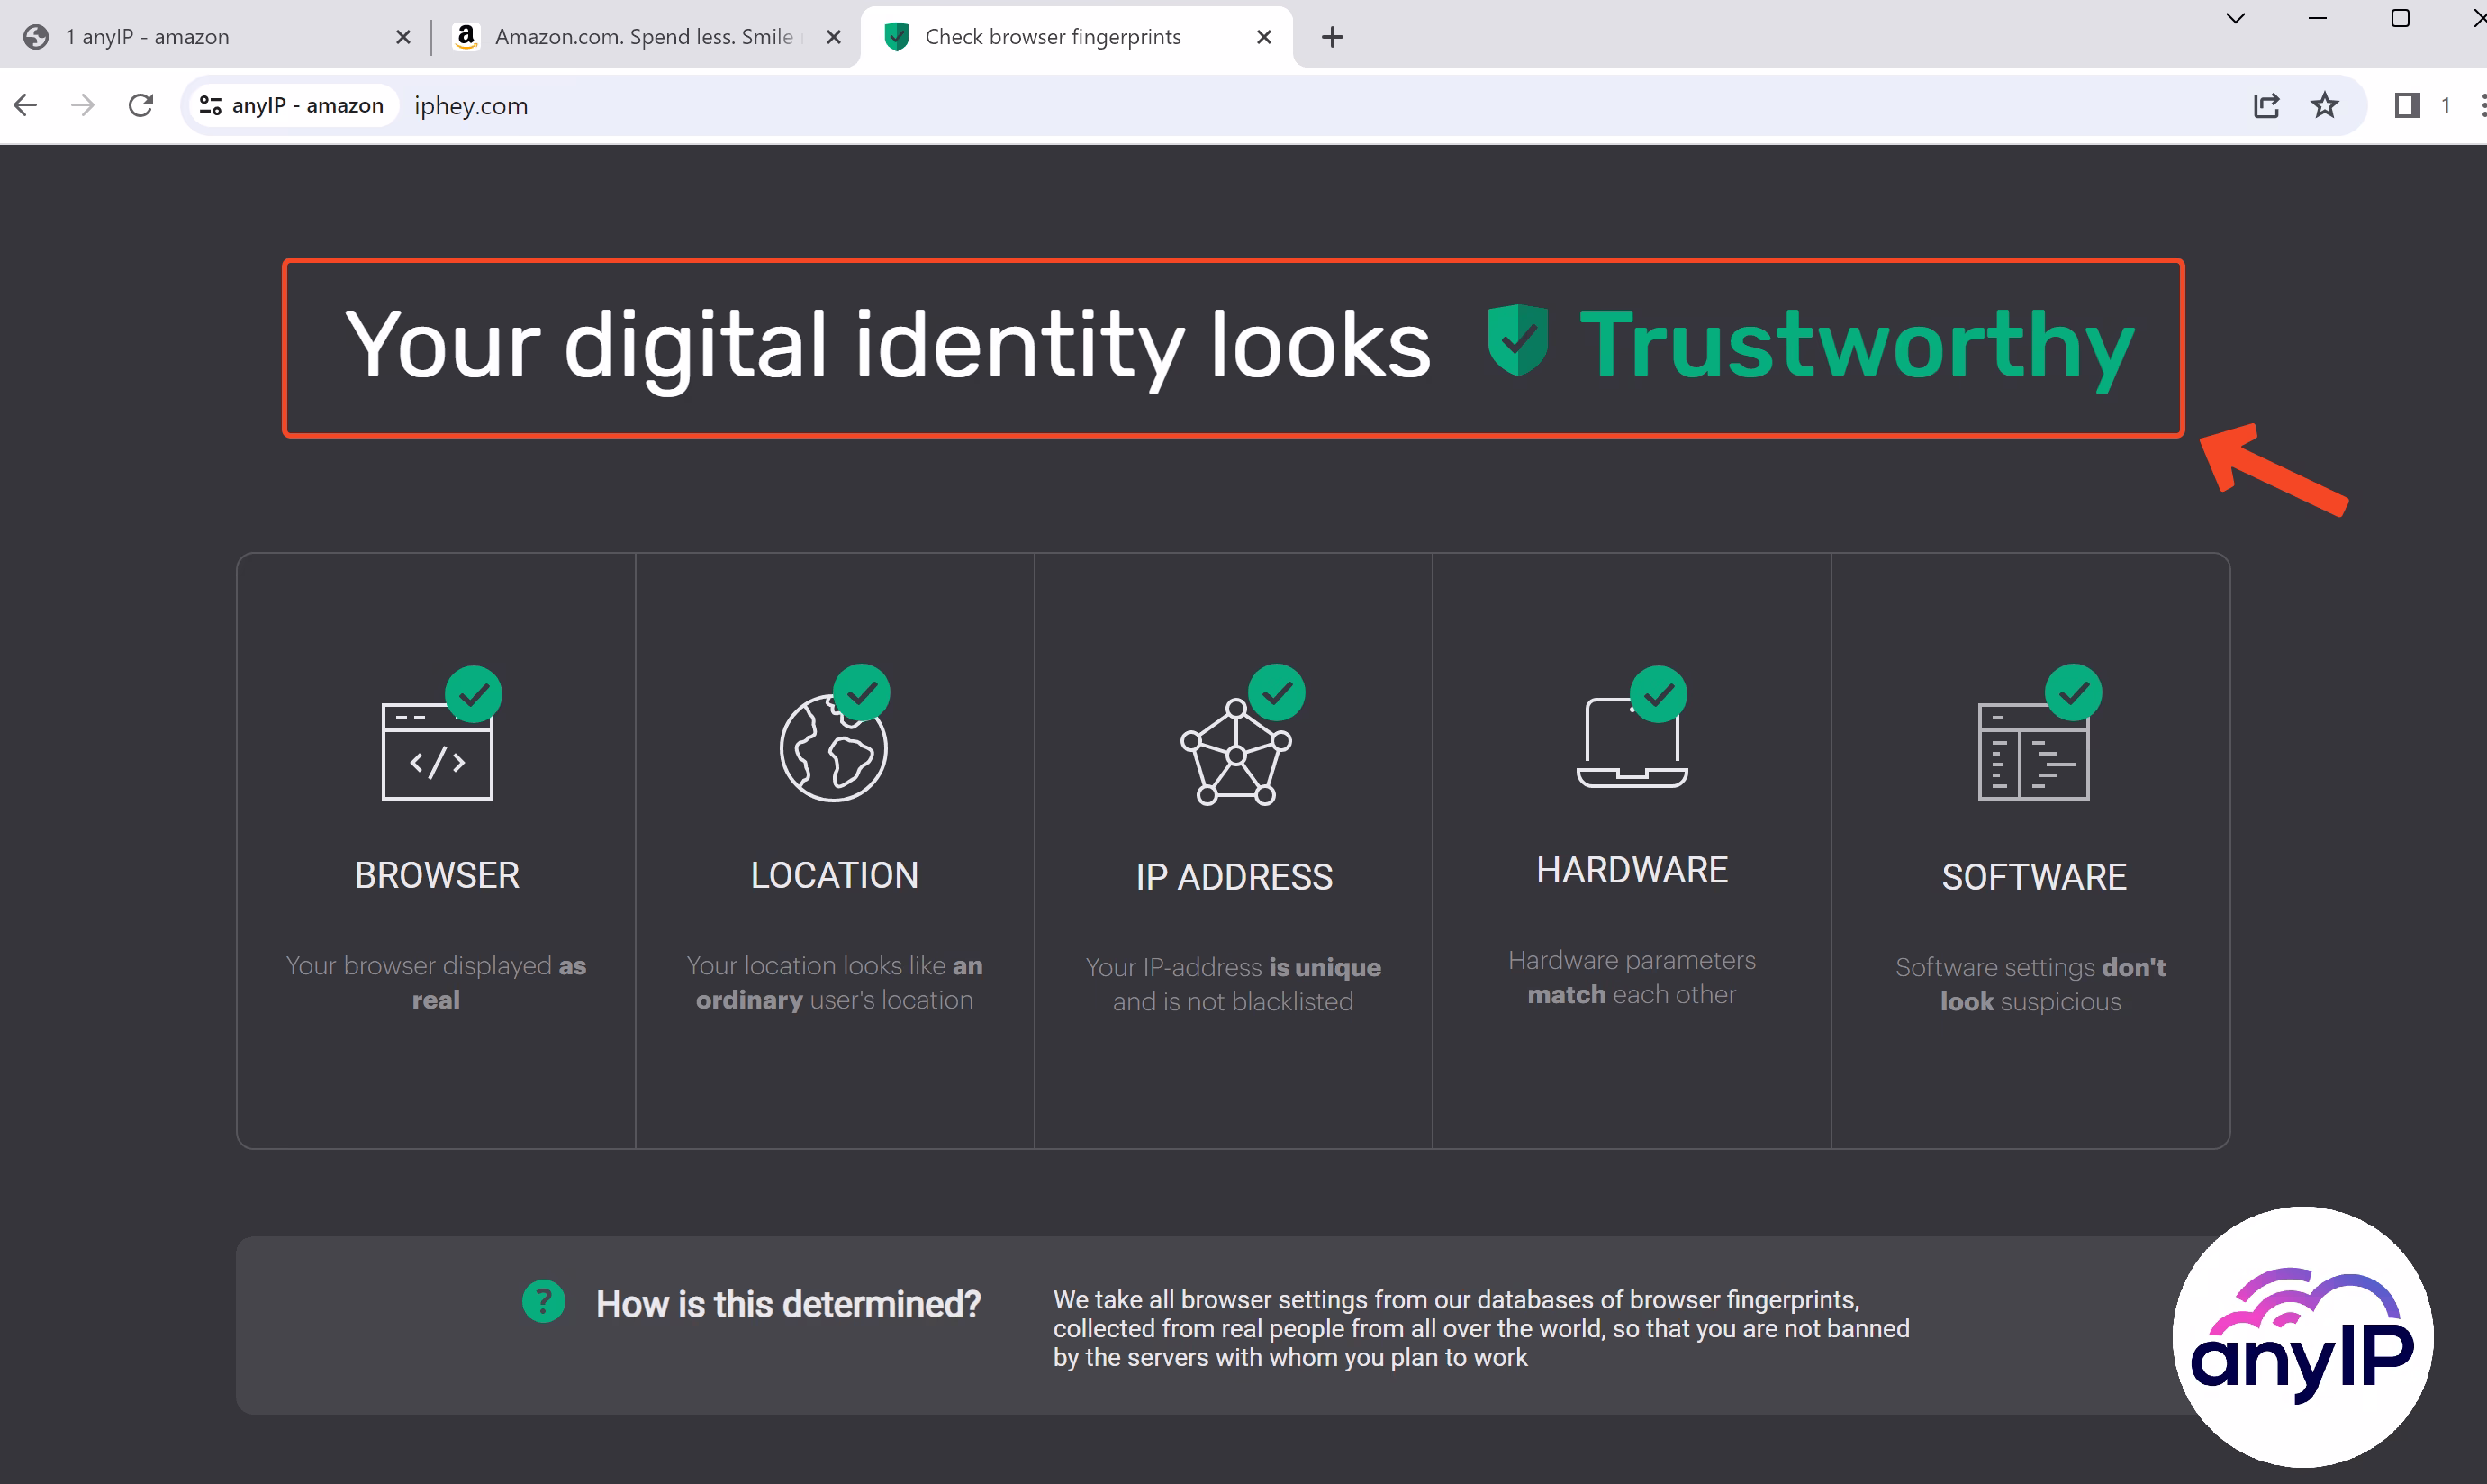 |
There is nothing more I want from an anti-detect browser than a consistent and trustworthy fingerprint! Well done ixBrowser!
How To Edit a Profile
One by one
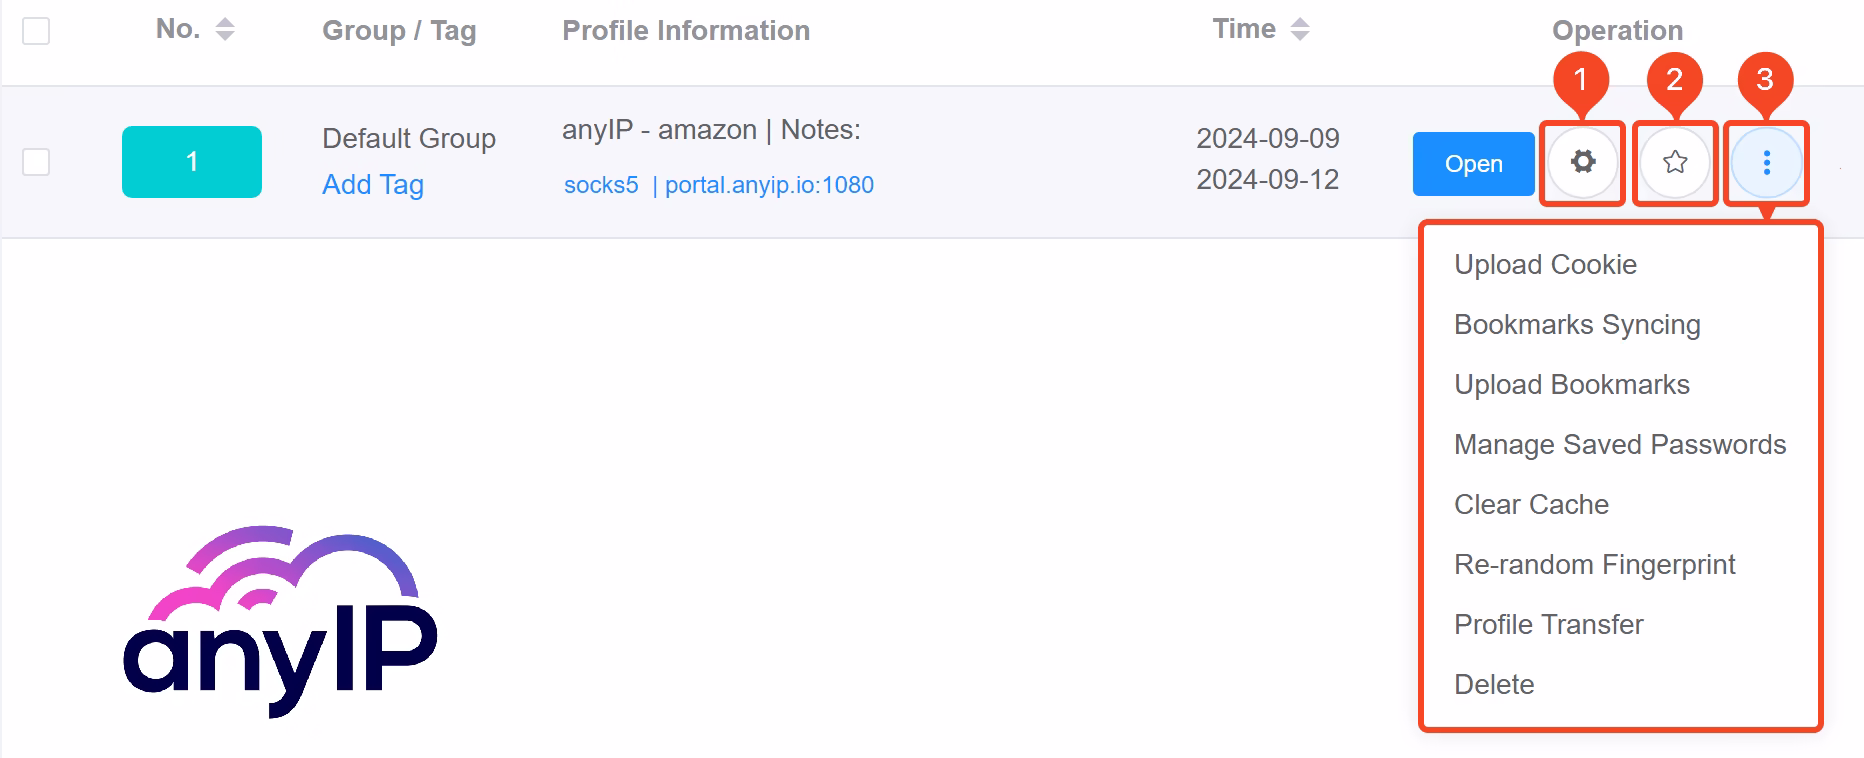
If you click on this button, you’ll open the edit form. It is the same as the creation form and allows you to edit your profile completely.
Use this “Star” button to set this profile as your favorite.
Click on the “tree dot” button to access the contextual menu. You can access advanced options from this menu, like cookies & bookmarks settings, password management, etc.
Batch editing
ixBrowser allows you to perform batch operations, such as editing your profiles.I’ve created another profile to illustrate this feature.
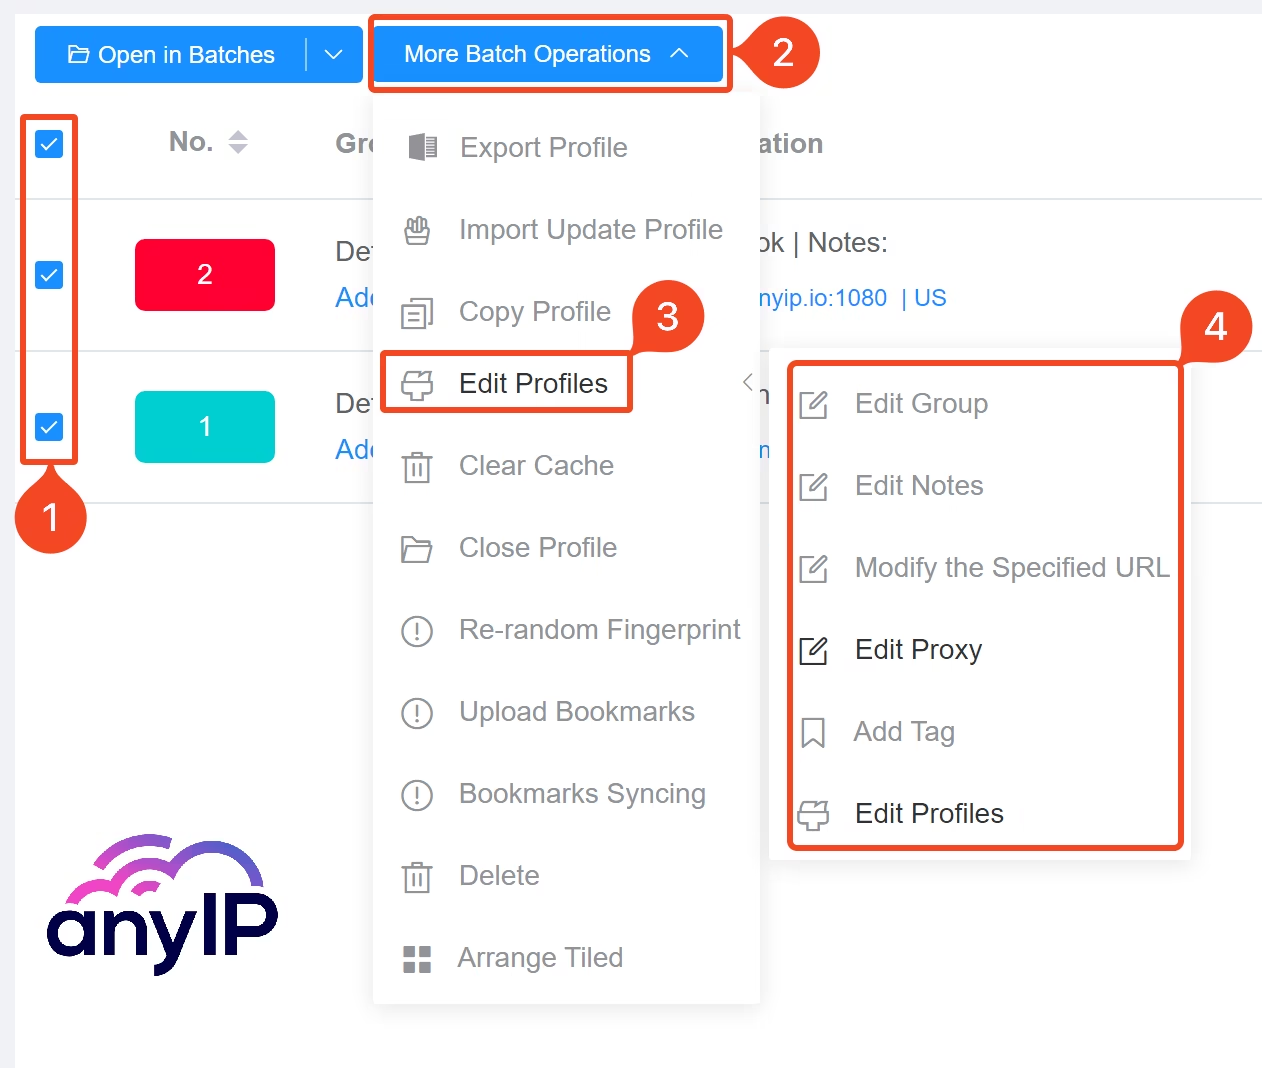
Select the profile you need to interact with
Open the “More Batch Operations” menu
Select “Edit Profiles”
Select the settings you want to edit.
The form will look like this:
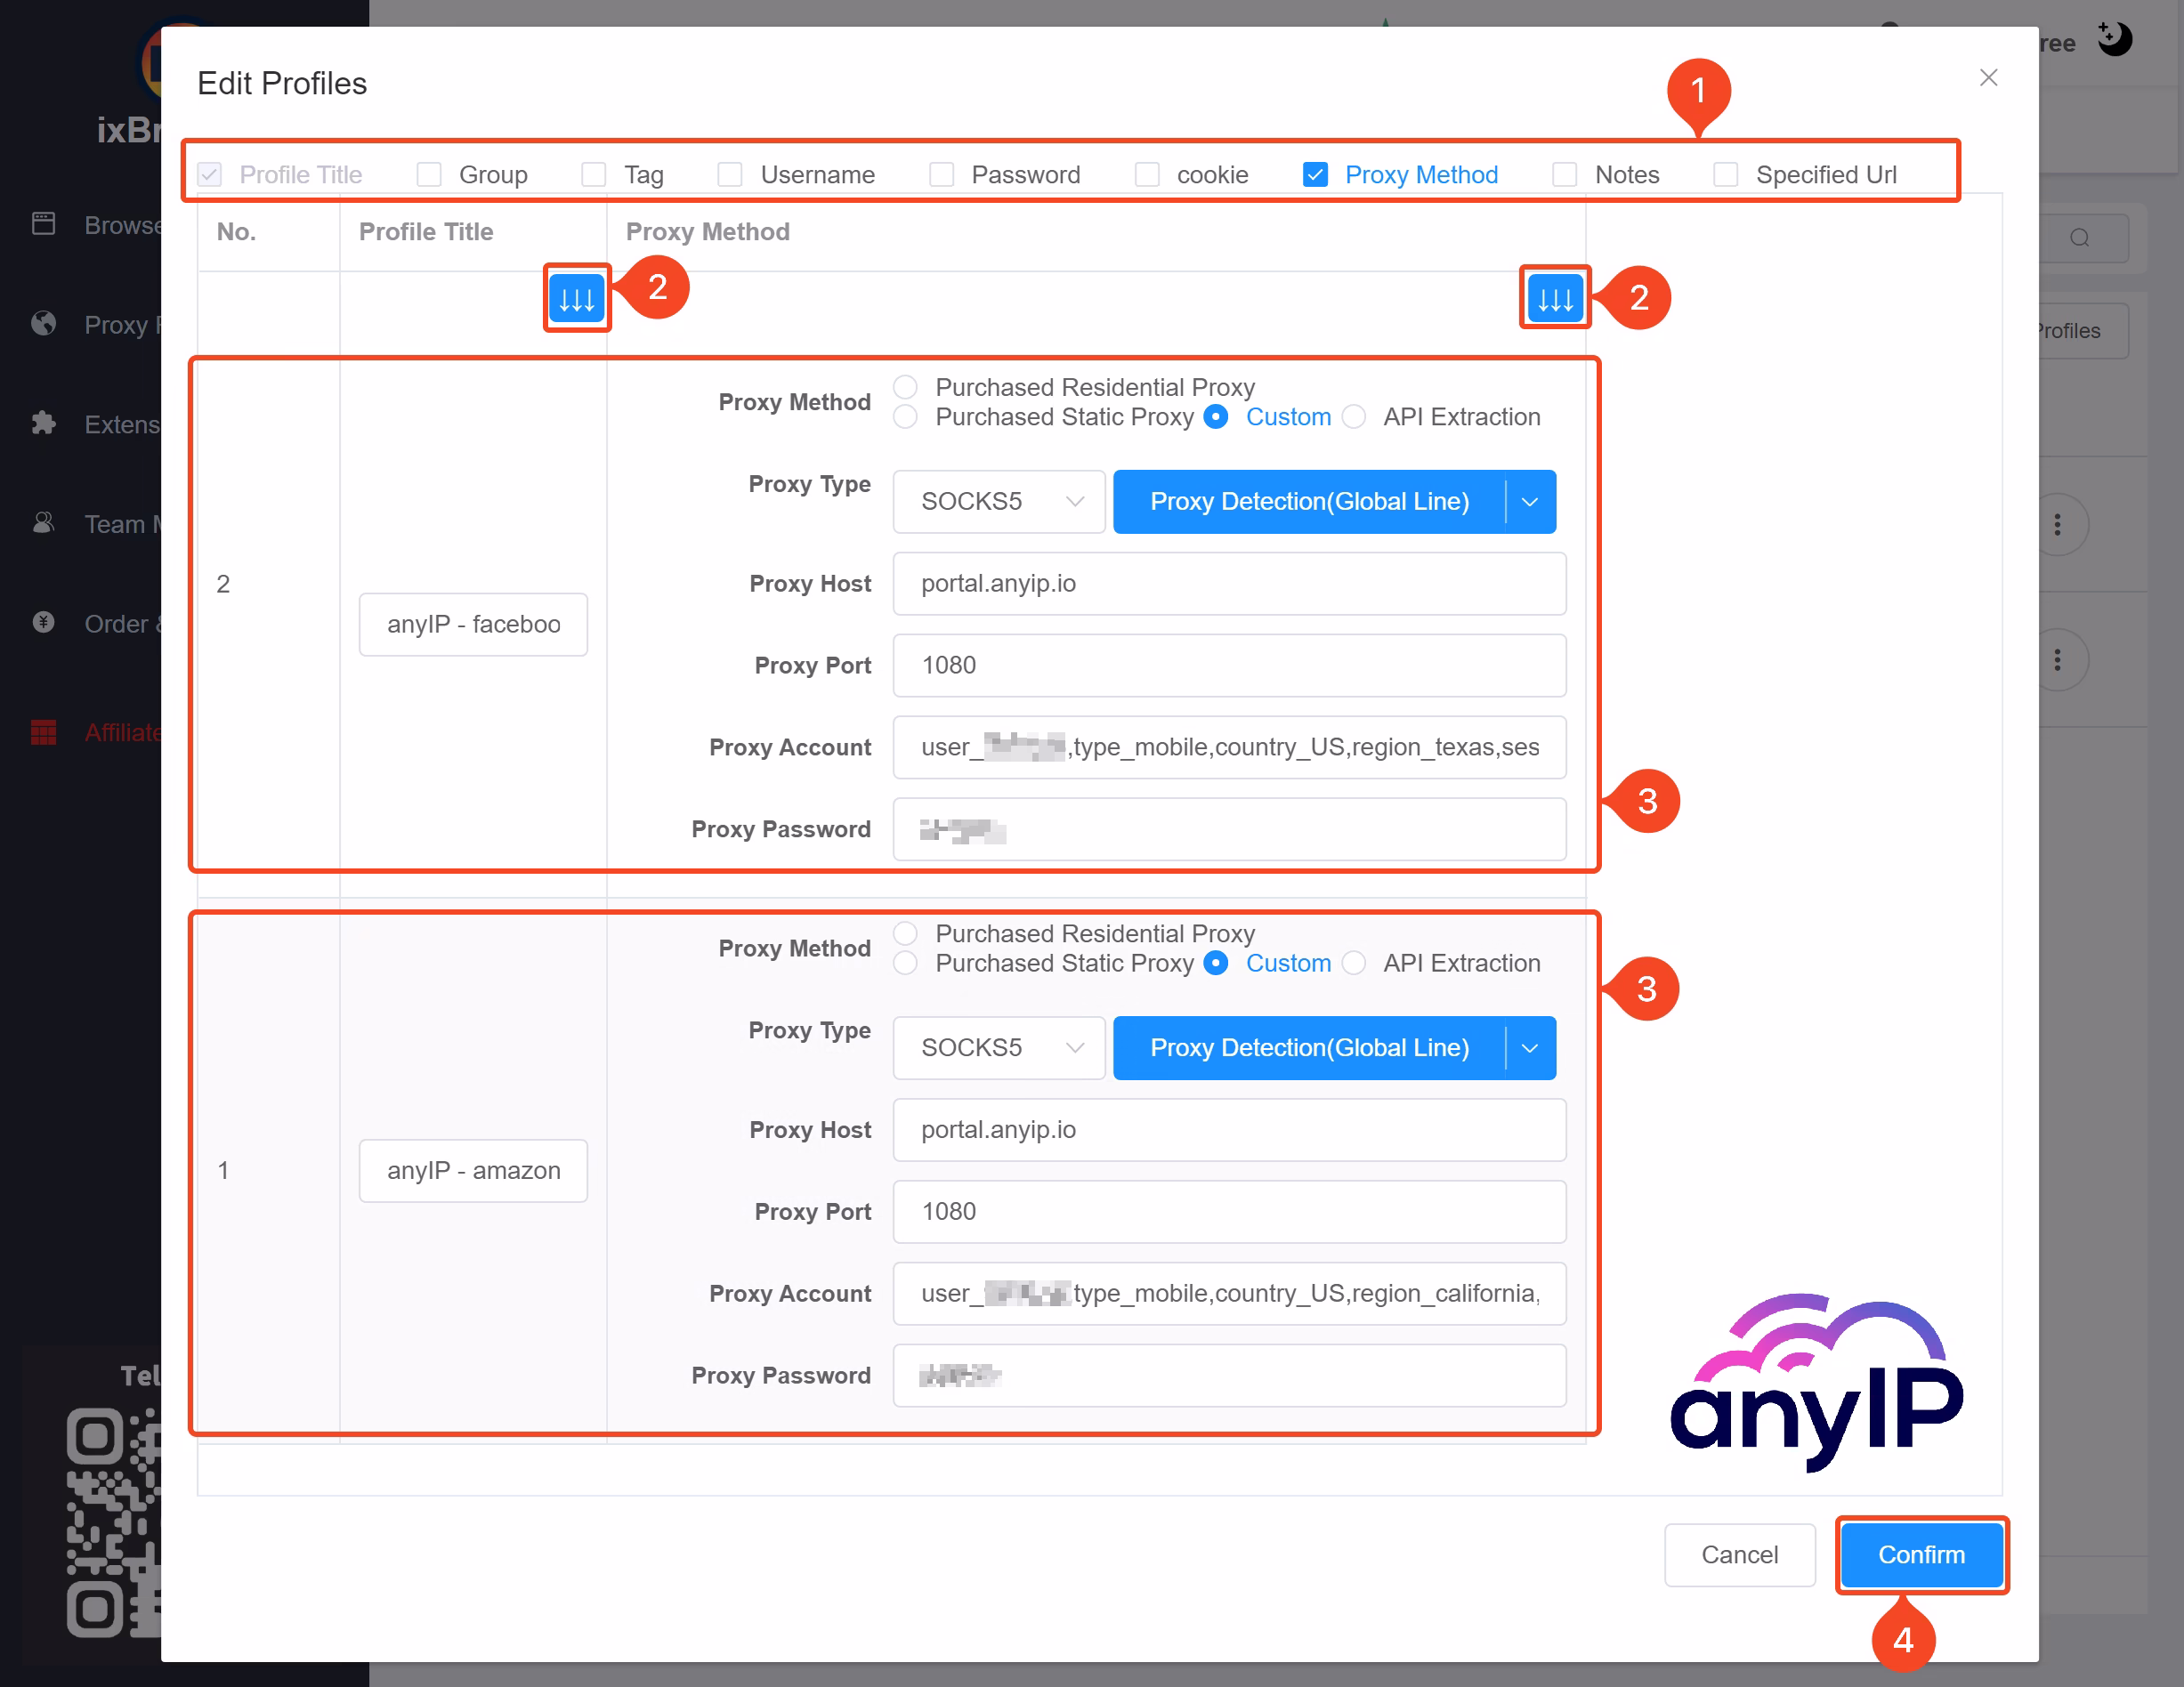
While the UI is still a bit raw, it’s a very clever feature. You’ll be able to easily edit multiple profile this way.
You can quickly select which settings you want to edit by selecting here
Those buttons will allow you to apply the modification to all profile
Here, you can edit each profile one by one
Finally, click on “Confirm” to save all your modifications
Why Should I use ixBrowser?
ixBrowser is a feature-packed anti-detect browser that stands out from the competition. It uses strong encryption to keep your data secure and helps bypass network restrictions, providing users with complete anonymity.
Whether you need to manage multiple profiles or work securely online, ixBrowser makes it simple and reliable for both individuals and teams.
How To Test It?
ixBrowser has a free plan that allows users to create 10 profiles per day, and there is no limit to the total number of profiles.
Compared with the mainstream anti-detect browsers on the market, ixBrowser also has a higher price/performance ratio. If you want to create more profiles every day or you want to unlock API and advanced cloud storage functions, you can purchase packages (plans) that start from $3.99/month.
In addition, ixBrowser has no team seat limit. Users can create a team, invite unlimited team members, and efficiently manage their permissions to make teamwork more efficient. ixBrowser also supports extension management, profile transfer, batch creation, batch modification, proxies sales, and many other functions.
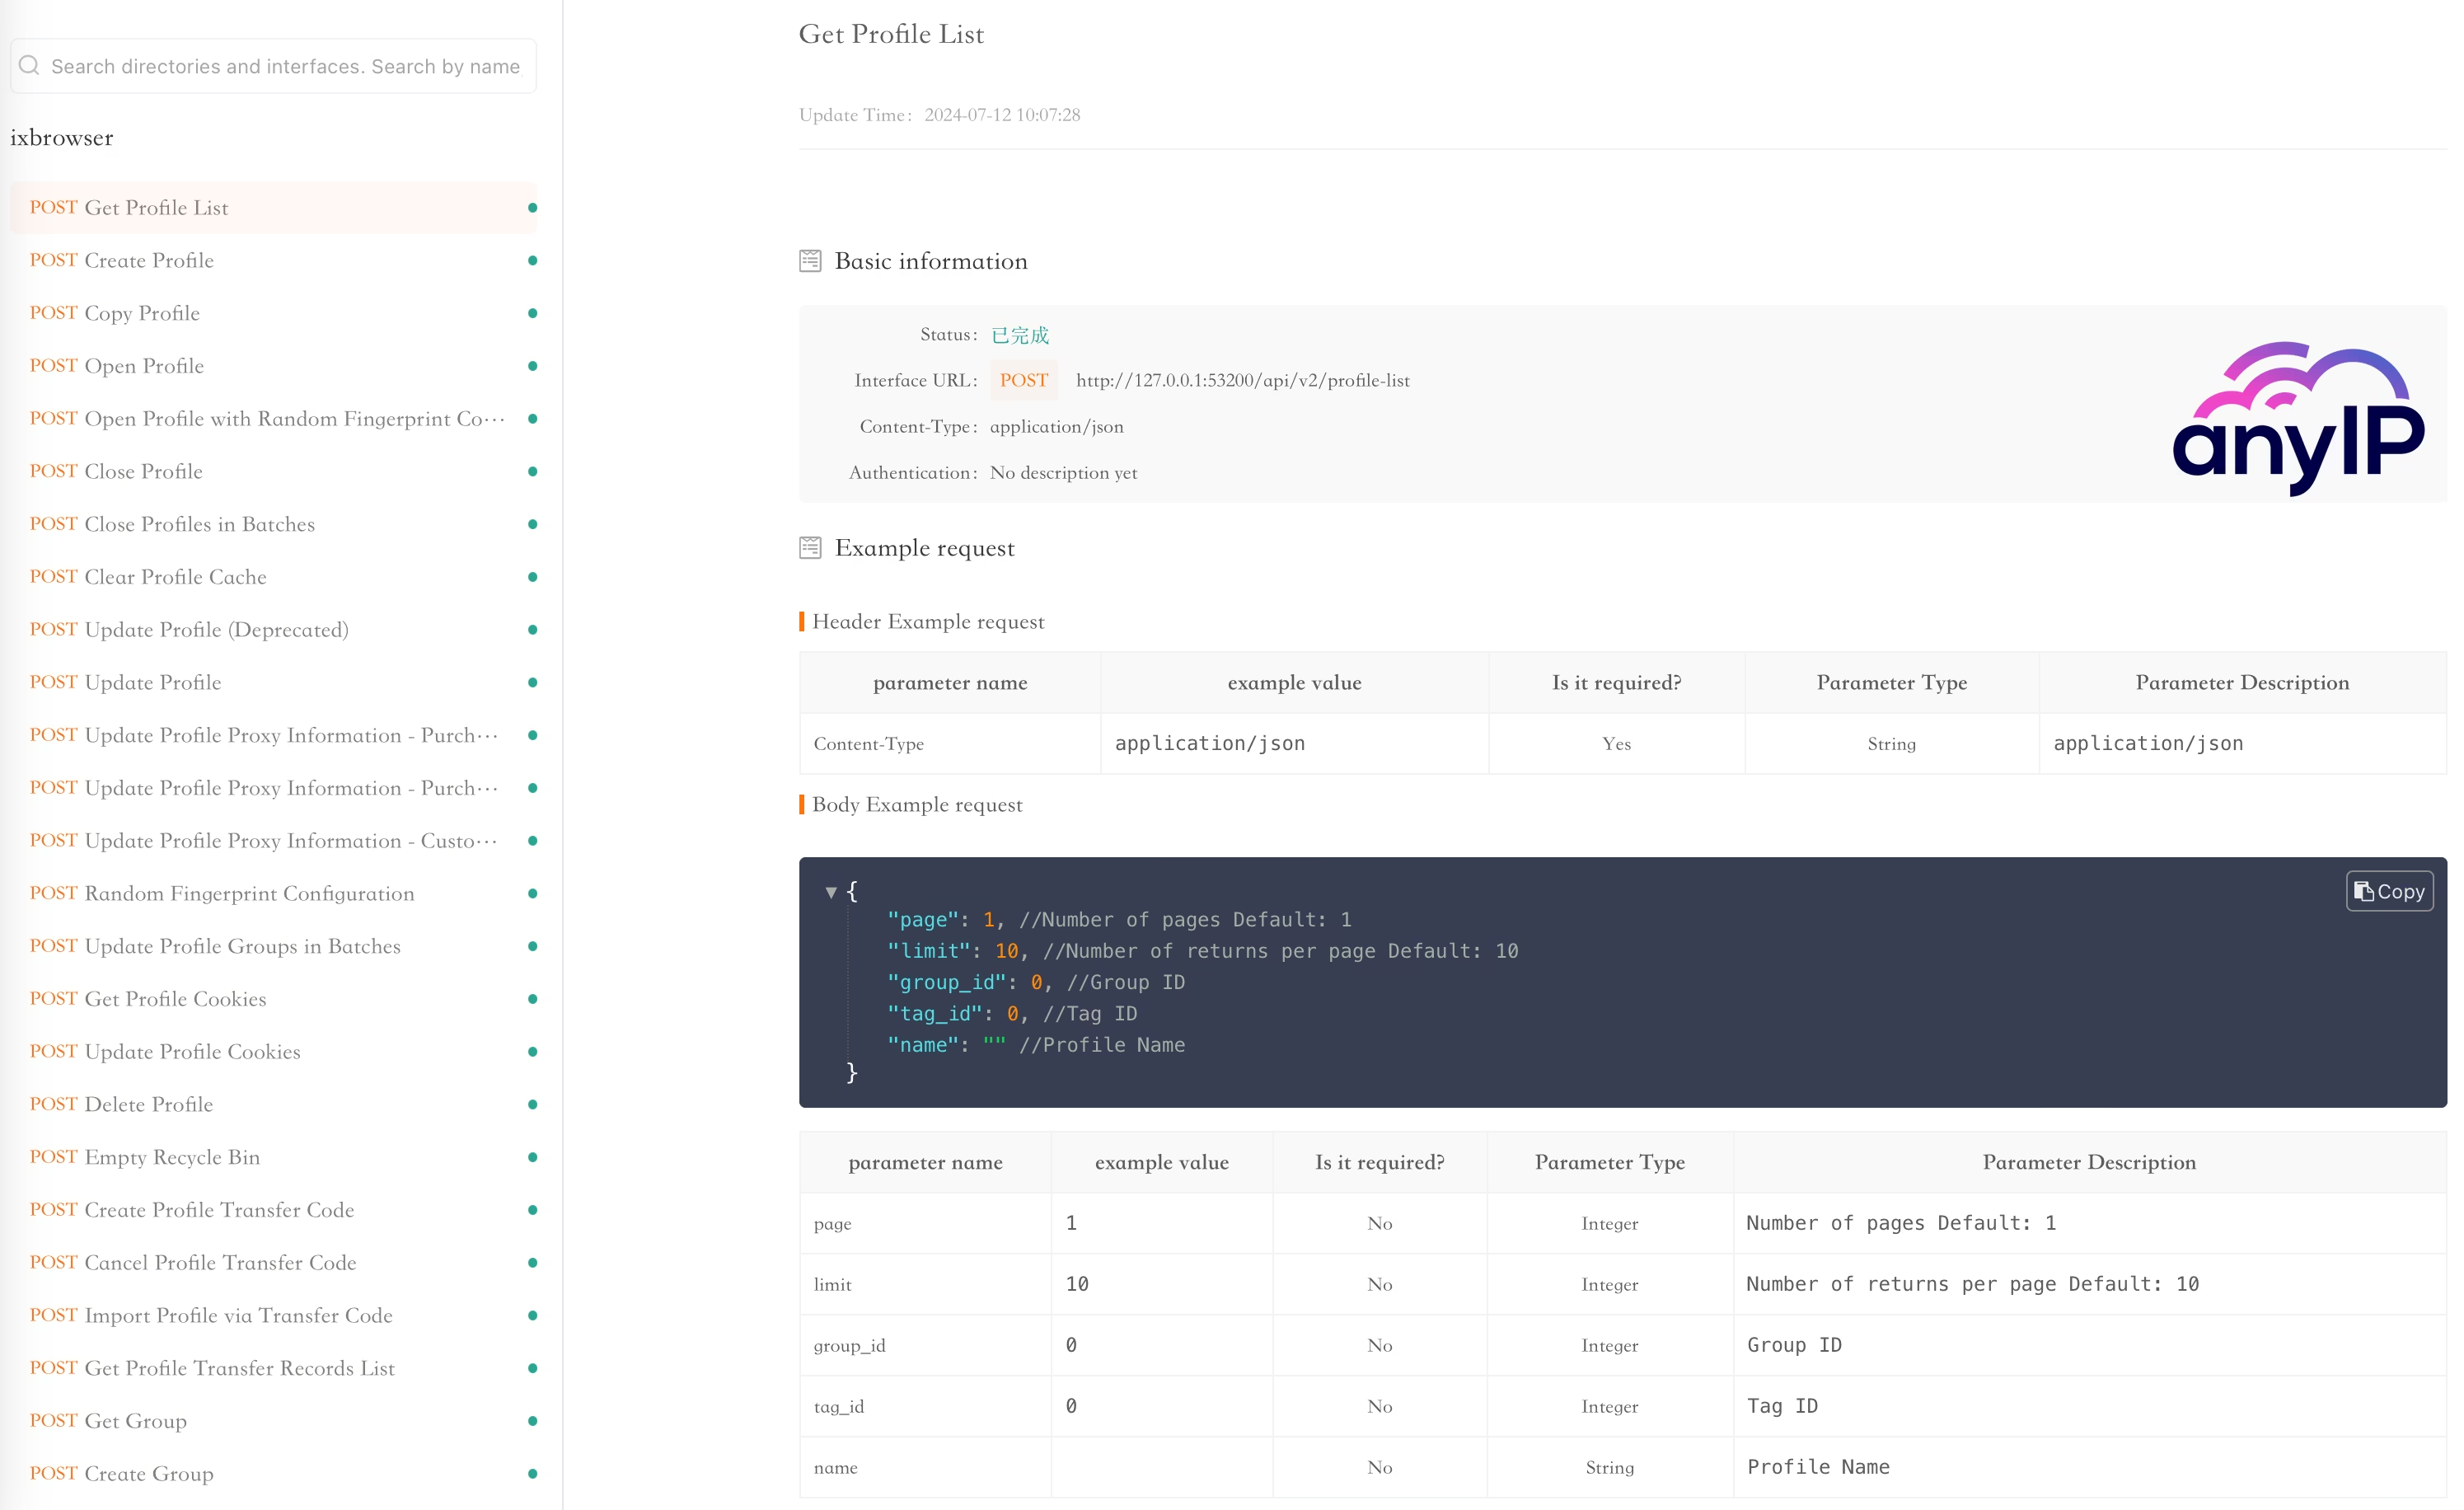
How To Use The ixBrowser API
ixBrowser offers a remote API for users with technical expertise looking for a more automated way to manage profiles and proxies. The documentation is available here.
Article by
Khaled Bentoumi
Khaled is a software engineer. He's been involved in many startups of different sizes. Previously, he founded Data to Page, an AI Programmatic SEO startup. He now handles all the marketing at anyIP.


Article by
Khaled Bentoumi
Khaled is a software engineer. He's been involved in many startups of different sizes. Previously, he founded Data to Page, an AI Programmatic SEO startup. He now handles all the marketing at anyIP.
Read more
How to customize Your User-Agent with Python Requests
Learn how to update and rotate user-agents in Python Requests to avoid detection and improve scraping efficiency.

