
Incogniton Proxy Integration: Ultimate Guide
Table of Contents
Table of Contents
Key takeaways
Incogniton lets users create unique browser profiles with custom fingerprints.
anyIP.io provides high-quality mobile and residential proxies for increased anonymity.
Integrating anyIP.io proxies into Incogniton is straightforward with a simple step-by-step guide.
Users can manage proxies in Incogniton via a dedicated dashboard with bulk creation options.
Incogniton's API supports automation and custom dashboards for advanced users.
Incogniton stands out as a widely used anti-detect browser choice. Like its counterparts, it lets users create and manage individual chrome browser profiles with a unique fingerprint and proxy settings.
At anyIP, we provide mobile and residential proxies around the world. Our high-quality proxies allow our clients to use them for many purposes, including scraping data, managing social accounts, advertising, or simply bypassing geo-restriction. Years of experience in the field give us the know-how to exceed client expectations consistently.
This tutorial will help you integrate an anyIP.io proxy easily into Incogniton.
💡 To follow this guide, you will need:
Incogniton desktop application installed on your computer.
Your anyIP.io proxy credentials
username/password;
proxy server addresses (IP + port);
How To Integrate a Proxy on Your Browser Profile
Incogniton has a well-designed UI for creating new profiles. Although there are many optional features, the process is simple and natural.
Try it yourself by following this guide.
Step 1: Create a new profile
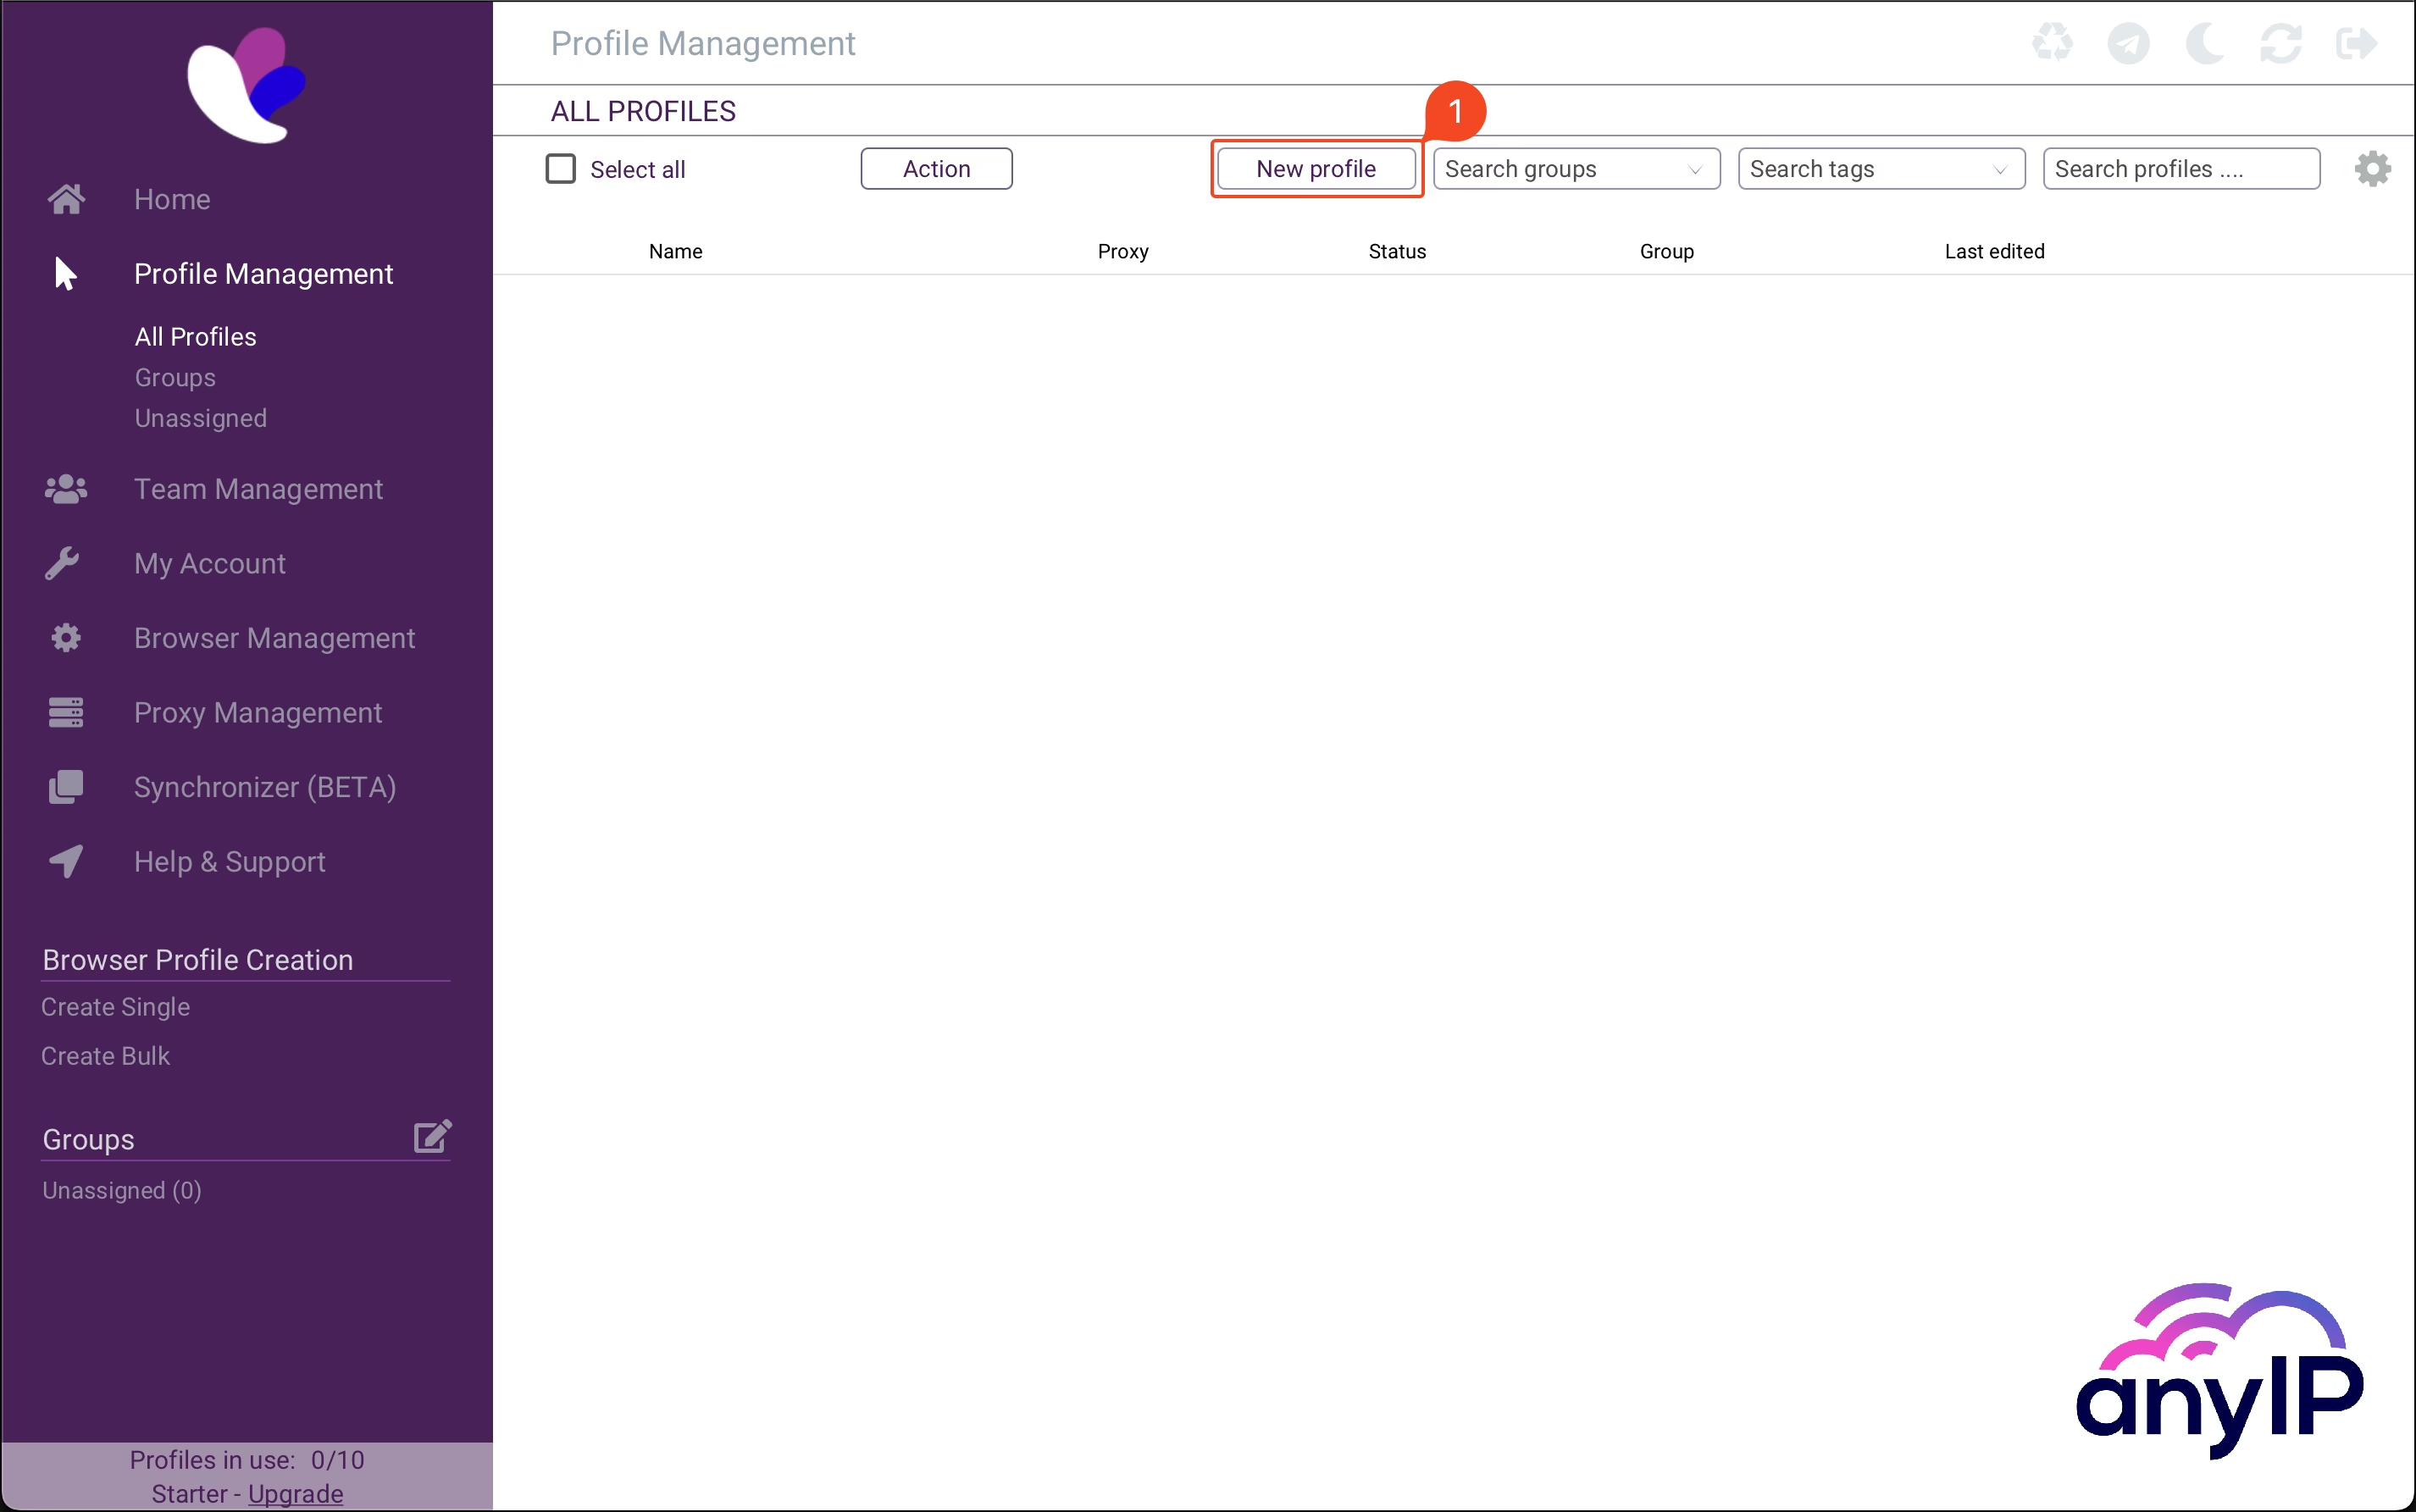
Click on “New profile” (1) to open the creation form.
Step 2: Name your profile and add your proxy
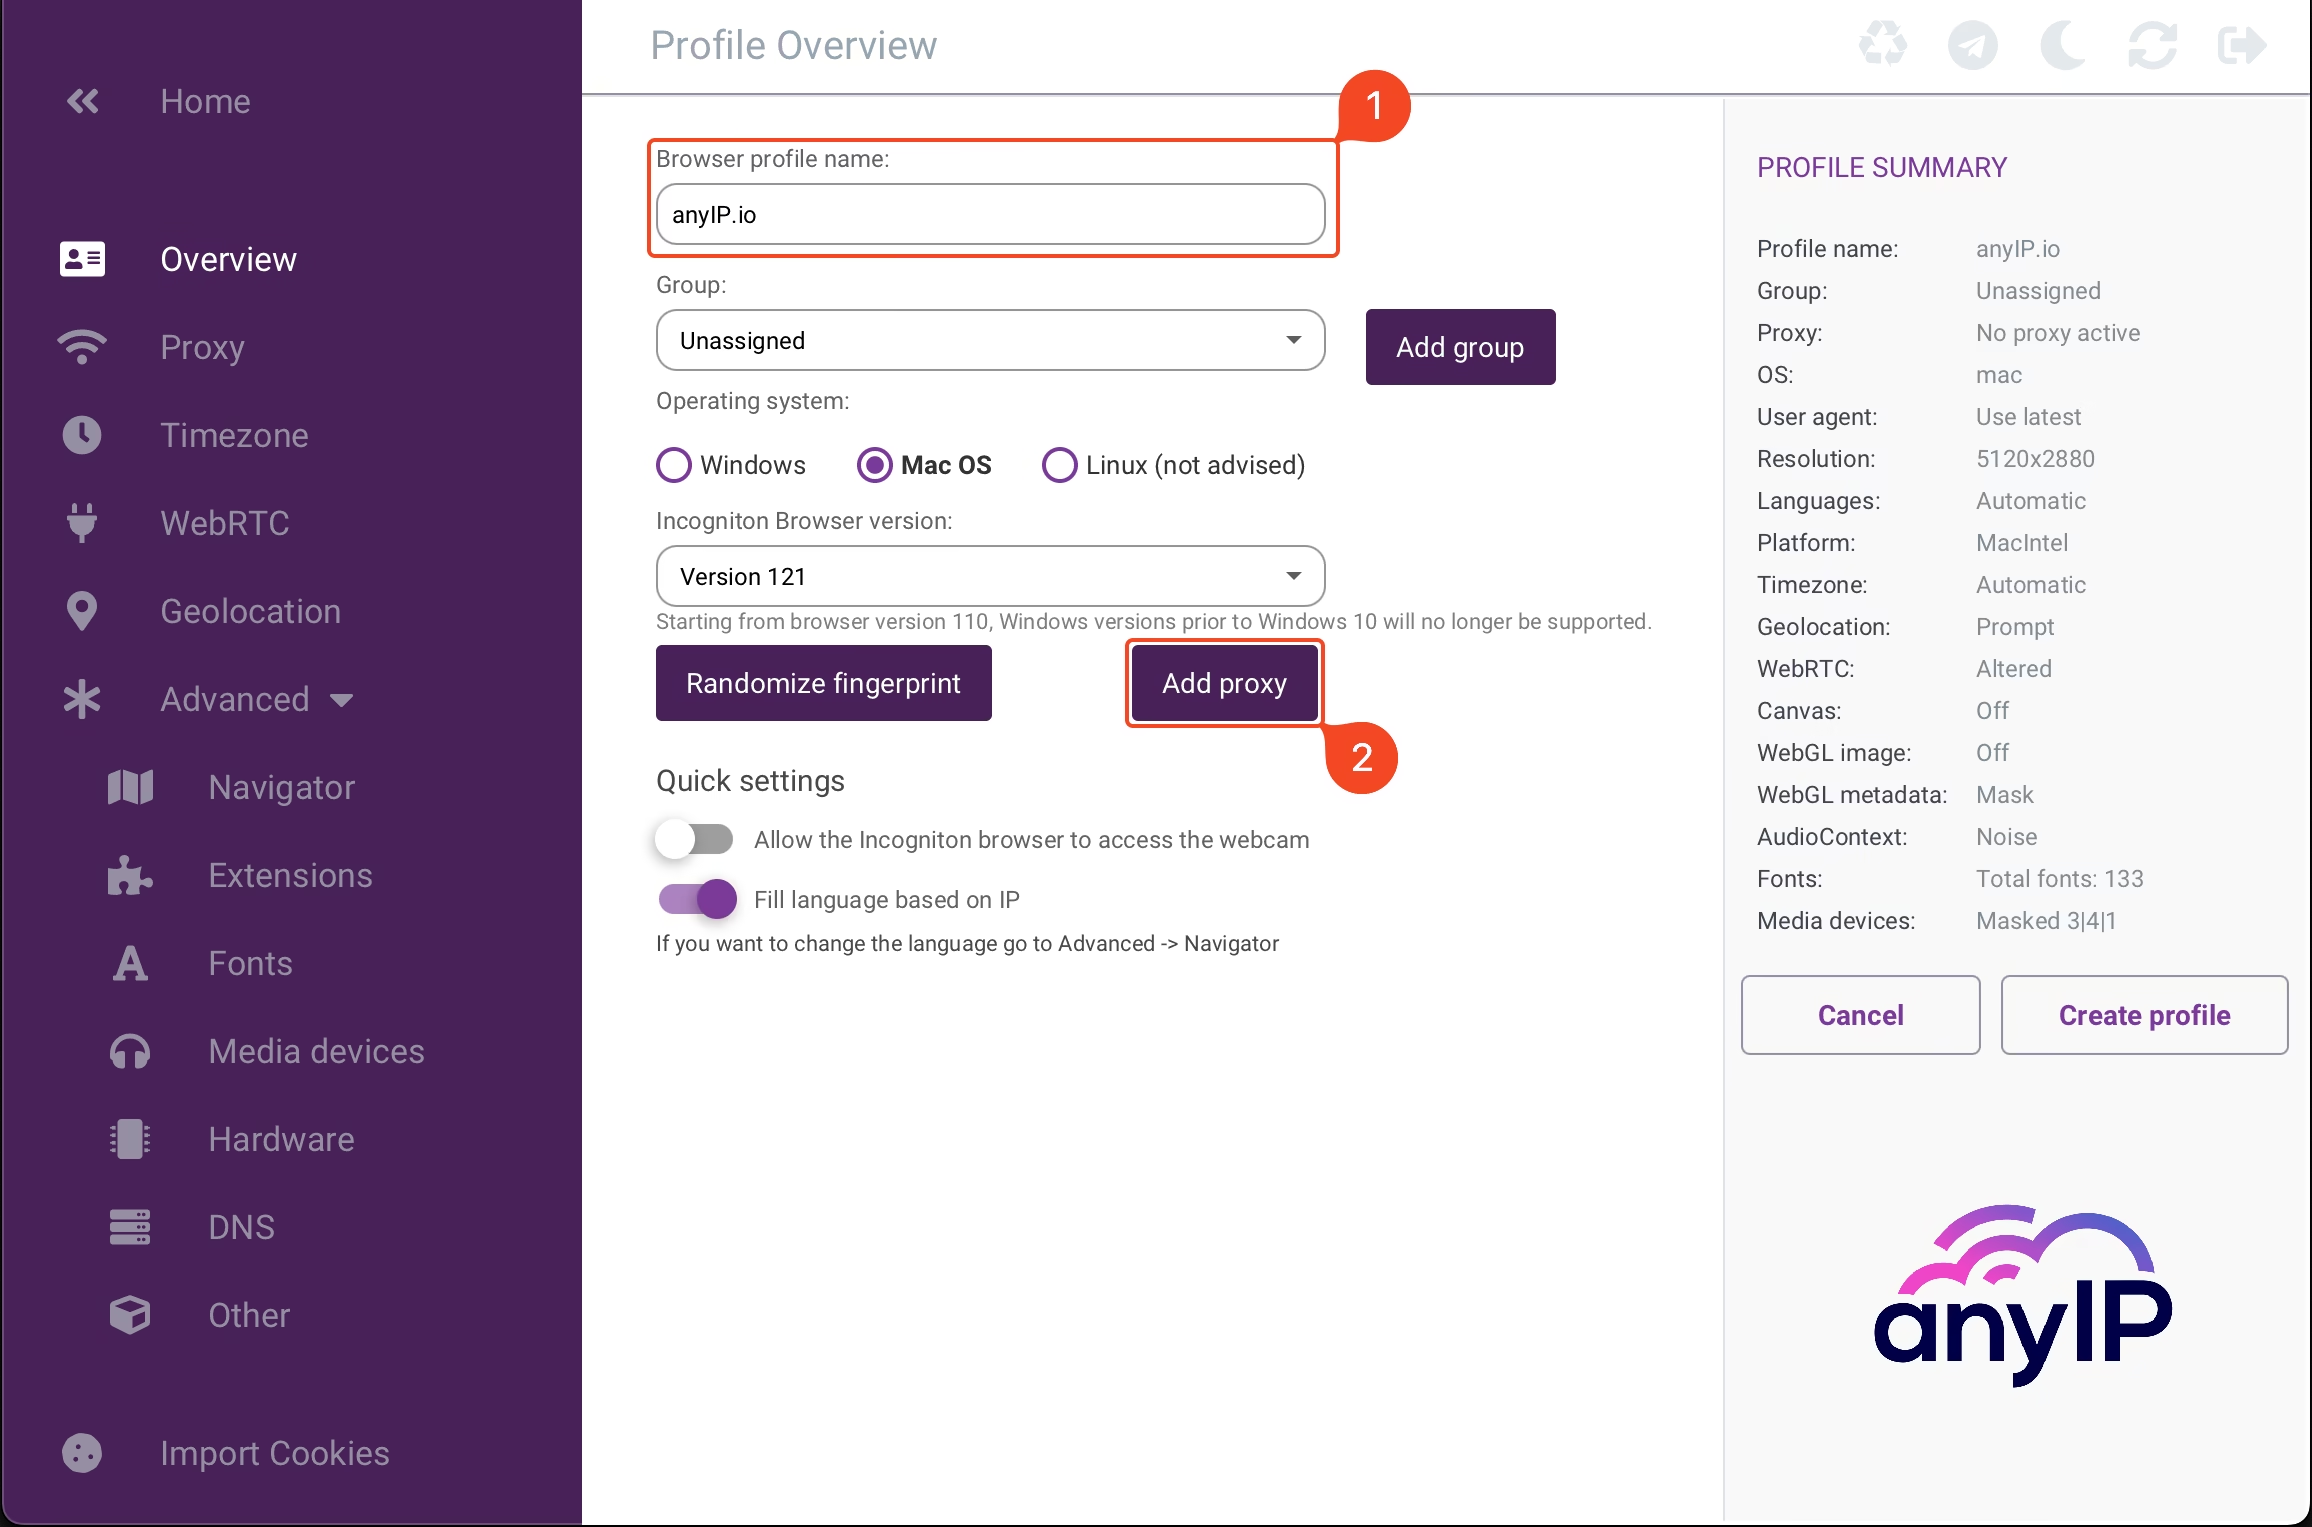
Enter a name for your new browser profile.
Click on “Add proxy” to configure the proxy.
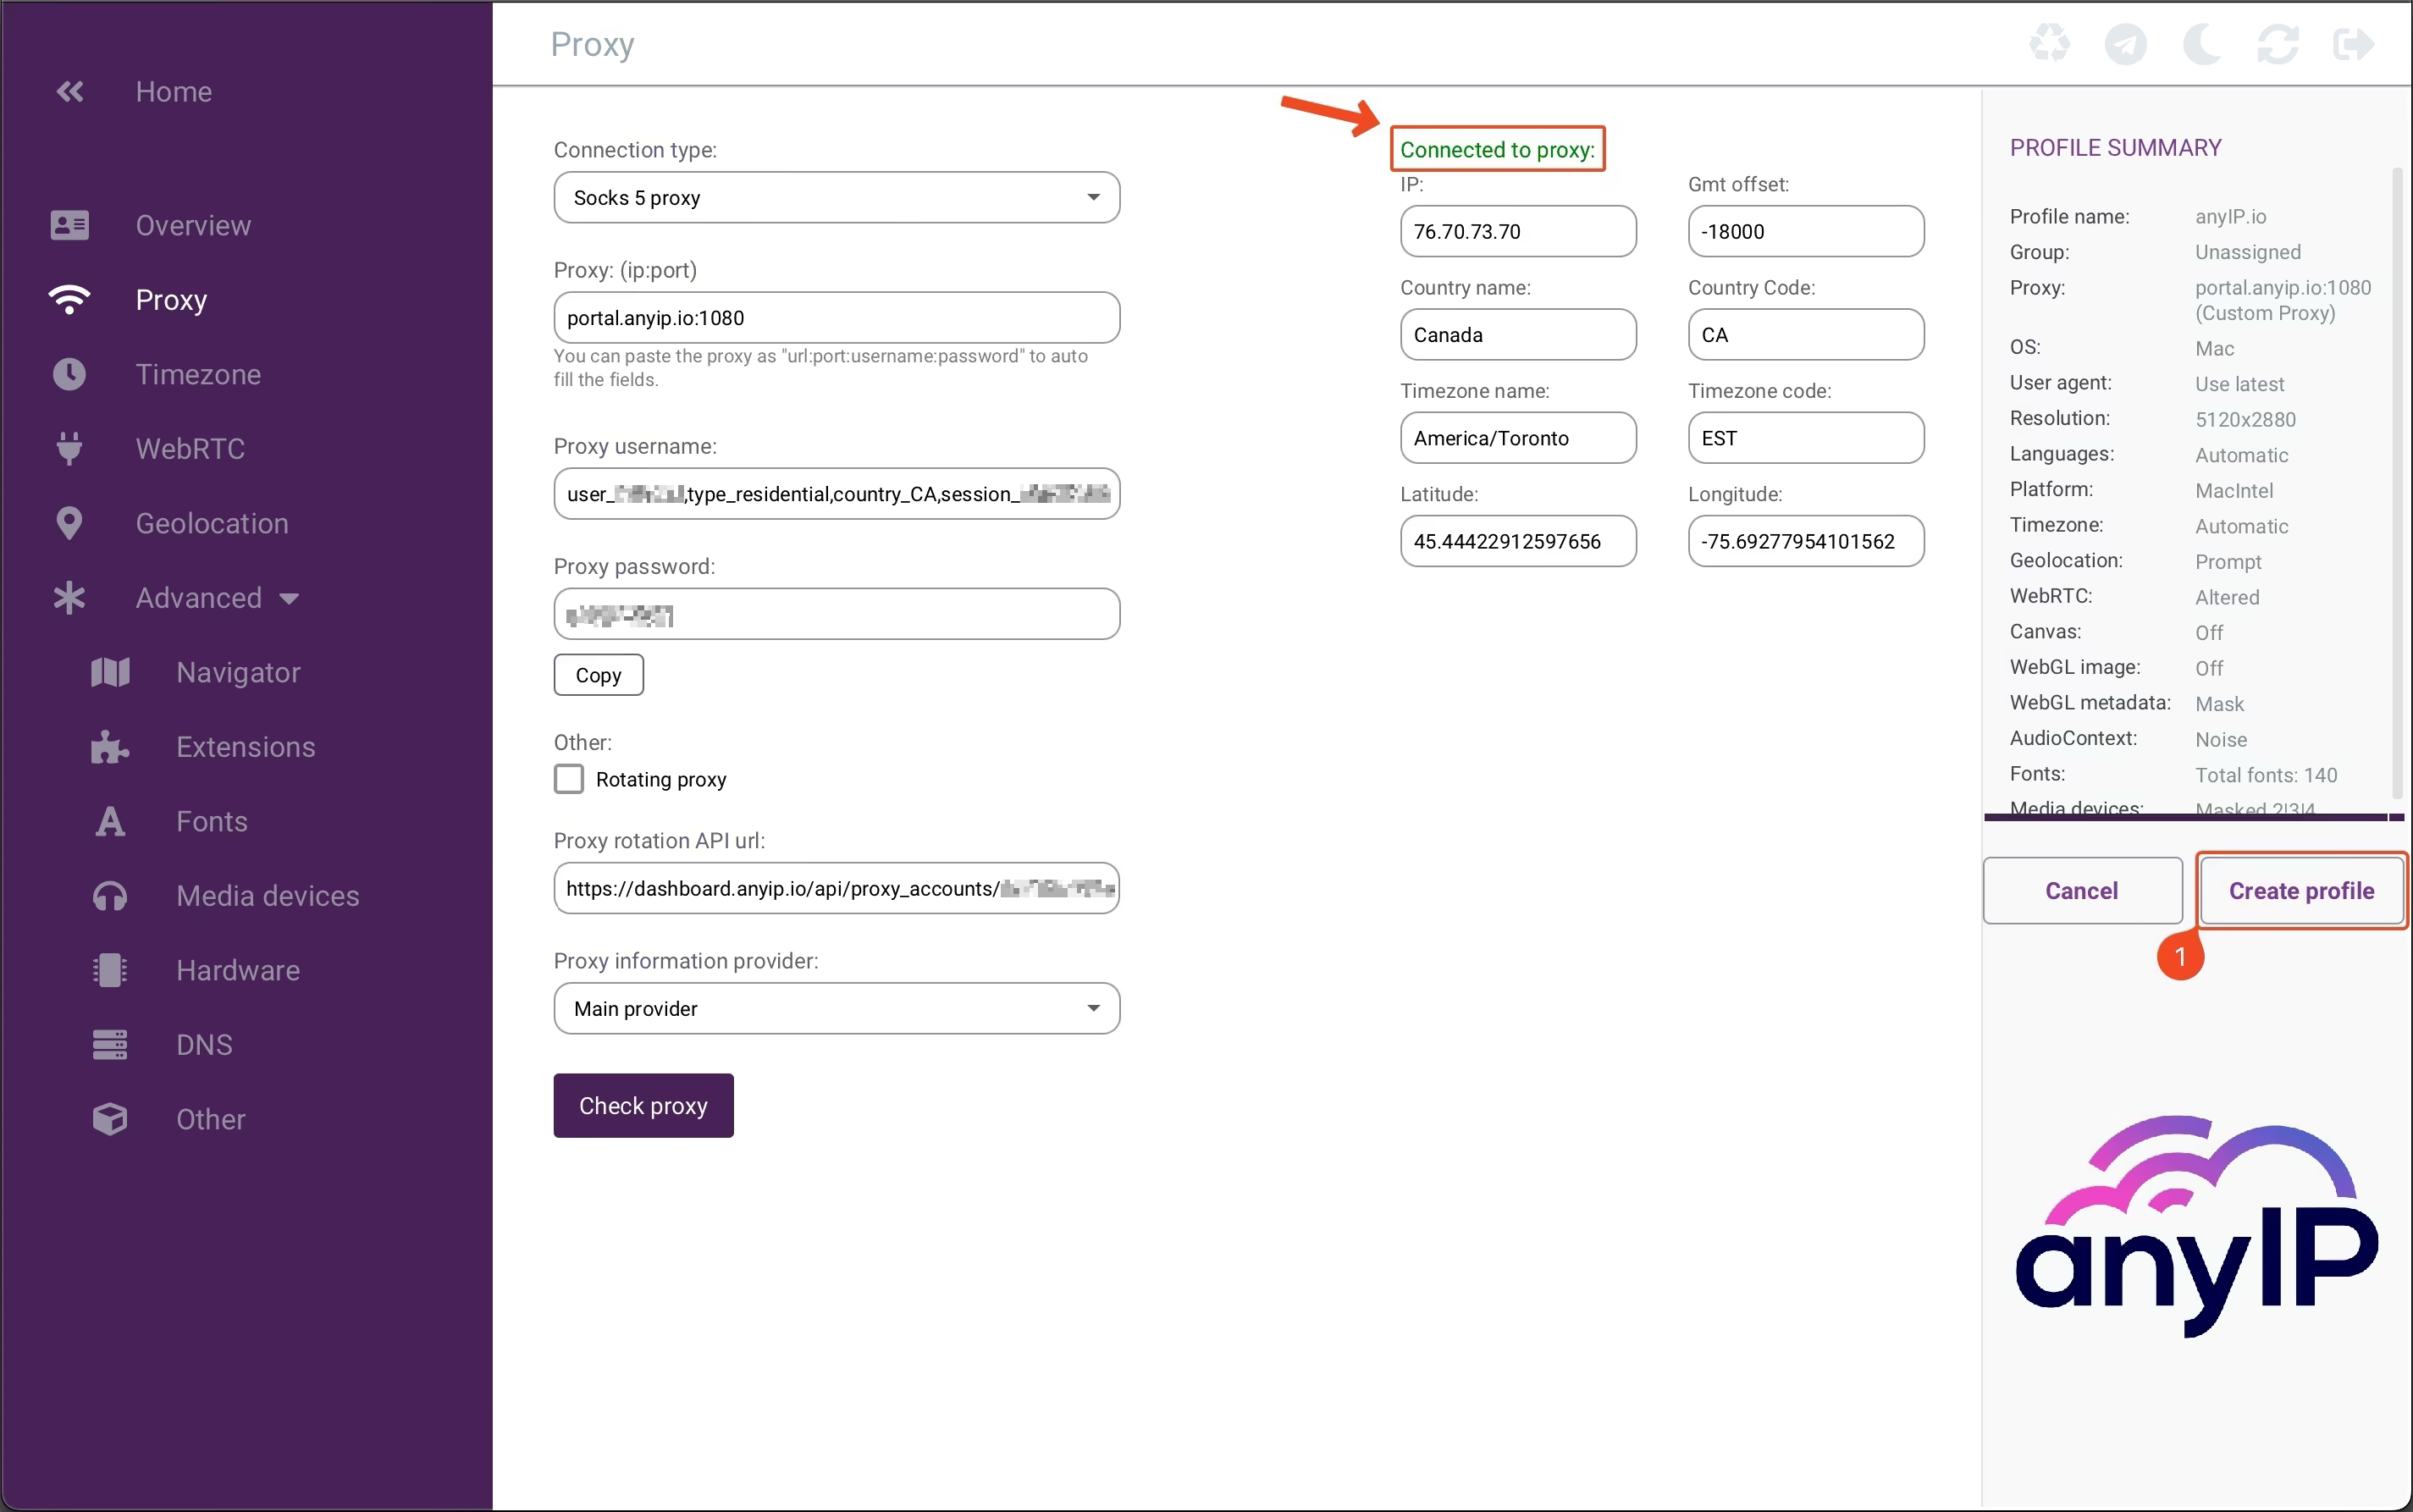
Step 3: Configure the proxy
The most important step! Get your credentials ready for the proxy configuration!
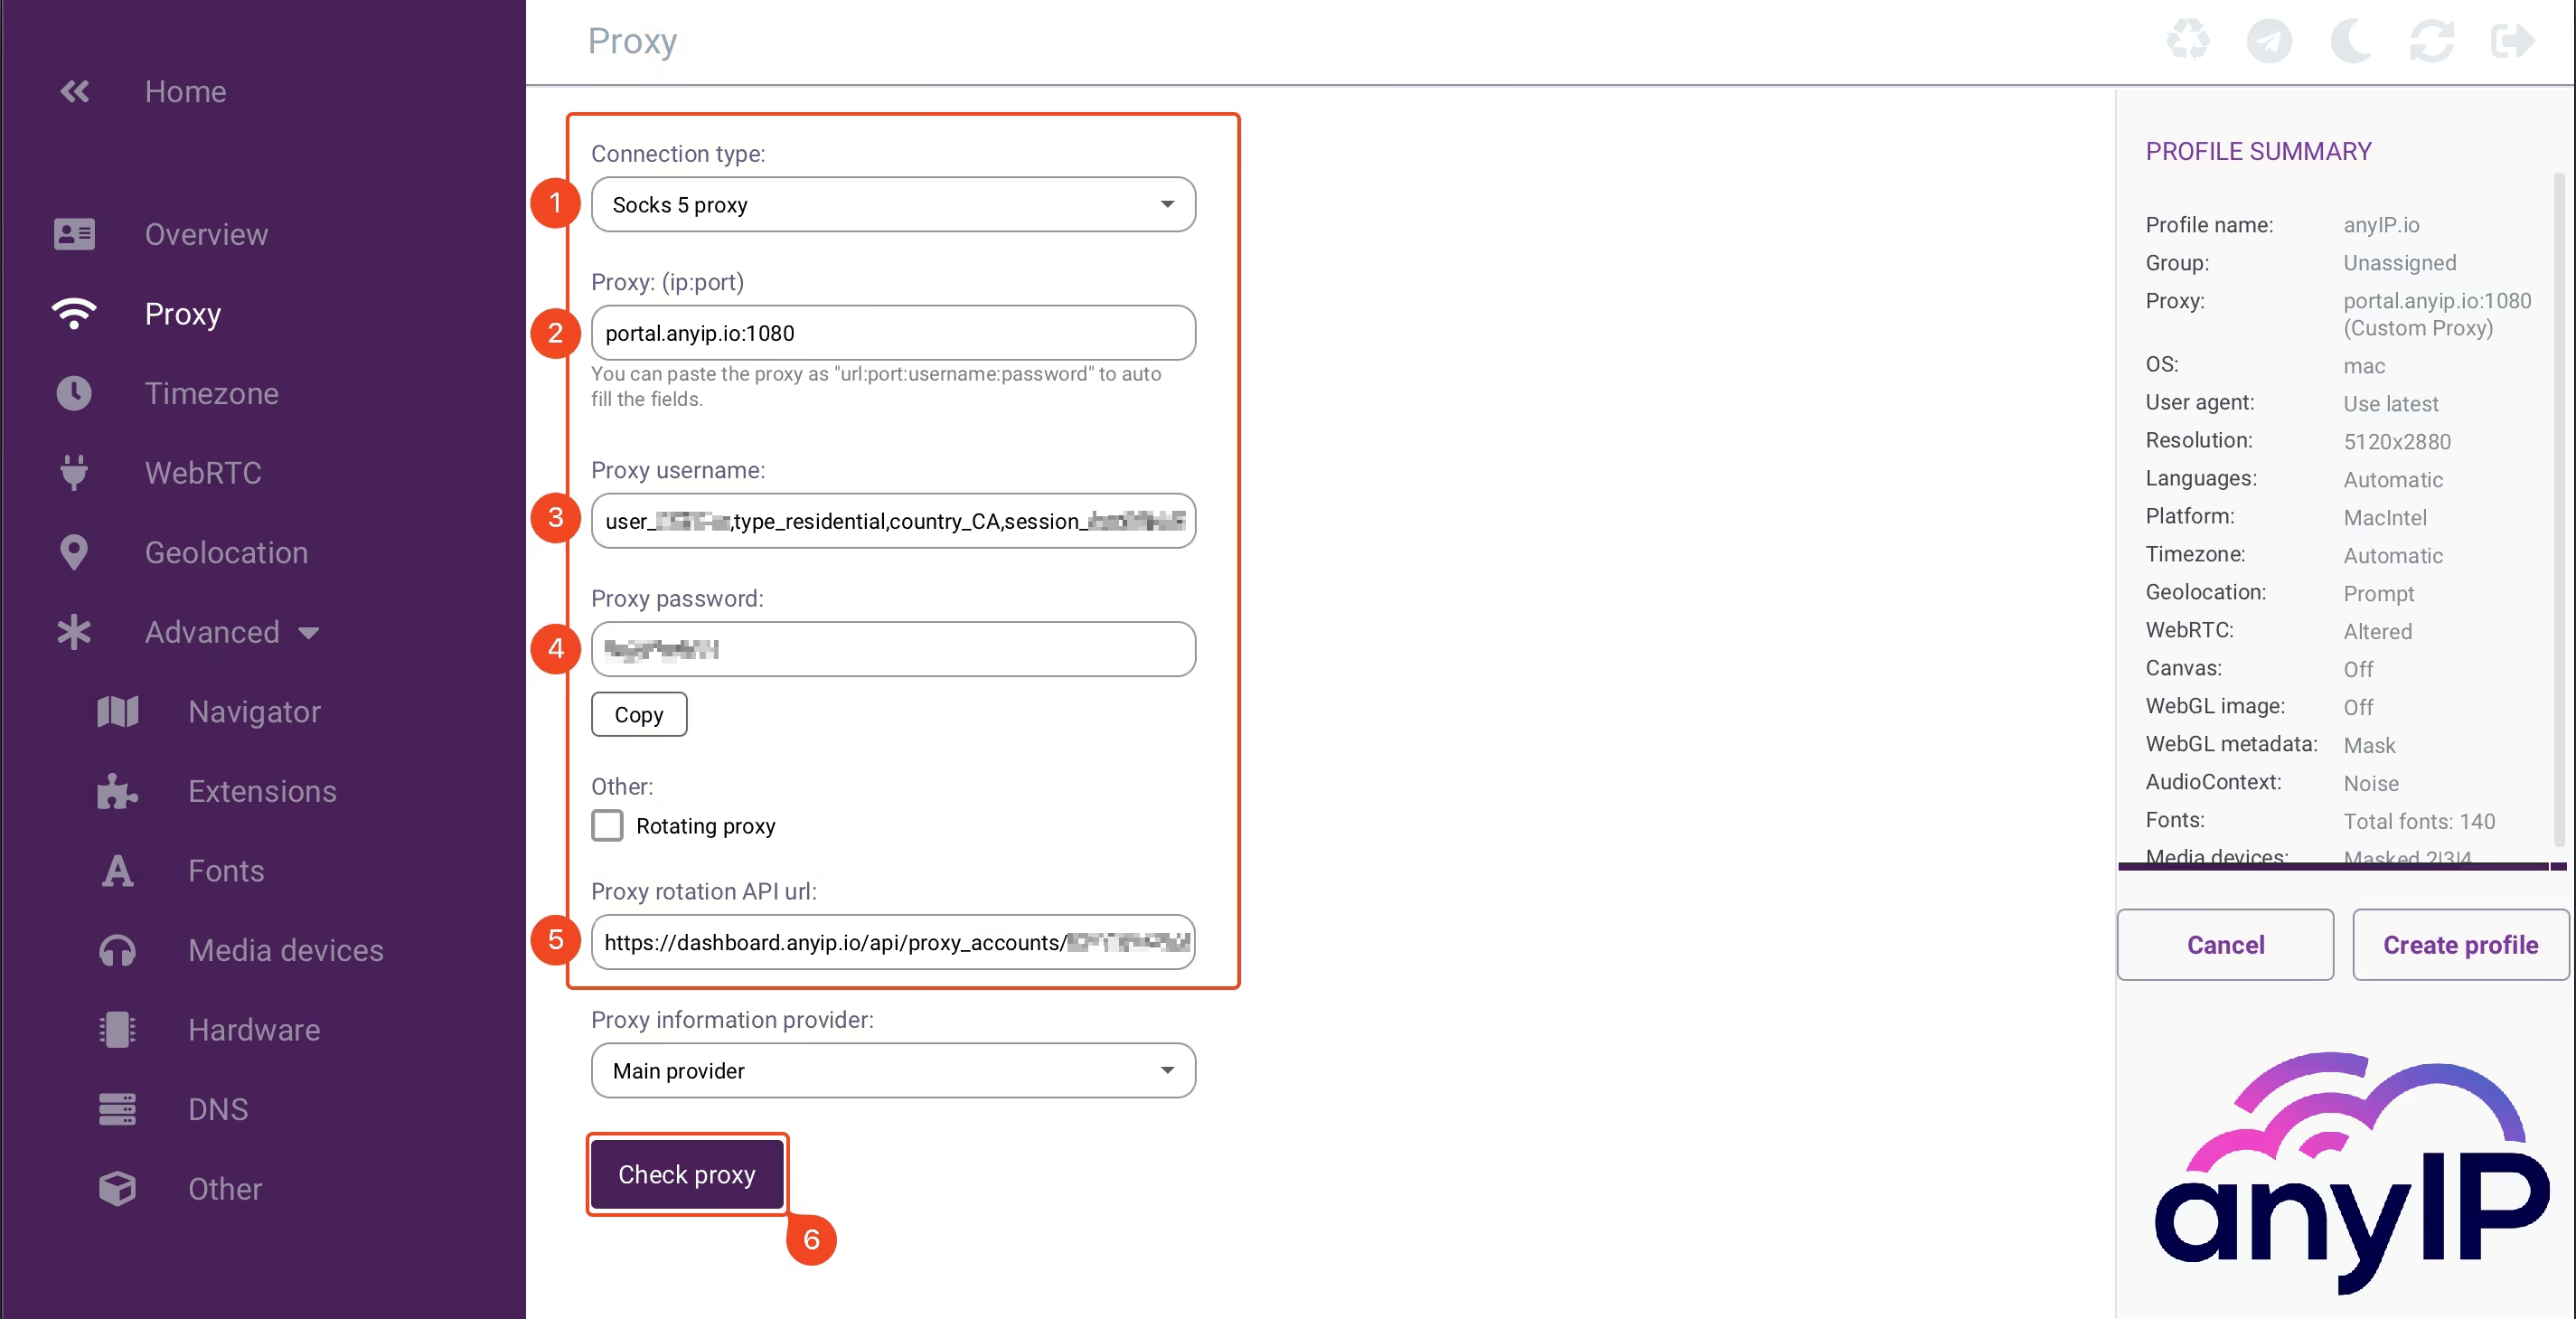
Select the protocol you want to use. Incogniton is compatible with HTTP, SOCKS4, and SOCKS5 proxy.
Enter your host and port information. For our example, we use our host:
portal.anyip.io:1080
Enter your username.
Then, you can type your password.
After reviewing your proxy details, click on “Check proxy” to test the proxy connection.
When your proxy is working well, Incogniton will automatically display the details like:
IP
GMT offset
Country name and code
Timezone/timecode
Latitude and Longitude
Confirming that you have the right proxy configuration quickly is very useful.
💡 Incogniton allows you to paste a proxy configuration from your clipboard. To do so, the format must be:
URL:PORT:USERNAME:PASSWORDportal.anyip.io:1080:user_XXX,type_residential,country_CA,session_XXXX:SecretPassStep 4: Save Your Profile
Save your new profile by clicking on “Create profile” (1).
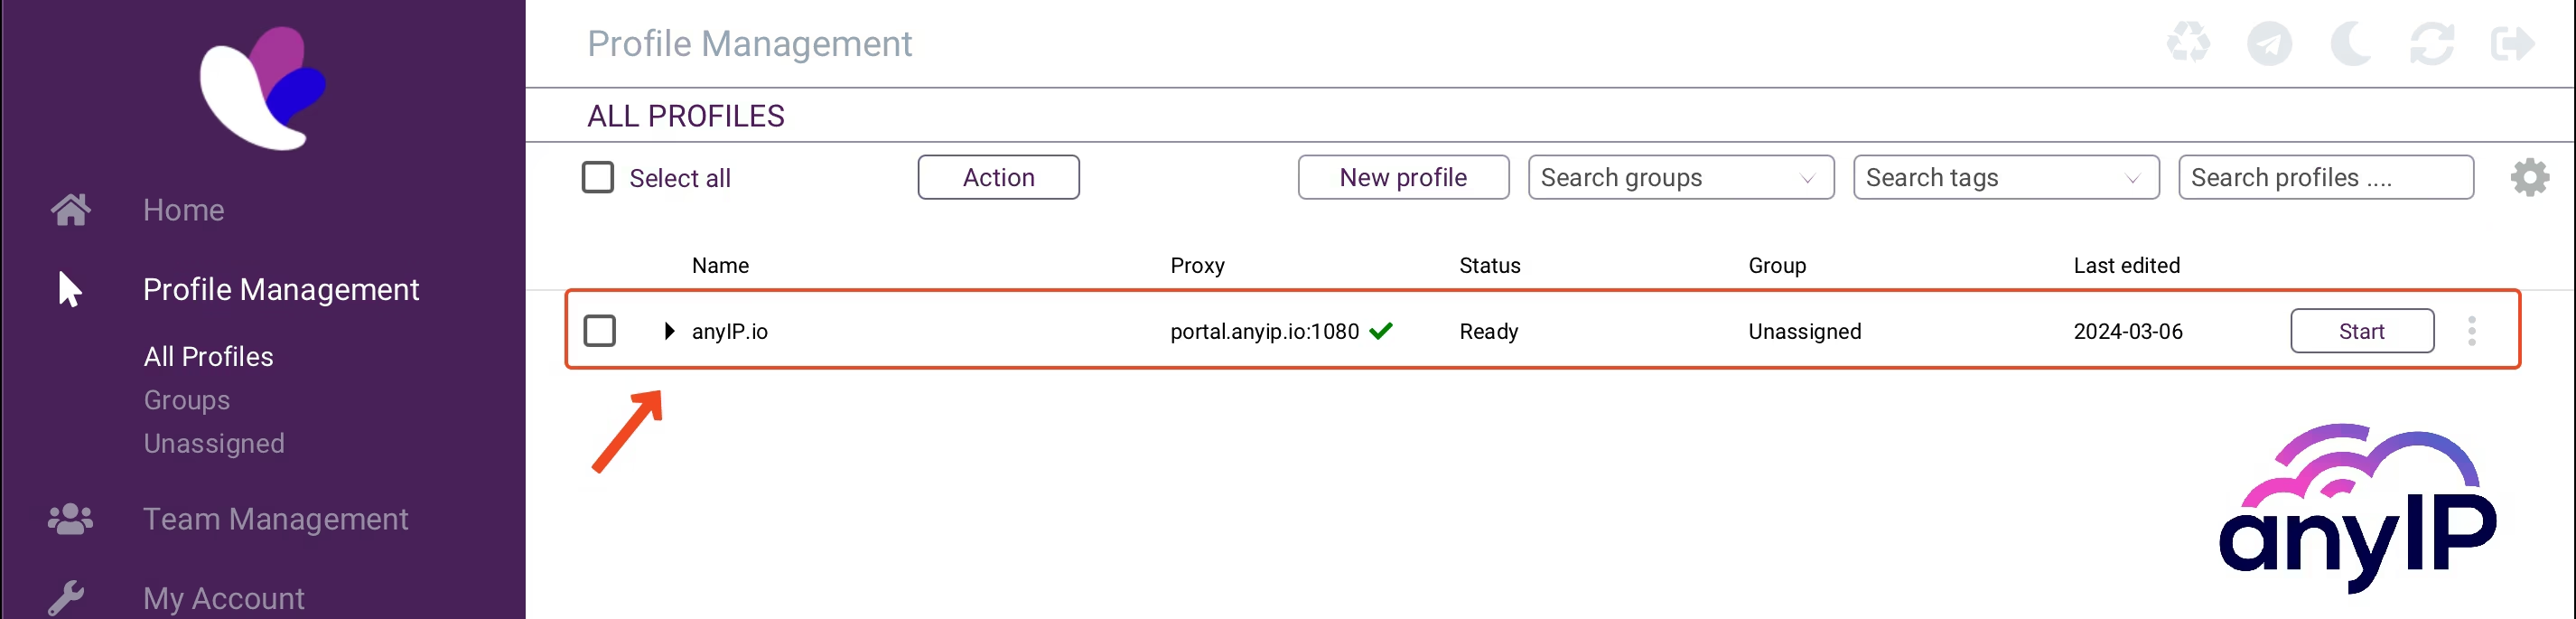
You will be automatically redirected to the Profile Management listing. You should see your new profile:
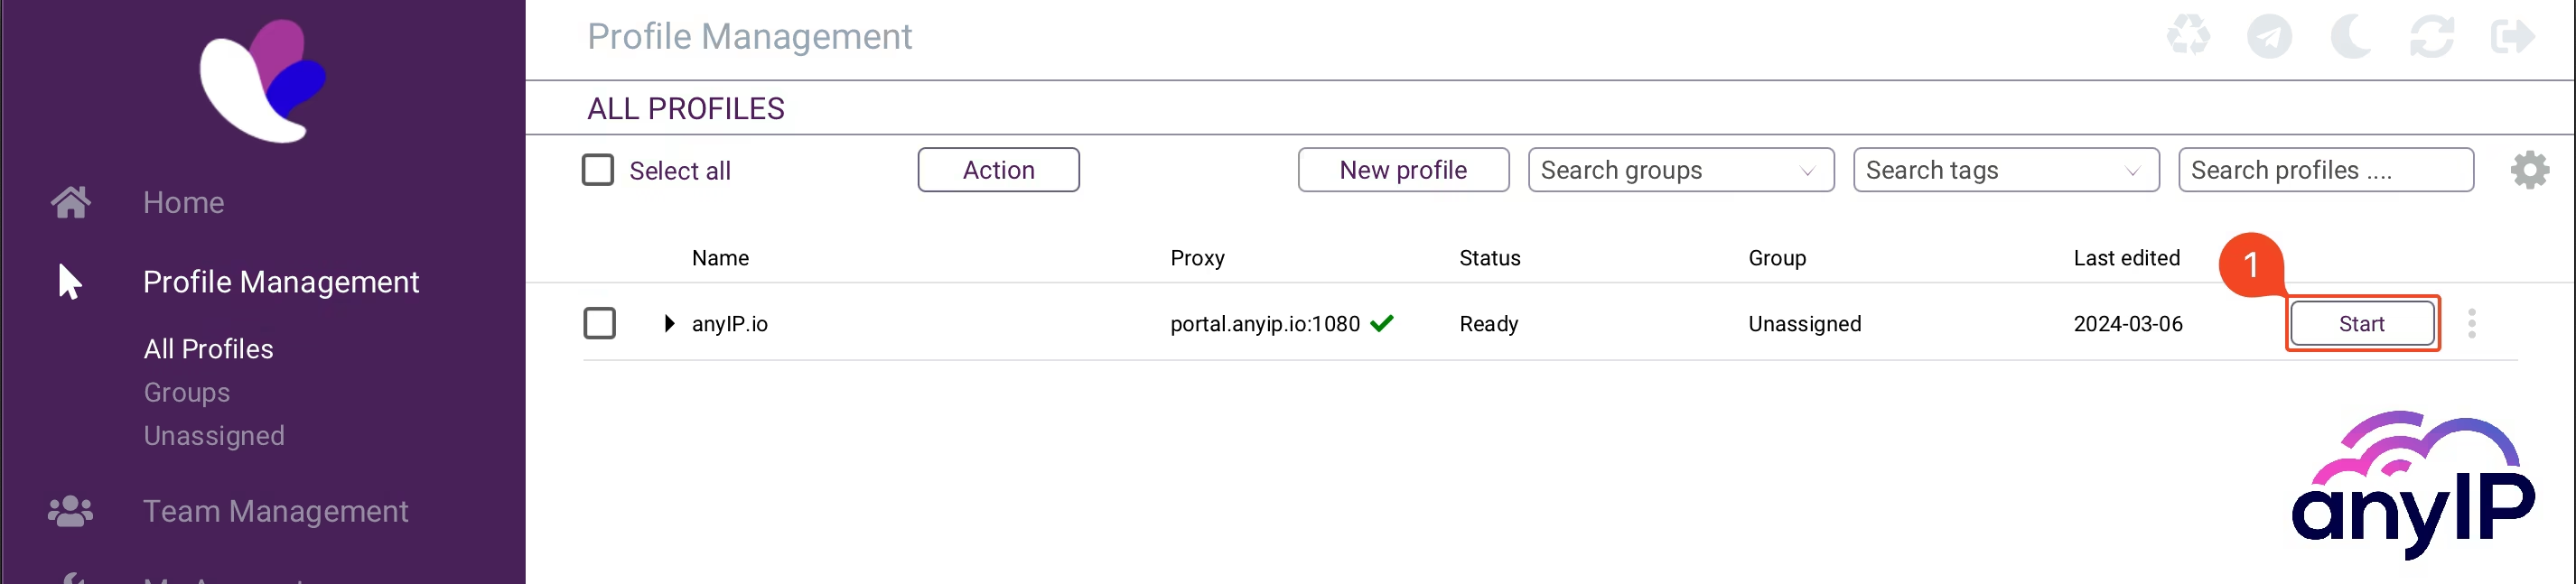
Step 5: Start/Stop the profile
Now that our profile is ready, click on “Start” (1) to launch it.
|
Like other anti-detect browser, Incogniton launchs an instance of a custom browser using your configuration. |
Once your done with your routine, you can easily stop your browser by closing it or by clicking the “Stop” button (1) on the profile list.

How to manage your proxies
In my opinion, proxy management is one of the most essential features of an anti-detect browser. Incogniton offers a great dedicated dashboard that allows you to create, edit, and test your proxies simultaneously.
|
|
Create a new proxy
Create a single proxy one by one
If you're using incogniton for personal use, you'll love it. Easy and straightforward.

Click on “New proxy” or “Create Single Proxy” (1) to open the creation form.
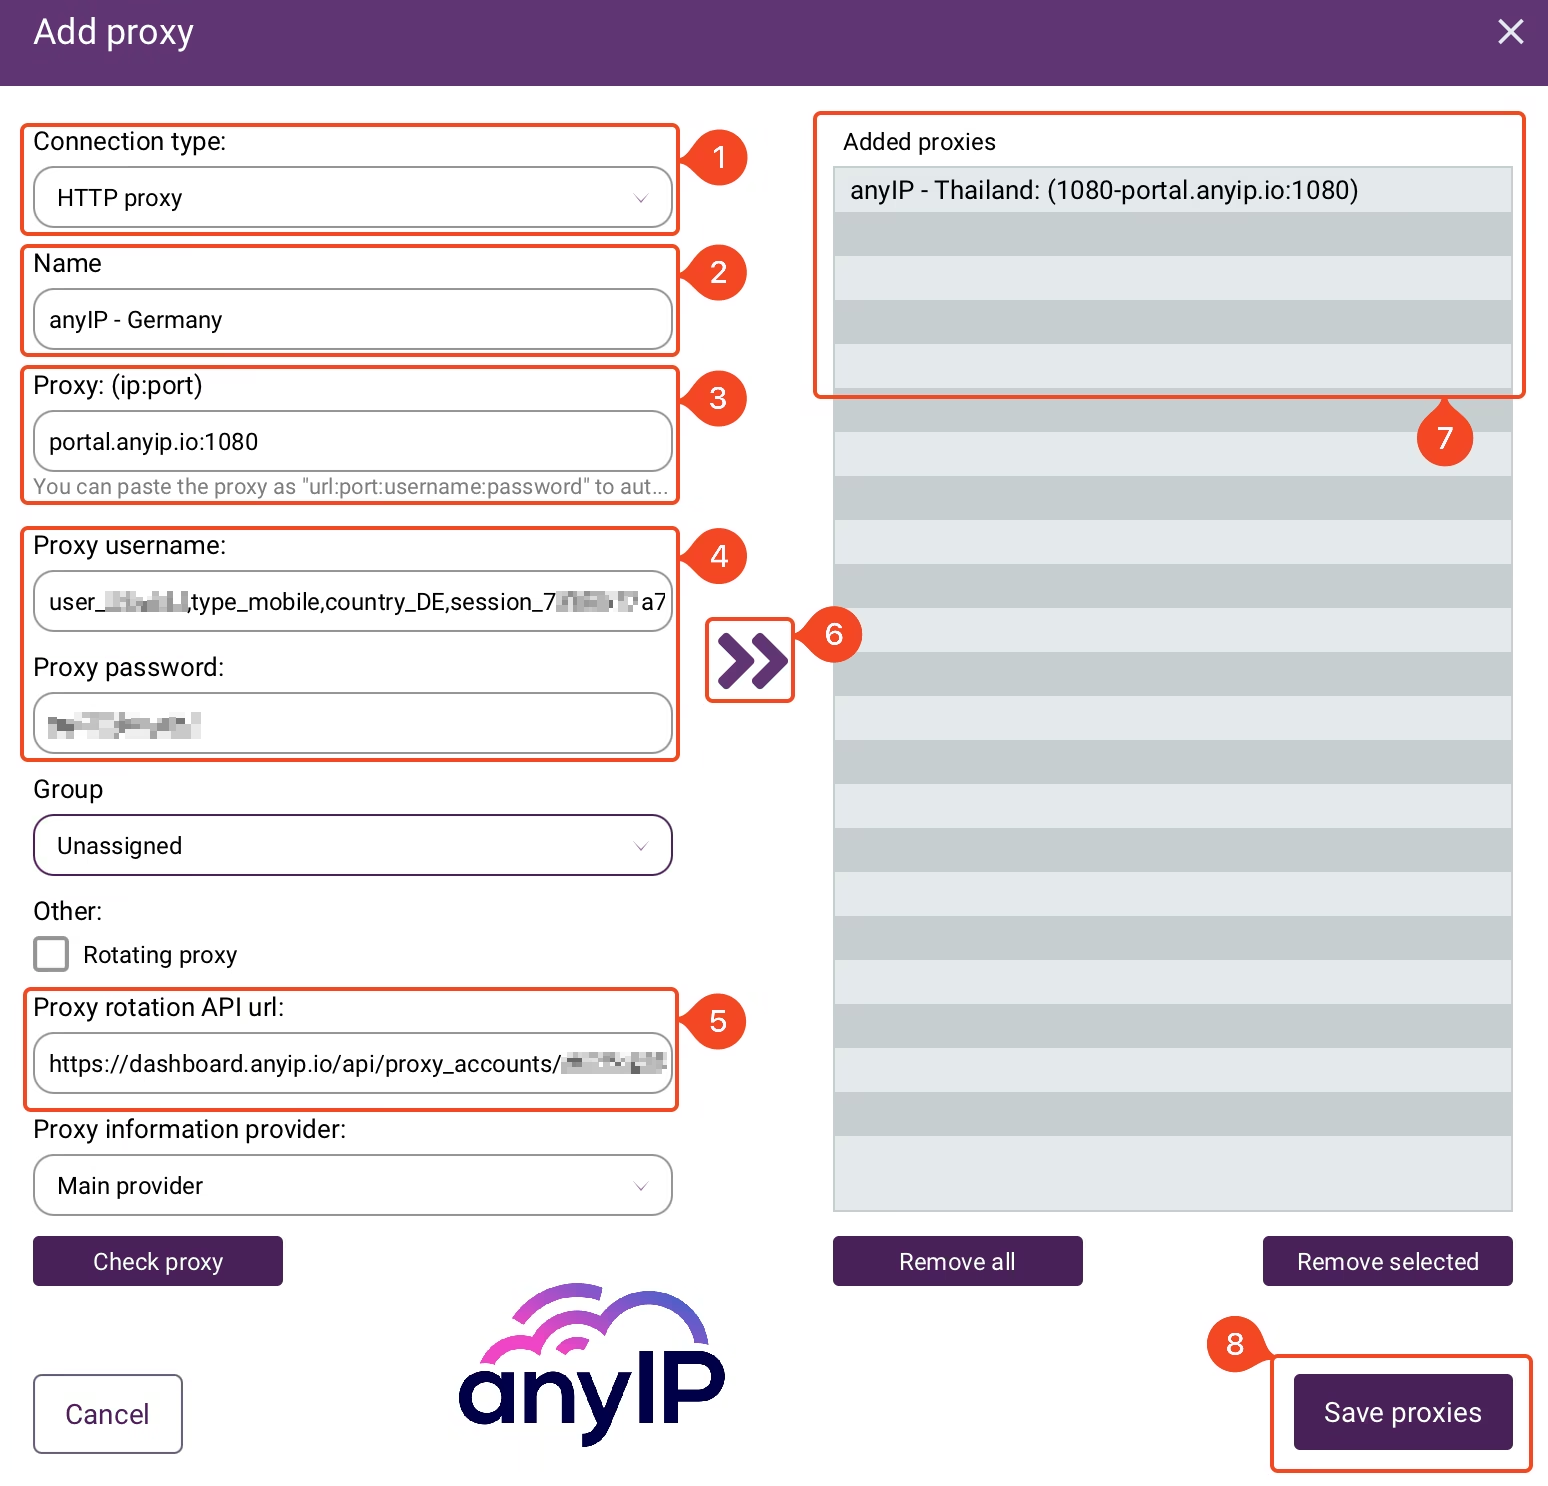
Choose the proxy type for your proxy. You can choose HTTP, SOCKS4, or SOCKS5.
Enter a name to identify your proxy quickly. For this guide, we named it "anyIP - Germany."
Enter the host:port for your proxy. Here: portal.anyip.io:1080
Enter your proxy’s username and password.
If your provider has this feature, you can specify the rotation API URL here.
Review, and click on the “>>” button to add a proxy to the pre-saved list.
You will see the list. Looking at the screenshot, you can see that I've already pre-saved one proxy for the example "anyIP - Thailand."
Once you’ve added all your proxies one by one, you can click “Save proxies” to save them all.
💡 You can add as many proxies as you need one by one this way. It's perfect to add one or two proxies, but if you need to add more, the next section will be interesting ;)
You will now see the two proxies on your proxy management dashboard

💡 Incogniton allows you to paste a proxy configuration from your clipboard. To do so, the format must be:
URL:PORT:USERNAME:PASSWORDportal.anyip.io:1080:user_XXX,type_residential,country_CA,session_XXXX:SecretPassCreate bulk proxies
Imagine managing 50 different proxies and the pain of having to save them one by one!
Luckily, Incognito has the option of bulk creation! Trust me, this feature is very handy and will save you time!
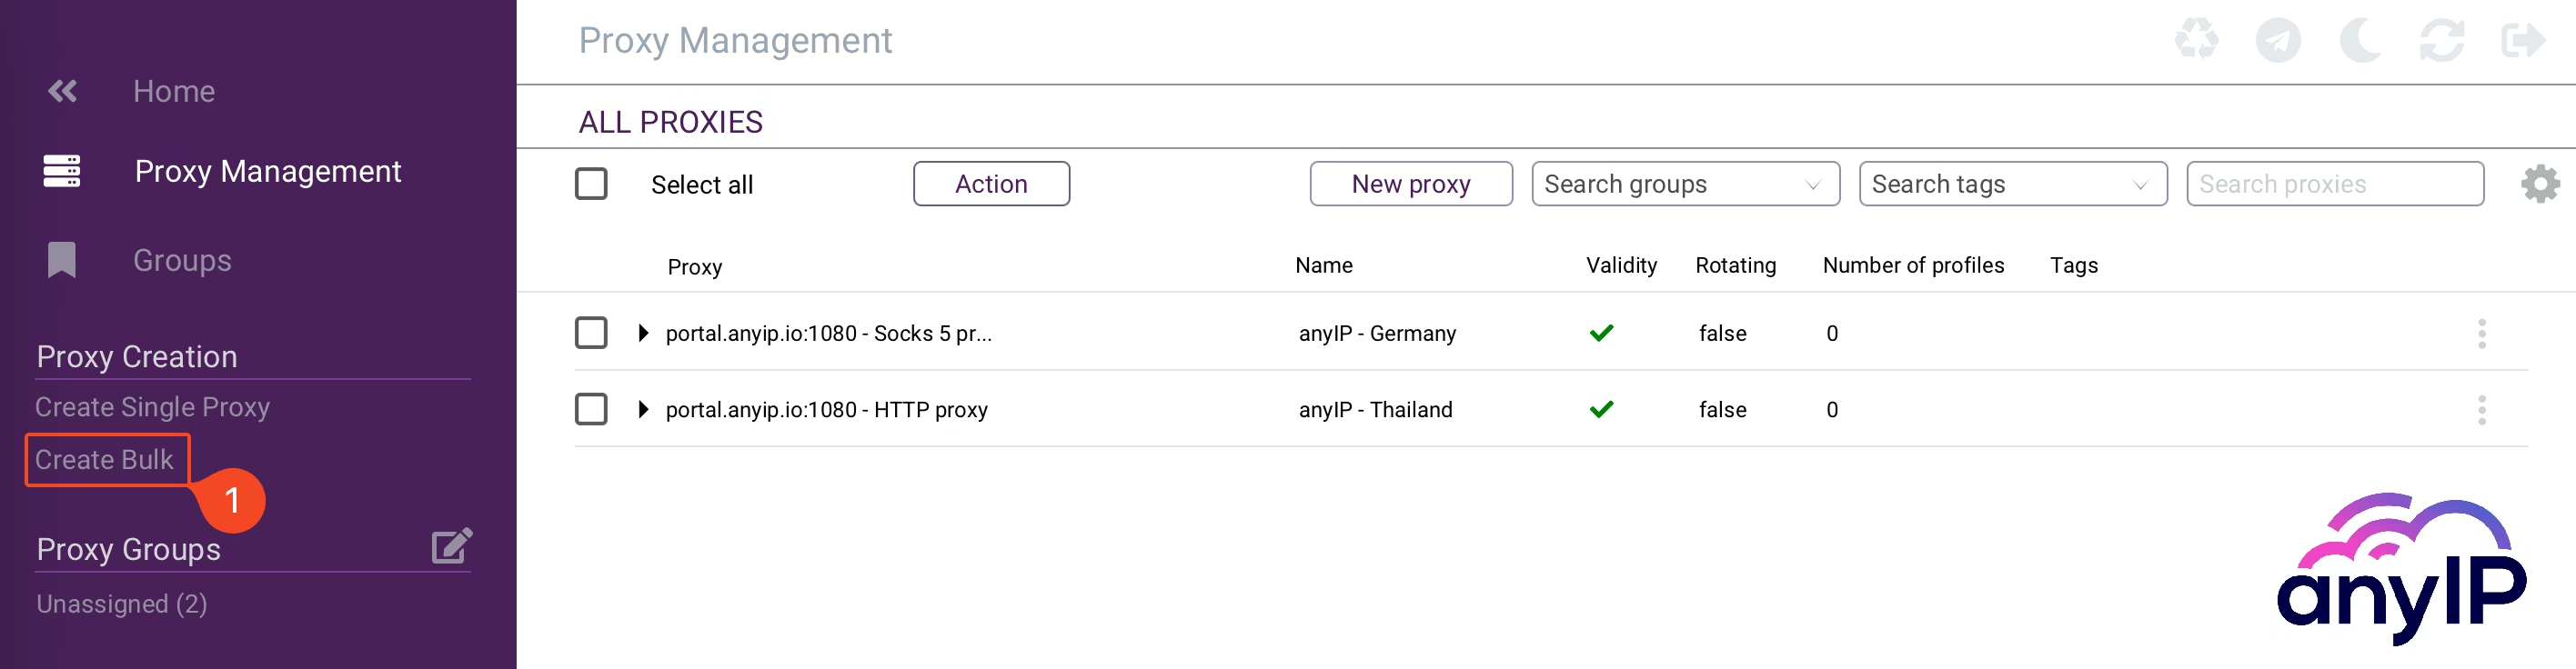
Click on “Create Bulk” (1) to open the bulk creation form.

💡 Incogniton allows you to add bulk proxies using different formats/file types.
You can use :
the Standard proxy format, the one we used during this guide (URL:PORT:USERNAME:PASSWORD);
a CSV format that you can customize with different headers;
a CSV file import;
an excel file;
Click on “Standard proxy format.”
Select the proxy type you want to add.
Copy/paste all the proxies you want to add.
Click “Check” to review all your proxies.
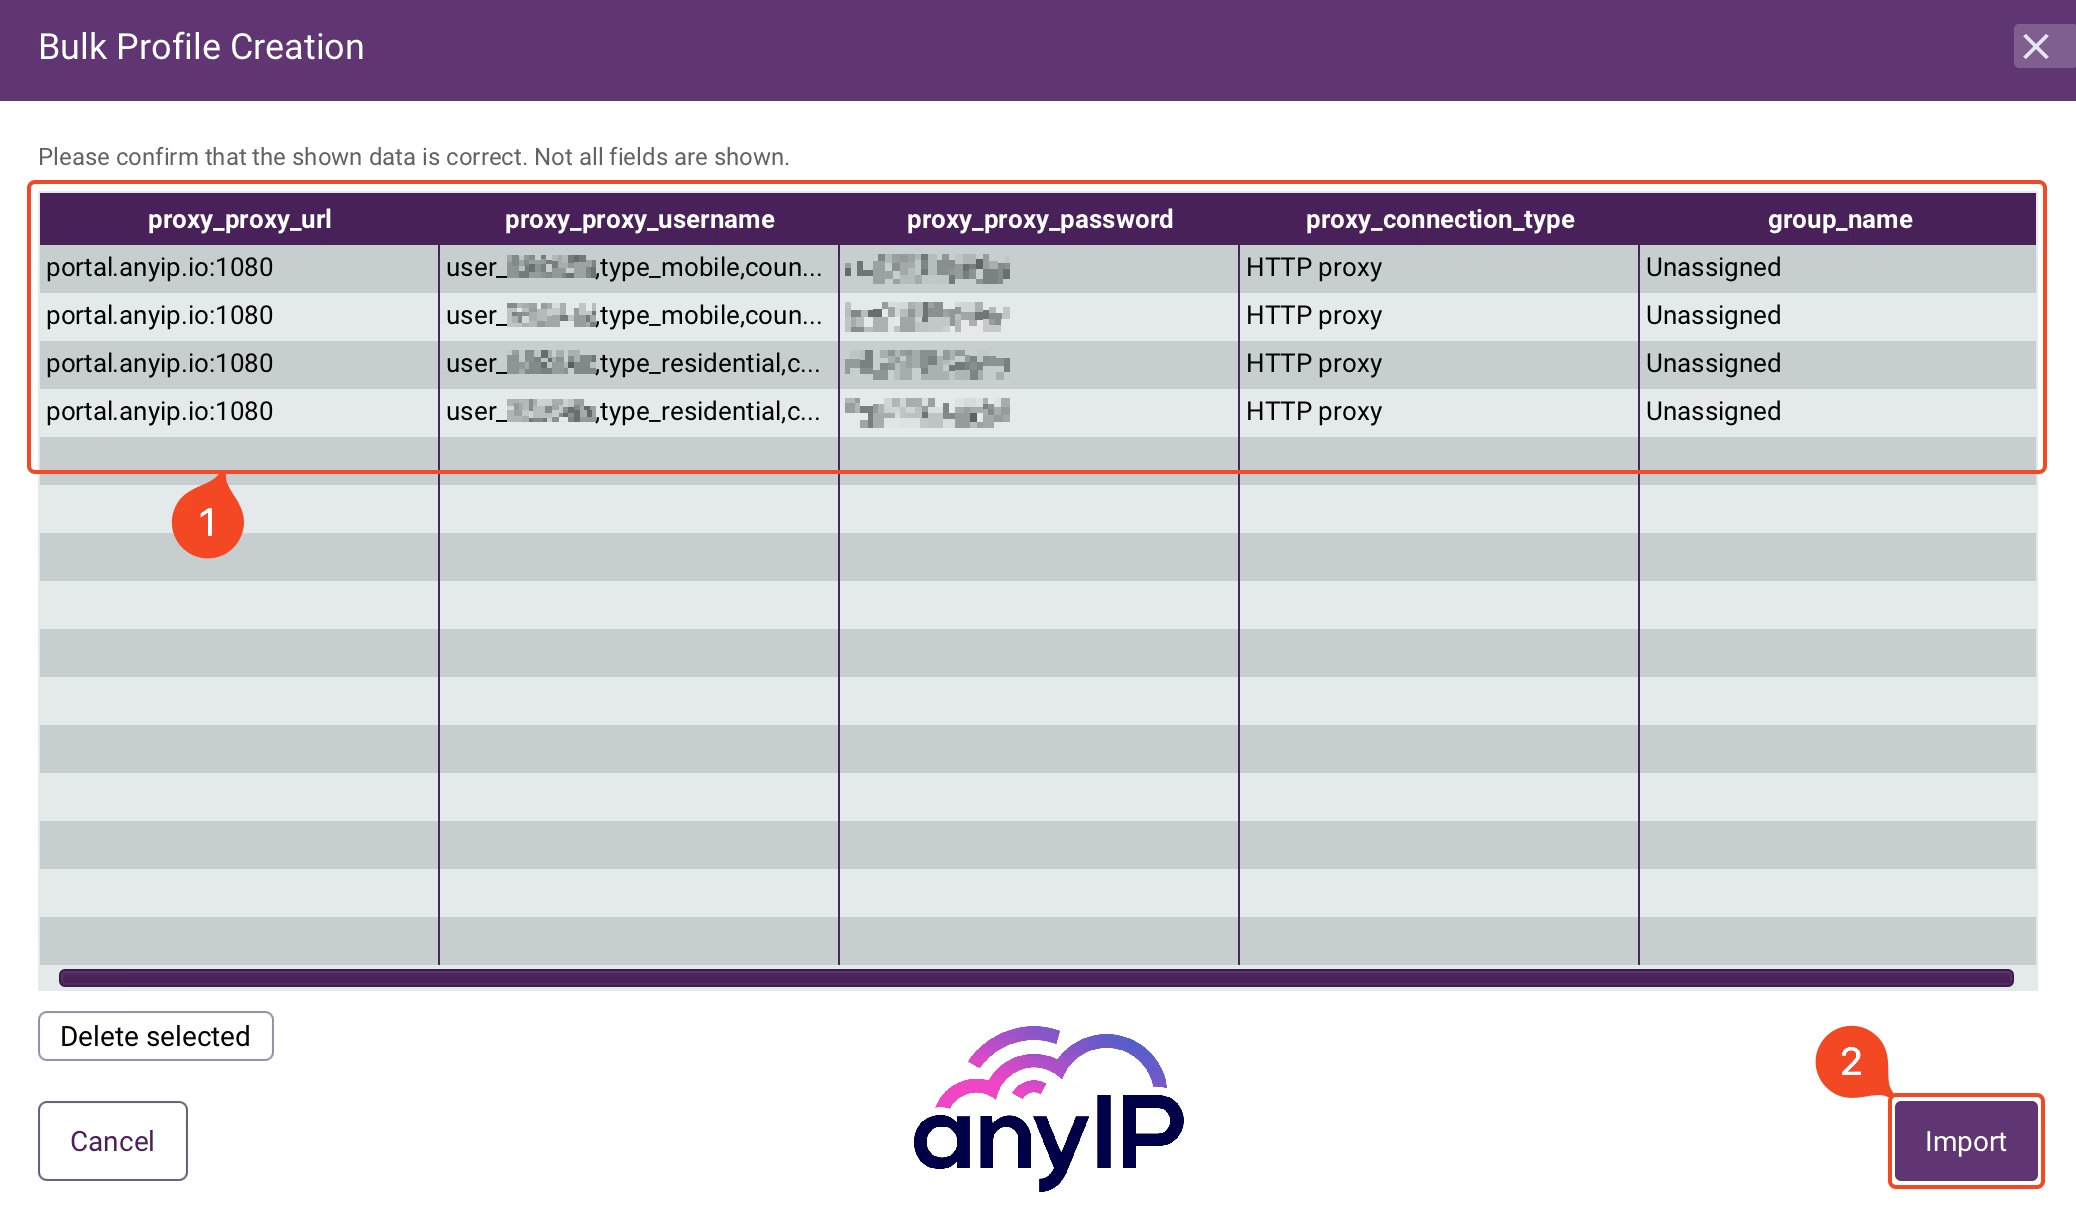
Double-check that the proxy details are correct (1) and proceed by clicking on "Import" to save all the proxies.
You should now see your updated proxy list on the proxy management dashboard.
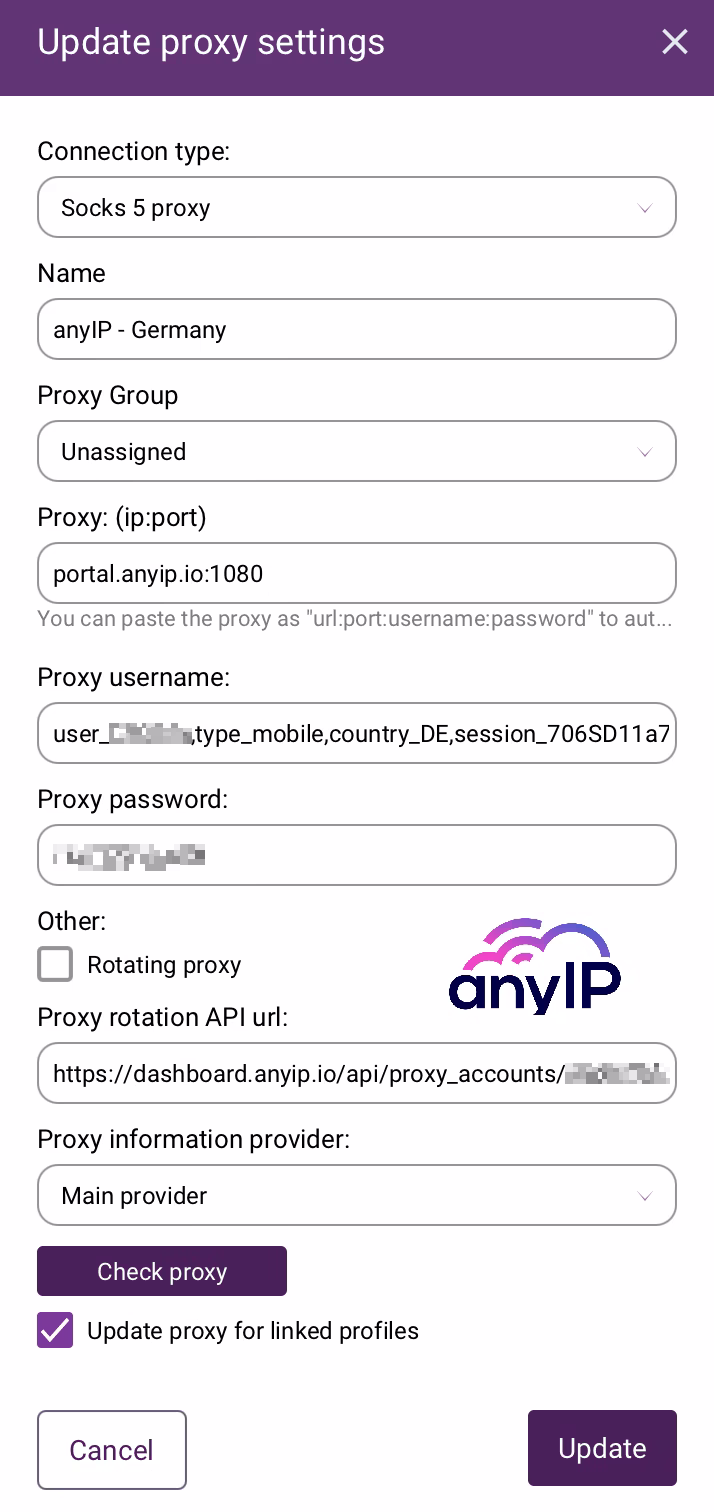
Edit a proxy
Incogniton uses a basic UI to make it easy for the user to manage their profile. Editing a proxy is a straightforward process
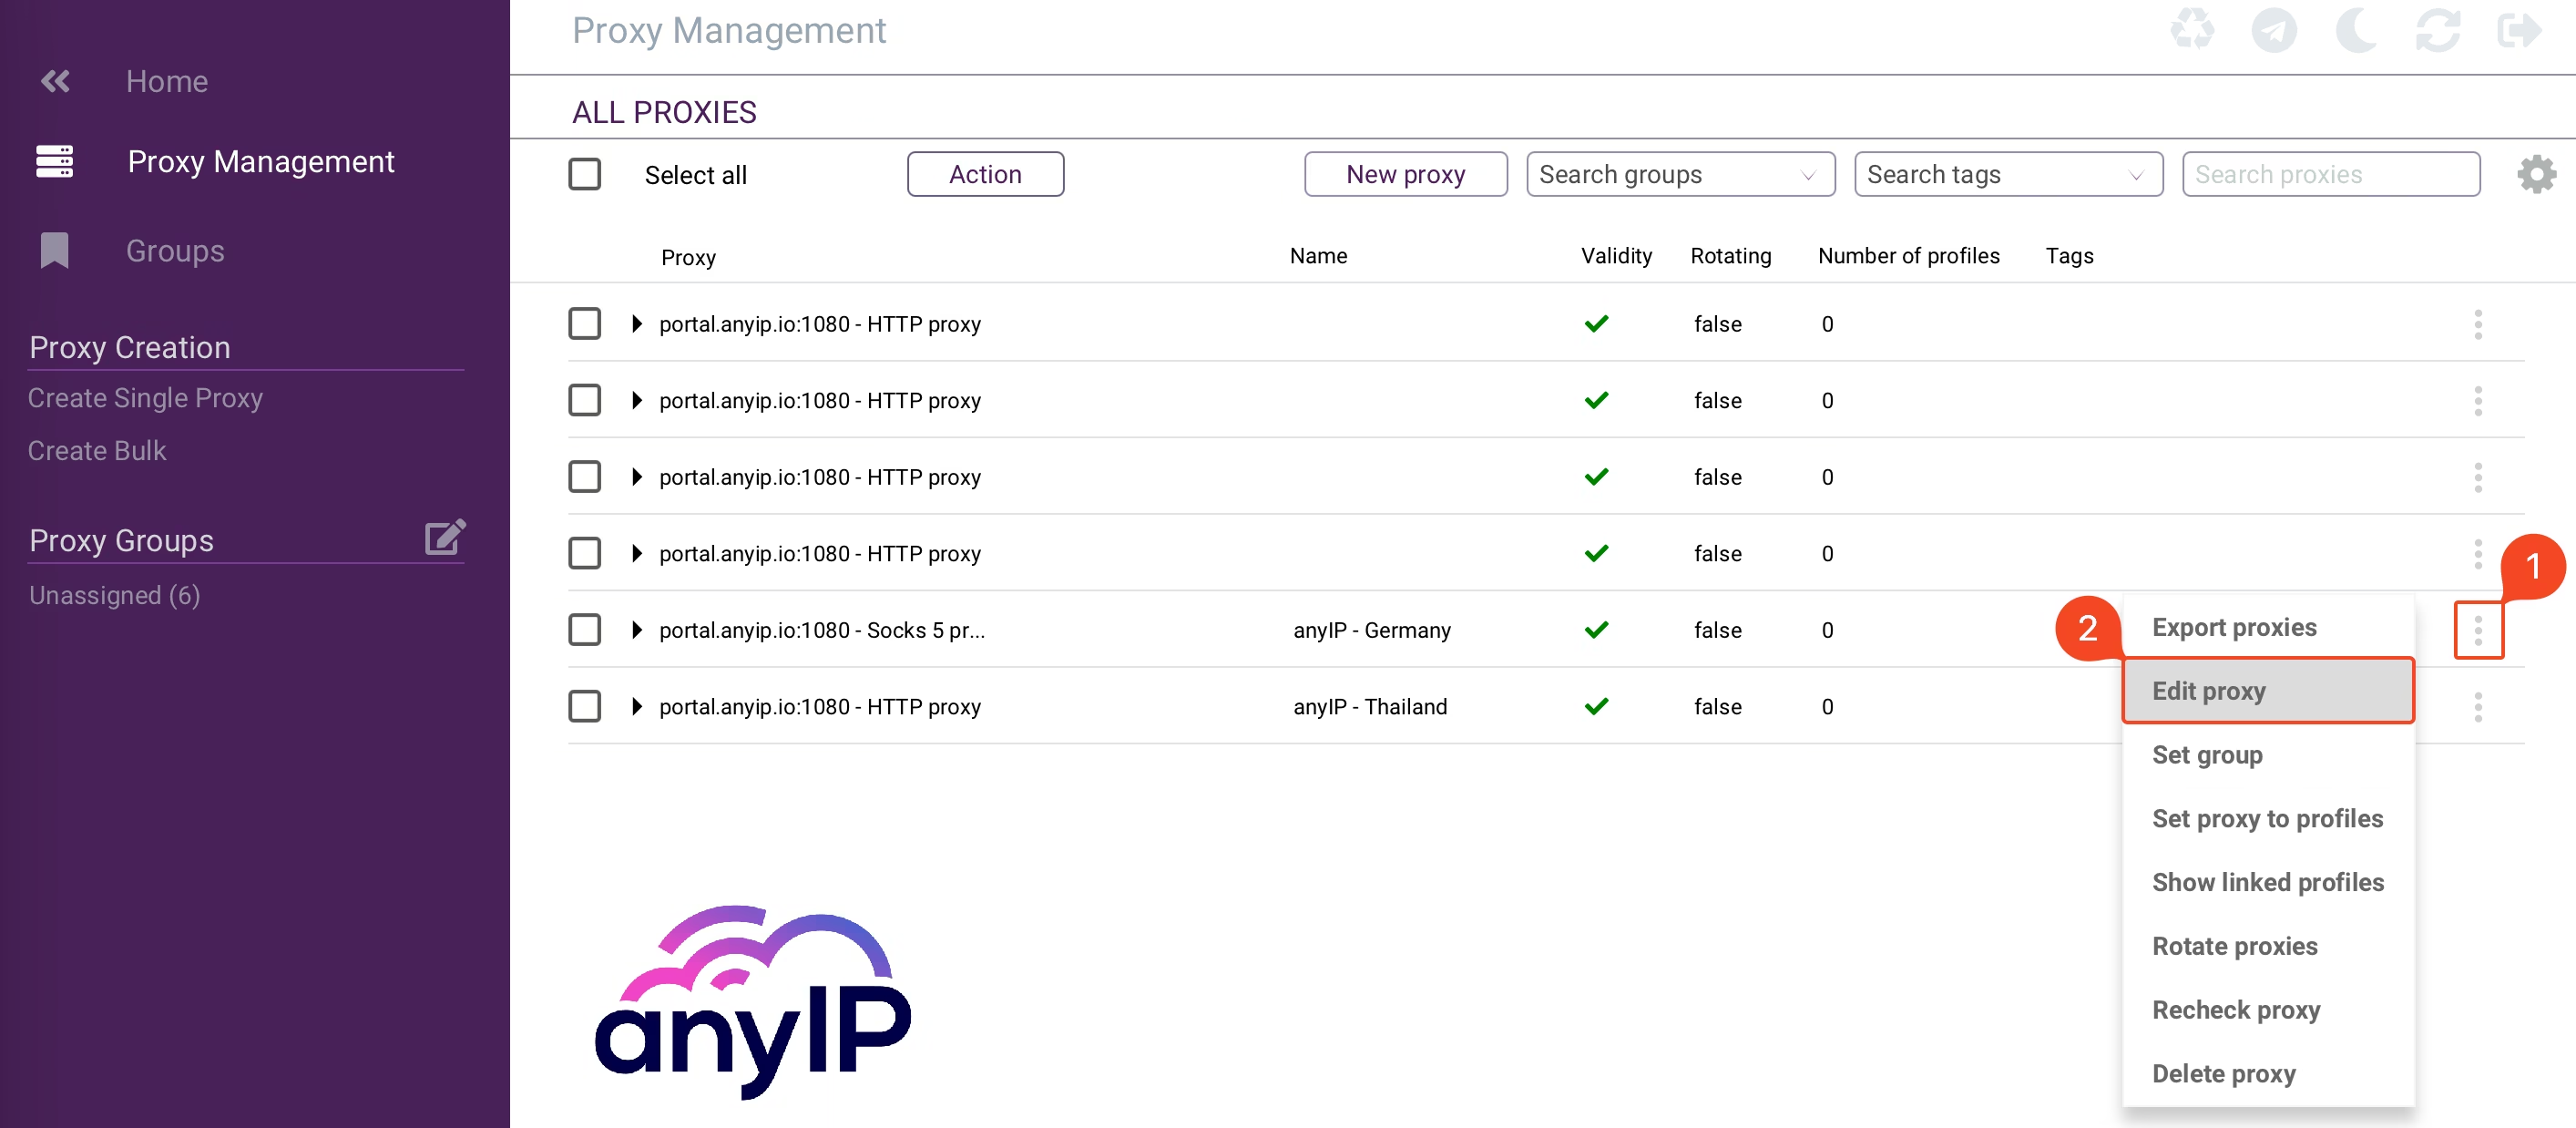
Click the “triple dot” button next to the proxy you want to edit.
Click on “Edit proxy” to open the update form.
|
You can now edit the proxy settings, such as:
You can also check if the proxy connects by clicking "Check proxy."  After you've updated all the needed info, click "Update" to save. |
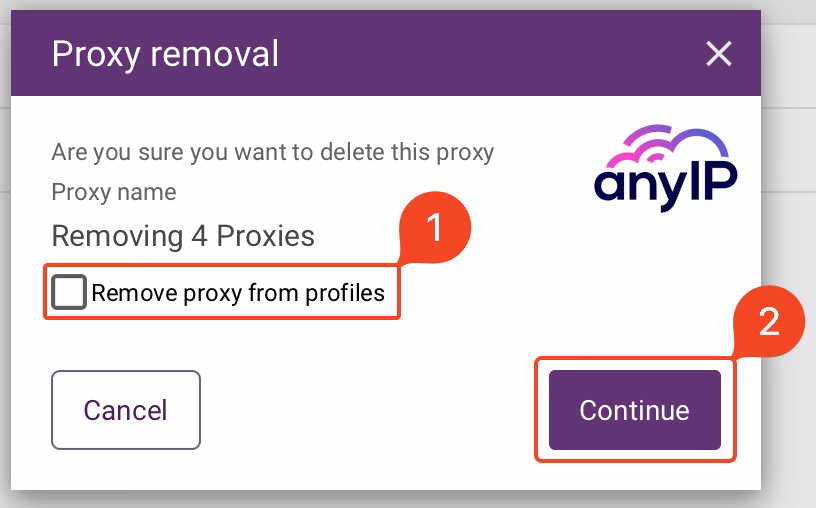
Delete a proxy
Delete a proxy using the "triple dot" button on each line. Note that you can also remove multiple proxies at once like this:
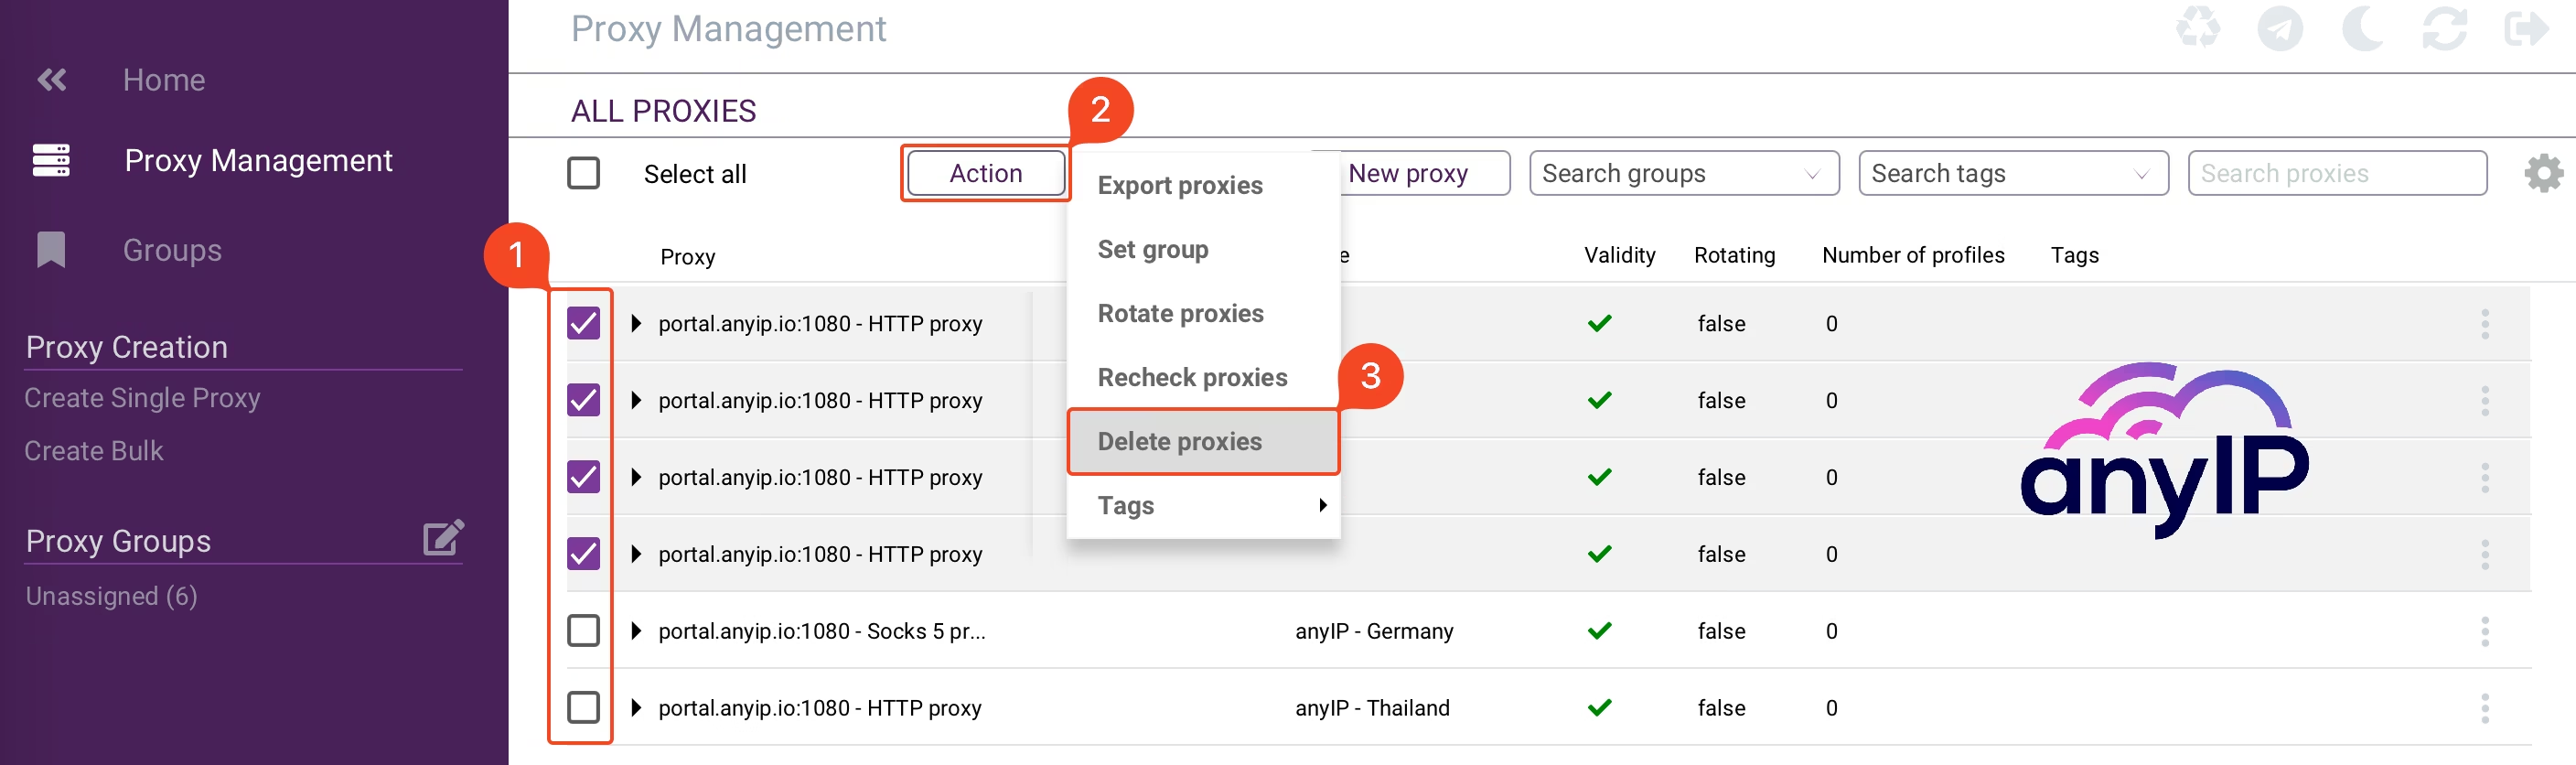
Select one or numerous proxies;
Click on “Action;”
then “Delete proxies;”
|
|
How do I test my proxy connectivity?
If you take a day off and need to check your proxy when you return, easy peasy. Incogniton can do it for you.
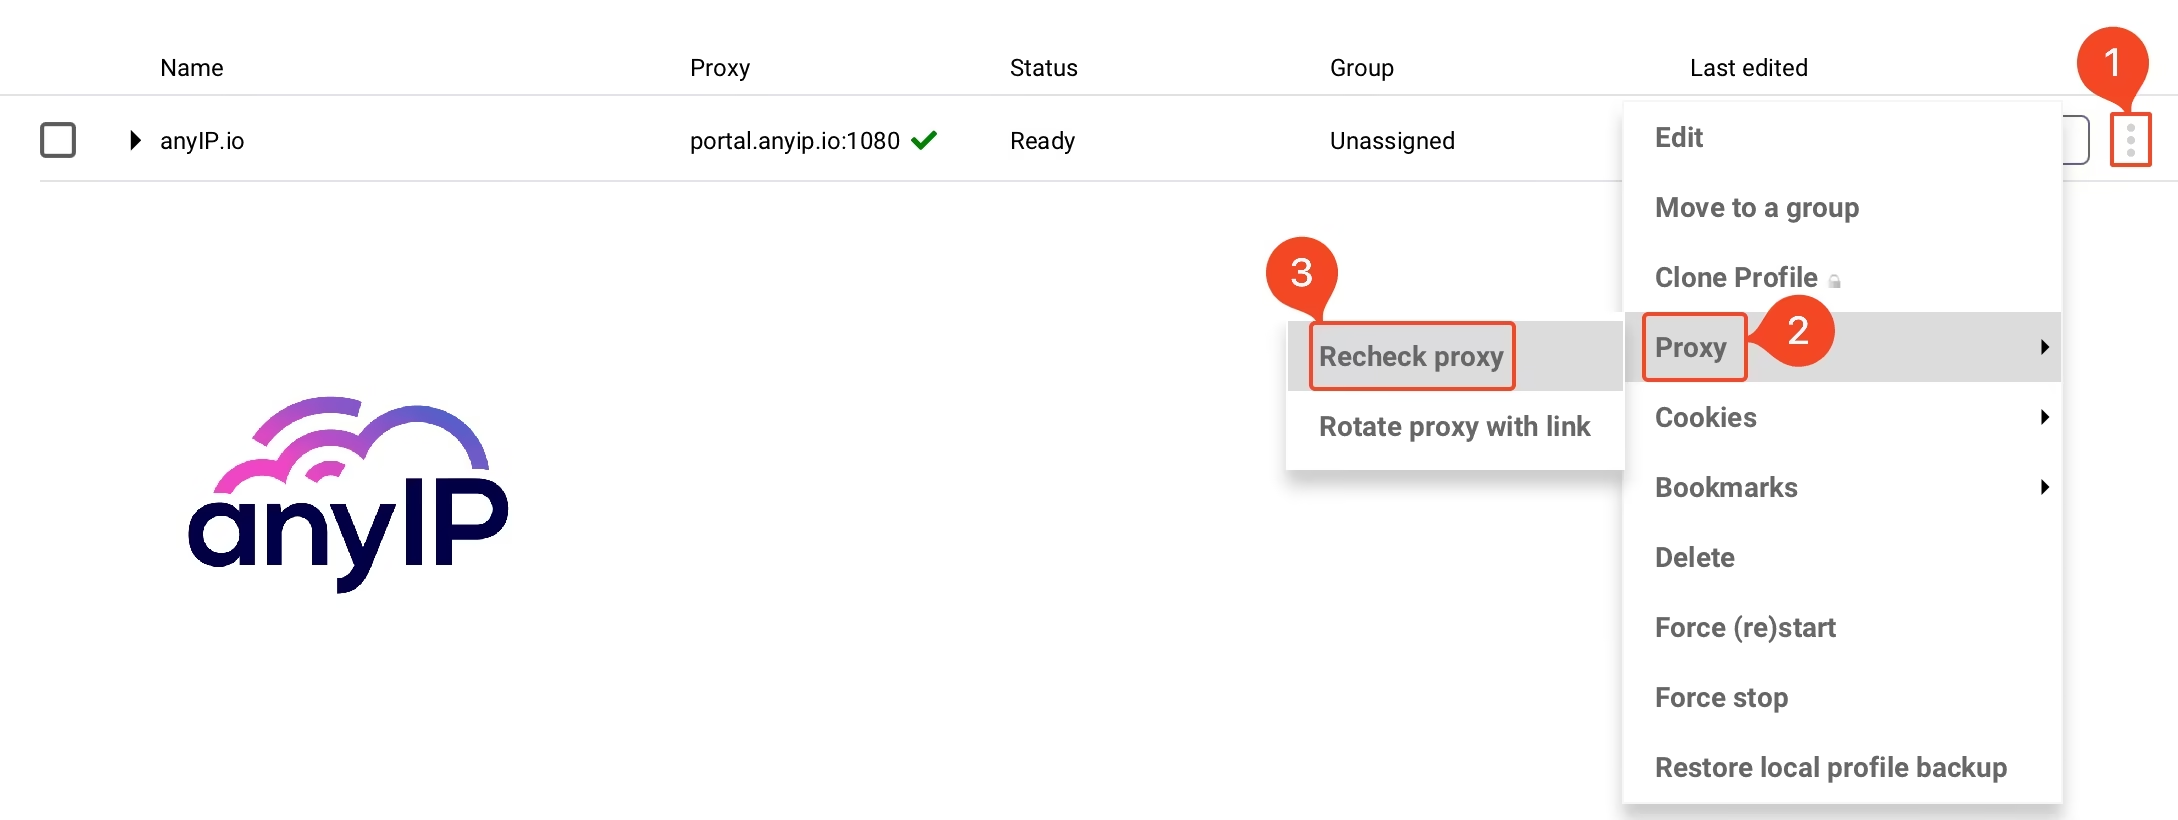
Click on the “triple dot” button to open a contextual menu.
Click on “Proxy”.
Then click on “Recheck proxy” to force a proxy check.
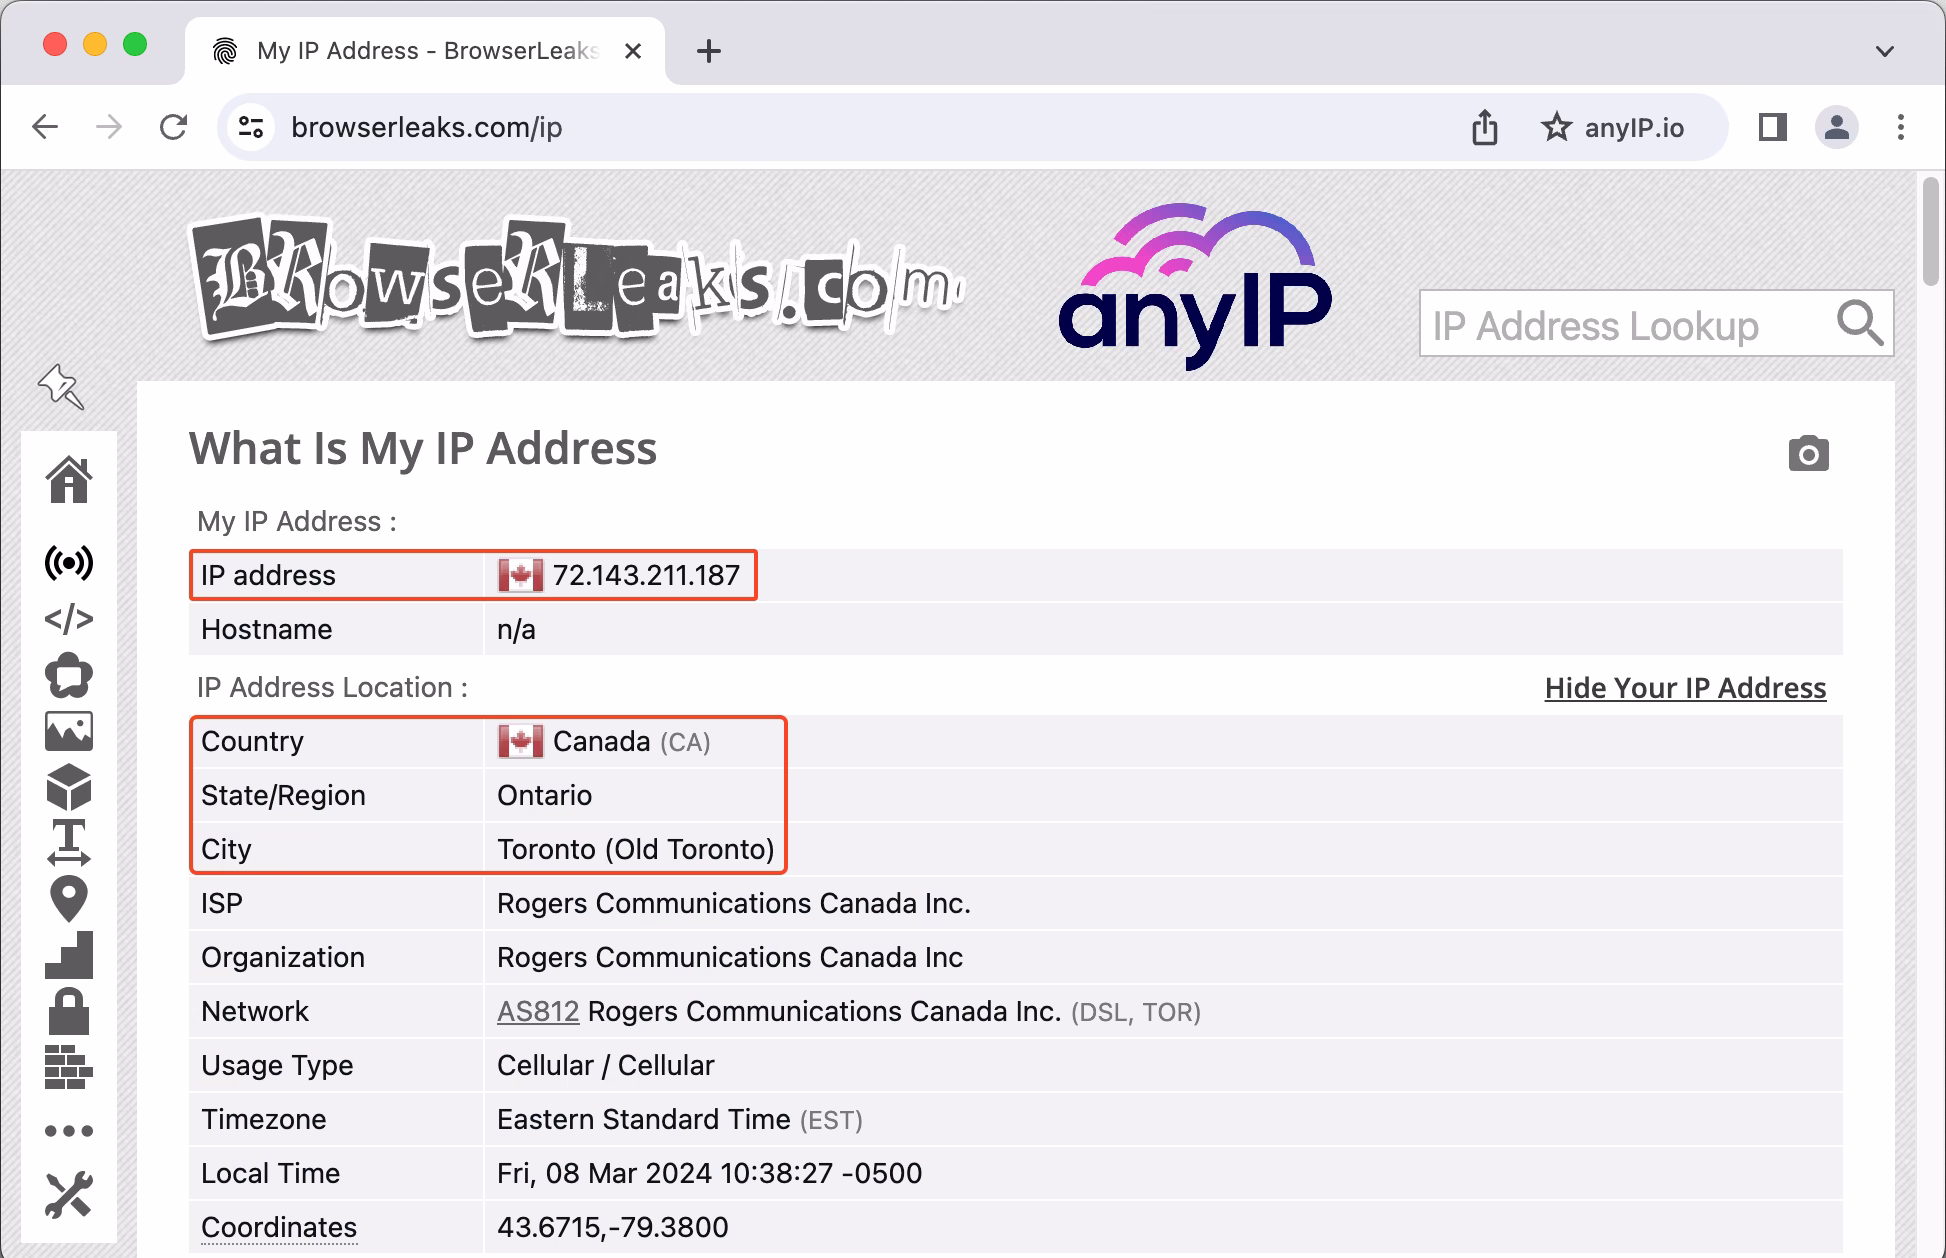
How to verify your IP and control the fingerprint
Visit an IP checker like browserleaks.com/ip to confirm that the proxy is well-configured and offers excellent anonymity**.**
Now, one of the main reasons to use an anti-detect browser is the ability to use a custom fingerprint setting to mask your real one.
But how can you be certain that your fingerprint is trustworthy?
Head up to iphey.com. This website will check each parameter of your fingerprint and will let you know if you have a leak.
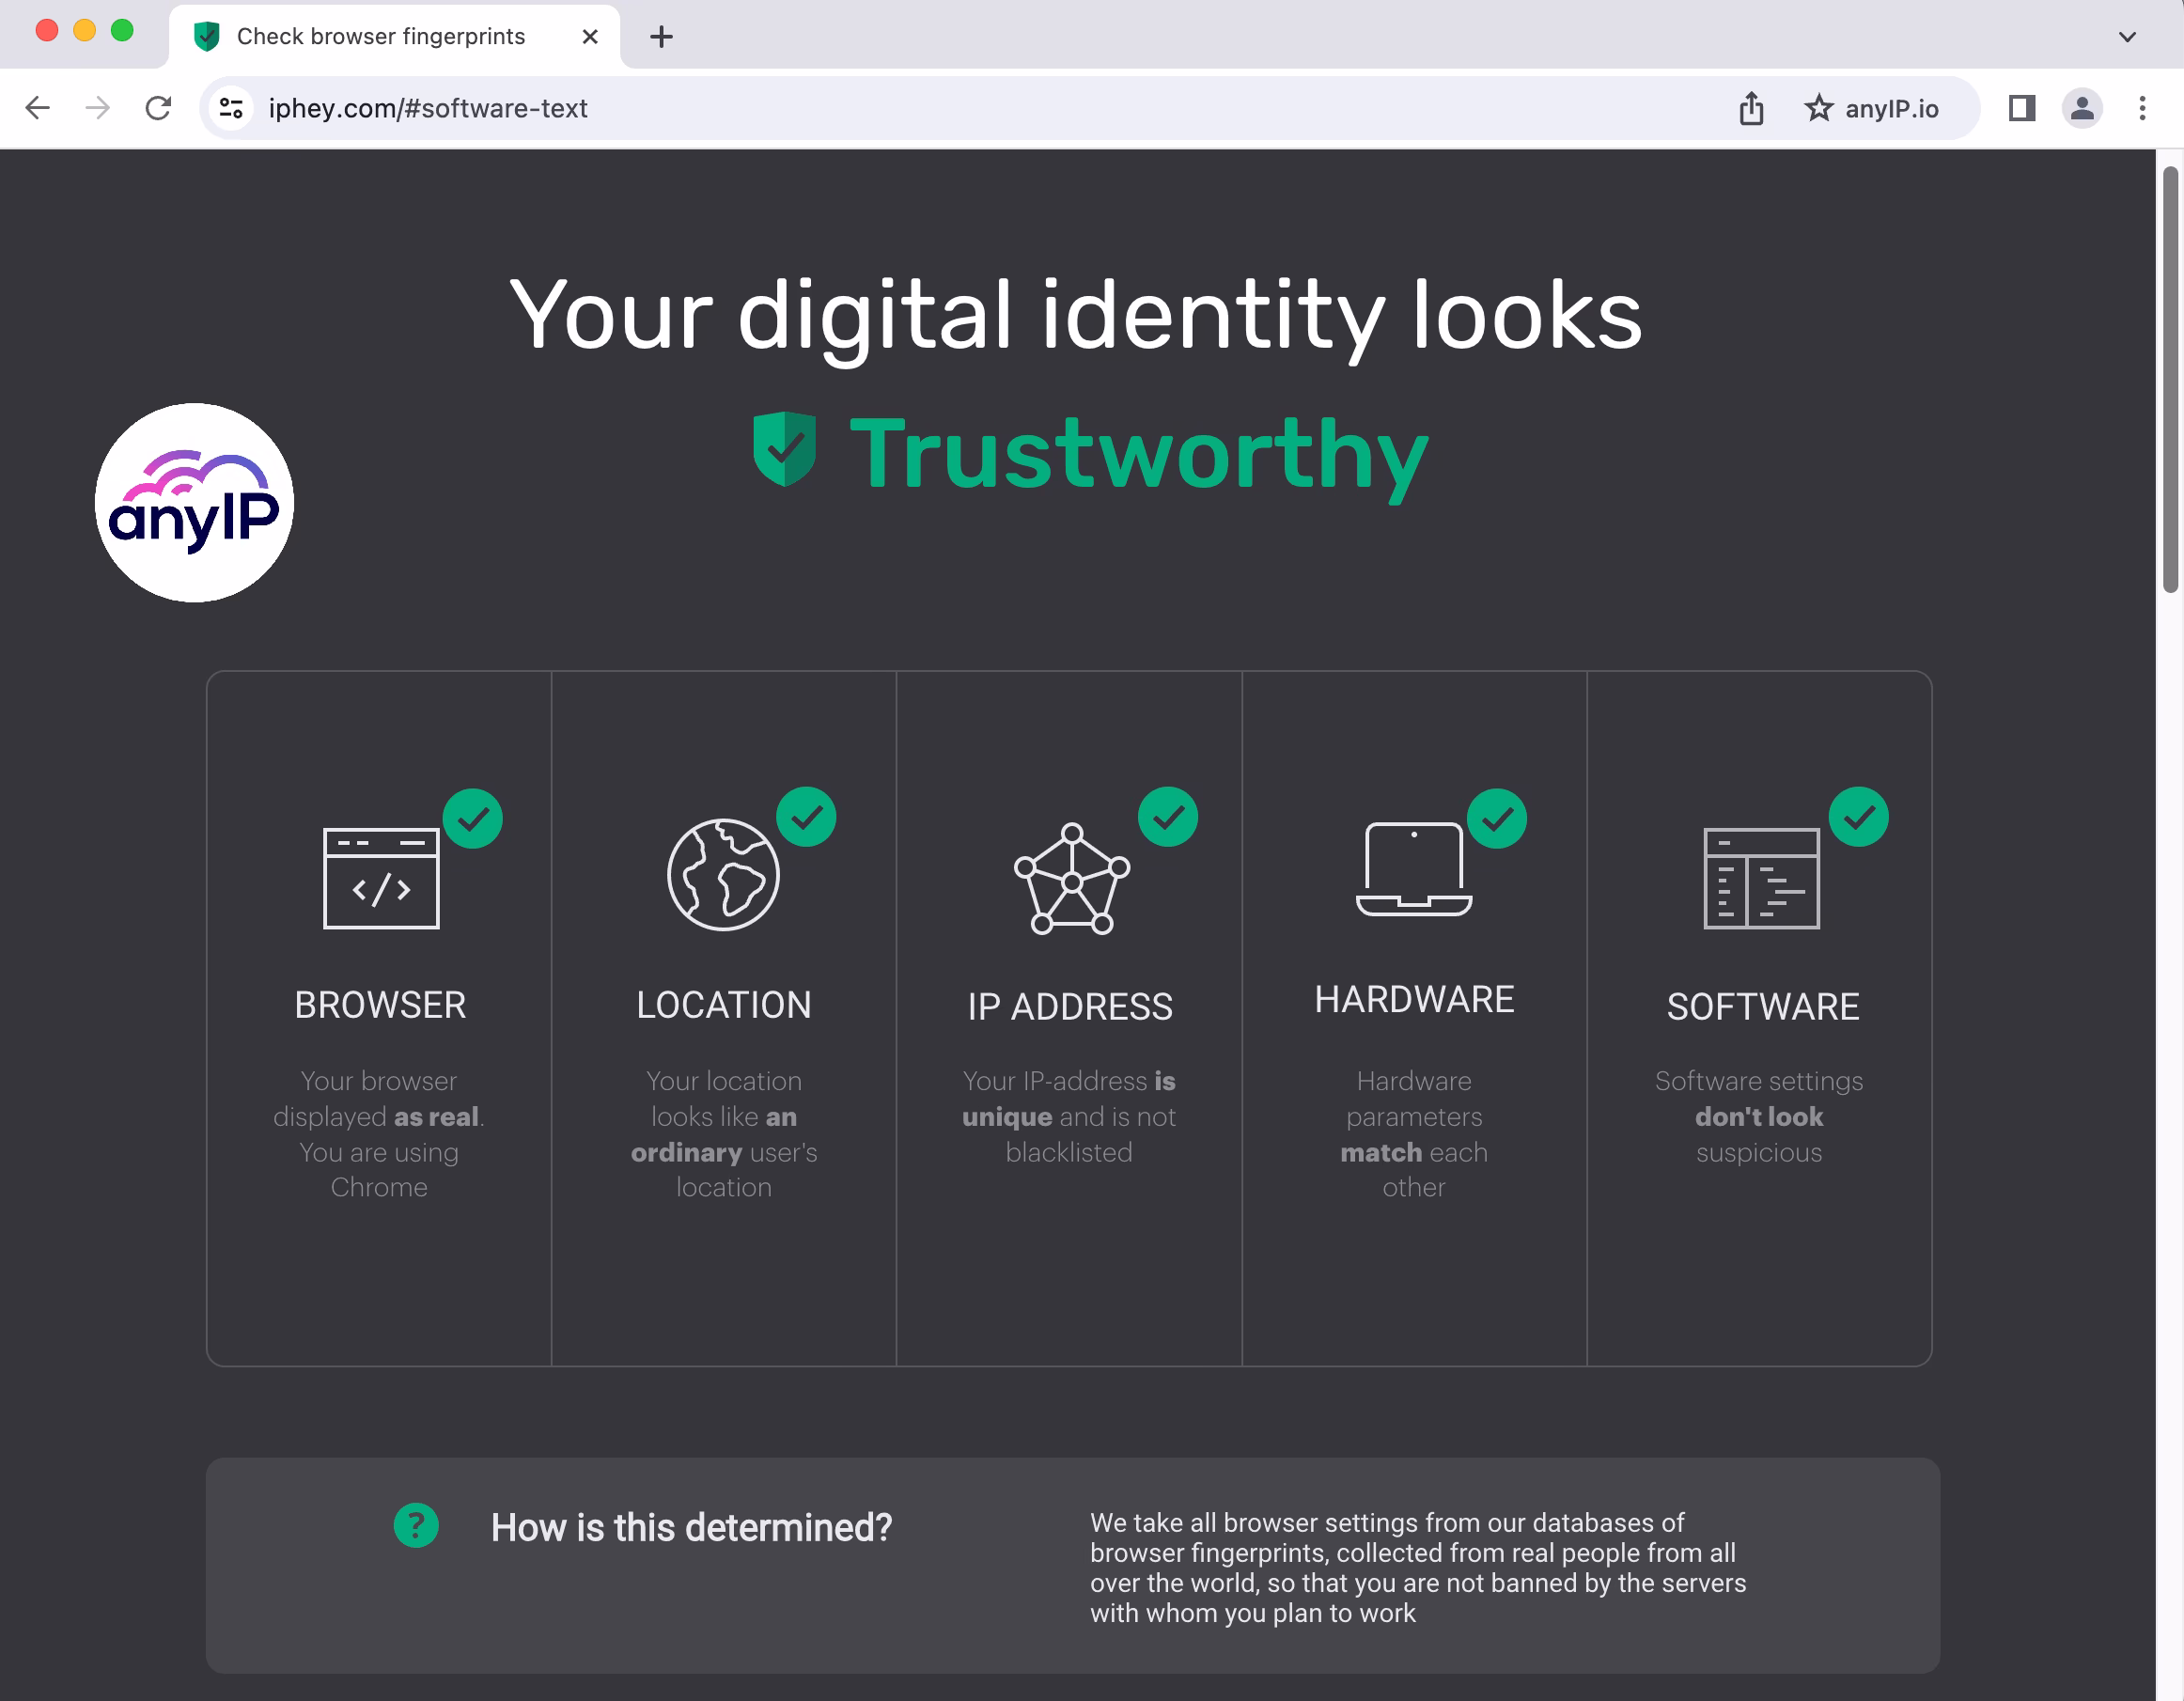
Our browser looks as real as a “normal” browser.
Thanks to the proxy provided by anyIP.io, our location and IP address are legit.
Both our hardware and software don’t look suspicious.
You can now navigate without risking your data to leak.
Advanced: Managing your profiles with Incogniton API
💡 Keep in mind that a paid subscription is needed to use the Incogniton API
An anti-detect browser like Incogniton is essential for anyone looking to browse the internet in complete stealth. It will help you unblock restricted content while securing your online identity through randomly generated fingerprints and multiple profiles.
In short, it ensures you stay undetectable, making it perfect for tasks requiring privacy, security, and anonymity.
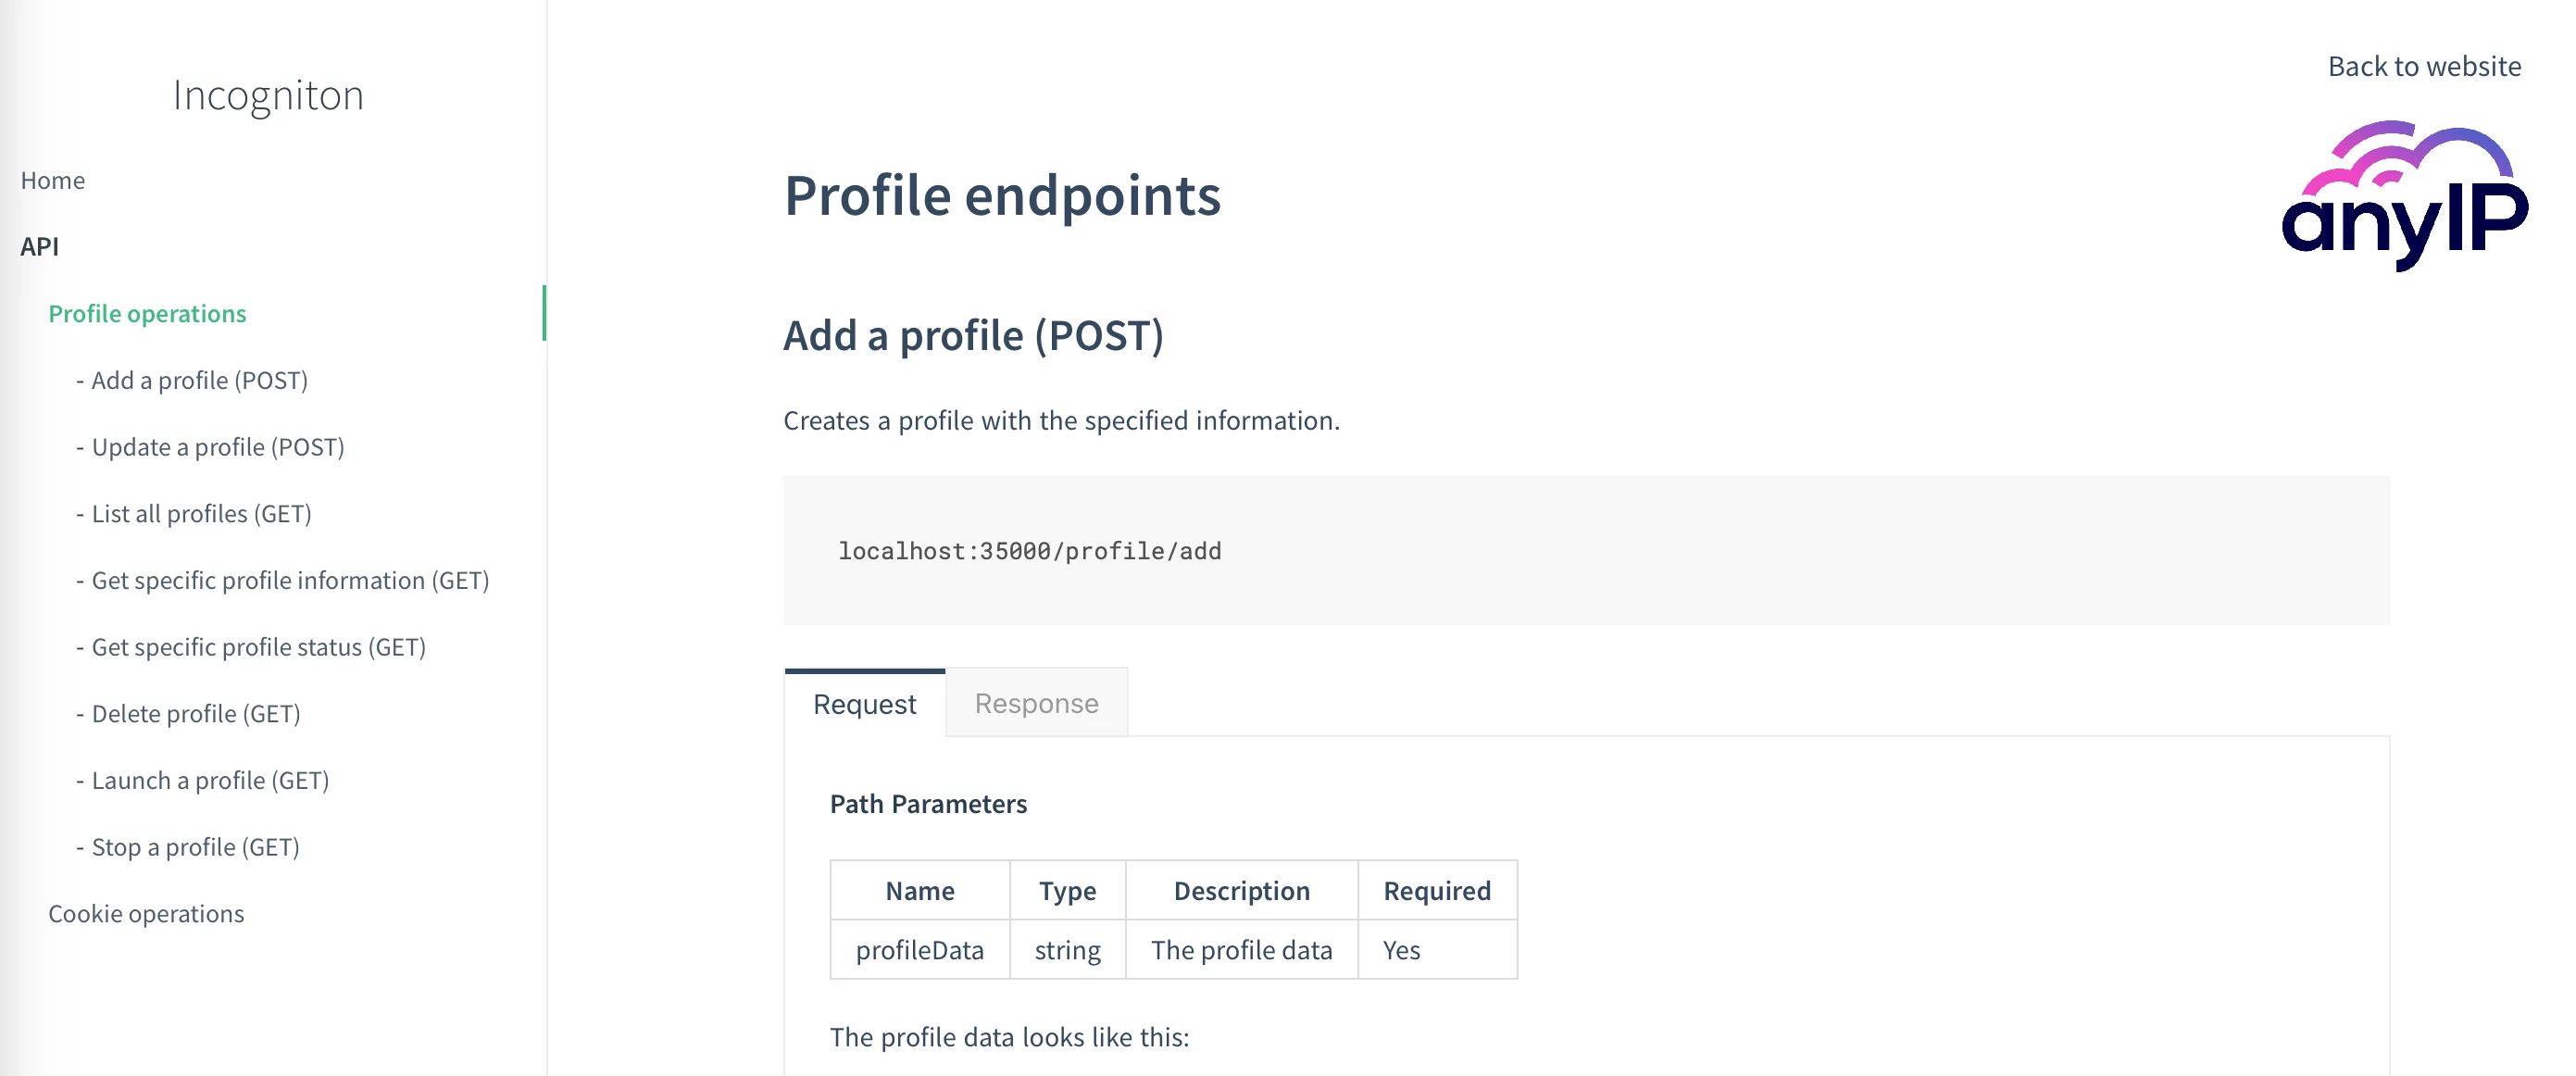
For more advanced users, Incogniton offers an API. It is perfect for you if you need automation (using Selenium) or want to create a custom dashboard.
To learn everything about it, follow this link to explore the official documentation.
Get a proxy now with anyIP.io
Choosing the right proxy is crucial. Key factors like proxy type, performance, and bandwidth limitations play a big role in making the right decision. Residential and mobile proxies stand out as the safest and most reliable options compared to data center, public, or ISP proxies.
With IP rotation and routing through genuine devices, these proxies provide unmatched anonymity and security.
Sign up with anyIP.Io in under 5 minutes and gain access to a global IP pool starting at just $2/GB.
Our dedicated 24/7 support team is always here to assist you with any questions or setup needs.
Article by
Khaled Bentoumi
Khaled is a software engineer. He's been involved in many startups of different sizes. Previously, he founded Data to Page, an AI Programmatic SEO startup. He now handles all the marketing at anyIP.


Article by
Khaled Bentoumi
Khaled is a software engineer. He's been involved in many startups of different sizes. Previously, he founded Data to Page, an AI Programmatic SEO startup. He now handles all the marketing at anyIP.
Read more
How to customize Your User-Agent with Python Requests
Learn how to update and rotate user-agents in Python Requests to avoid detection and improve scraping efficiency.

