
How to Set Up Proxies in Android: Ultimate Guide
Table of Contents
Table of Contents
Key takeaways
Set up proxies on Android via mobile or WiFi using anyIP.io.
Mobile proxies require username/password for authentication.
Use IP Whitelisting for proxy on WiFi network without credentials.
Test connections and detect DNS leaks with browserleaks.com and apps.
Connection issues often stem from incorrect credentials or server issues.
Welcome to this step-by-step tutorial.
In this guide, we’ll cover the two ways to set up a proxy on a non-rooted Android device natively:
First, on your mobile network.
Then, how to configure your proxy on your WiFi network.
💡 To follow this guide, you need a few requirements:
An anyIP.io proxy account. With our Micro Plan, you can access 5GB of data, completely refundable.
Your anyIP.io proxy credentials
username/password;
proxy server addresses (IP + port);
Your Android device.
What is a proxy?
A mobile proxy server is an intermediary between your device and the websites/applications you access.
When using a proxy, you can:
mask your identity
enhance security
unlock restrictions
and even improve browsing speed in specific situations.
Set up proxies natively on Android using my mobile network.
Configuring a proxy on your Android device can be challenging for most. If you want to keep your data private or bypass all geo-restricted content, you are in the right spot!
💡 During our tests, we used a Google Pixel device on Android 14.
Step 1: Go to your Android mobile network’s settings (APNs settings)
| |
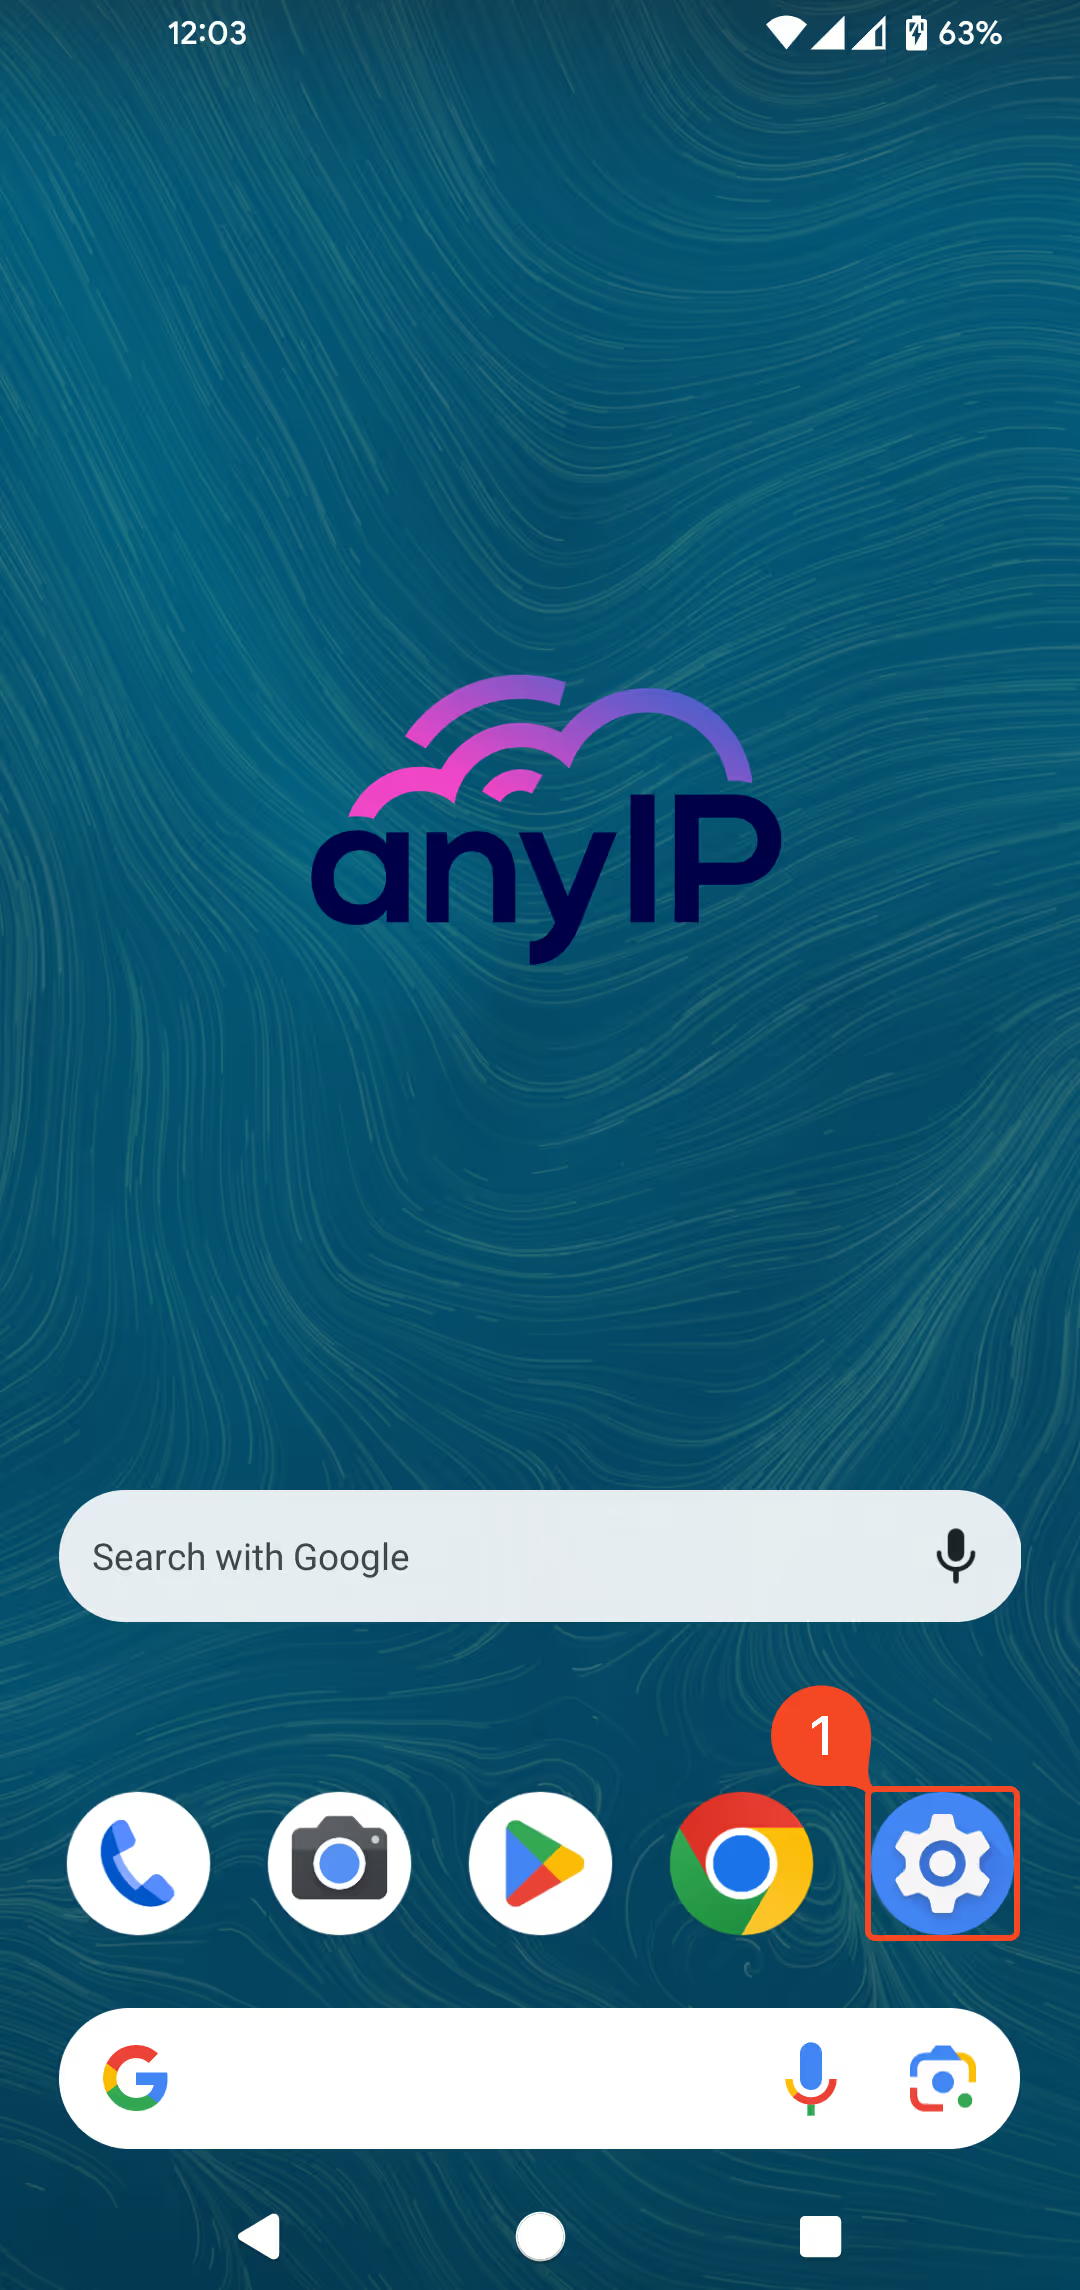
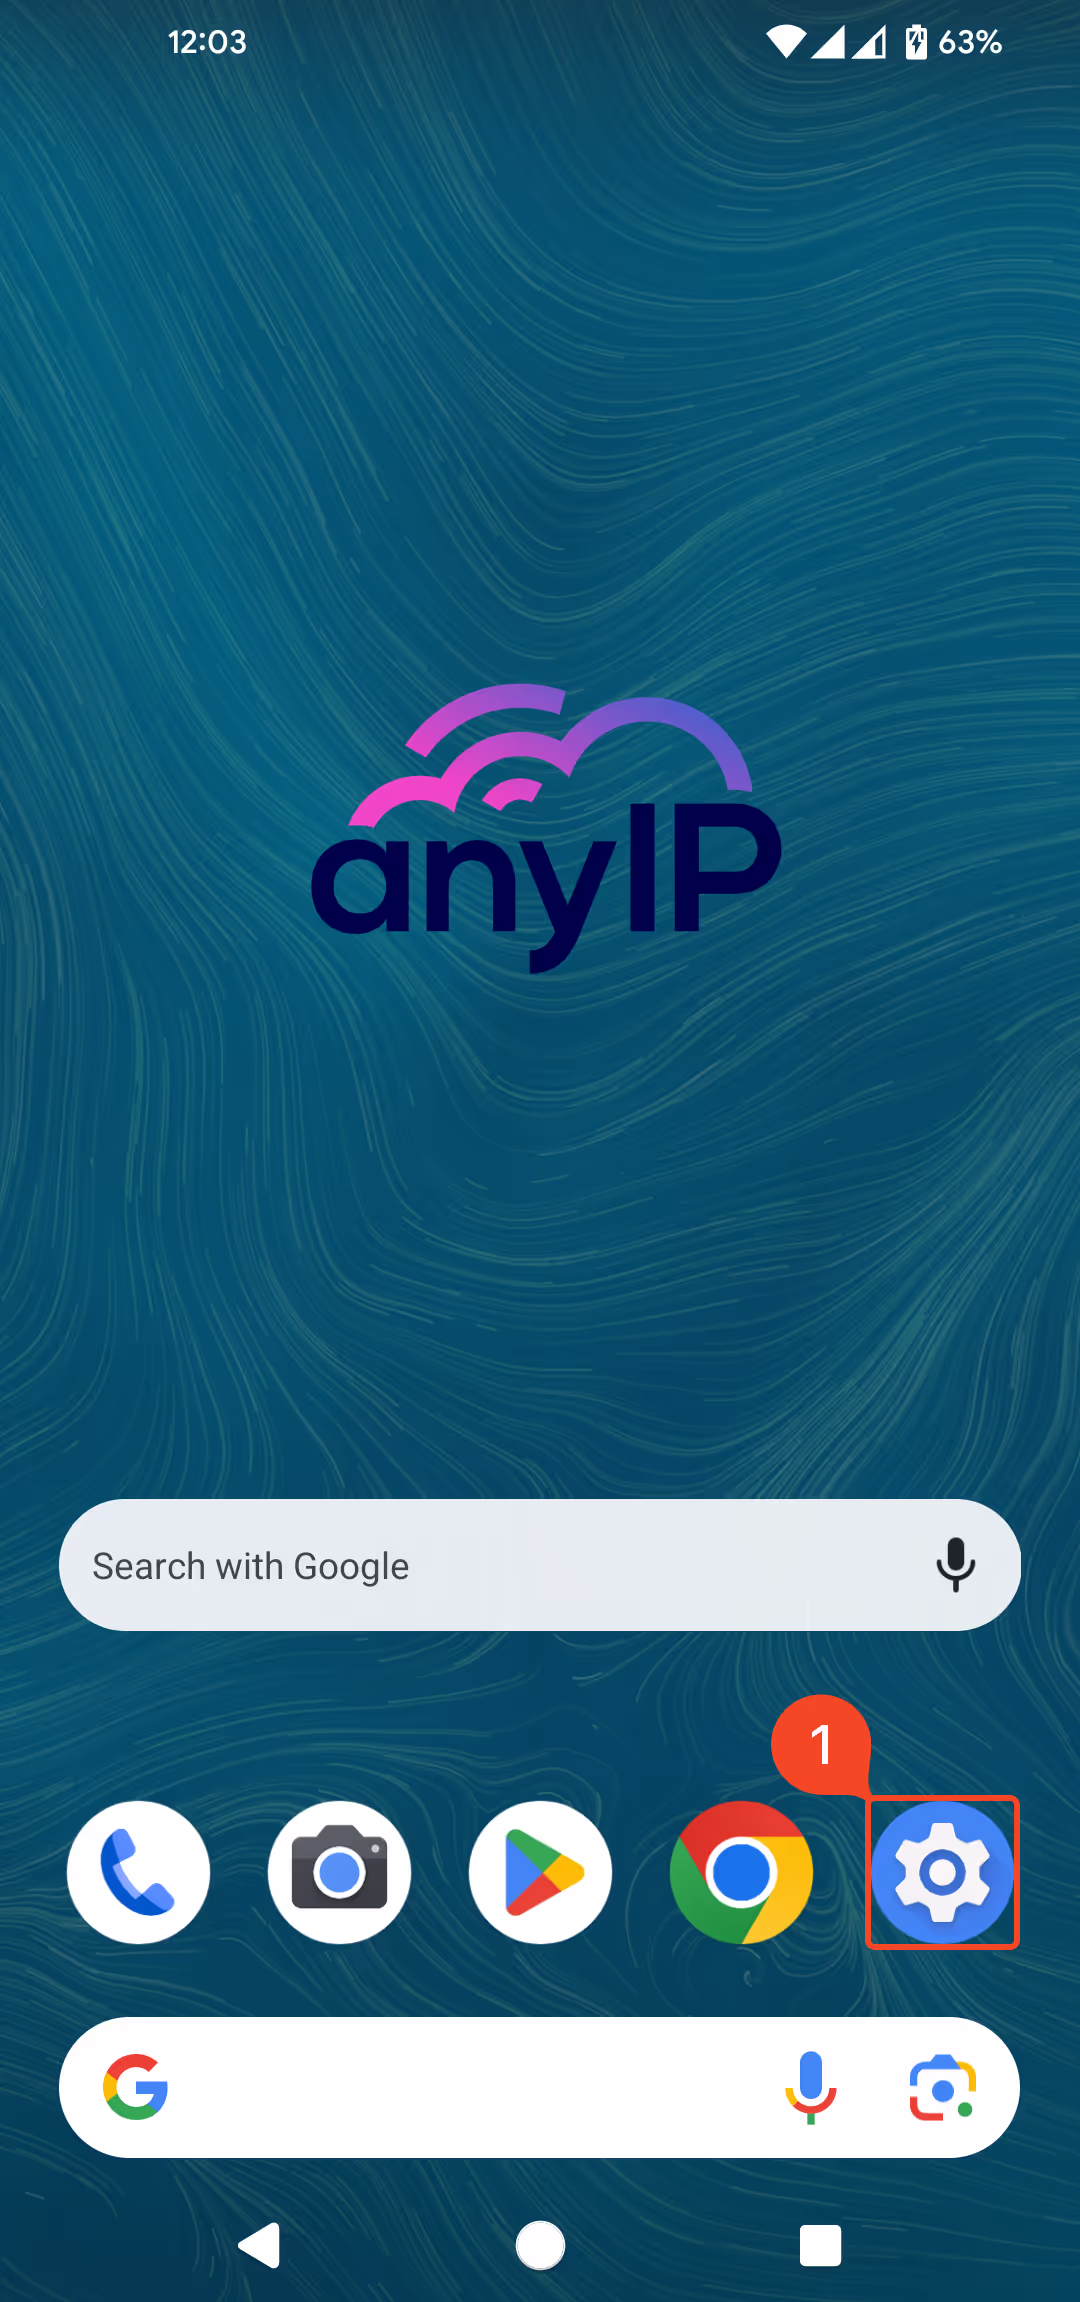
Click on the “Settings” icon.
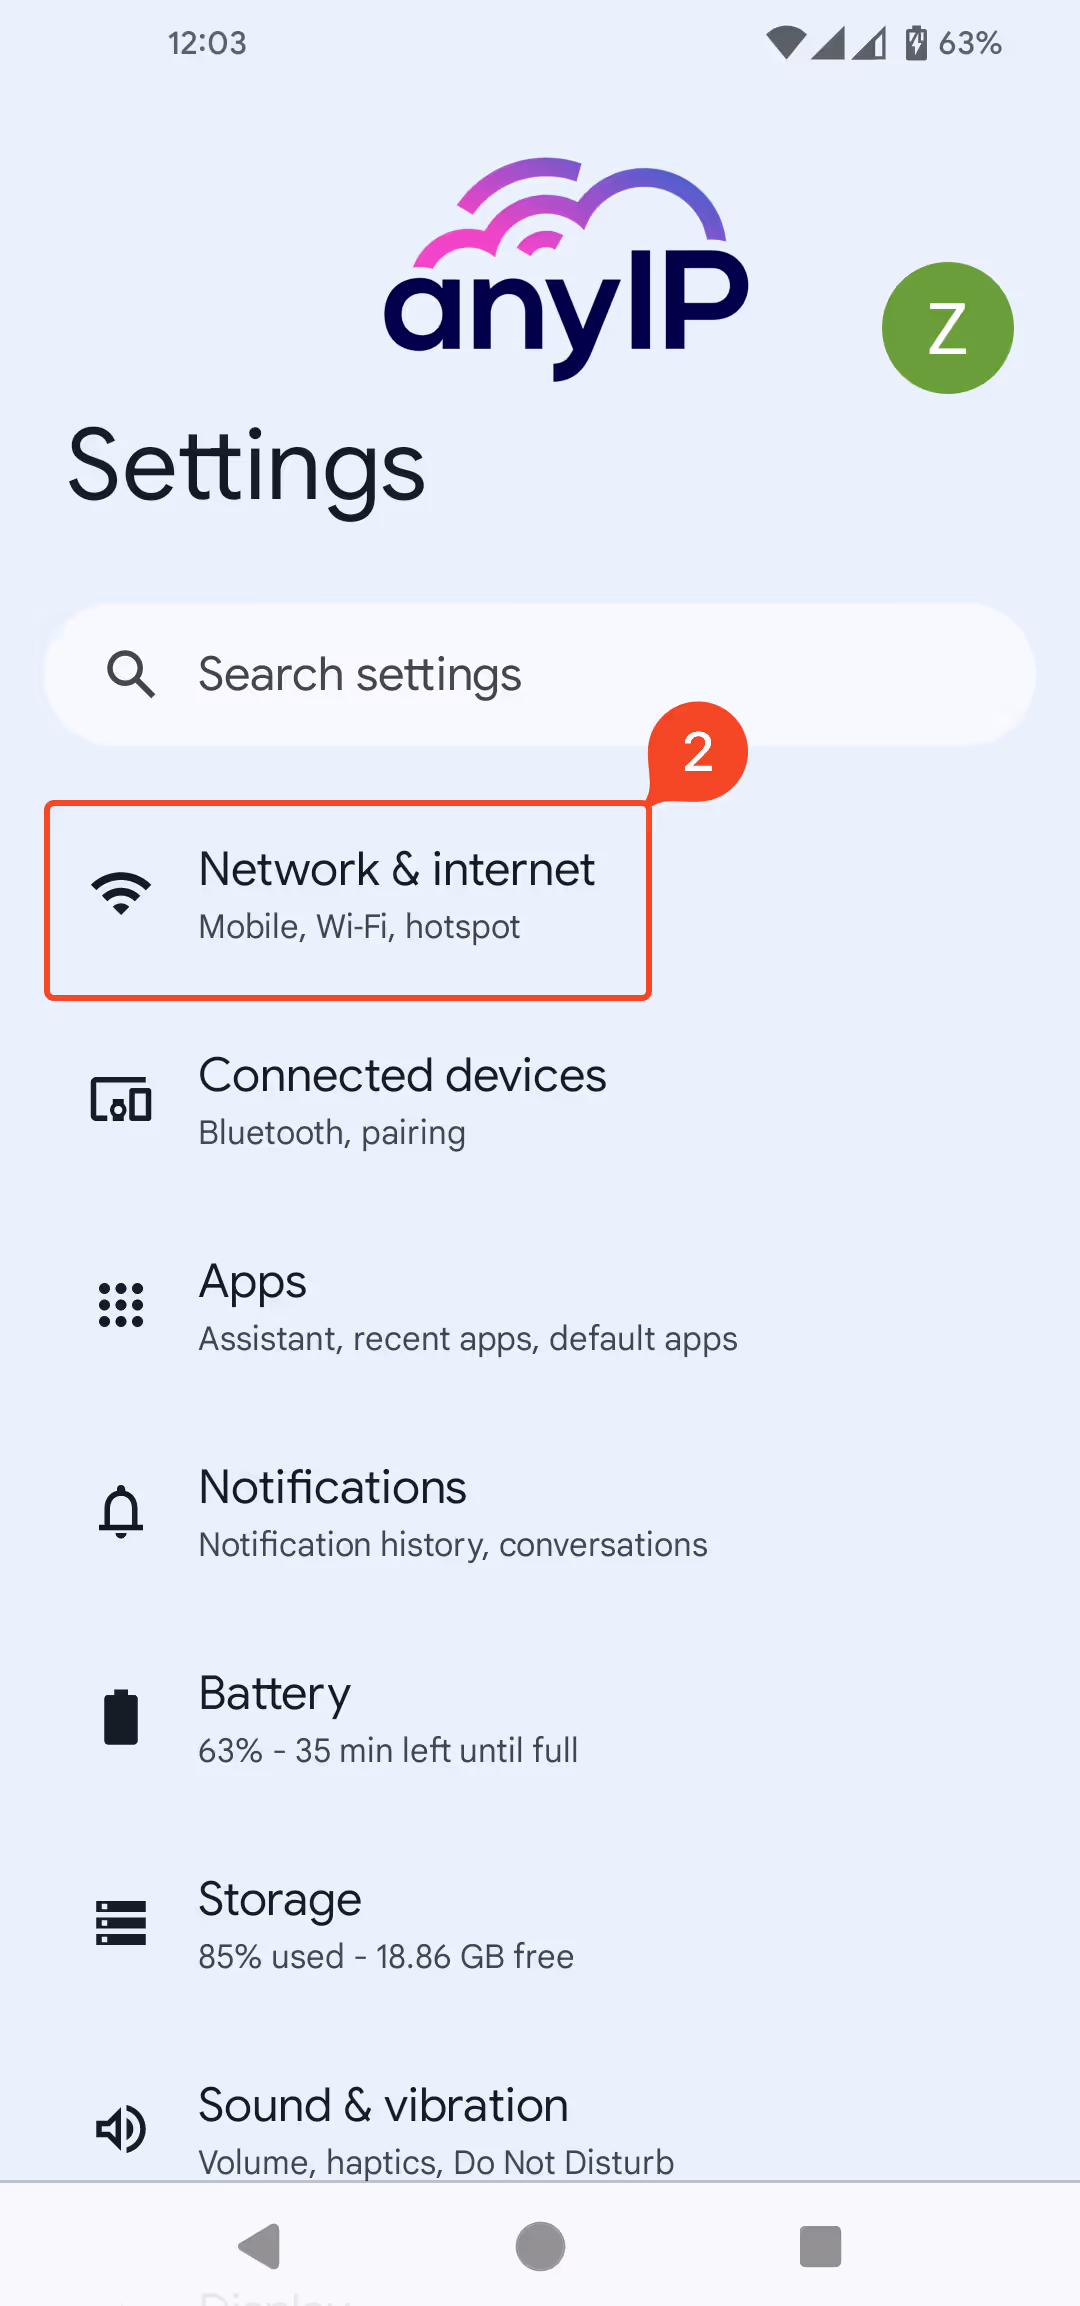
Click on “Network & Internet.”
| |
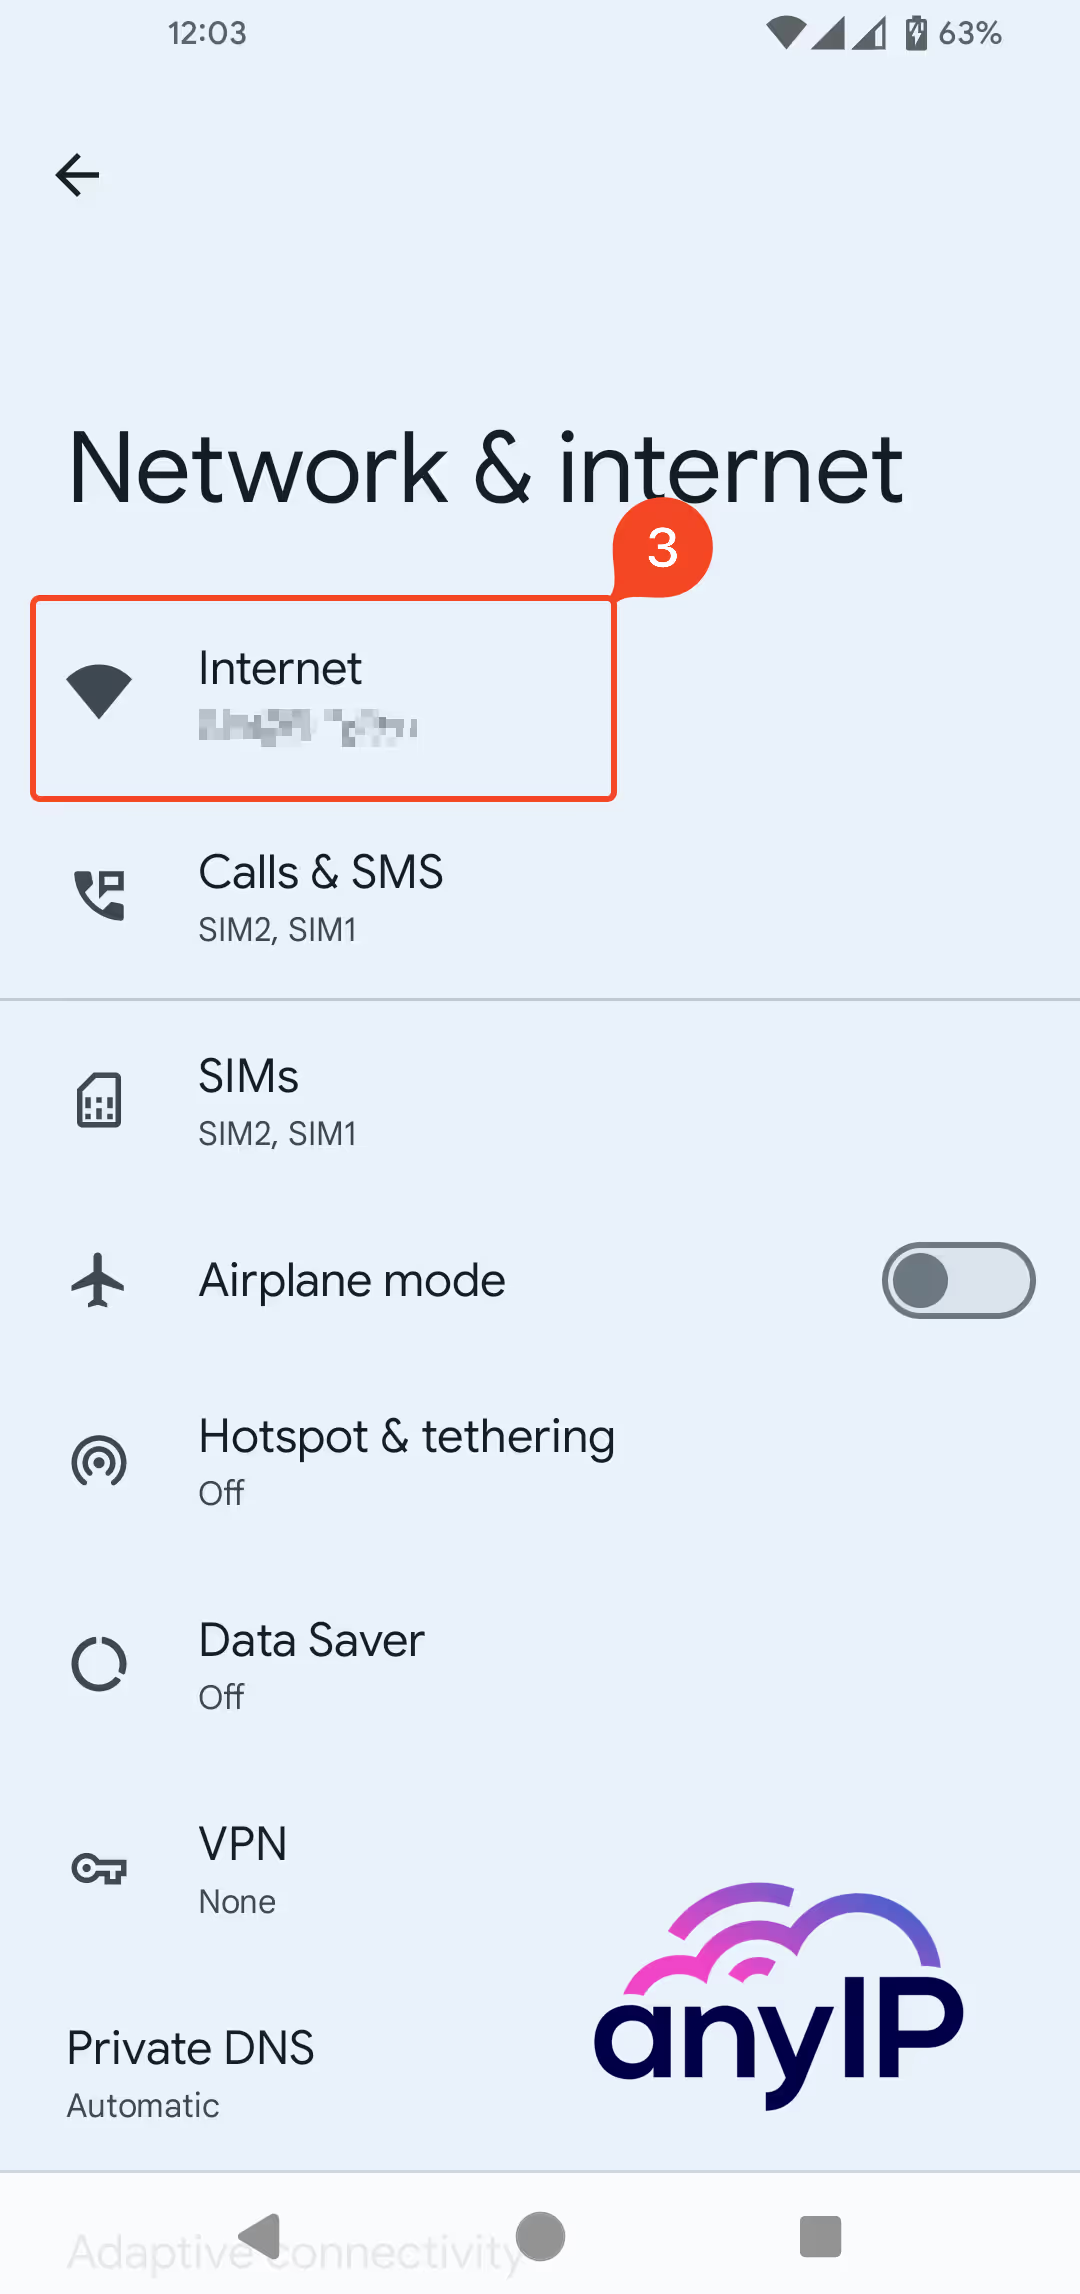
Click on “Internet.”
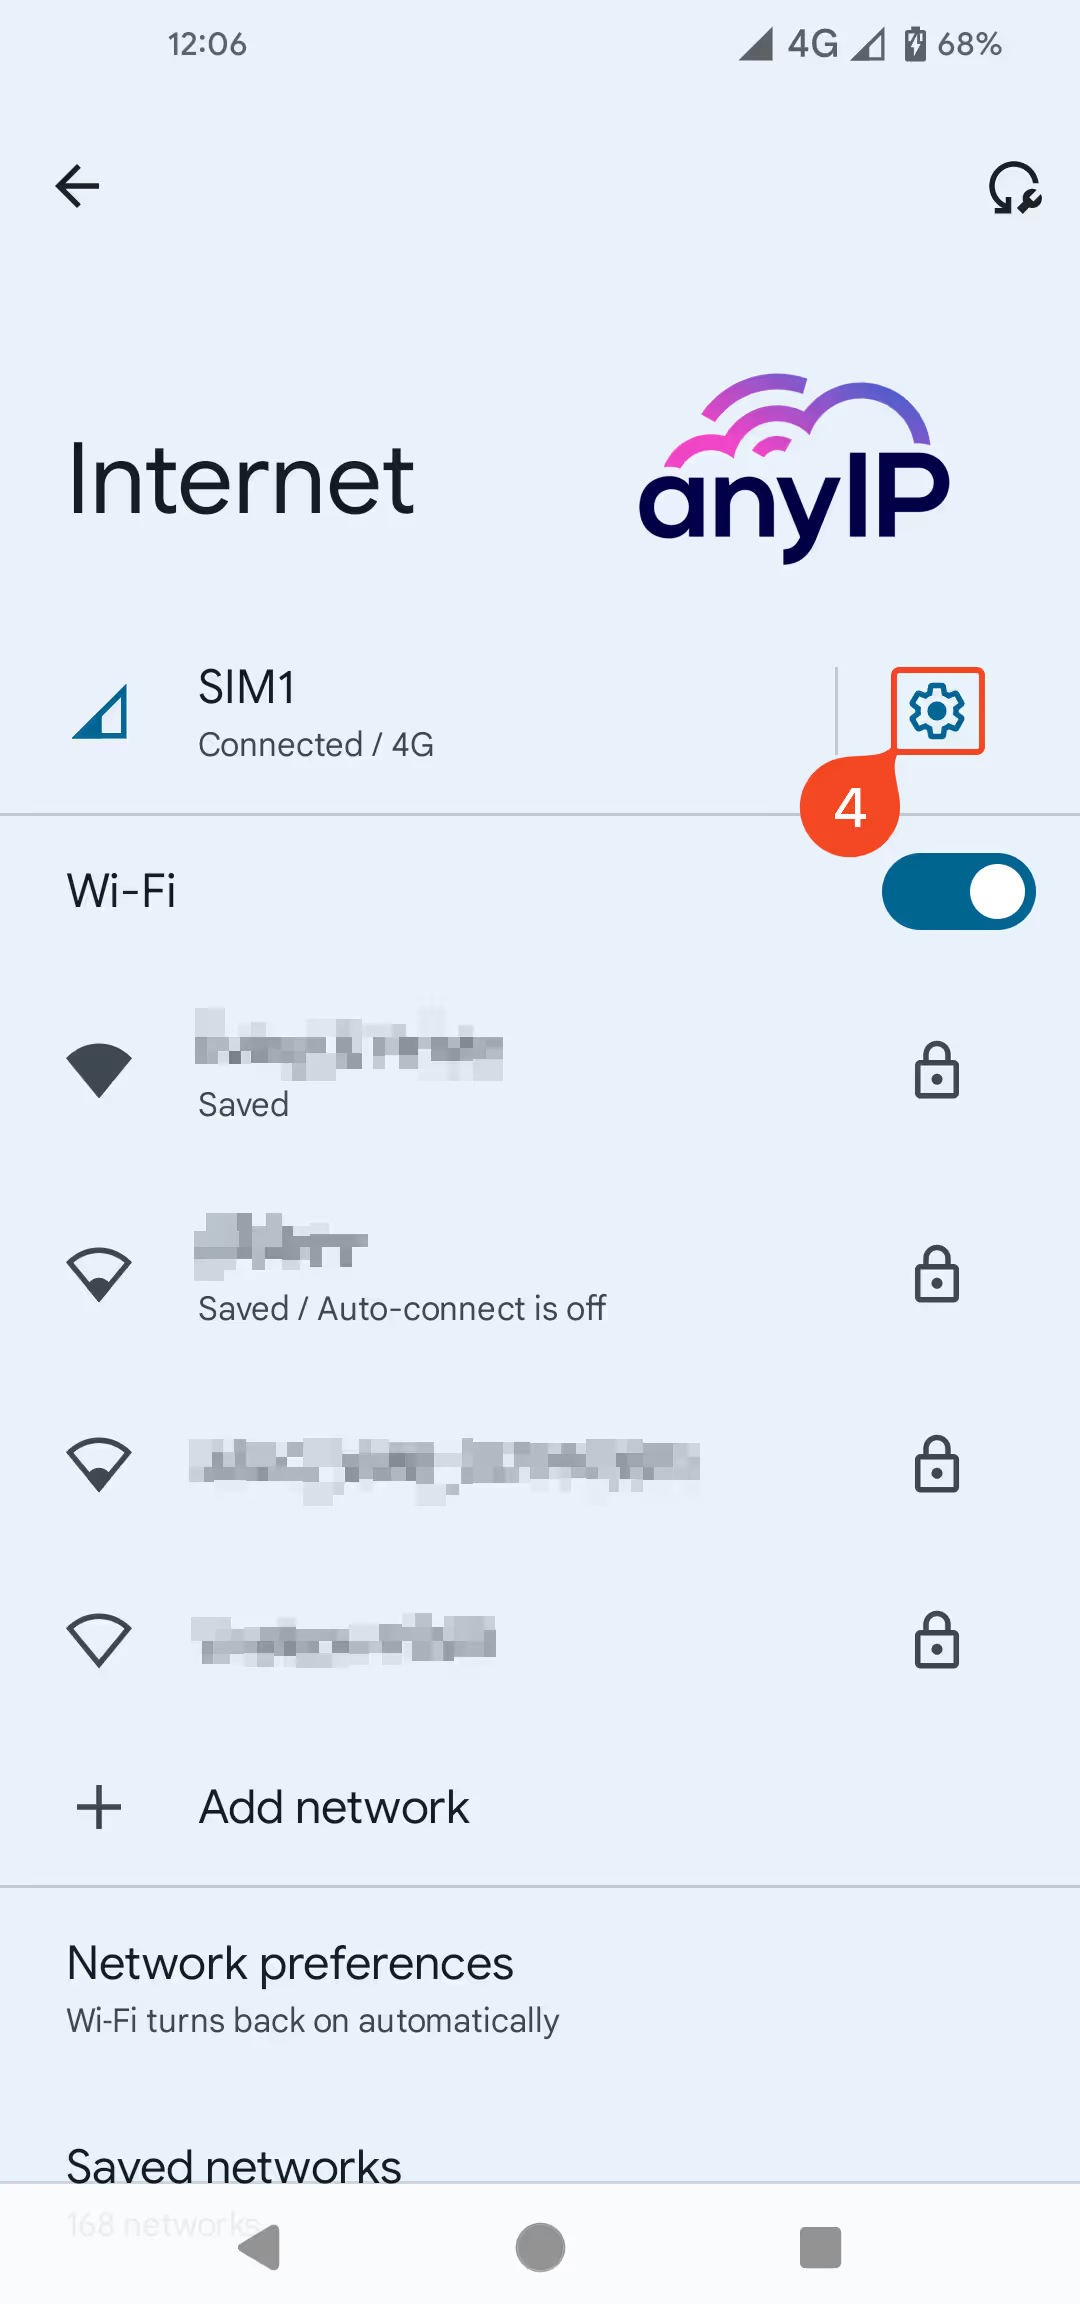
Click on the “Settings” icon next to your SiM card.
| | |
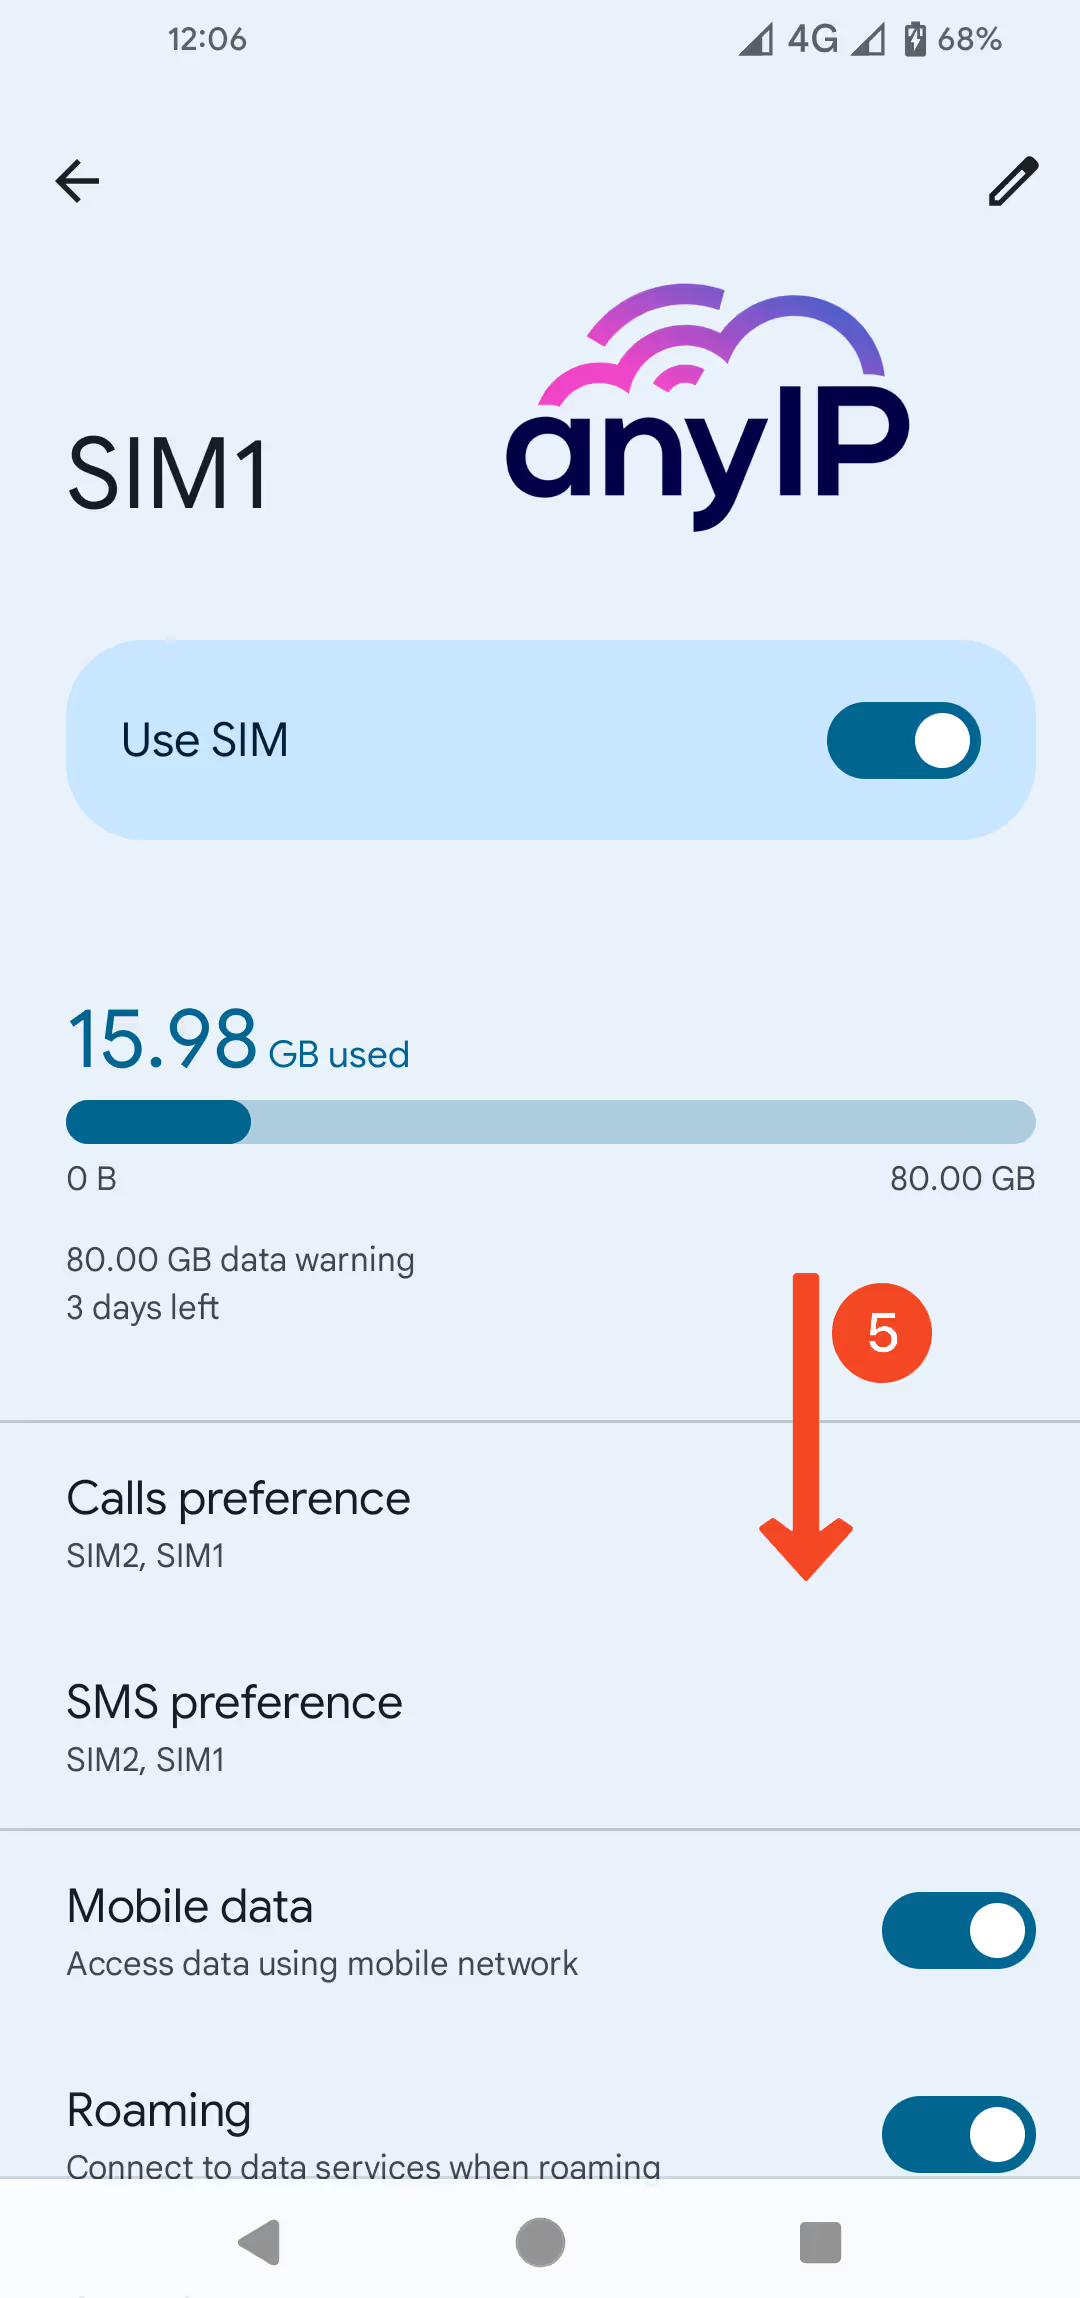
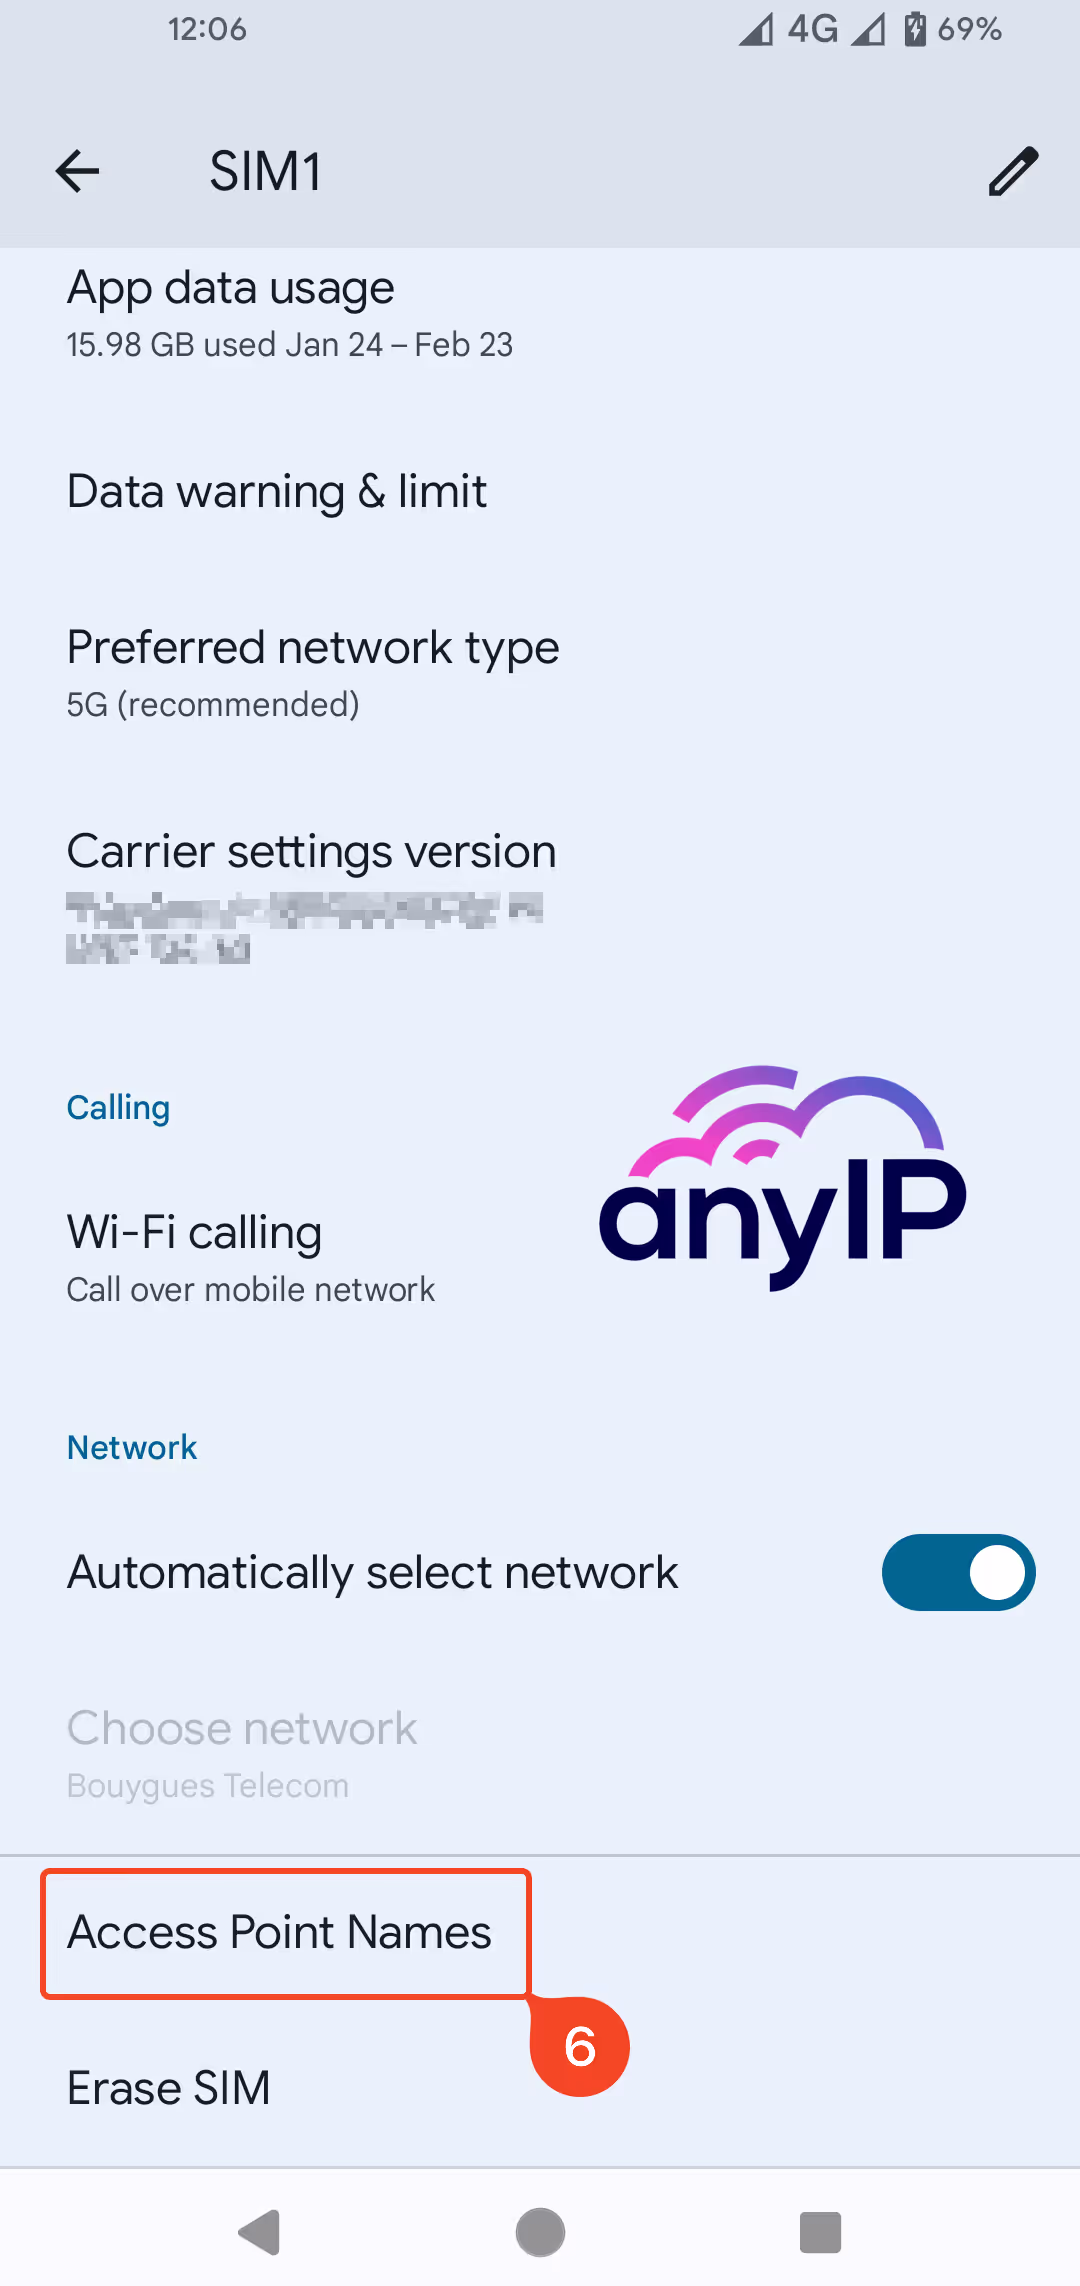
Scroll down to the bottom of the menu.
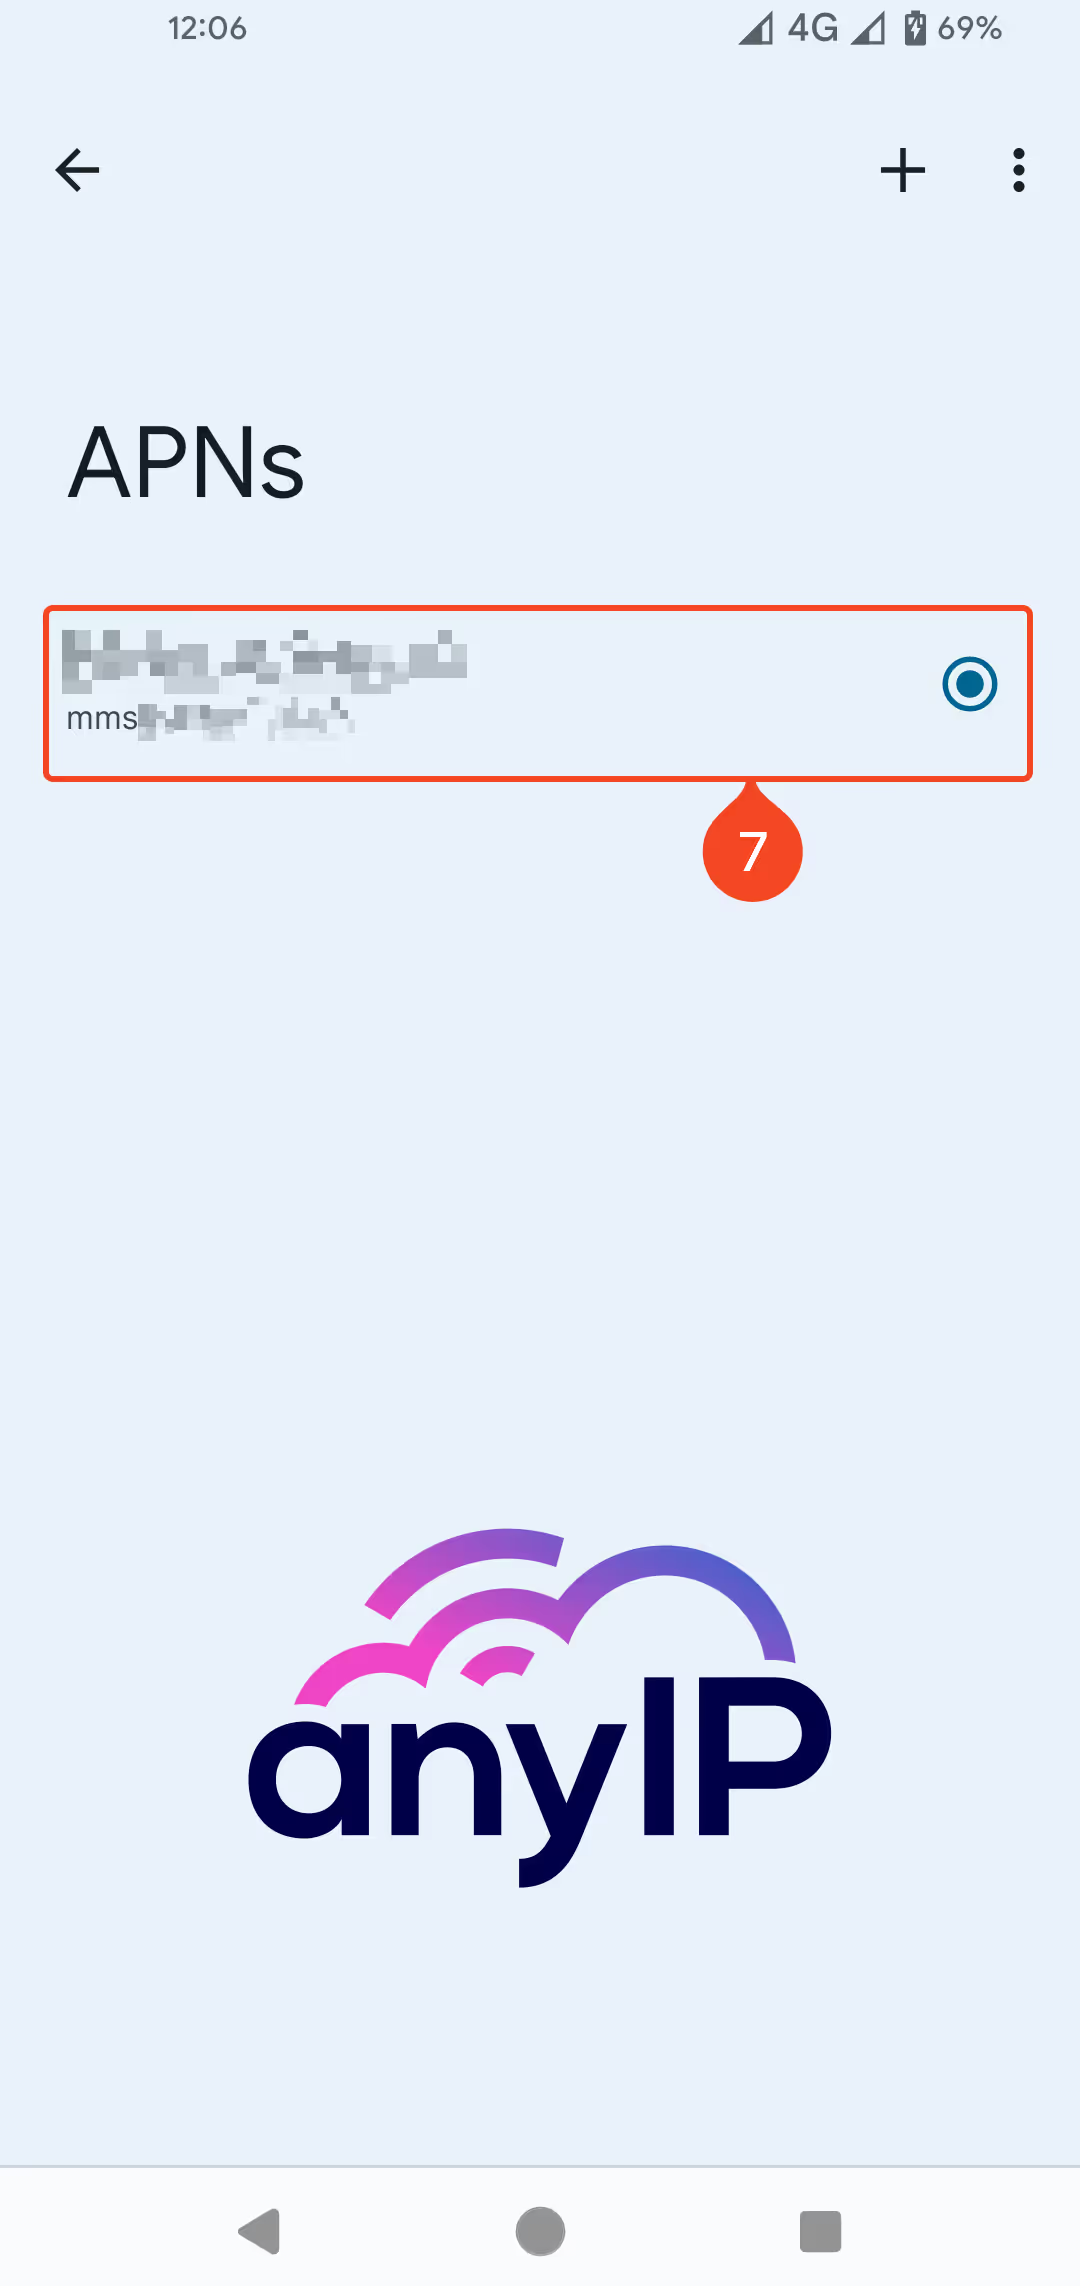
Click on “Access Point Names” to open your APNs list.
Select your APN to edit it.”
Step 2: Configure the proxy in your APN option
| |
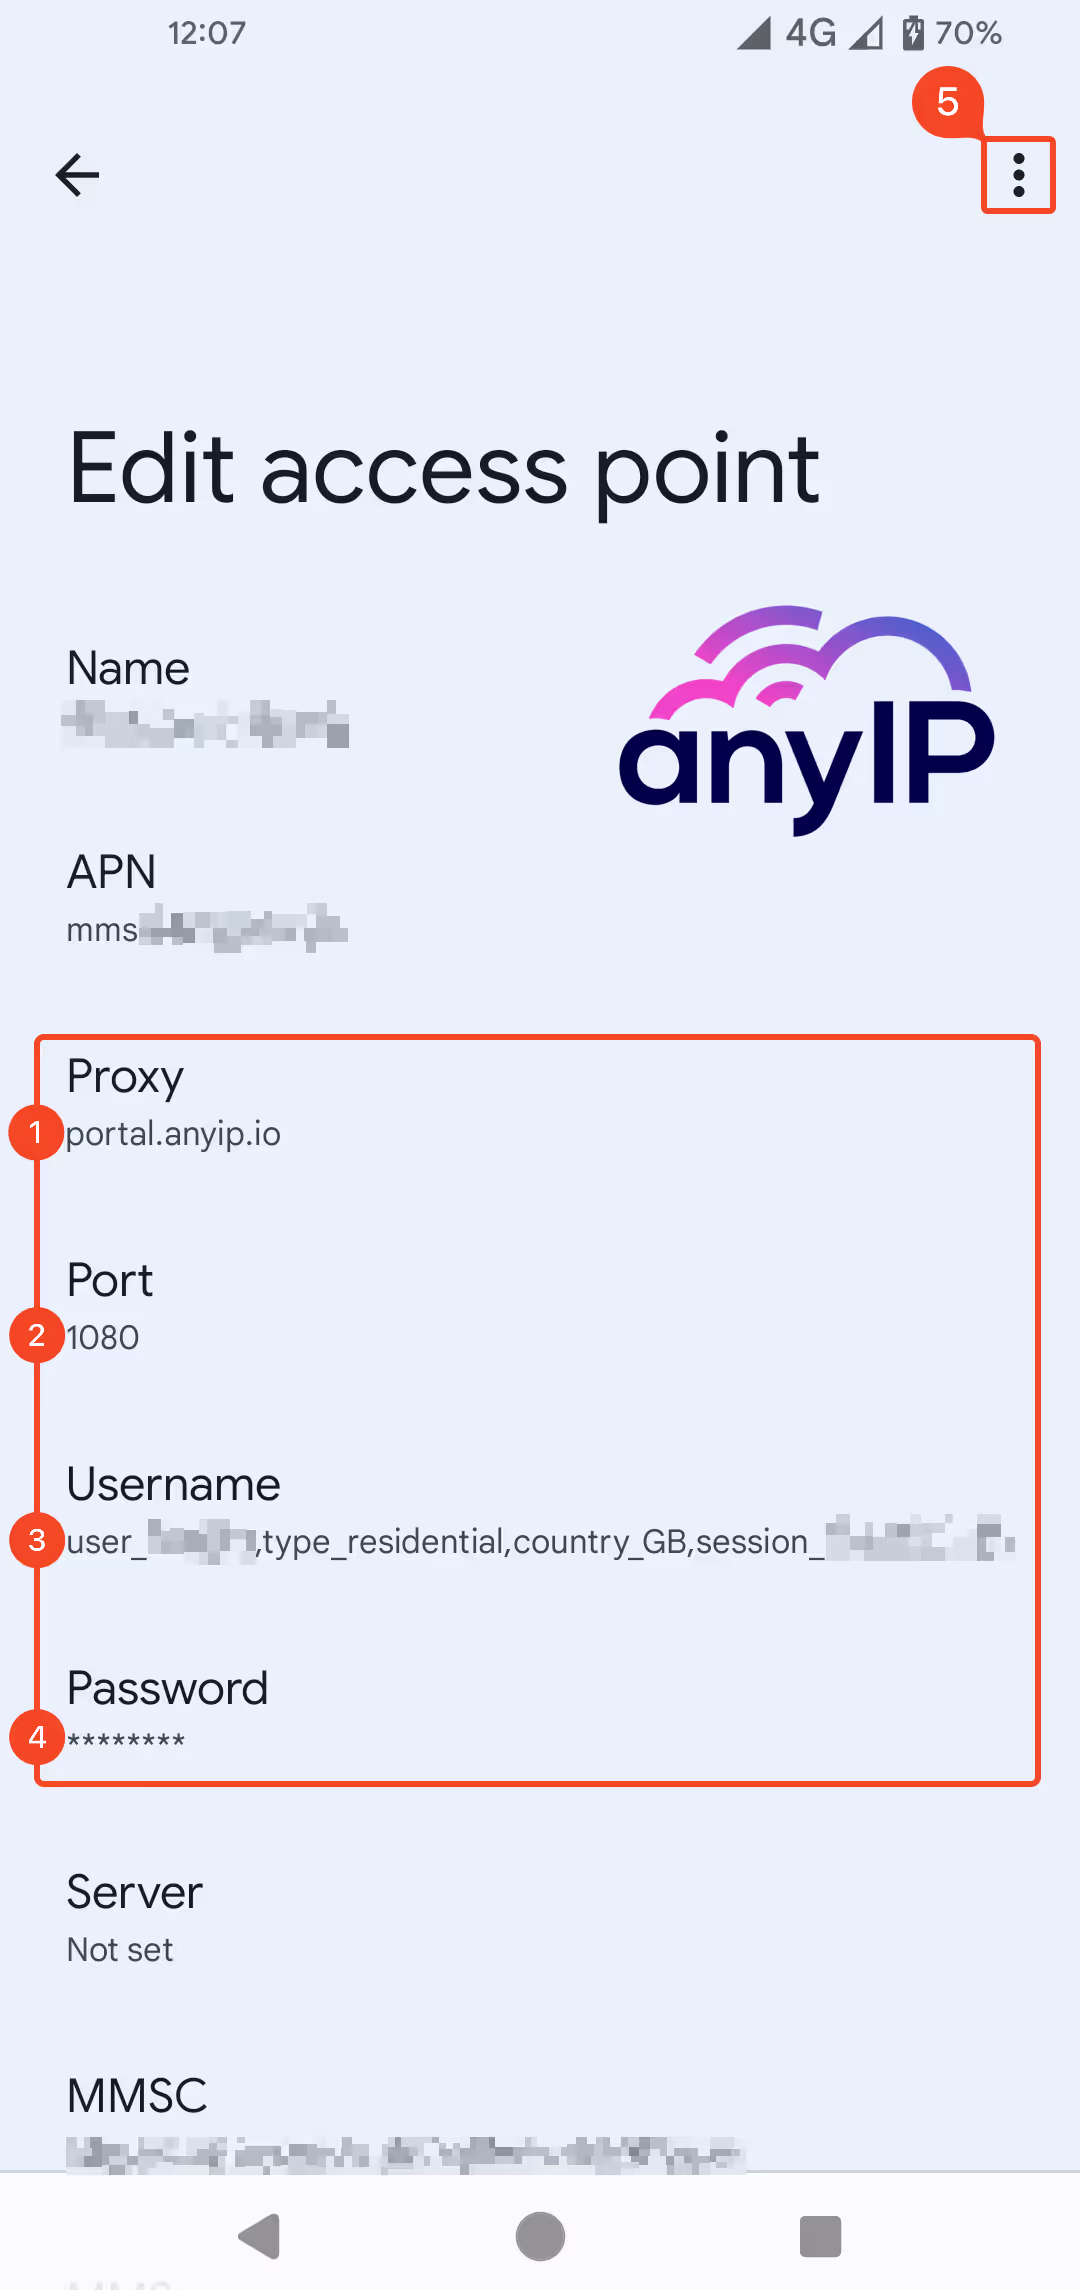
Add your Proxy host (or IP). For our example, we used: “portal.anyip.io.”
Add your Proxy port. For our example, we use: “1080.”
Type your Proxy username.
Finally, you can enter your password.
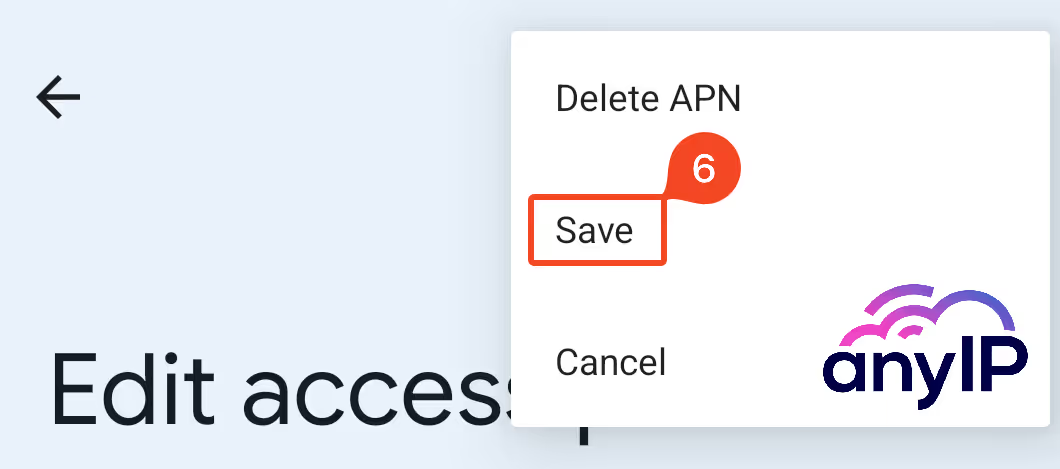
Click on the “3 dots” icon to open the menu.
Click on “Save” to save your configuration.
Step 3: Confirm your login and check your connection
| |
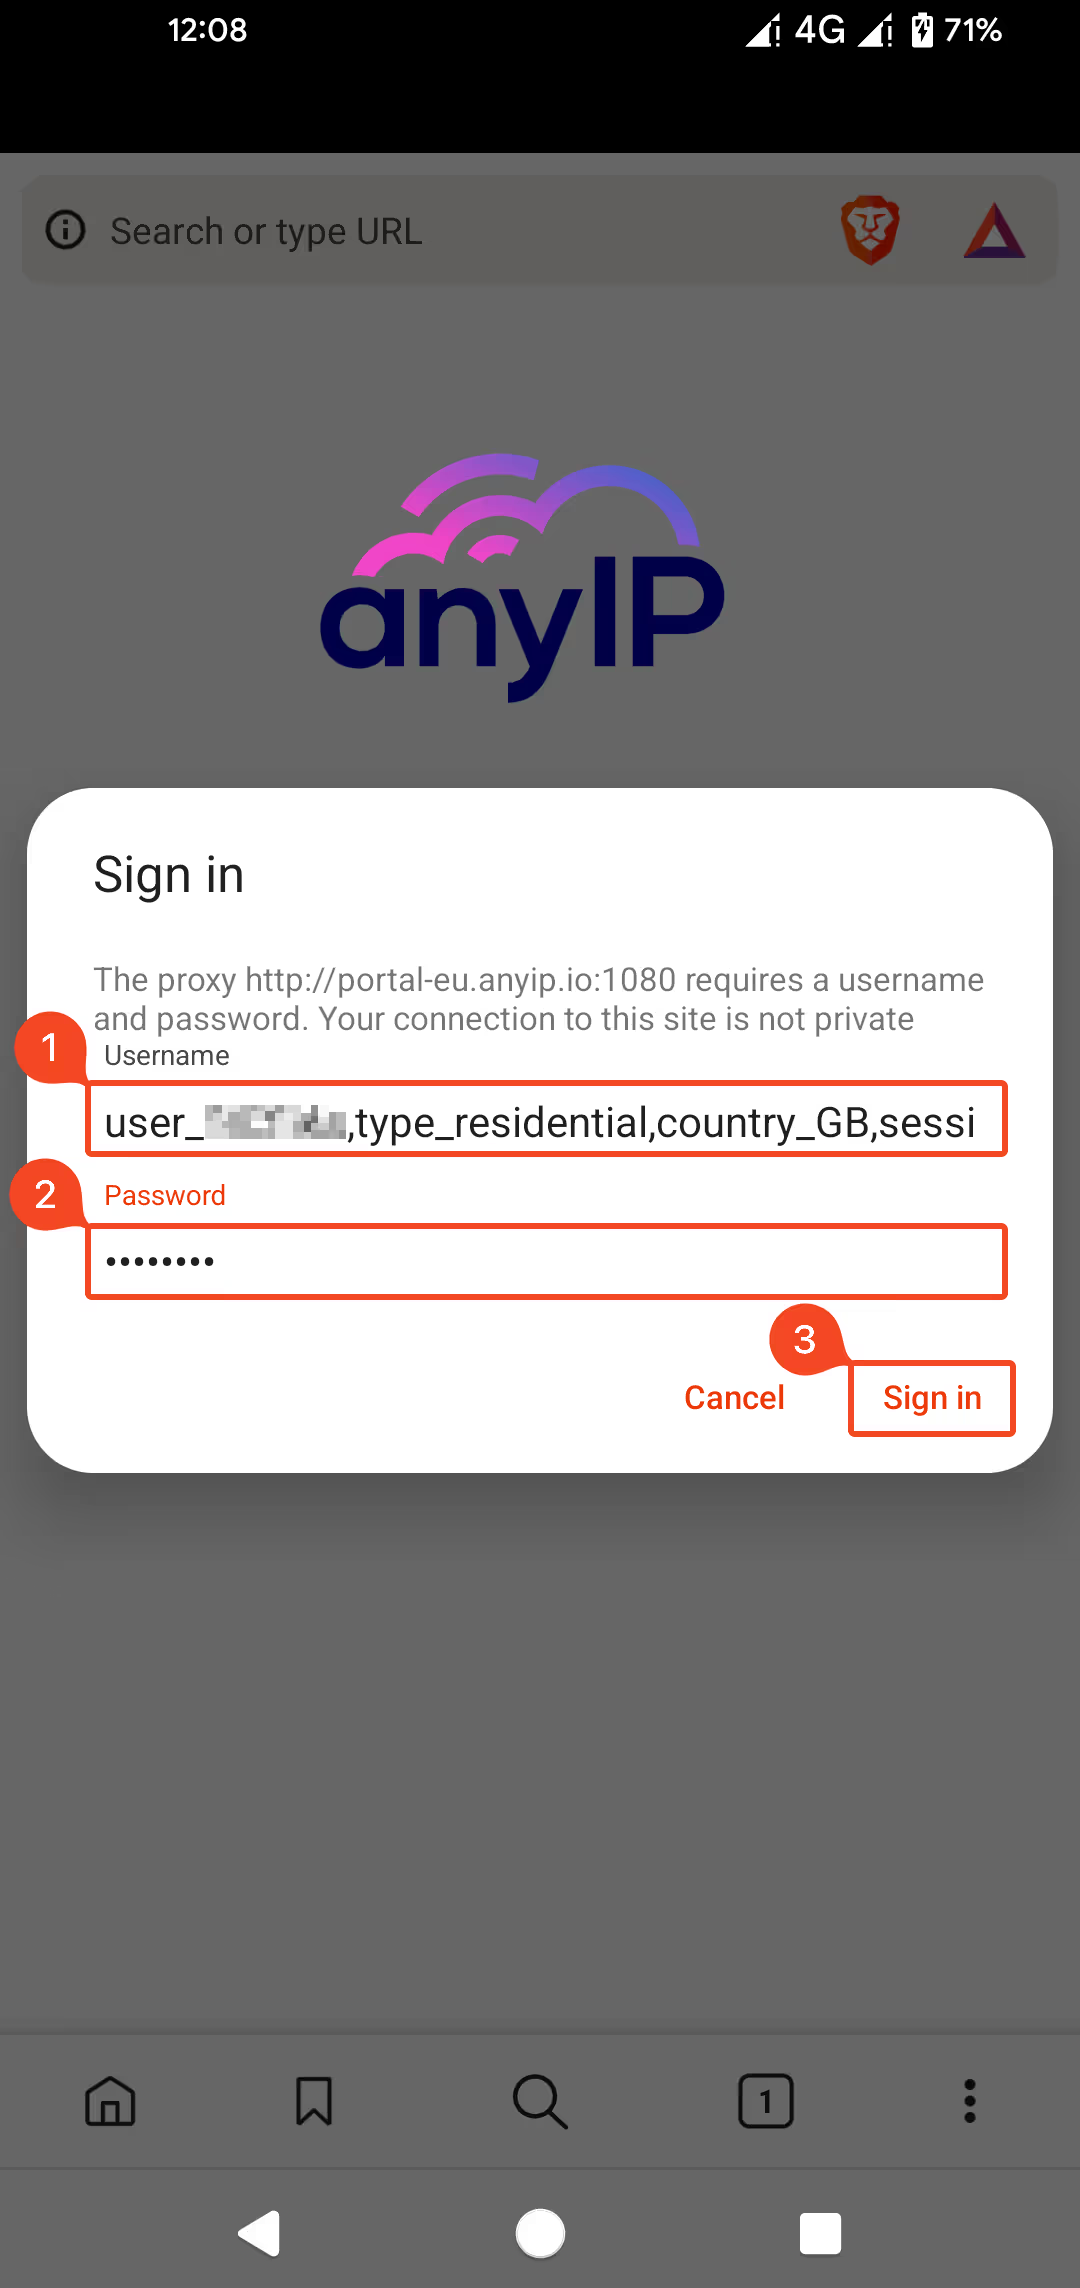
You might see a sign-in form when trying to browse. If so, fill up the form with your proxy credentials to connect:
Enter your username.
Enter your password.
Click on “Sign in” to connect.
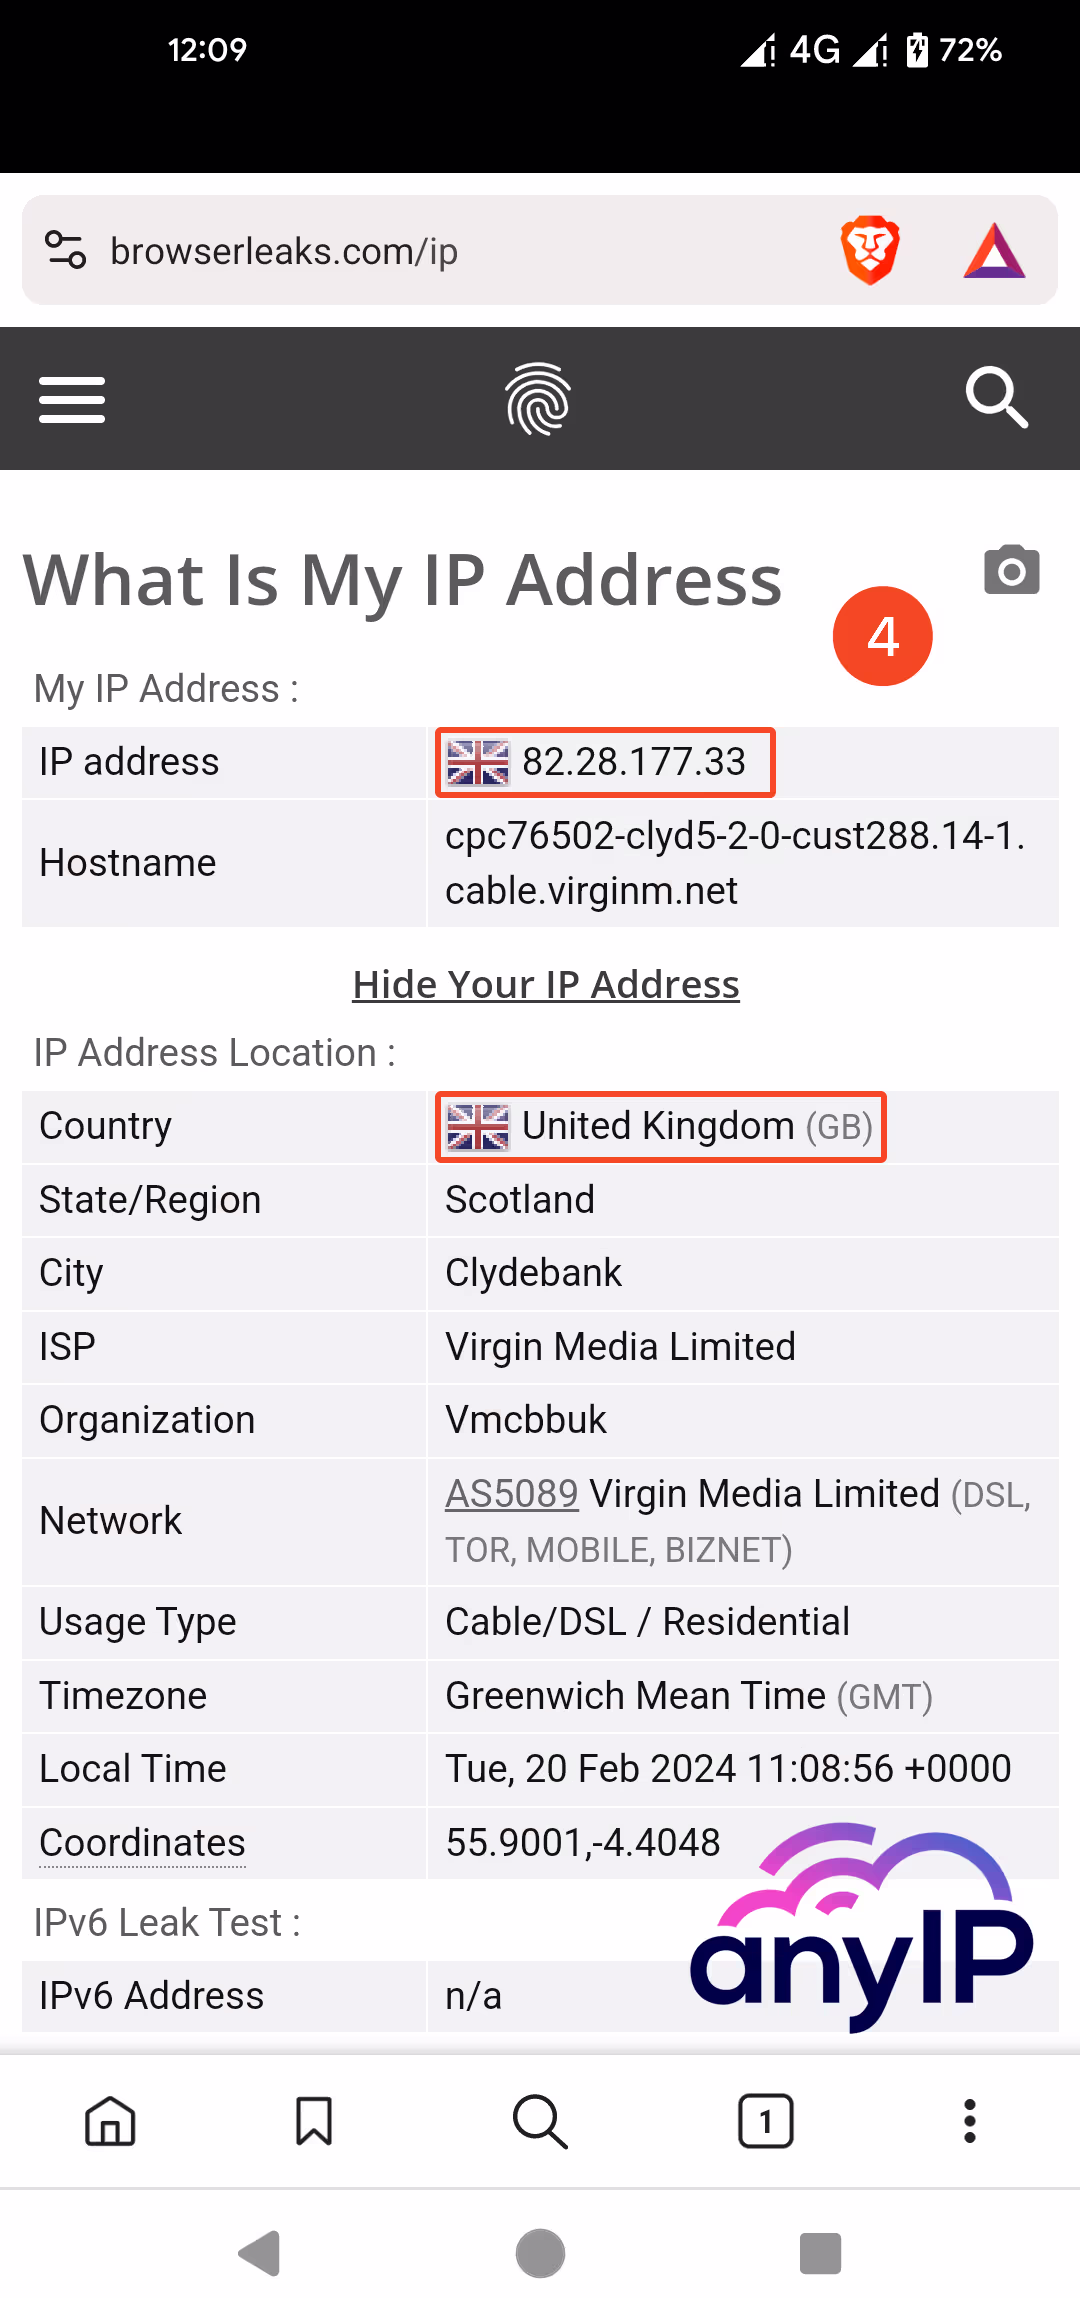
Go to “browserleaks.com/ip” to check your new IP located in
UK.
You are now connected to your proxy through your mobile network.
Keep reading to learn how to connect your proxy using a WiFi network.
How to set up a proxy on Android using a WiFi network
Step 1: Head up to your Android mobile network’s settings (WiFi settings)
If you don’t want to use your data, you can configure the proxy on your WiFi connection.
The only issue doing so is that you won’t be able to use a username/password to authenticate.
Don’t worry, anyIP.io can help you with that. Use our IP Whitelisting feature to connect. Exit the basic authentication form, all you need is to whitelist your IP on your anyIP’s dashboard.
| | |


| |
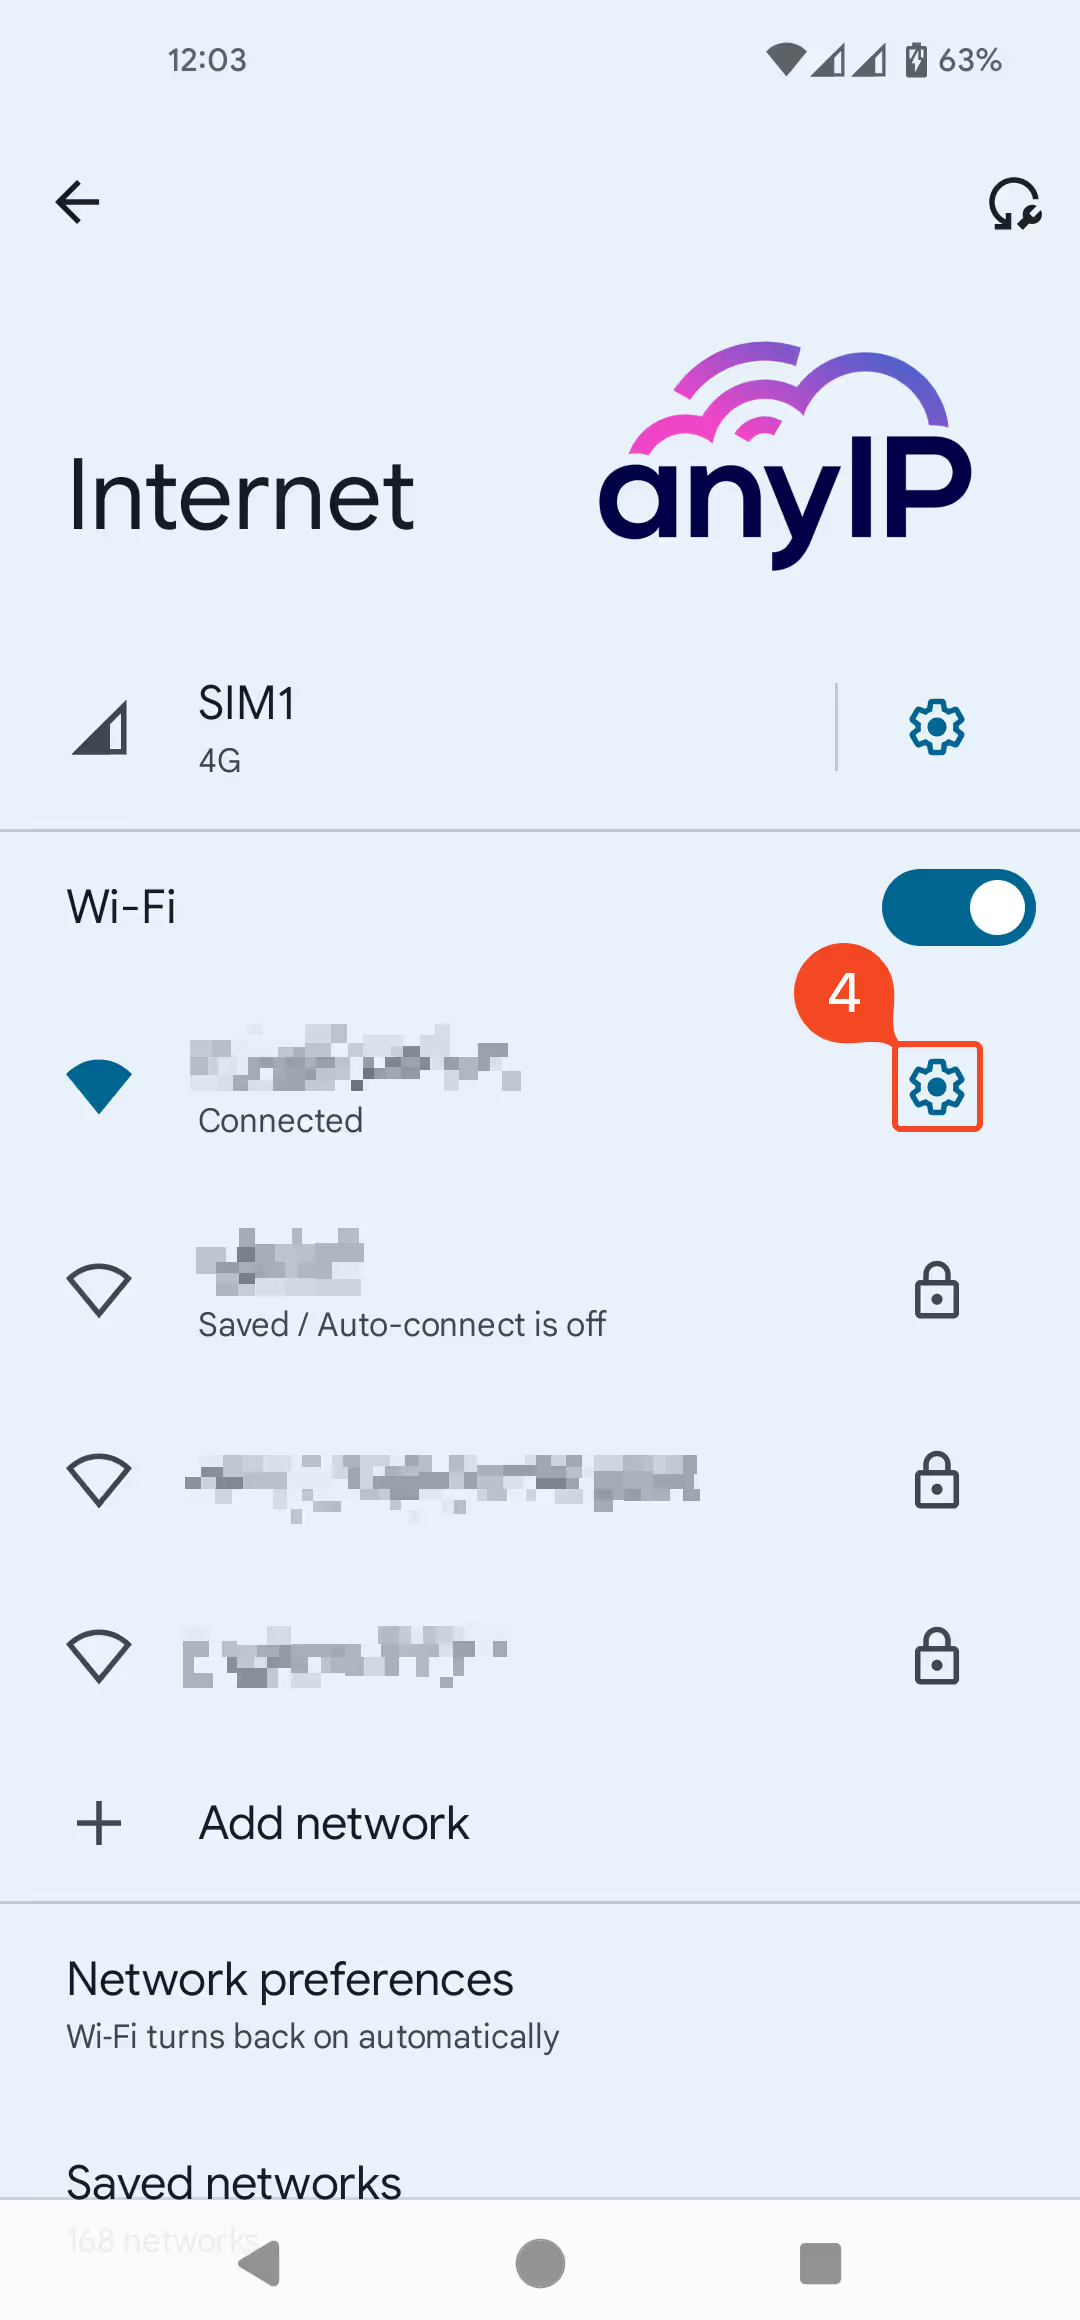
Click on the “Settings” icon.
Click on “Network & Internet.”
Click on “Internet.”
Click on the “Settings” icon next to your WiFi network.
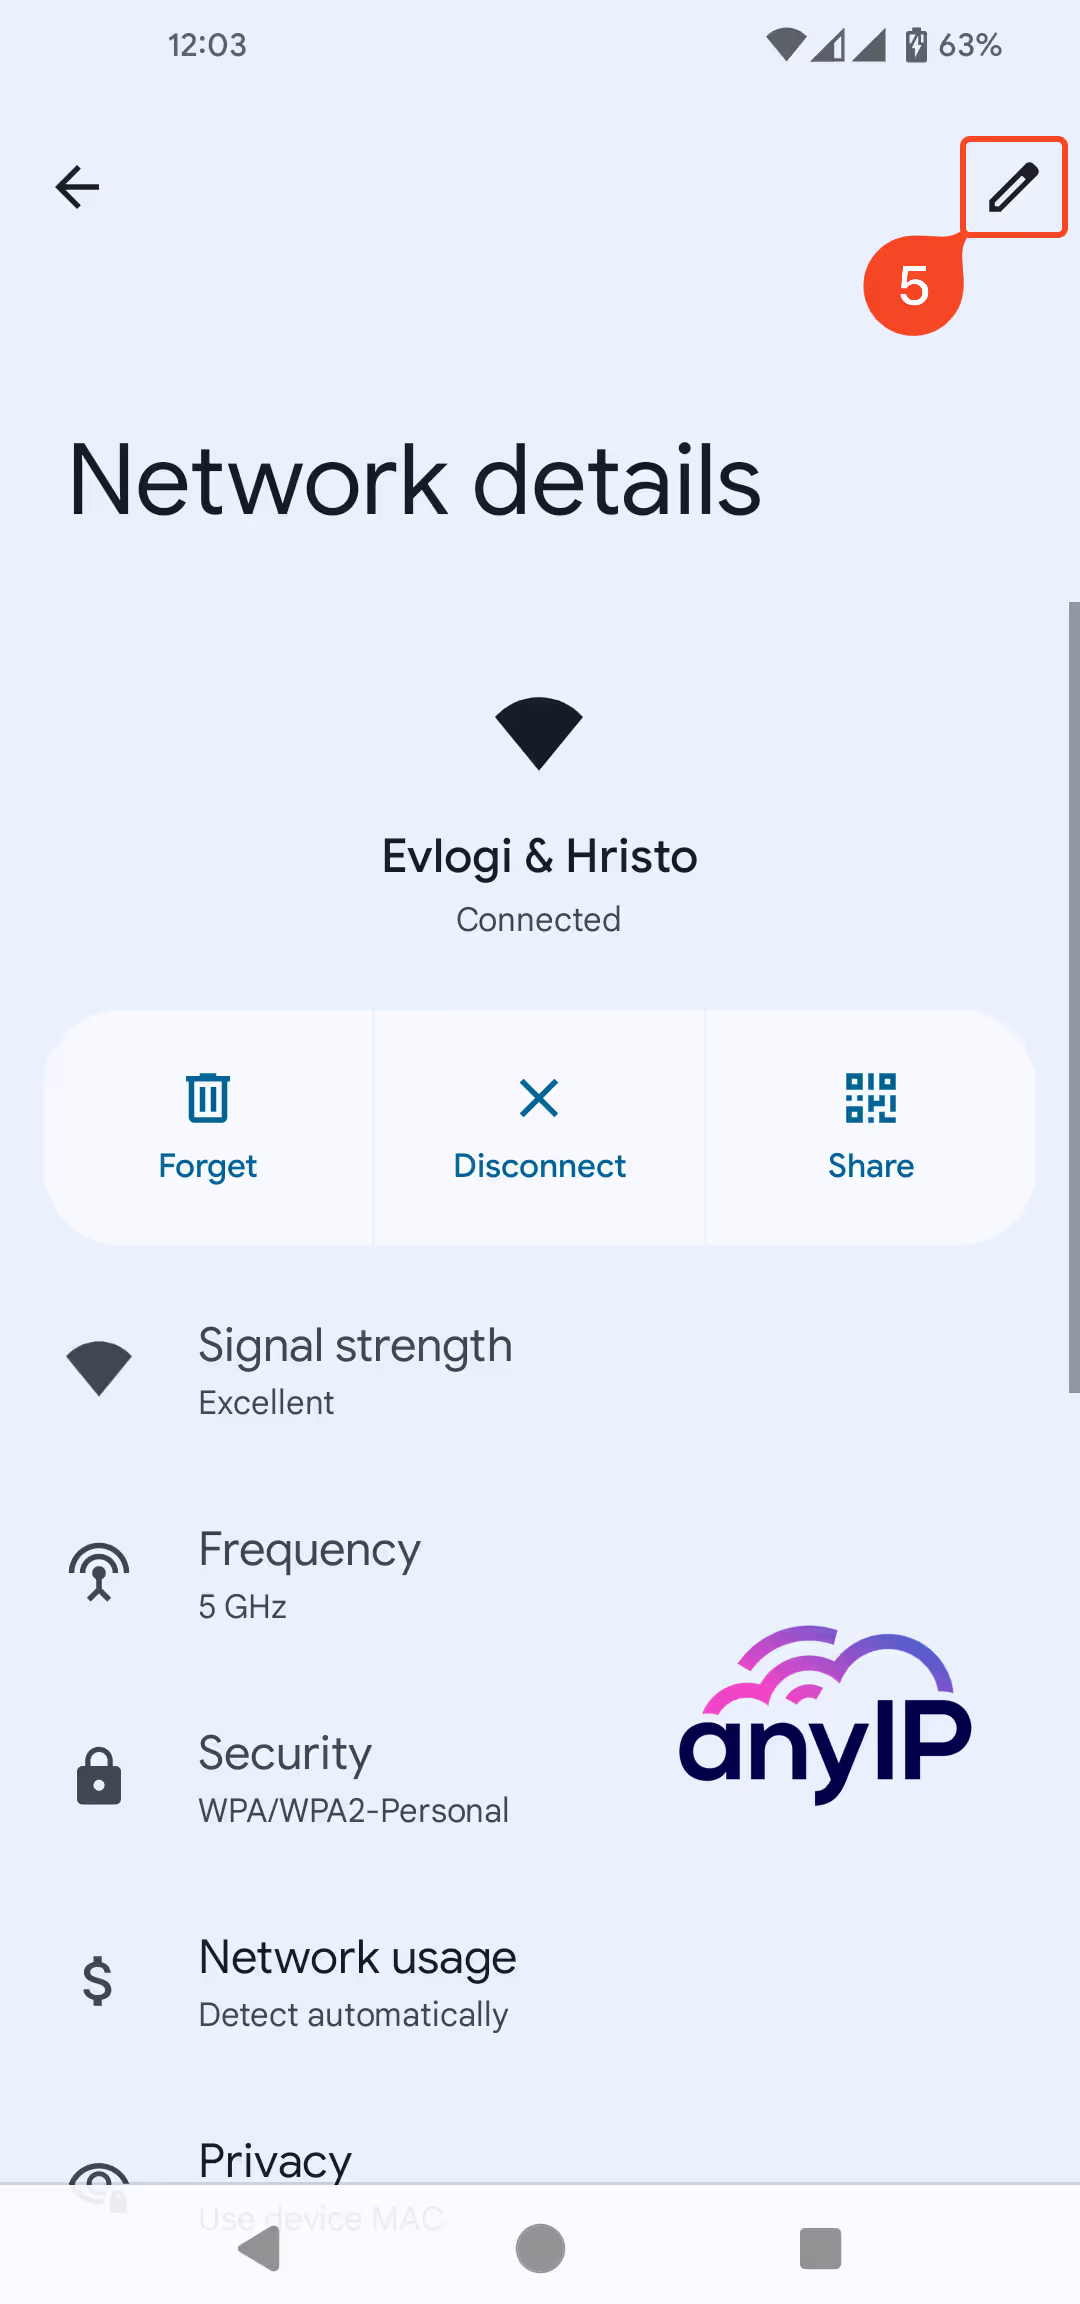
Click on the pencil icon to edit your network settings.
Step 2: add your proxy credentials to your WiFi settings
| |
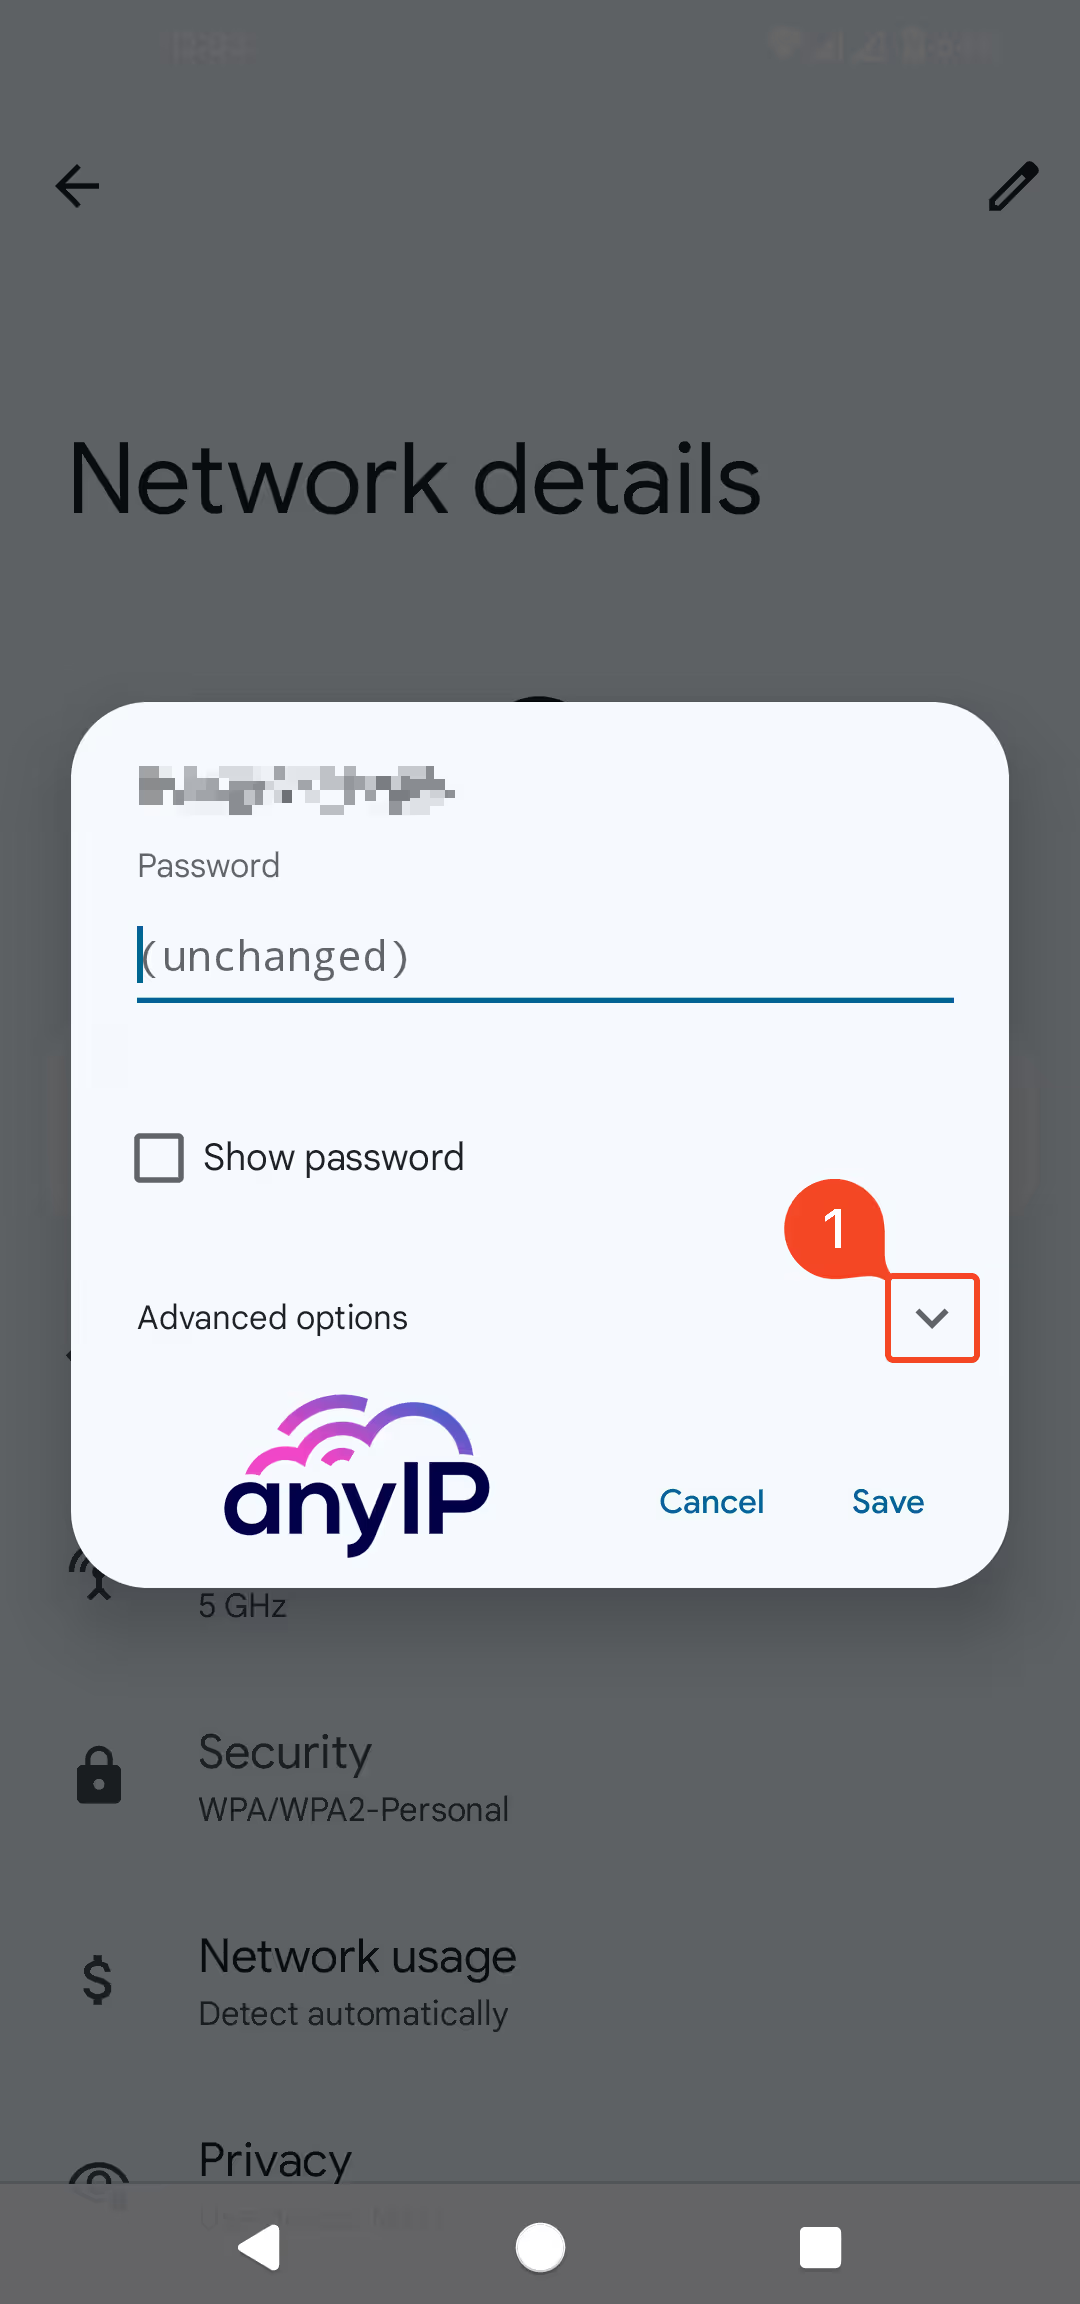
Open the “Advanced options” by clicking on the expand icon.
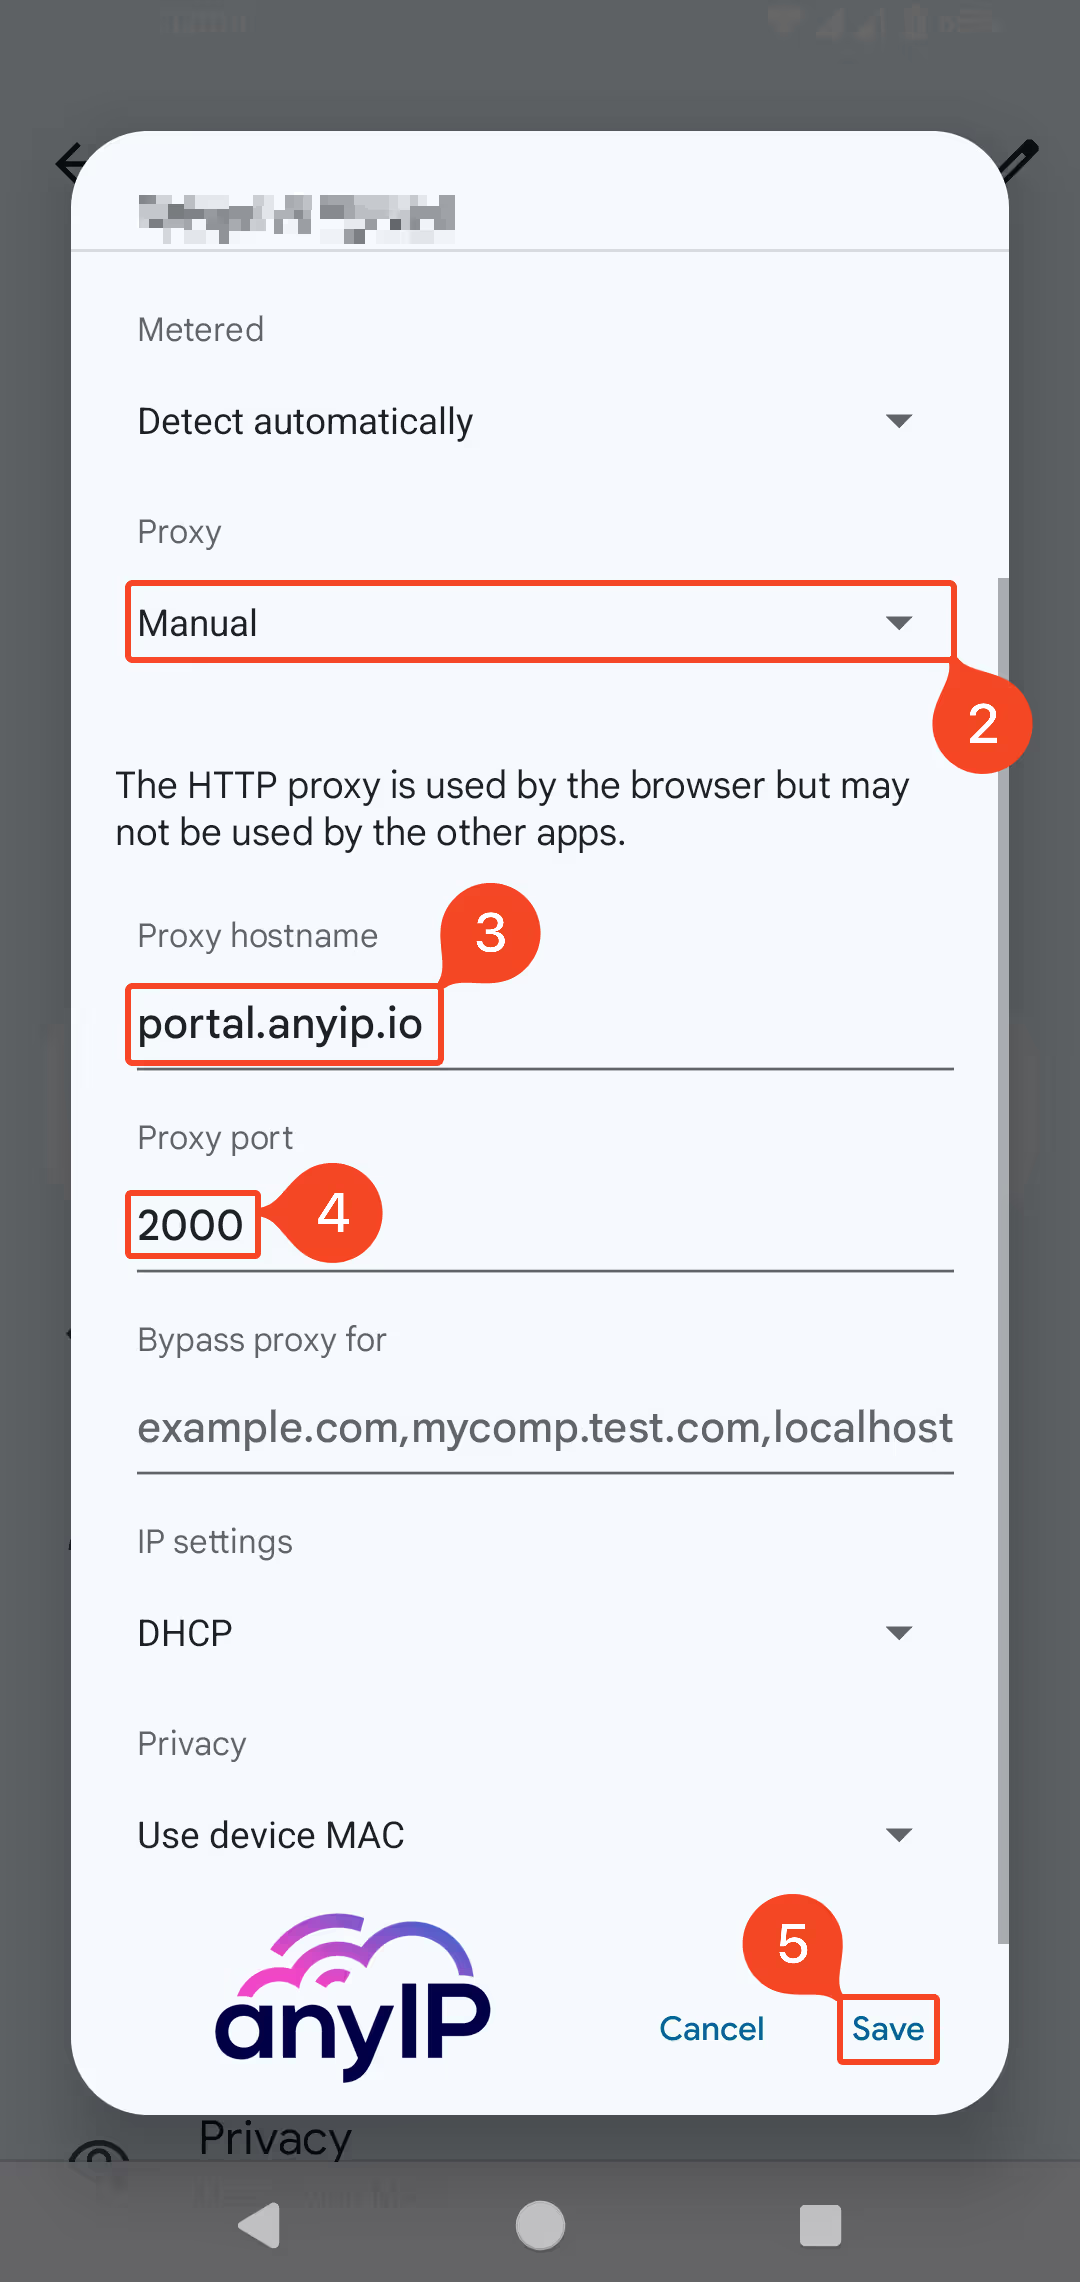
Select “Manual” on the proxy dropdown menu.
Add your proxy host (or IP). For our example, we use: “portal.anyip.io.”
Add your proxy port. For our example, we use: “2000.”
Click on “Save” to save your settings.
💡 You can’t specify a username/password using this method. Hence, your proxy provider must offer an IP Whitelisting authentication.
Step 3: Check your connection

Head up to browserleaks.com/ip to see that you are now connected with a Canadian IP and can enjoy your proxy on your WiFi connection.
💡 Be aware that the HTTP proxy is used by the browser but may not be used by other apps.
Troubleshooting Common Issues
You may come across a few common issues, such as:
How to check if the DNS Leak.
You can install the “DNS leak test” application to quickly determine if you have a DNS leak.
| |

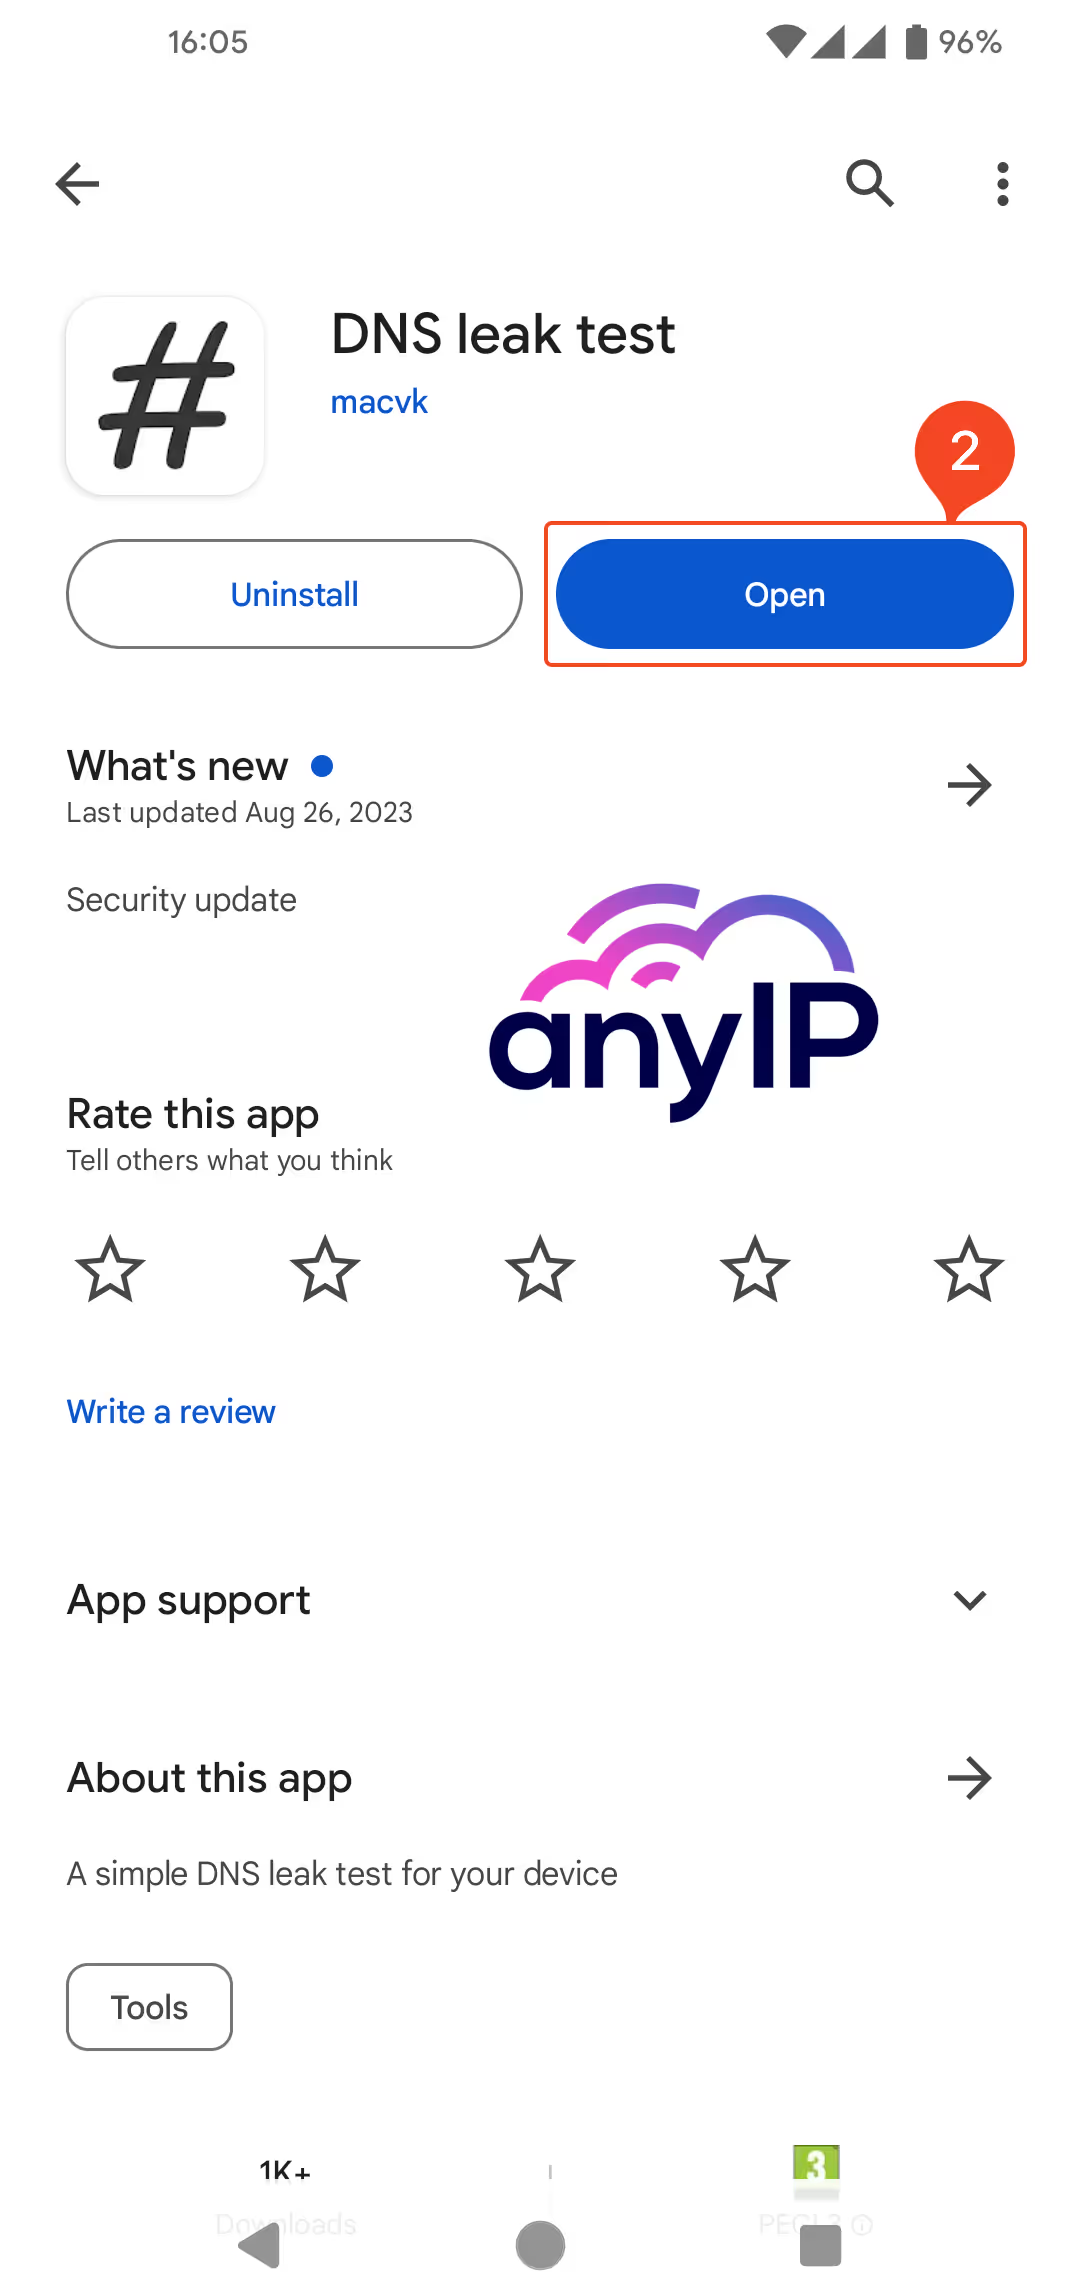
Download and install the “DNS leak test” app from the Google Play Store.
Open the app.
| |
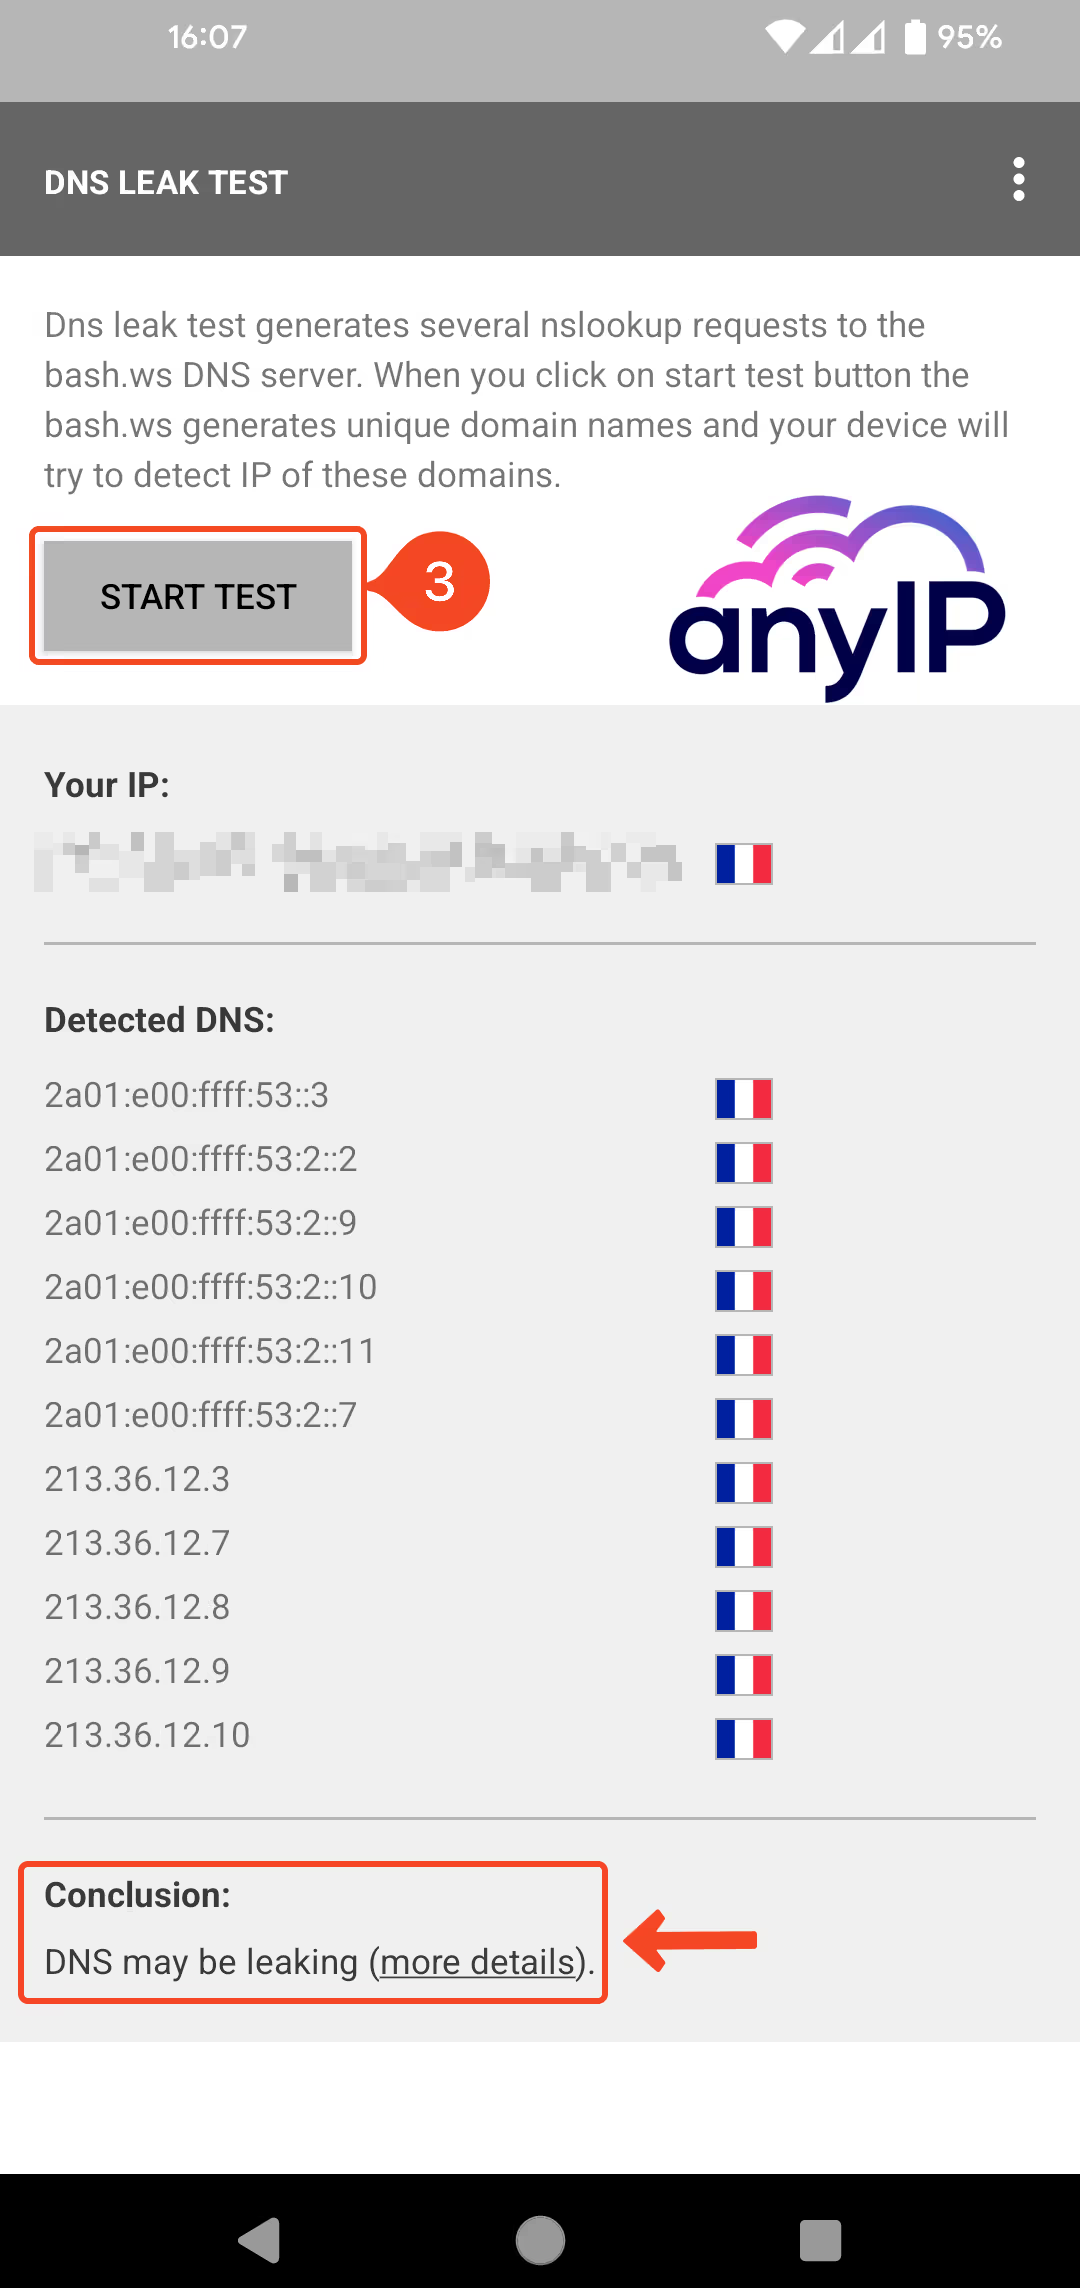
First, start a test without proxy by clicking “START TEST.”
You’ll see your real IP, location, and the DNS you’re using.
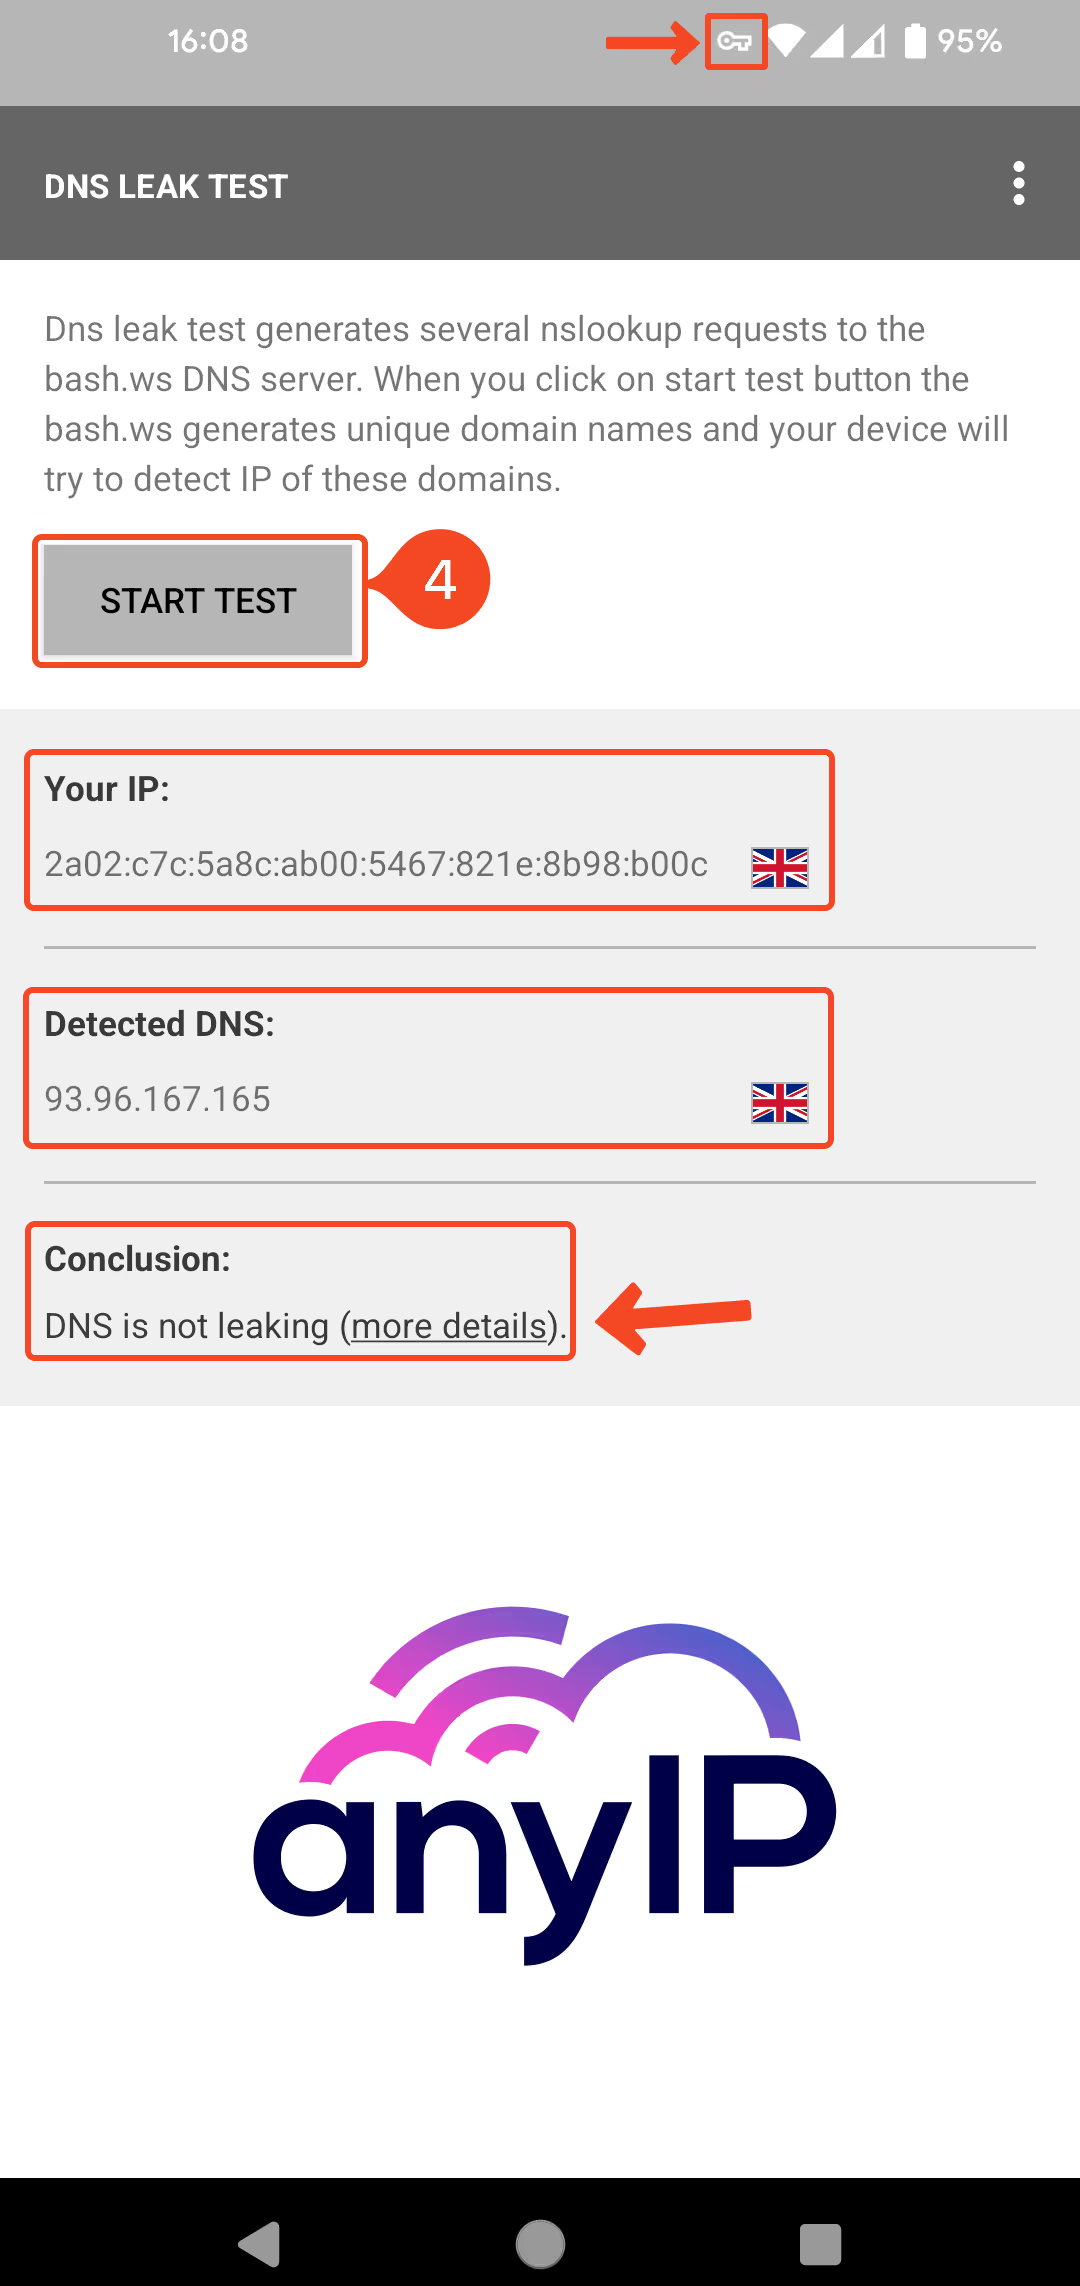
Then, connect to your proxy and start a new test.
You can see your new IP, location, and DNS.
My proxy is not connecting?
The main issue when your proxy is not connecting is because of a wrong credential. Always double-check your username/password and hostname/port.
Connection refused or server not responding
If you have correctly entered your credentials, we strongly suggest asking your proxy provider if they’re experiencing a malfunction.
If you have an account at anyIP.io, you can check our system uptime in real-time.
How to configure a SOCKS5 proxy?
You’re looking for a better solution to anonymized your web traffic?
Check out our guide on setting up a SOCKS5 connection on Android!
This alternative offers similar privacy benefits with potentially more granular control over your connection.
How easily get a proxy with anyIP.io
You can create your account in less than 5 min on anyIP.Io to enjoy a high-quality proxy on our growing network. Our 24/7 support team will be available to answer all your questions and help you configure your proxy.
Create an account for free and start using our proxies today.
Article by
Khaled Bentoumi
Khaled is a software engineer. He's been involved in many startups of different sizes. Previously, he founded Data to Page, an AI Programmatic SEO startup. He now handles all the marketing at anyIP.


Article by
Khaled Bentoumi
Khaled is a software engineer. He's been involved in many startups of different sizes. Previously, he founded Data to Page, an AI Programmatic SEO startup. He now handles all the marketing at anyIP.
Read more

How to customize Your User-Agent with Python Requests
Learn how to update and rotate user-agents in Python Requests to avoid detection and improve scraping efficiency.

